[Blender 2.92] Creating Animation of a Rolling Lemon
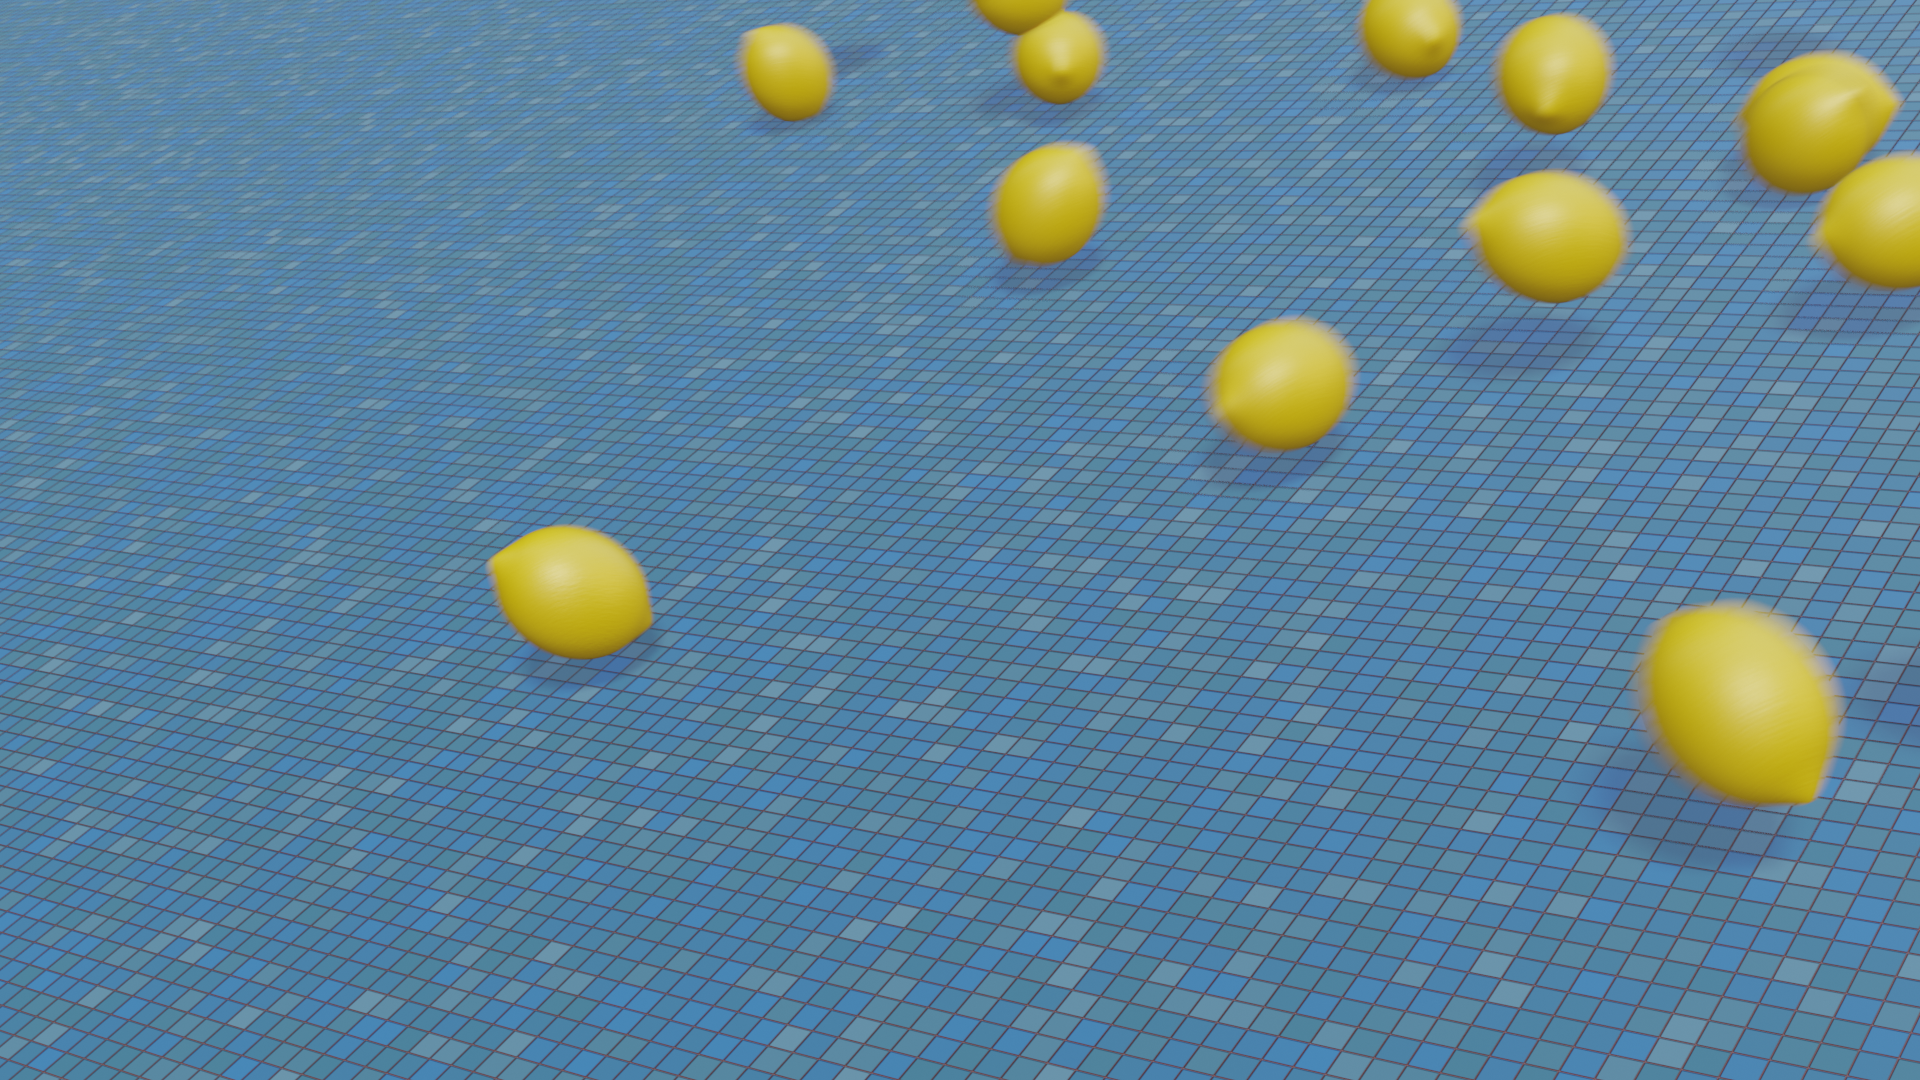
This is an explanation of the “Rolling Lemon" I created on May 24th.
I followed a tutorial video by Mdesign to create a lemon 🍋, and thought it would be fun to roll a lot of them, so I decided to try particle physics animation.
…However, when I actually tried it, rolling a single object turned out to be different from what I expected when working with multiple objects 💦.
It was a challenge, but I managed to get the lemons rolling as I envisioned, so here’s a summary of the method I used. 🍋🍋🍋
If you have any comments or questions, feel free to reach out to me on Twitter (https://twitter.com/klala_lab) (^)/
Mdesignさん(@Mdesign_blender)の動画を参考に、レモンを作りました🍋
— クララ/Klala (@klala_lab) May 24, 2021
アニメーションの勉強もかねて、坂道を転がしてみました。パーティクル使ったので、よく見るとところどころレモン同士が合体しちゃってますが😅笑https://t.co/yD0lWyitTV#blender #b3d #3dcg #blender初心者 pic.twitter.com/UBZ5sdU0qx
AD
Intent of the Work
I created the lemon after watching the tutorial video by Mdesign. I was amazed at how easily I could apply realistic lemon skin textures using the standard add-ons!
While rendering it as a still image looked realistic and good, I thought, “Why not use the physics animation I recently learned to make a bunch of them roll?" and decided to create an animation.
I wanted the cut to start with just one rolling lemon, and gradually increase the number of lemons. So I approached it with the following steps:
- For the first cut, roll just one lemon using rigid body physics.
- For the subsequent lemons (multiple), make them roll using particles.
Let me know if you’d like to proceed with the next part!
Techniques Used
- Proportional Editing
- Standard Add-on “Material Library"
- Single Lemon: Rigid Body
- Multiple Lemons: Particles → Physics → Collision
- Slope: Collision
Creation Process
Lemon
The lemon can be easily created by following the tutorial video by Mdesign, so please check it out! 😊
- Create a UV Sphere → Use Proportional Editing to shape it → Activate the “Material Library" add-on and apply the material.
That’s all it takes to create a lemon!
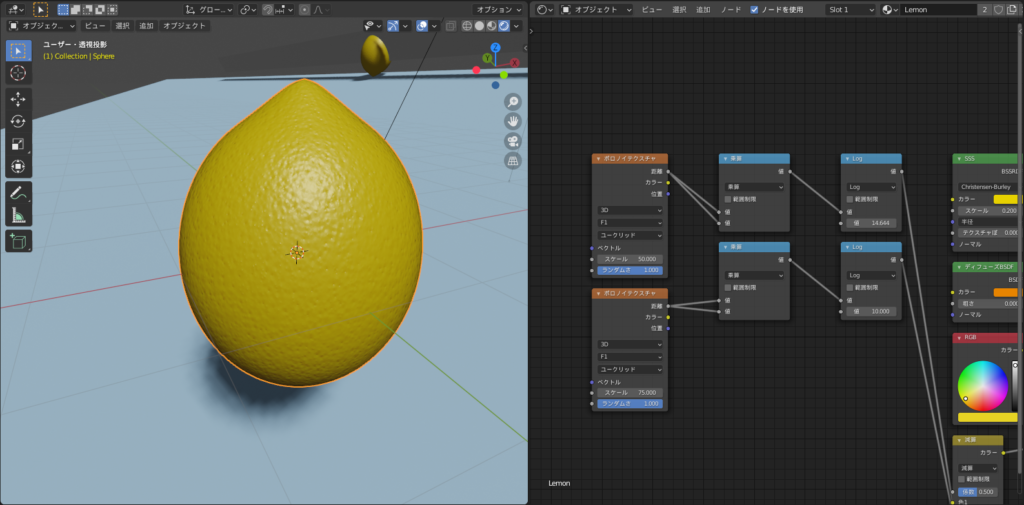
I happened to have a real lemon at home, so I observed it and made the pattern slightly larger to make it more realistic (I changed the scale of the Voronoi texture in the Shader Editor from 200 to 50).
(Top: CG, Bottom: Real Lemon)
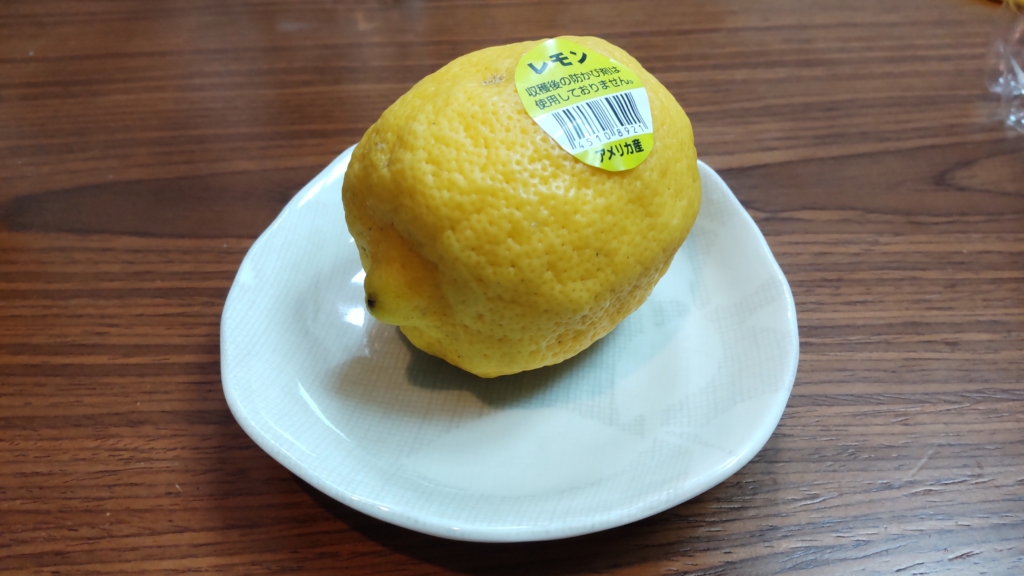
Apologies for the slightly bumpy real lemon… 😅
Ramp
For the animation, I wanted to use the rigid body technique I introduced in the “Dice Animation" article, so I first created a ramp for the lemon to roll down.
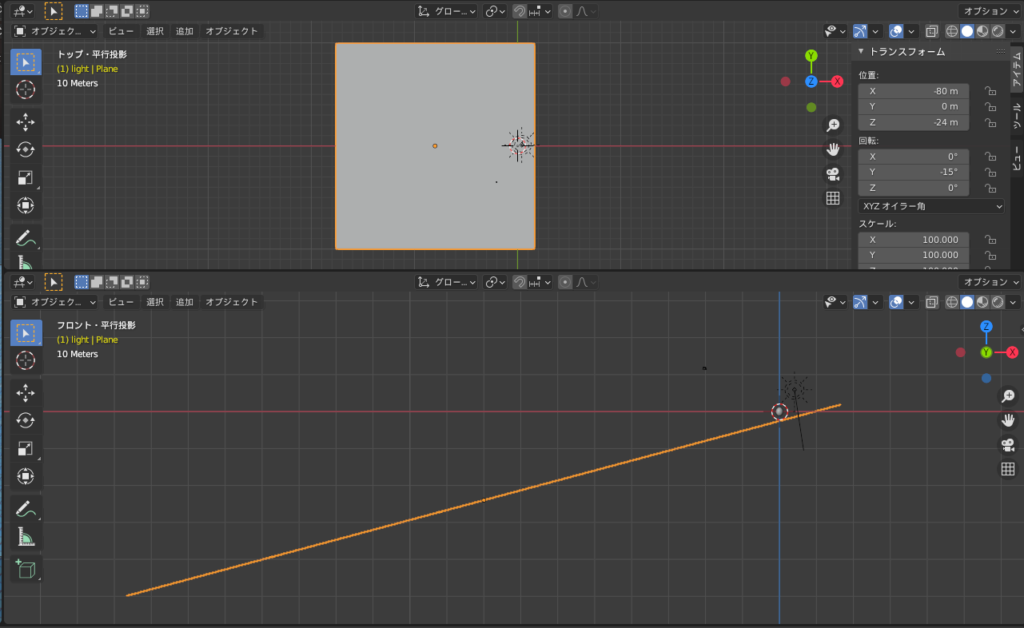
I arranged a square plane mesh of 200 meters each and tilted it at a 15° angle, as shown below.
The material was chosen in blue to contrast with the color of the lemon.
At first, I used a plain material, but adding a pattern made it easier to see how the lemon rolls.
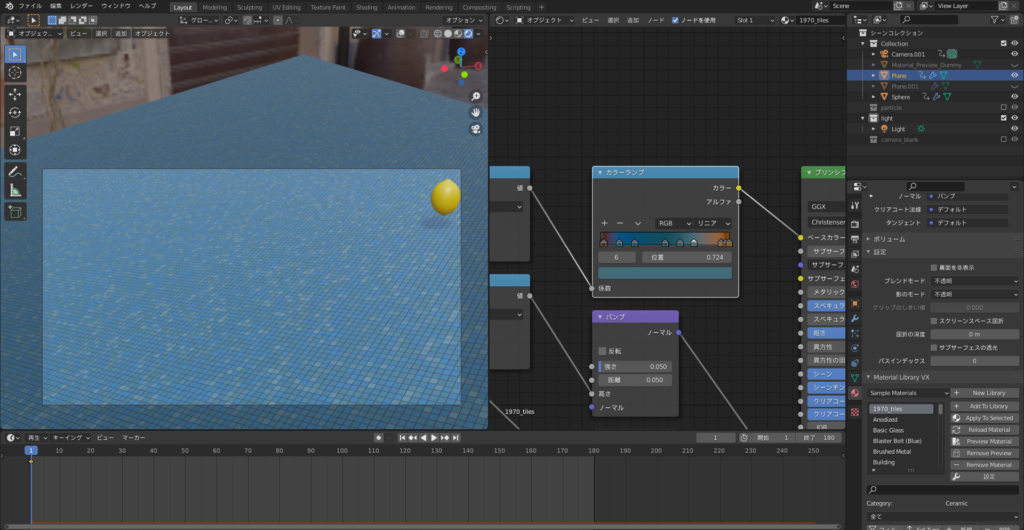
I selected the “1970_tiles" material from the same “Material Library" add-on used for the lemon.
The default tile color is reddish-brown, but I changed the color using a color ramp to create a blue tile pattern as shown below.
Lemon Single Animation
Below are the steps involved:
This time, I will skip the detailed explanation as it is similar to the “Dice Animation" I created earlier. Please refer to that article for a more in-depth guide.
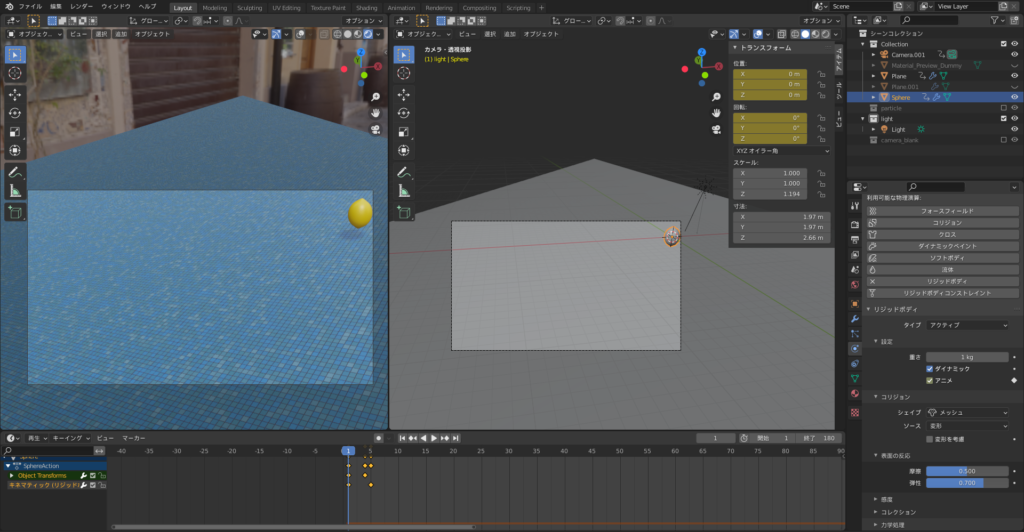
- From the “Physics" properties, select “Rigid Body."
- Set the type to “Active."
- Set the collision shape to “Mesh."
- Apply “Rigid Body" to the ramp as well, setting the type to “Passive."
- On frame 1, check “Animate" and insert keyframes for position and rotation in the viewport.
- On frame 4, move and rotate the lemon, then insert keyframes for position and rotation.
- On frame 5, uncheck “Animate" and insert a keyframe.
- Adjust friction and elasticity based on rolling behavior (I set them to 0.5 and 0.7, as shown below).
Additionally, I learned the method for “Rigid Body Animation" from Ume-chan’s Udemy course (@zero_blender_).
It’s very beginner-friendly, and I highly recommend it for those new to Blender. The animation for rolling down ramps is explained in detail at the beginning of the course. 👍✨
2021 Latest: “Physical Animation for Beginners" – Learn by Creating Physics Animations
https://www.udemy.com/course/2021-ass/?referralCode=E719AEB3A5C765F1FDAA
AD
Lemon Multiple Animations
Now, the main part of the tutorial, explaining the animation using particles. 😅💦
First, here is an overview of the steps.
- Copy the lemon and save it in a separate collection.
- Create an emitter (the particle source).
- Set up particles in the emitter.
- Select the collection saved in step 1 using “Collection Instance."
- Set parameters such as number, lifetime, speed, rotation, collision, scale, etc.
- Add “Physics → Collision" to the ramp.
- Set field absorption, transparency, friction, etc.
- Bake the animation.
- Select the emitter and bake all physics with “Particle → Bake All Physics" to record the particle movement.
Next, I’ll explain each step in more detail.
Step 1: Copy the Lemon and Save It in a Separate Collection.
To emit the lemon from the emitter (particle source), create a collection that holds the particles (objects to be emitted).
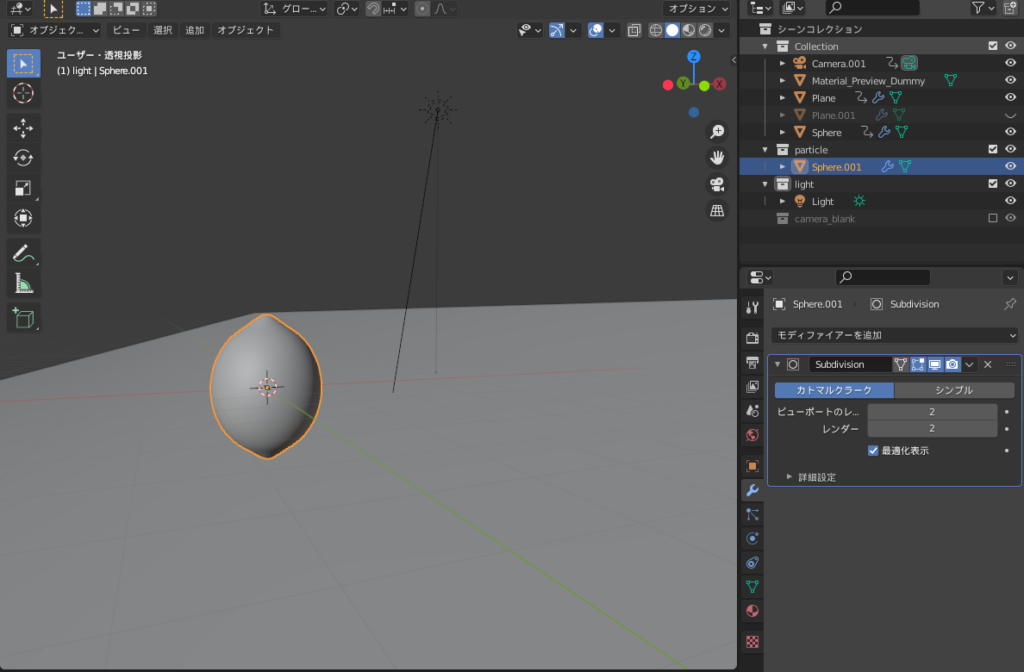
Copy the lemon object with “Shift + D," then press “M" → “New Collection" and save it in a new collection. I named the collection “particle."
Make sure the collection is hidden by unchecking it. If you don’t hide it, the lemon will remain on the slope! (laughs) 💦
(Note: Even though it’s hidden, you can select the particle collection in step 3.)
Step 2: Create an Emitter (Particle Source).
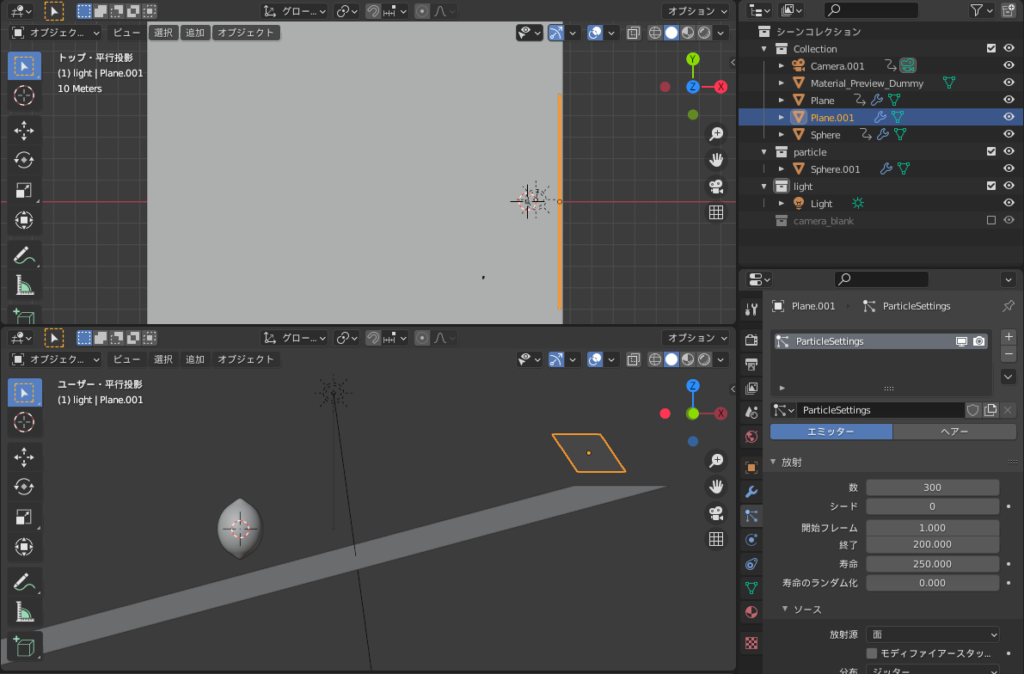
To roll the lemons down the ramp, place a plane mesh slightly above the lemon’s level, as shown below. (If it’s too far from the slope, it will bounce like a ball 😅)
I set the height to 1m and the width to 100m.
Step 3: Set Up Particles in the Emitter.
In the “Particle Properties" panel, click the cross button to add a new particle system slot.
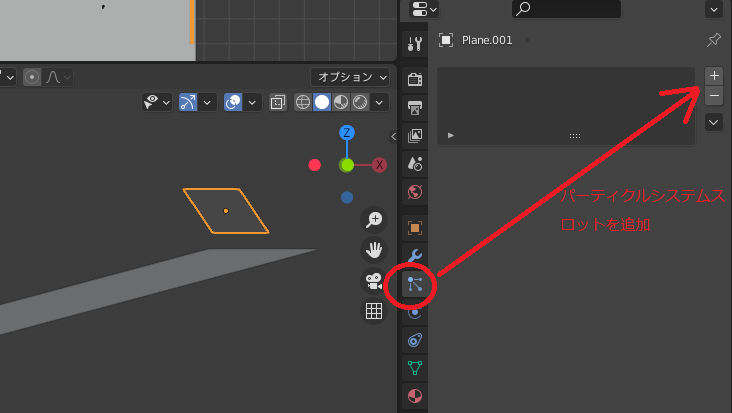
Then, under “Render → Render As → Collection," select the “particle" collection you saved earlier and set the scale to 1.
This will display lemon particles on the emitter! 🍋
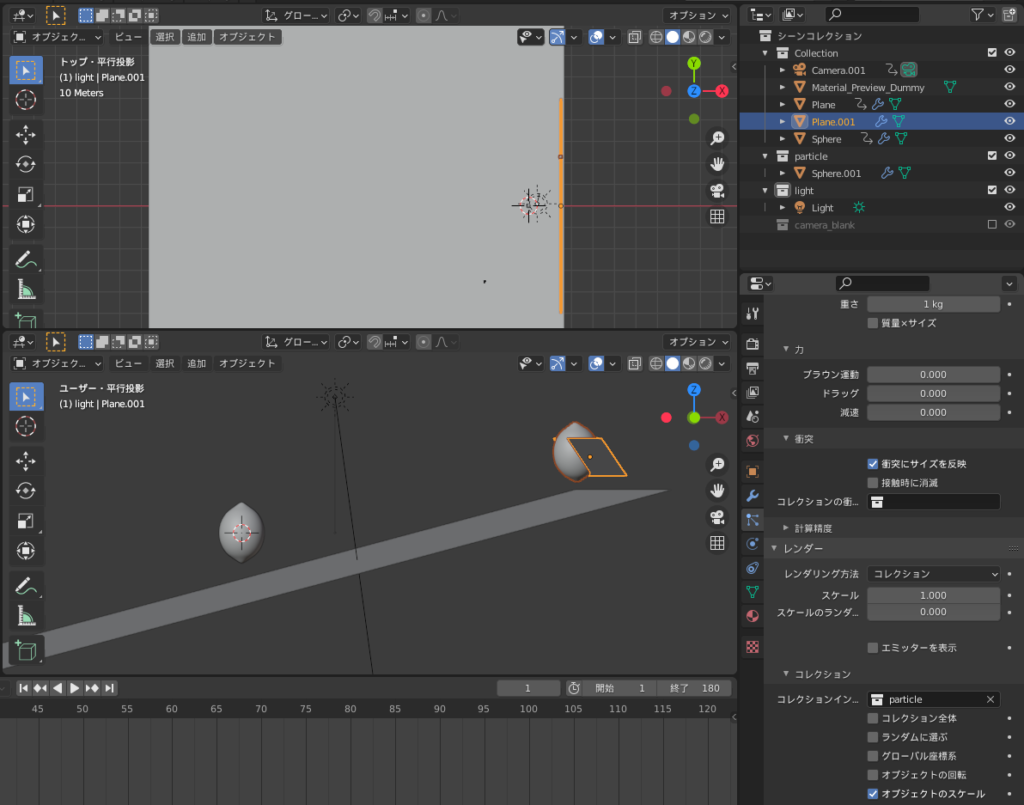
Adjust parameters such as the number, lifetime, speed, rotation, collision, and scale to match the animation’s frame rate and rolling speed.
I set it to 300 particles, lifetime 250, speed in the Z direction to -10m/s, checked “rotation," set angular velocity to -5, and enabled “Reflect size on collision."
At this point, the particles will be drawn into the slope, so in Step 4, we need to adjust the collision settings for the ramp. 😅
Step 4: Add “Physics → Collision" to the Ramp.
Add collision detection to the ramp so the particles can roll.
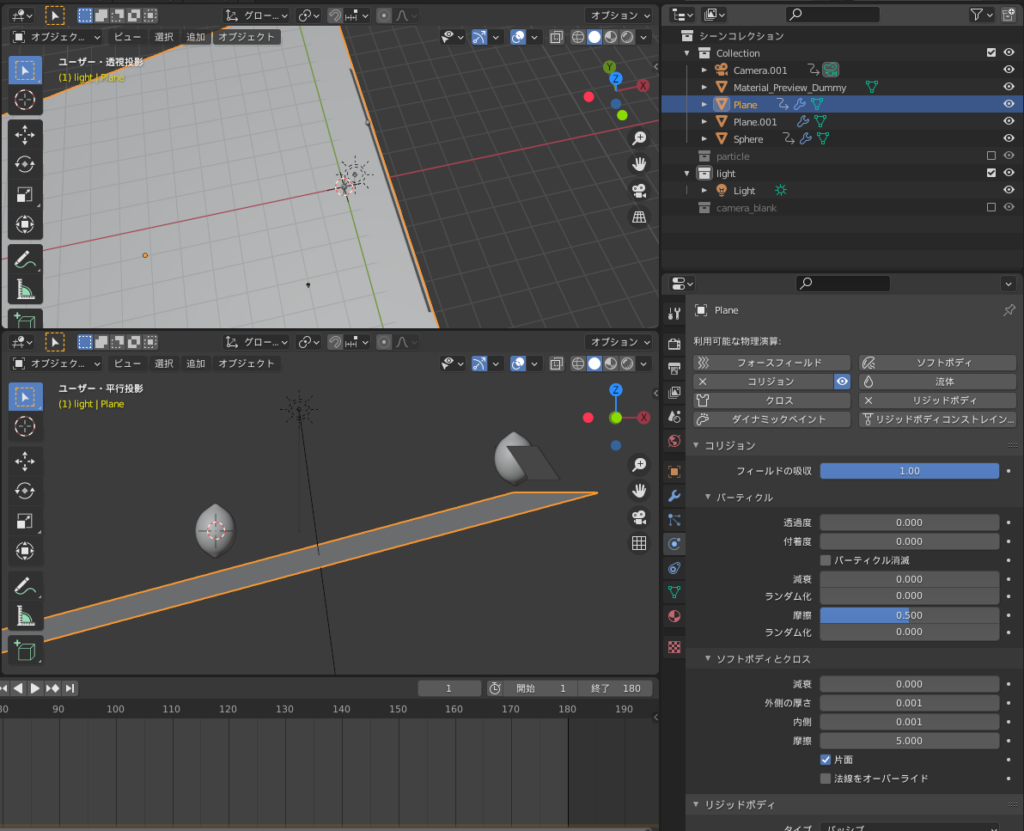
Select the ramp, go to “Physics Properties → Available Physics," and add “Collision."
Set the field’s absorption (bounciness) to 1, transparency to 0, and friction to 0.5.
Step 5: Bake the Animation.
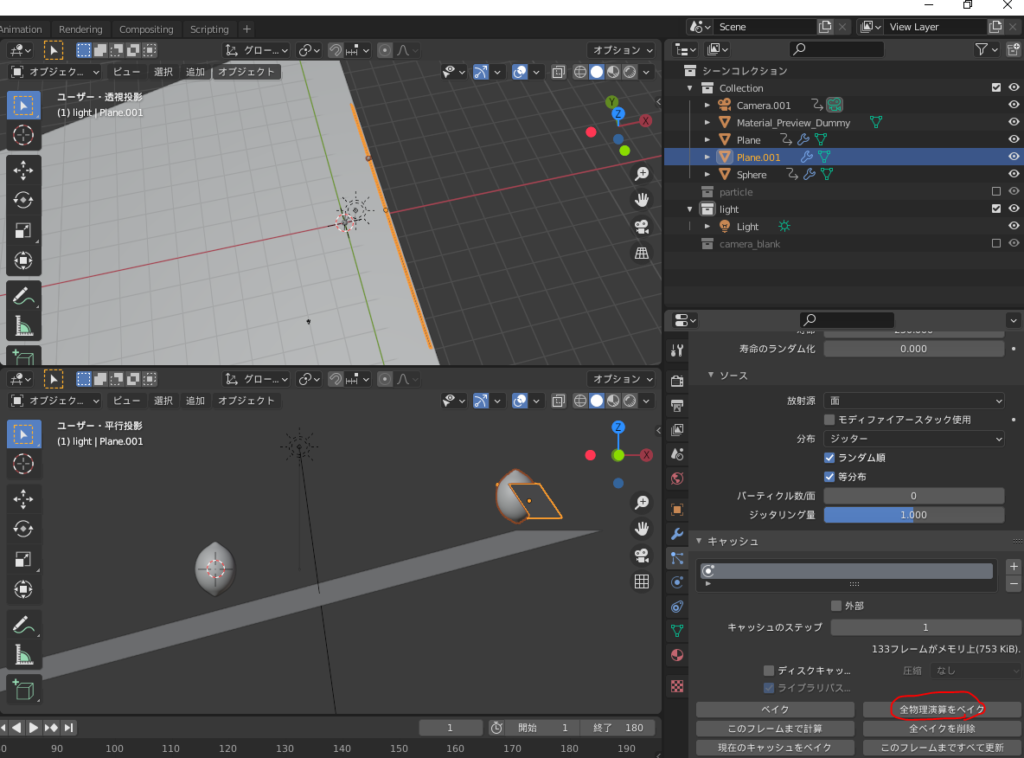
Finally, select the emitter, go to “Particle → Cache," and select “Bake All Physics" to record the particle movement.
If you skip this step, the animation might not roll correctly during rendering, so be careful! 😅
The final animation is as follows:
I set keyframes for the camera position to follow the lemon’s movement and then focused on the large number of lemons rolling down in the animation. 😊🎥
Challenges / Reflections
The particle physics steps I listed above were the result of much trial and error before I managed to get something that worked. 😅
However, when watching the animation, it looks like the particles are bouncing more than the first lemon that was rolled using rigid bodies. 😓
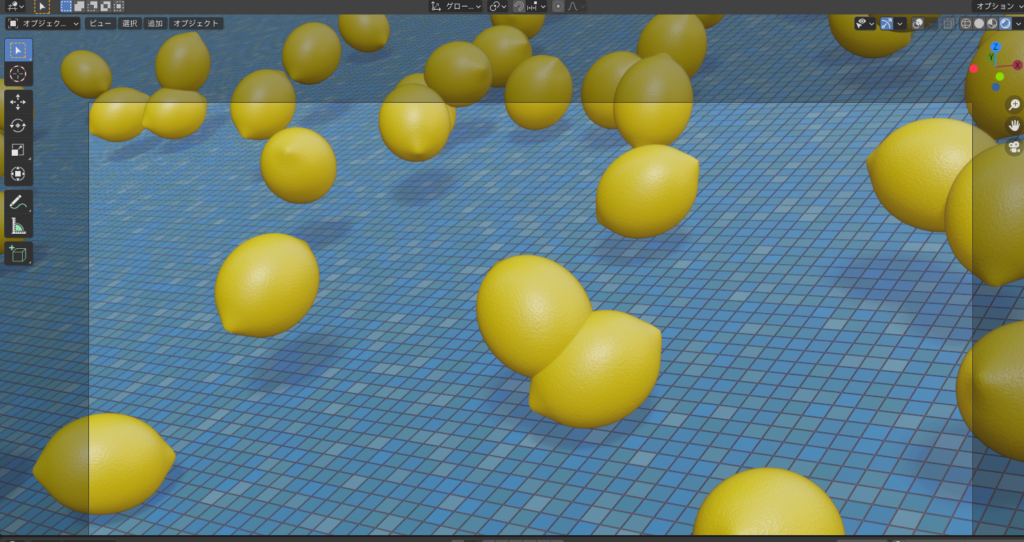
Another drawback of using particles in animation is that, as you can see, the particles tend to merge together (there is no collision detection between particles) 💦
After some research, I found that using a “game engine" could help avoid this merging, so I plan to try that in a future project.
AD
Conclusion
After much trial and error, I was finally able to create the “rolling lemons" animation as I imagined it. 😊🍋🍋🍋🍋
The Core i5 10400F + GTX1650 PC I introduced in my previous article did a great job in making this possible. 😊💻✨
With this setup, you can apply the same method to roll various objects, so if you’re interested, feel free to give it a try! 😆
Reference Links:
Mdesign 【Blender Beginner】Creating a Lemon Using the Built-in Addon to Quickly Apply Materials
Particle Reference:
ML/Ch 【Blender 2.8】Rain/Basic Particle Usage/Particle Part 1 【Starting 3DCG with Koo-Suke】
Physics Animation Reference:
Ume-chan 2021 Latest Version 【Beginner’s Physics】 Learn Physics Animation by Creating
https://www.udemy.com/course/2021-ass/?referralCode=E719AEB3A5C765F1FDAA
I would also be happy if you check out my previous article, “Creating a Dice Animation"! 😊✨
AD
