【Blender 2.93】Modeling the “Sea of Clouds (and Rocky Mountains)
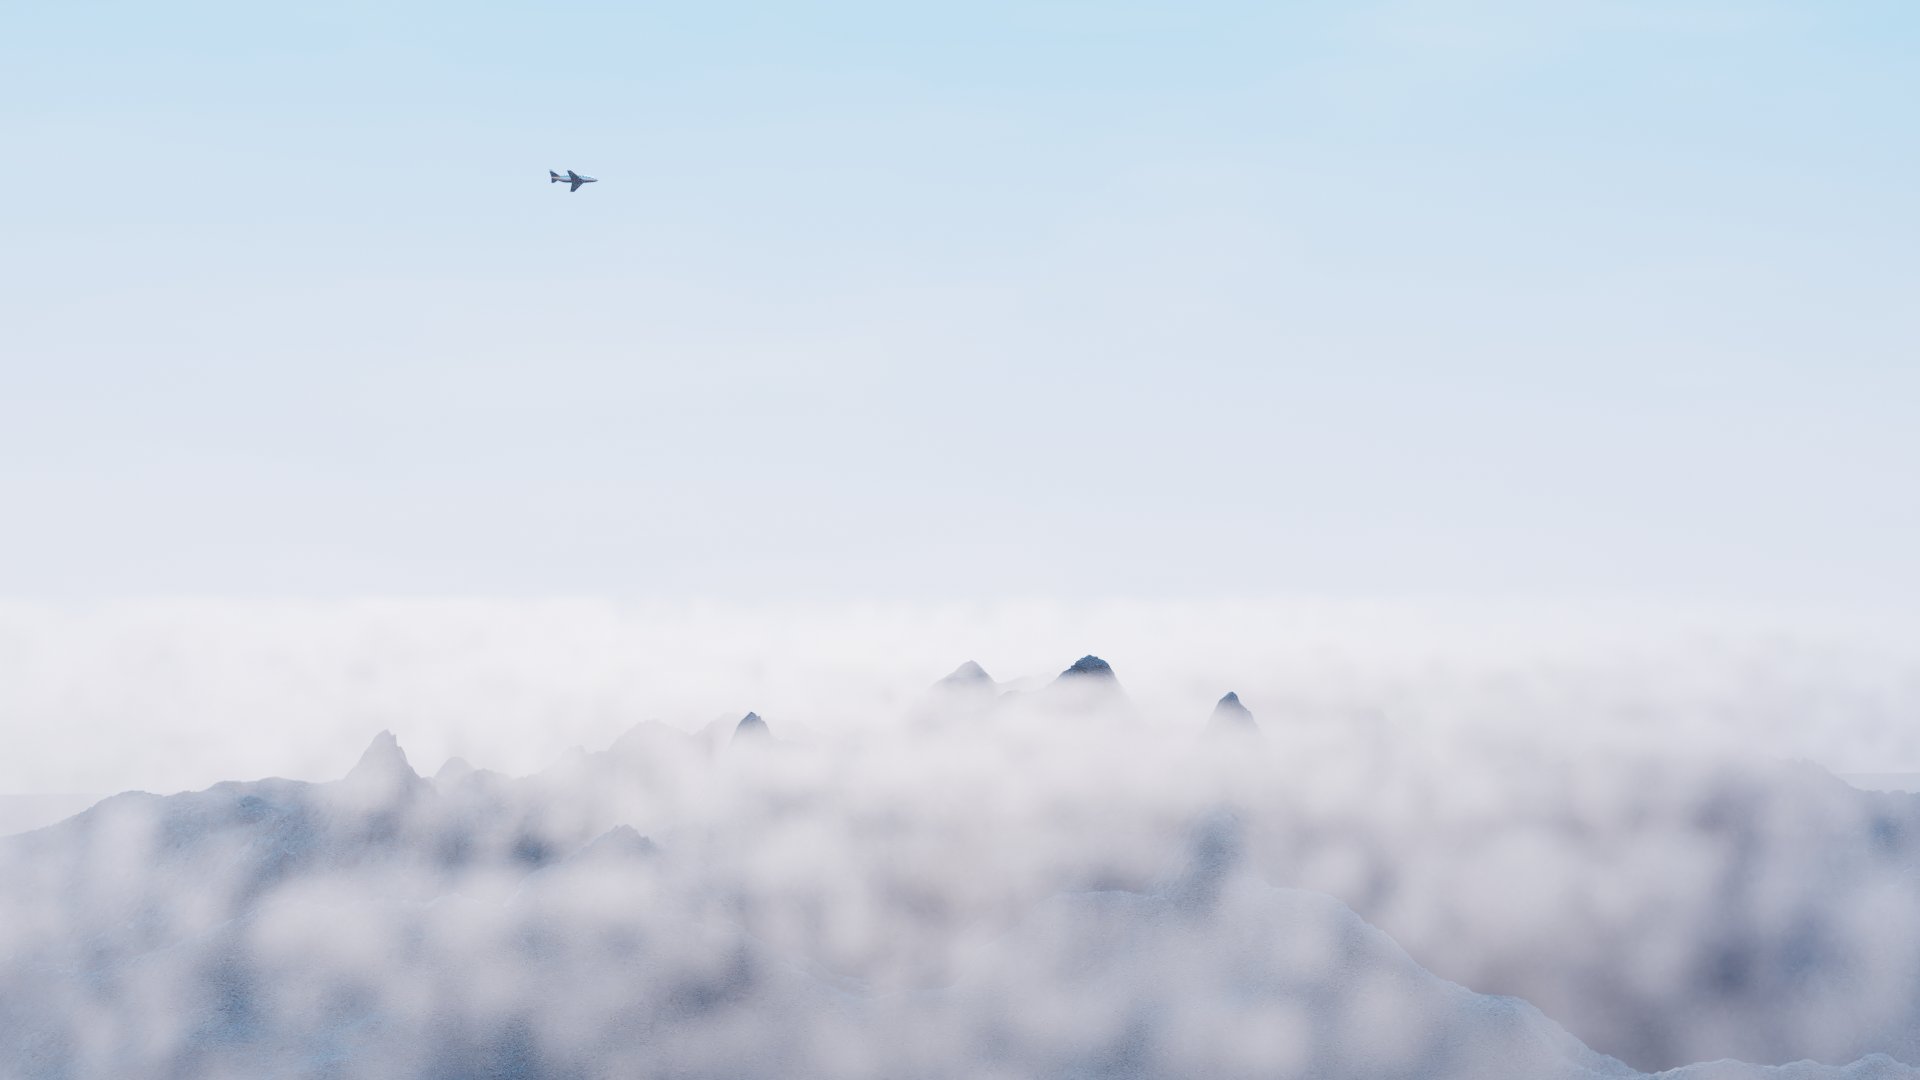
This is an explanation of the “Sea of Clouds (and Rocky Mountains)" created on June 19.
I used Blender’s physics simulation (gas simulation) to create the sea of clouds.
I have summarized the method and key points for creating clouds using gas simulation for reference.
Additionally, I will touch on how to create rocky mountains using Blender’s built-in add-on “A.N.T. Landscape."
Feel free to send any comments or questions to my Twitter (https://twitter.com/klala_lab) (^_^)/
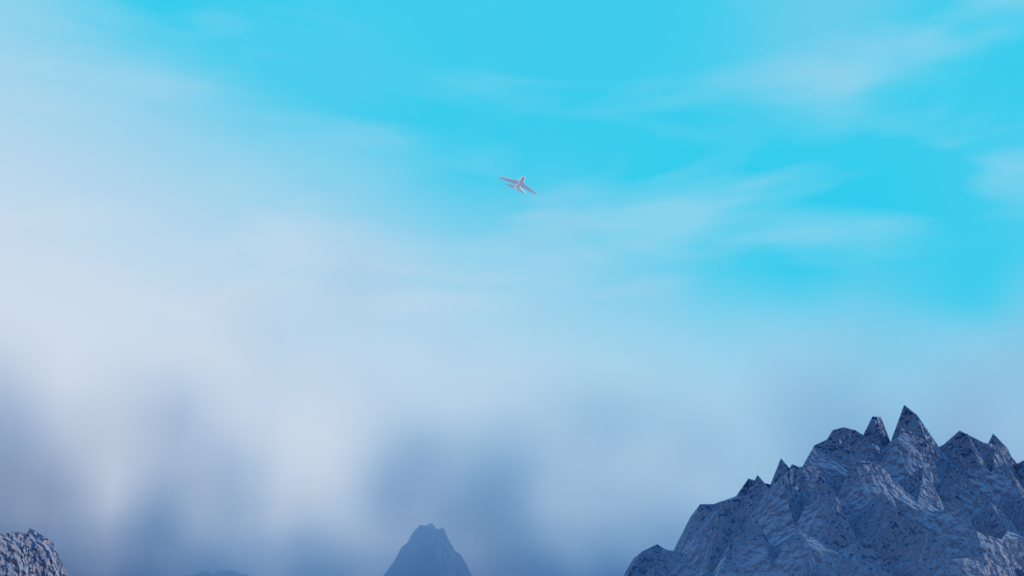
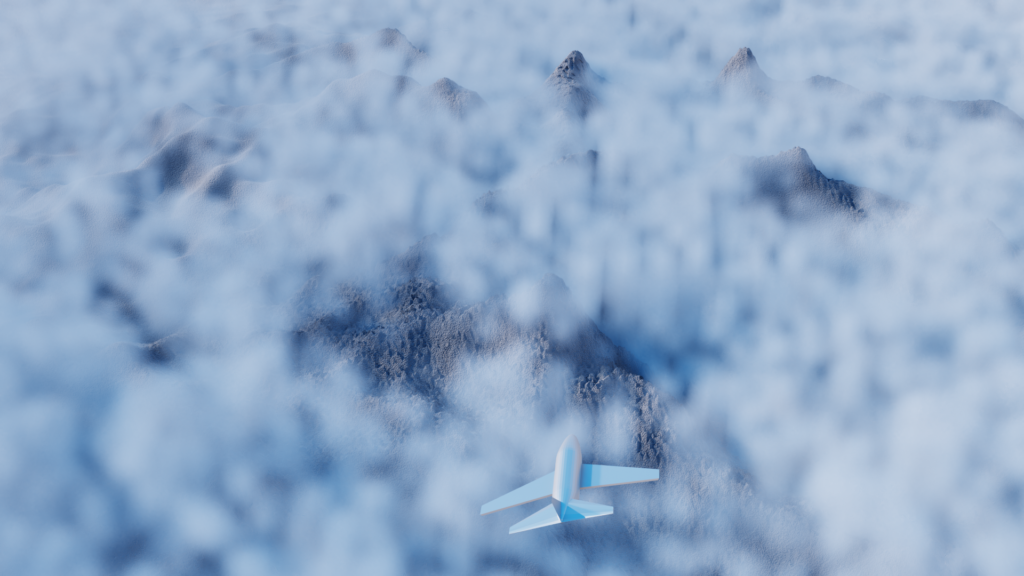
岩山のマテリアルを作って、下からと上からのアングルで雲海を撮ってみました✈
— クララ/Klala (@klala_lab) June 24, 2021
流体シミュレーションを覚えると、表現の幅が広がって楽しいですね😊🎵#blender #b3d #blender初心者 pic.twitter.com/3VcaaSEzTt
AD
Intent Behind the Work
The theme of the “Midnight Modeling 60-Minute Challenge" (#深夜のモデリング60分一本勝負, referred to as “Wan Mode") on June 19, 2021, was “Sea of Clouds."
Previously, I learned how to create clouds using textures in my project “Clouds Seen from an Airplane” , but I wanted to try a different method this time, so I decided to challenge myself with physics simulation (gas simulation) ☁️.
To be honest, the use of gas simulations is not as common as liquid simulations 😅.
However, because it’s not something I use frequently, it’s easy to forget. So, I thought it would be a good idea to document the process in a blog for future reference.
By the way, I learned the method for gas simulation through Ume-chan (@zero_blender)’s Udemy course, “Learn Physics Animation by Creating" (as mentioned in the “Dice Animation" article) (link below).
It’s highly recommended for systematically learning various physics simulation methods from the basics! 👍✨✨
2021 Latest Version: [Introduction to Physics] Learn Physics Animation by Creating
https://www.udemy.com/course/2021-ass/?referralCode=E719AEB3A5C765F1FDAA
Techniques Used
- Quick Effects → Smoke
- Domain Settings
- A.N.T. Landscape
- Material Nodes (Noise Texture & Bump)
Creation Steps
I will explain how to create the clouds, mountain, and the background sky as shown in the image from the tweet at the beginning of the article.
How to Create Clouds (Sea of Clouds)
I will explain the process of creating clouds using fluid simulation step by step.
Quick Effects Settings
We will use the “Quick Effects” feature, which was introduced in the previous article “Pouring Water into a Fishbowl”
First, add a cube and scale it flat by pressing S and then Shift+Z.
With the cube selected, go to Object → Quick Effects → Quick Smoke.
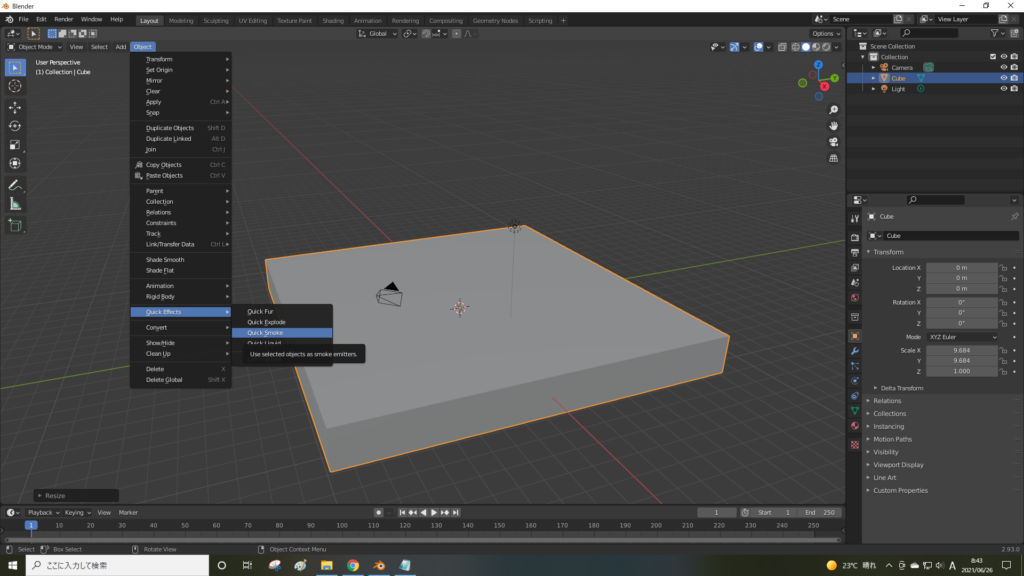
This will generate the “Smoke Domain” as shown below. This domain will be the area where the physical simulation takes place.
It is similar to the “Liquid Domain” created with the “Quick Liquid” feature, which was introduced in the previous article “Pouring Water into a Fishbowl”.
AD
Domain Settings
Select the domain and make the following adjustments in the Physics Properties:
- Settings → Resolution Divisions: Set from 32 to 64.
- This increases the resolution of the clouds.
- Buoyancy Density & Heat: Set from 1 to -1.
- By default, smoke rises, but since we want the clouds to stay in place, set the value to negative.
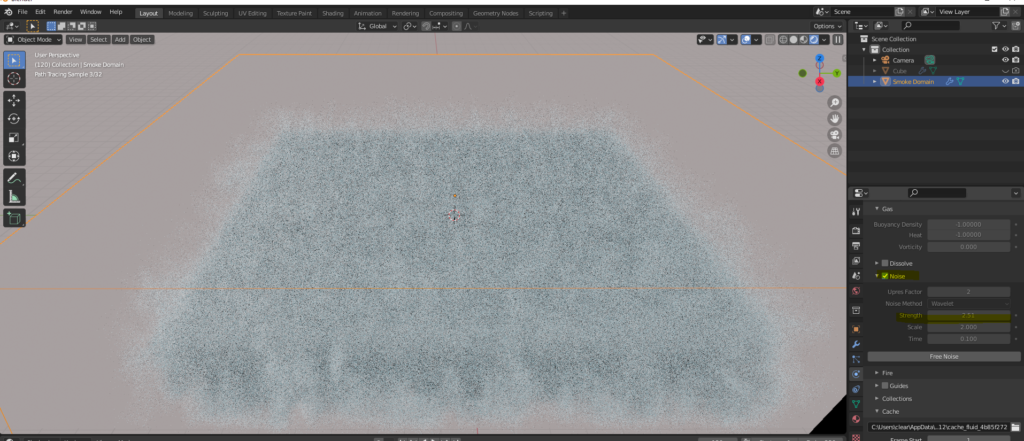
- Noise: Check this option.
- This adds randomness to the shape of the clouds.
- Cache:
- Set the type to Module.
- After choosing Module, click “Bake Data" and then “Bake Noise."
This will bake the cloud simulation, including noise.
- Frame End: Set from 250 to 60.
- This adjusts the number of frames for the simulation. Since we don’t need to output the animation, we set it to 60.
- Type: Change from Replay to Module.
- The Module setting ensures that the simulation will bake and render correctly.
「リプレイ」のままでも雲を出力することは可能ですが、レンダリングできないことがあるようです😅。「モジュール」に変更しベイクすることで、確実にレンダリングできるようになります。
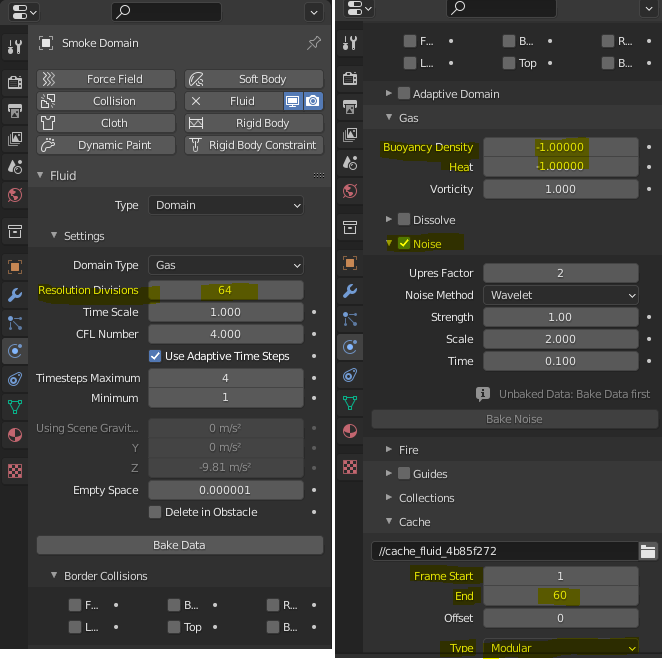
Once you set the Cache type to Module, the “Bake Data" button will be enabled, so click it to bake the data. The timeline data from frame 1 to 60 will be baked.
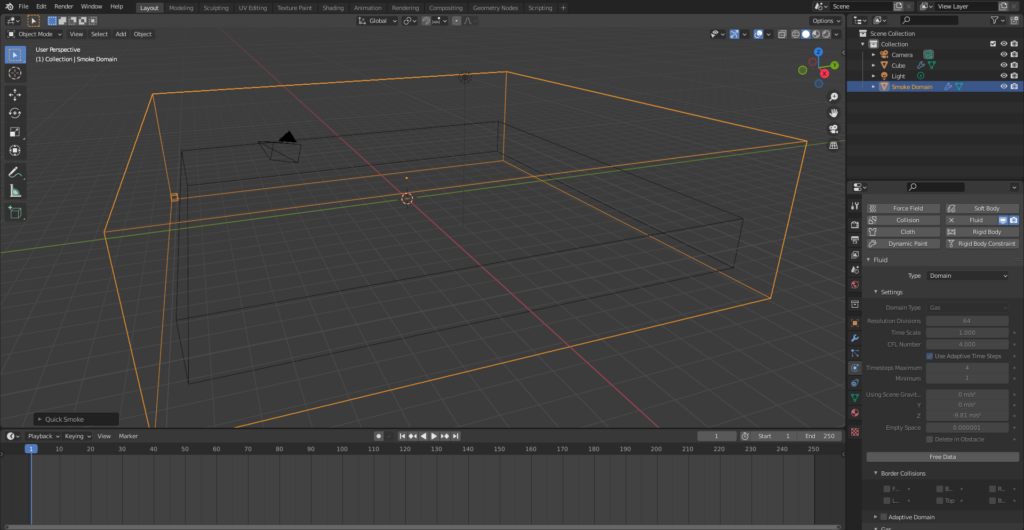
When baking, initially, nothing appears 😓.
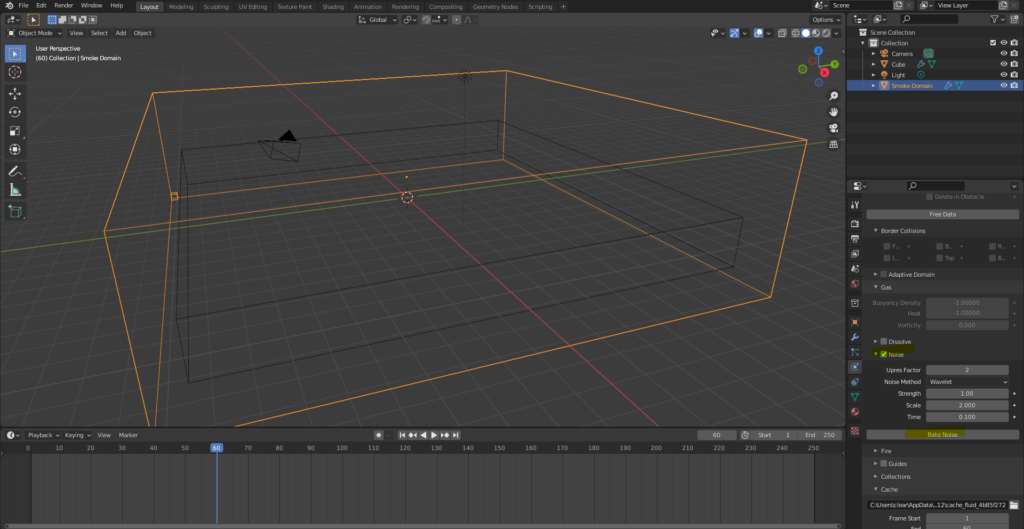
Click Bake Noise under the Noise menu, and after baking the noise, the clouds will appear!
(As a side note, during my first attempt at creating clouds, I forgot that I needed to bake the noise. No matter how many times I baked the data, the clouds wouldn’t appear, so I ended up using the “Replay" mode instead of “Module." I had completely forgotten this step, which I learned from @zero_blender’s Udemy course 🙄💦).
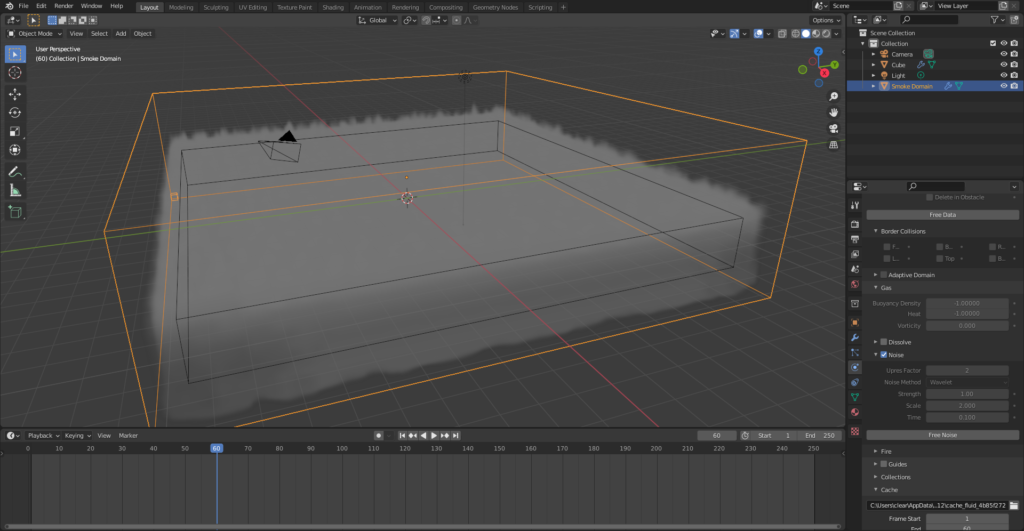
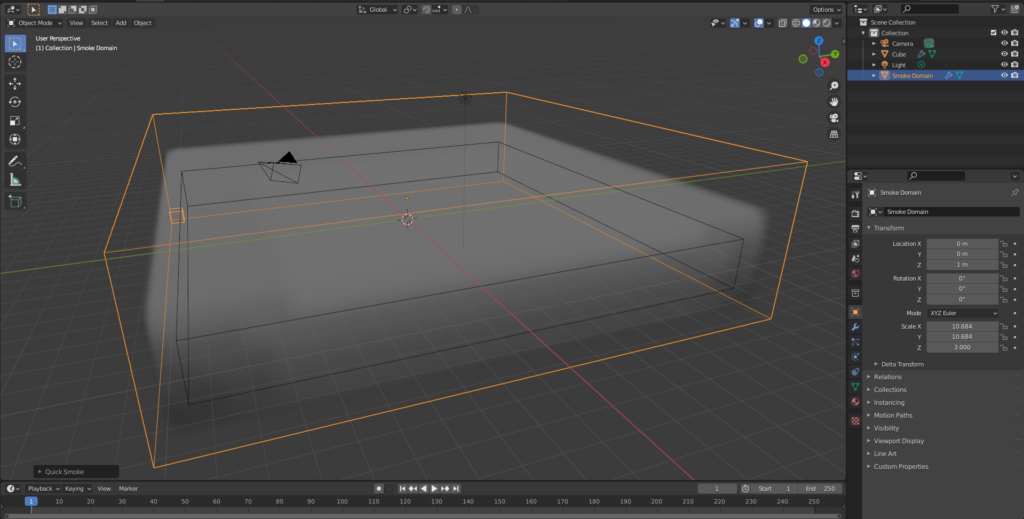
Cloud Material (Principled Volume) Settings
After baking the clouds, when you check the rendered view (using Cycles), you will notice that the clouds appear gray.
To make it look more cloud-like, adjust the material settings.
(In the top right of the Scene Collection, uncheck the “👁️" and “📷️" icons for the cube that emits the smoke to hide it from the view.)
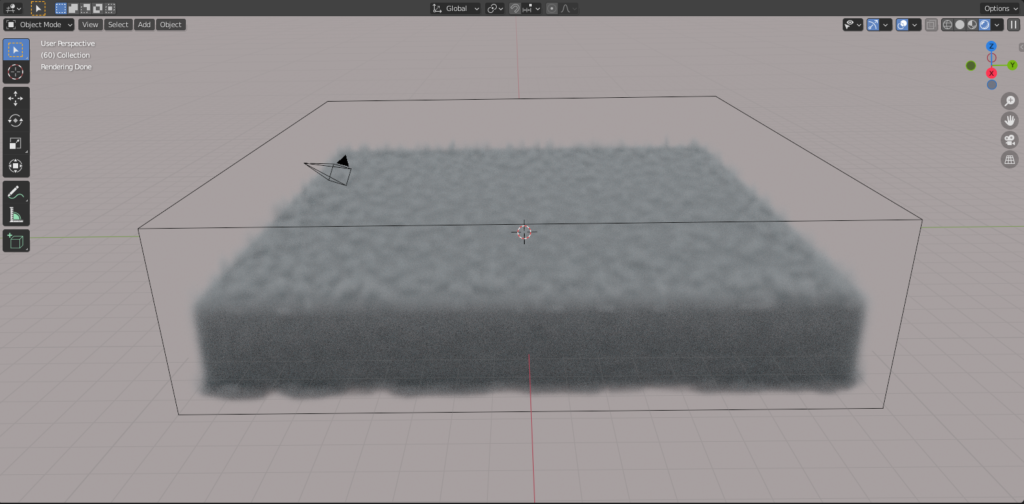
Select the Smoke Domain and open the Shader Editor. You will see Principled Volume.
The following three settings need to be adjusted:
- Color
- Density
- Anisotropy
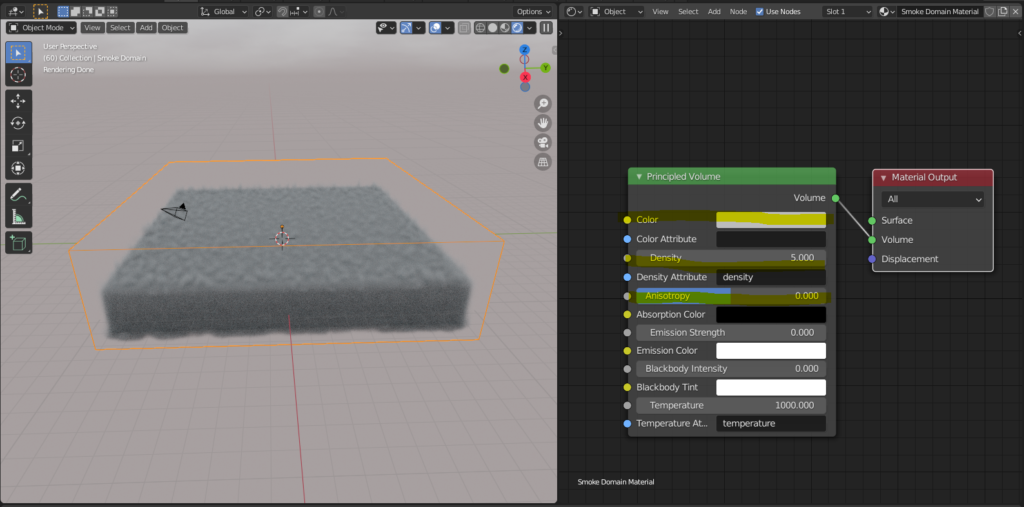
1.Color: Change from gray to white.
(Above: before change / Below: after change)
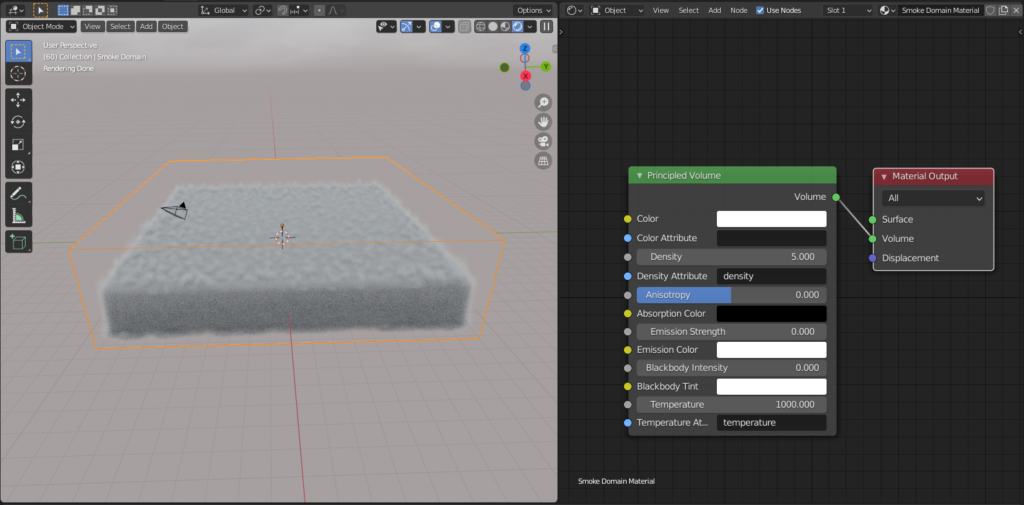
2.Density: Change from 5 to around 1.
(Above: before change / Below: after change)
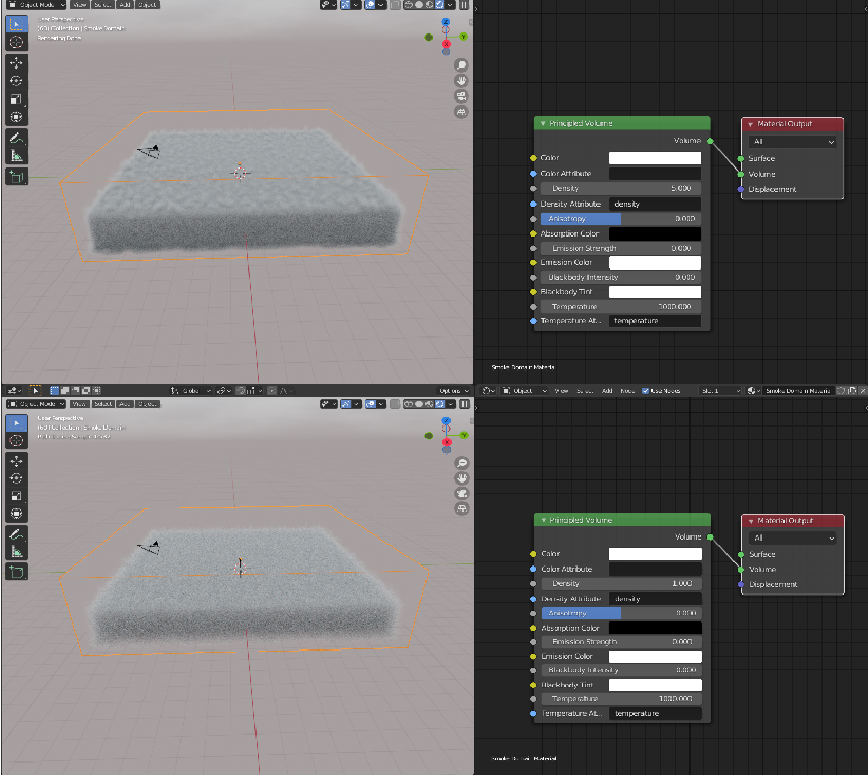
3.Anisotropy: Adjust to control the direction in which light reflects.
This can be adjusted in the range of -1 to +1 to make the cloud appear brighter (as shown below).
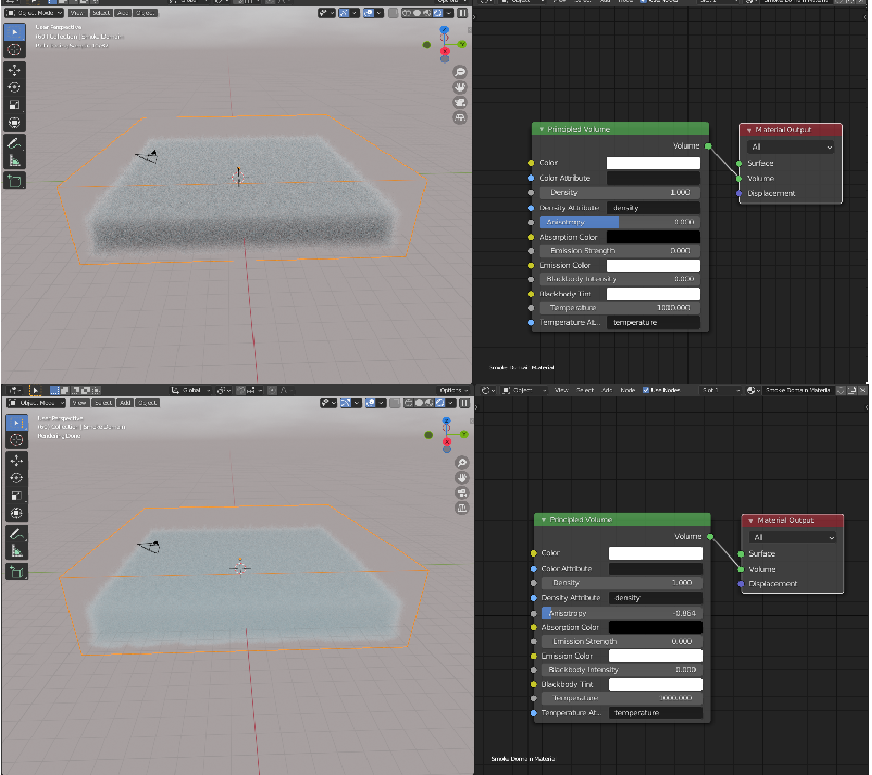
At this point, the cloud looks much more realistic. Since the shape of the clouds changes with the passage of time, it’s a good idea to render images at a step that captures the cloud shape you like.
Feel free to play around with the parameters, such as increasing the noise strength, to tweak it to your liking!
How to Create the Mountain
For the mountain, I used Blender’s built-in addon A.N.T.Landscape, which was also featured in my previous article “Modeling a Desert (Sand Dunes)“.
Make sure to enable the addon beforehand by going to Edit → Preferences → Add-ons.
Creating the Mesh (A.N.T.Landscape)
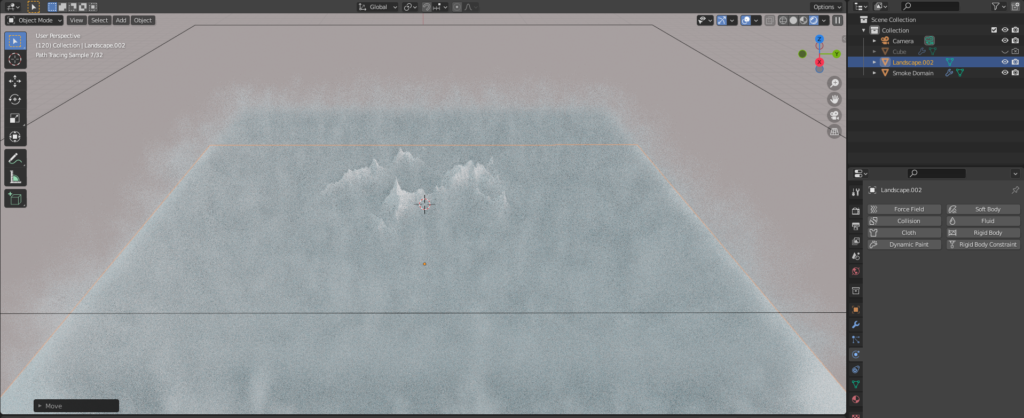
In Object Mode, press N to open the side panel, then under Create → Landscape, click Landscape to generate the mesh.
From the presets, I selected Mountain 1.
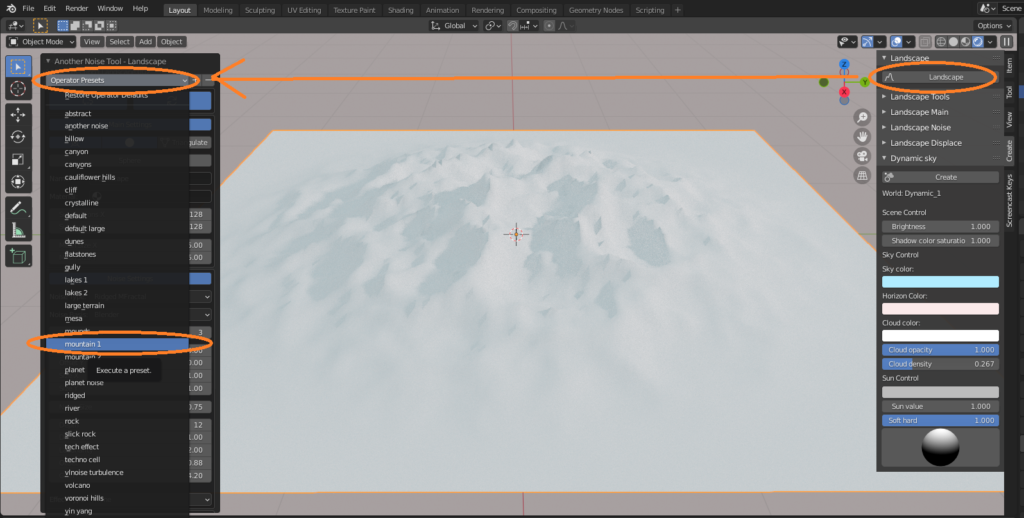
To create more detailed terrain, I increased Subdivisions X,Y to about 1000 (note that this will make your scene more demanding on your computer, so adjust based on your PC’s specifications).
Additionally, since I wanted the base to be wider, I increased Mesh size X,Y from 2 to 5.
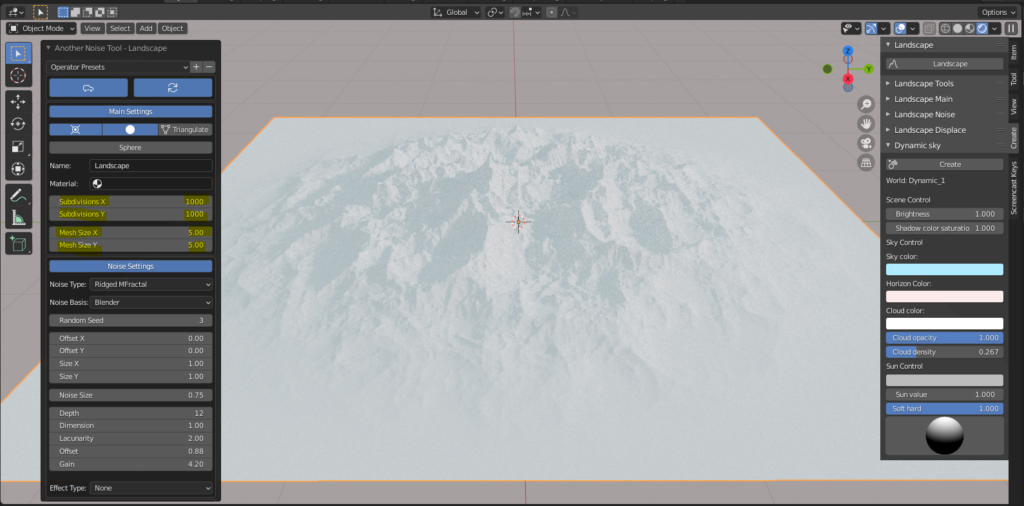
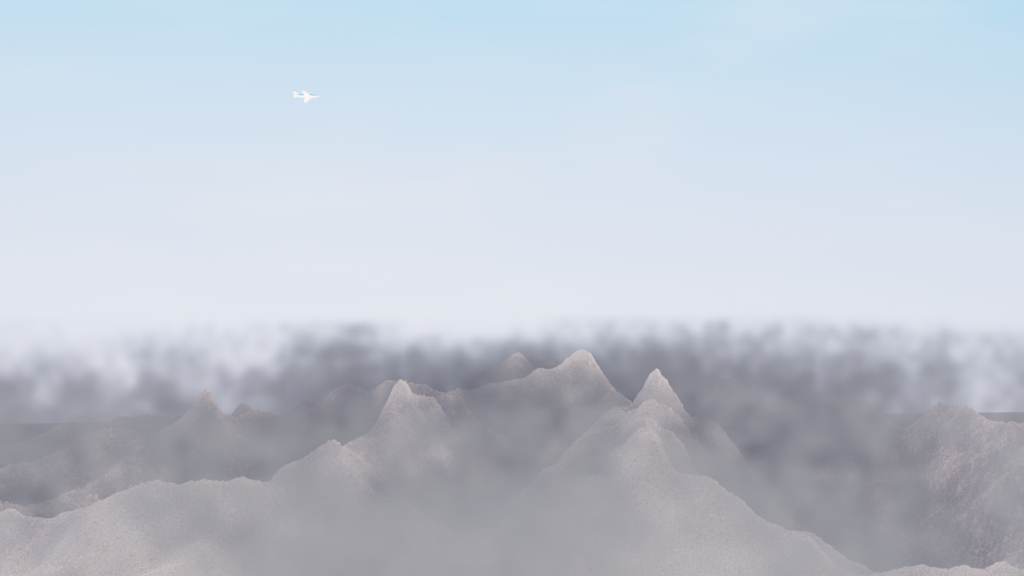
I then displayed the clouds (Smoke Domain) and adjusted the size and height of the mountain so that the peak would emerge from the clouds.
Mountain Material Settings
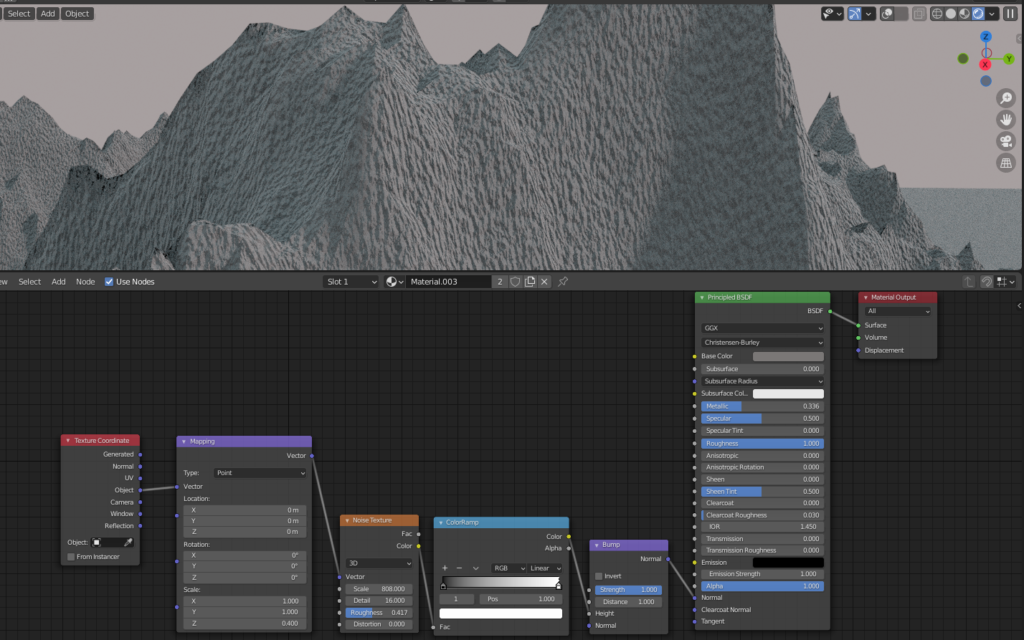
To depict the rugged surface of the mountain, I connected a Noise Texture and Bump to the Normal input of the Principled BSDF shader.
For more details on how to create bumps using material nodes, refer to my previous articles: “How to Create Shell Patterns (Shell Texture)“and “Modeling a Desert (Sand Dunes)“.
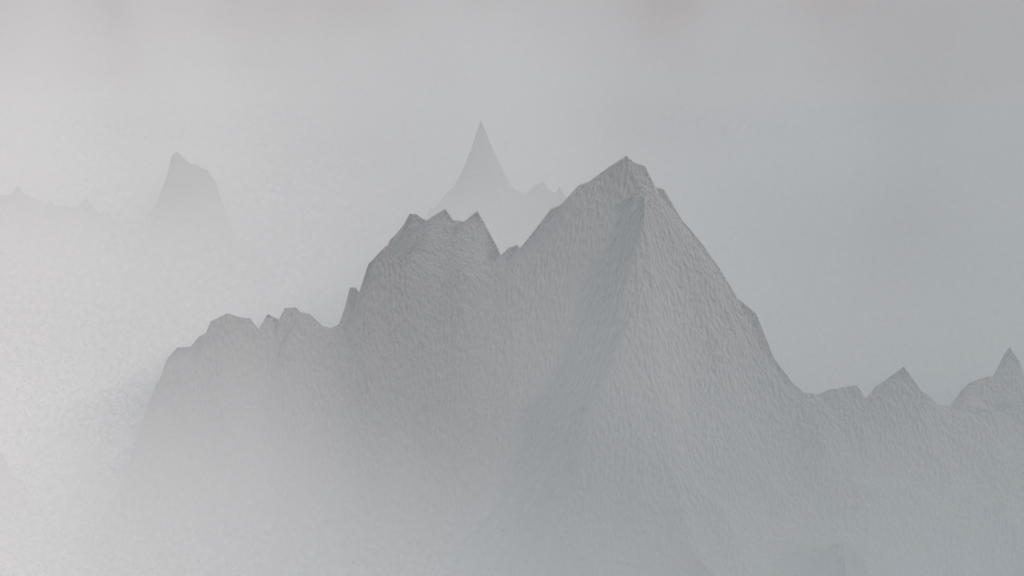
By combining the clouds with the mountain, I was able to create a somewhat mystical scene where the mountain rises out of the sea of clouds 😊.
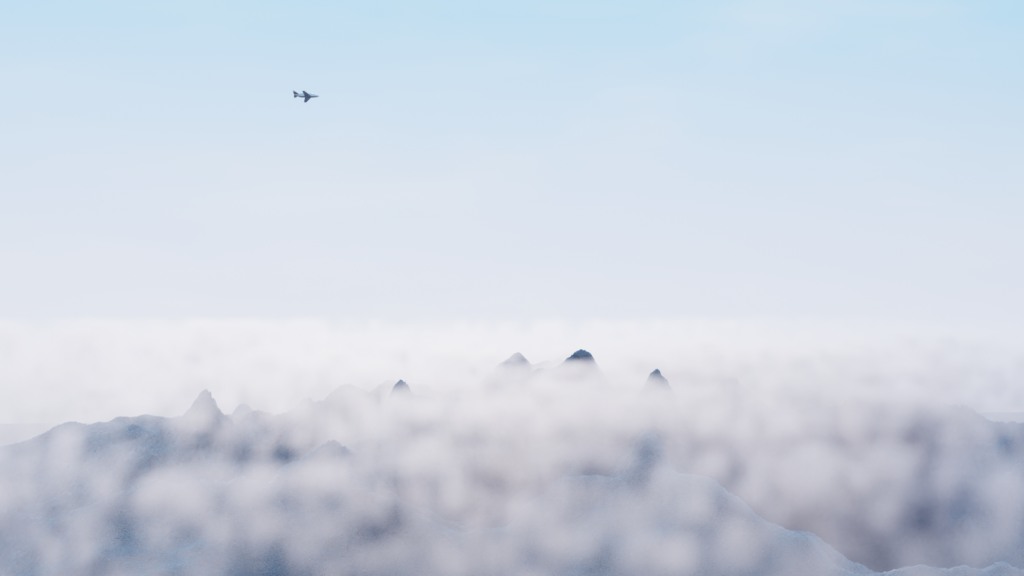
Since I love airplanes, I quickly made a simple model and had it fly above the cloud sea 😆✈.
(I hope to eventually make a more realistic airplane and have it soar through the sky!)
How to Create the Sky
For the sky in this project, I used Blender’s built-in addon Dynamic Sky. It’s a quick way to create realistic skies, and I highly recommend it 😊.
I introduced how to use it in my previous article “Modeling a Desert (Sand Dunes)“, so please refer to that article for the detailed instructions.
Additionally, if you’re looking for an even simpler way to create skies, I recommend the ML/Ch YouTube video I featured in my article “Clouds Viewed from an Airplane“. The resources provided in that video can help you quickly create a basic sky. 👍
For more details on using the video resources, please refer to either my article or the tutorial in ML/Ch’s video:
Note: Using Eevee
The clouds I introduced in this article are intended for rendering with Cycles (since it can handle the complex light refraction and reflection inside the clouds).
However, there may be situations where you want to use Eevee, such as when outputting videos. In this case, here are a few personal observations and tips.
When switching the renderer to Eevee, the internal light refraction and reflection of the clouds are not as well represented, which can make the clouds appear darker than they do in Cycles.
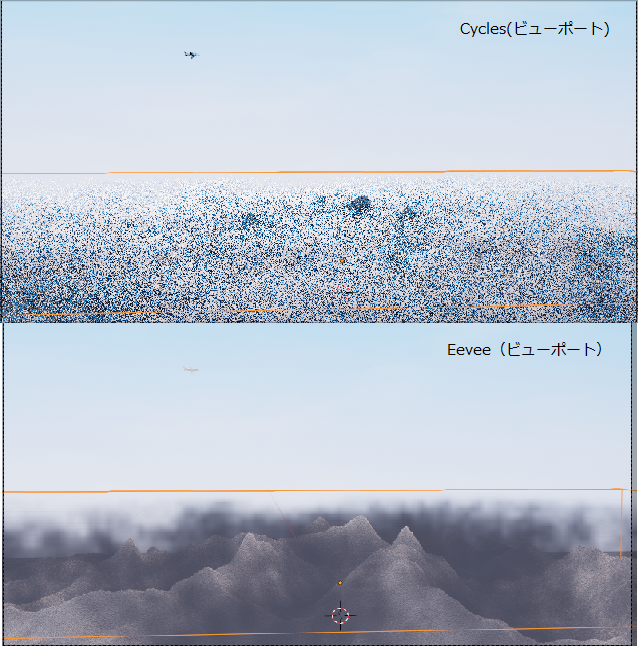
The only real workaround (as far as I know) is to add light to the scene.
There are various ways to light the clouds. For example, you could use a large Area Light under the clouds to brighten the whole scene. However, the exact lighting method you choose will depend on the specific scene you’re trying to depict 😅.
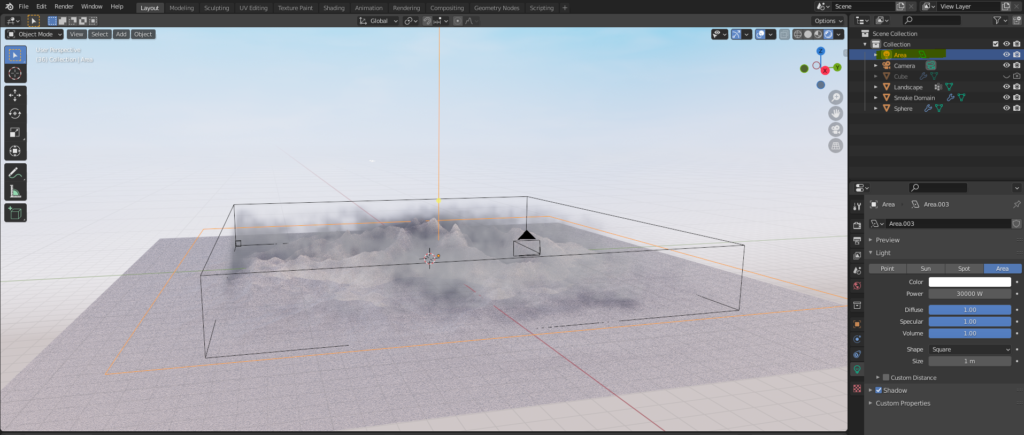
(Rendering result in Eevee… hmm, the top of the clouds looks a bit darker and not quite as good 😅.)
AD
Conclusion
I hope you enjoyed the tutorial on creating cloud seas (and mountains). Using gas simulation, you can create realistic clouds even if you’re not experienced with polygon modeling or sculpting.
That being said, it might not always give you the exact results you’re envisioning. But by following the instructions and tips in the articles above, I encourage you to give it a try! (^^;)
Reference Links
This blog article by Vasa Entertainment Co., Ltd. was helpful for the cloud material setup. 🙇♂️
Ume-chan’s Udemy Course – In addition to gas simulations, you can learn the fundamentals of various physics simulations:
2021 Latest Edition: Learn Physics by Creating Physical Animations
https://www.udemy.com/course/2021-ass/?referralCode=E719AEB3A5C765F1FDAA
An earlier article I wrote, “Clouds Seen from an Airplane," where I explain how to create clouds using textures.
Article on creating cumulus clouds using the Mesh to Volume modifier.
https://klala-lab.net/20210704-cloud
AD
