[Blender 3.2] Creating Sequential Turn Signals [Car Modeling]
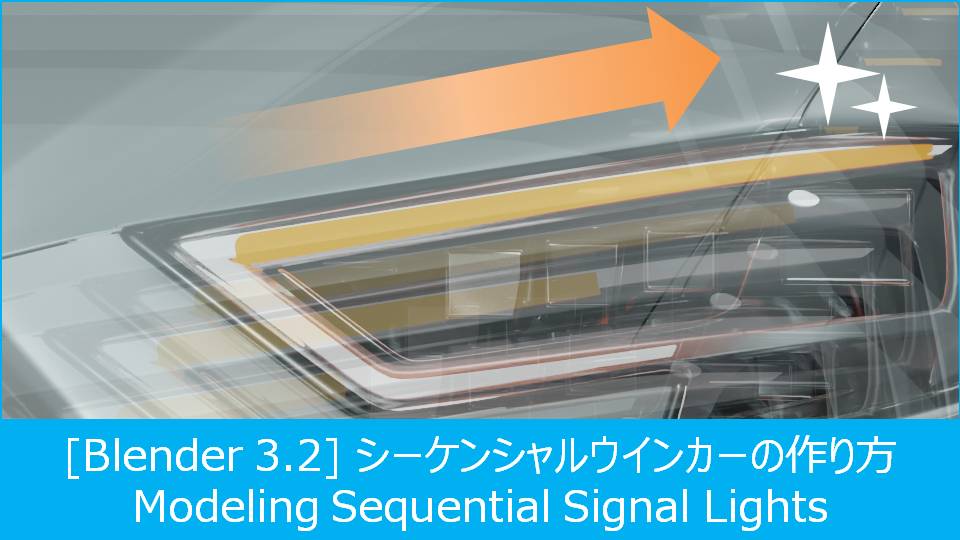
Recently, I modeled the “AUDI RS3 2017 model" in Blender.
The creation process is essentially the same as the “MINI Cooper S" I made last year. If you’re interested in car modeling, please refer to this series of articles:
This time, I’ll briefly introduce how to create a “flowing light" (sequential turn signal) like this:
For any feedback or questions, feel free to reach out to me on Twitter: https://twitter.com/klala_lab 😊
<Final Render>
AD
Method Used
For this project, I created a sequential turn signal effect by setting up material nodes.
Here are the nodes I used:
- Gradient Texture
- Color Ramp
- Math → Multiply
- Transparent BSDF
For details on how to use material nodes, please refer to my previous article on creating “conch shell patterns," which covers similar techniques.
Creation Process
Here’s an overview of the steps to create the sequential turn signal:
Modeling & UV Unwrapping
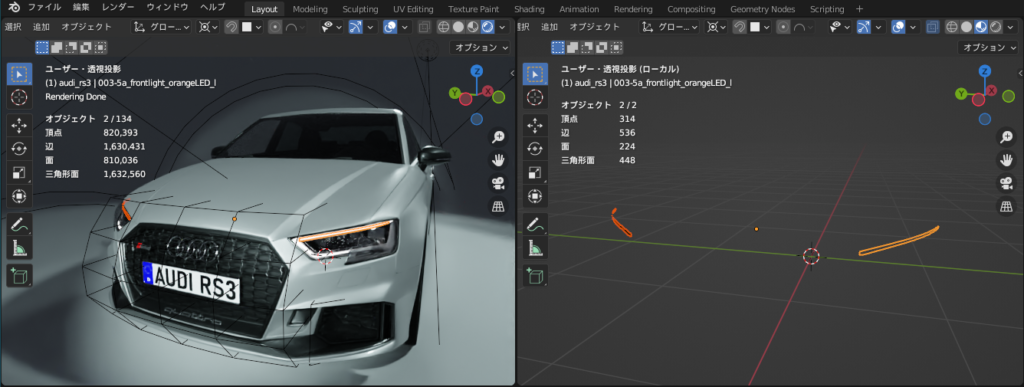
Model the Lamp:
Begin by modeling the lamp as shown below.
- Stretch a plane mesh into a long, thin shape.
- Add a Mirror Modifier.
You don’t need to apply the Mirror Modifier yet. It can be applied later after setting up the materials and animations.
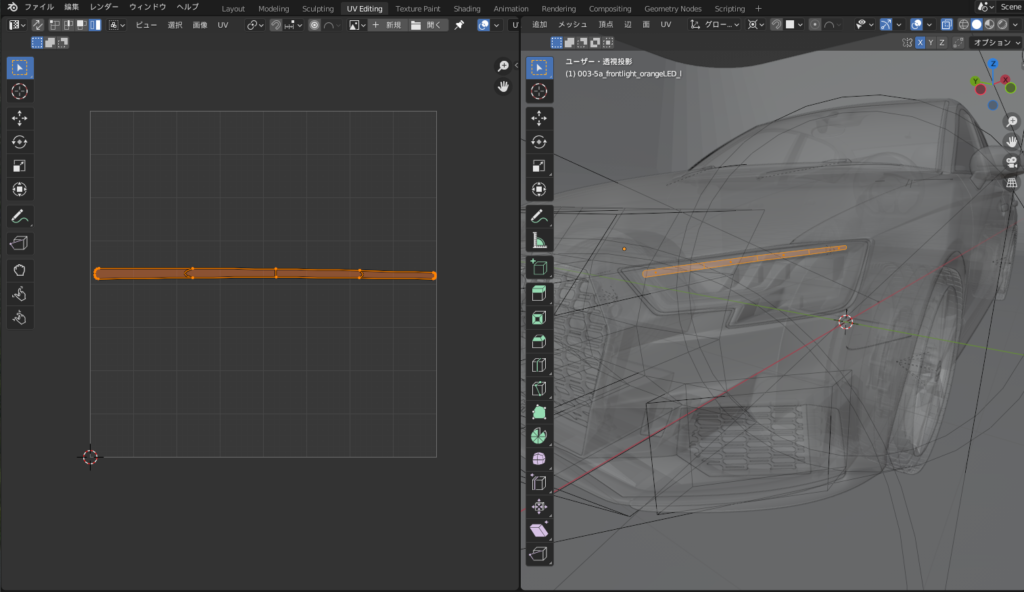
UV Unwrapping the Light:
Next, unwrap the UVs for the light.
In this example, I chose a horizontal orientation to match the direction of the Color Ramp and the lighting effect.
The UV orientation (vertical or horizontal) doesn’t matter too much.
Adding Material Nodes
Once the UV unwrapping is complete, proceed by adding the material and setting up the nodes.
To achieve the effect, the following material nodes were utilized:
- Gradient Texture
- Color Ramp
- Math Node (Multiply)
- Transparent BSDF
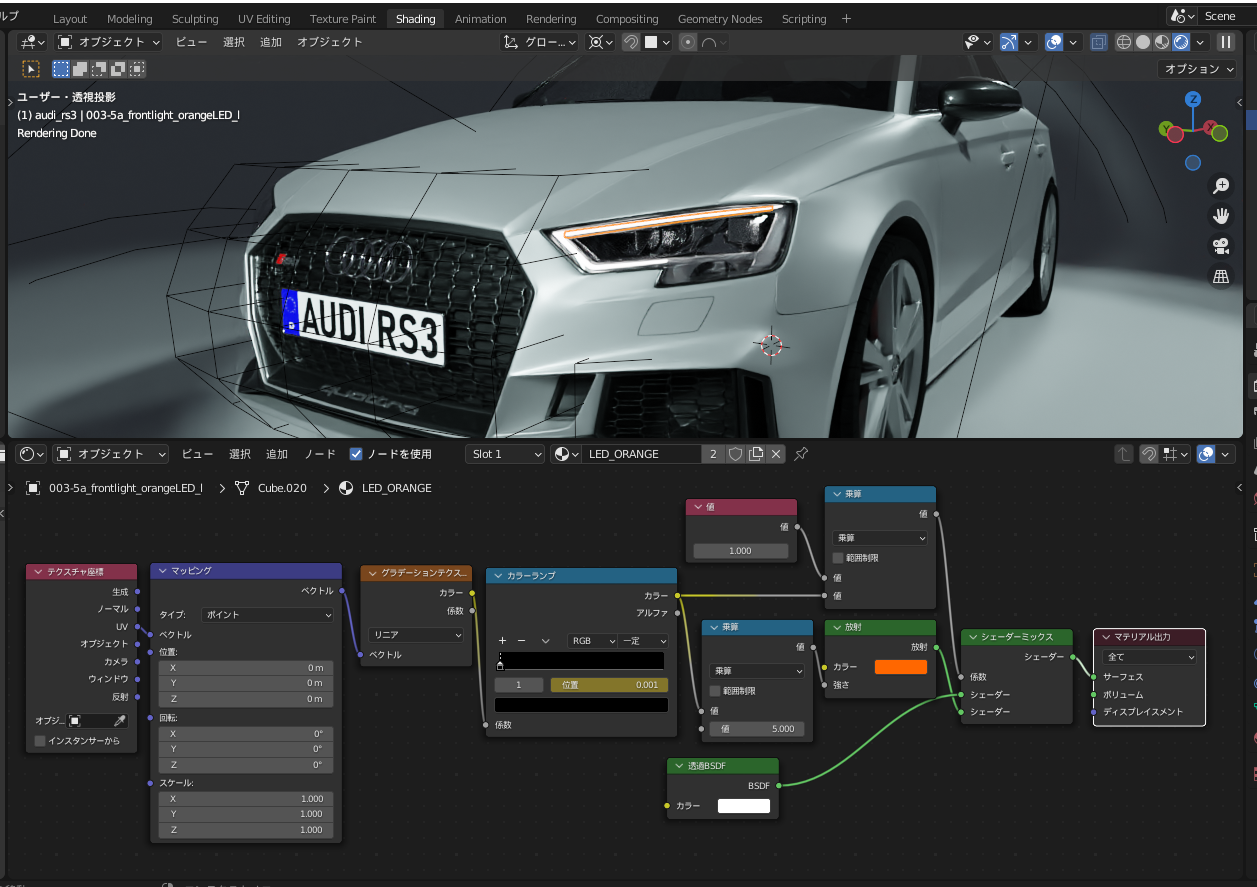
Node Setup
Below is the node structure used:
The Transparent BSDF and Shader Mix nodes are optional in many cases. However, for the RS3 model, the front light and turn signal positions overlap. To make the turn signal transparent when it’s not illuminated, these nodes were included.
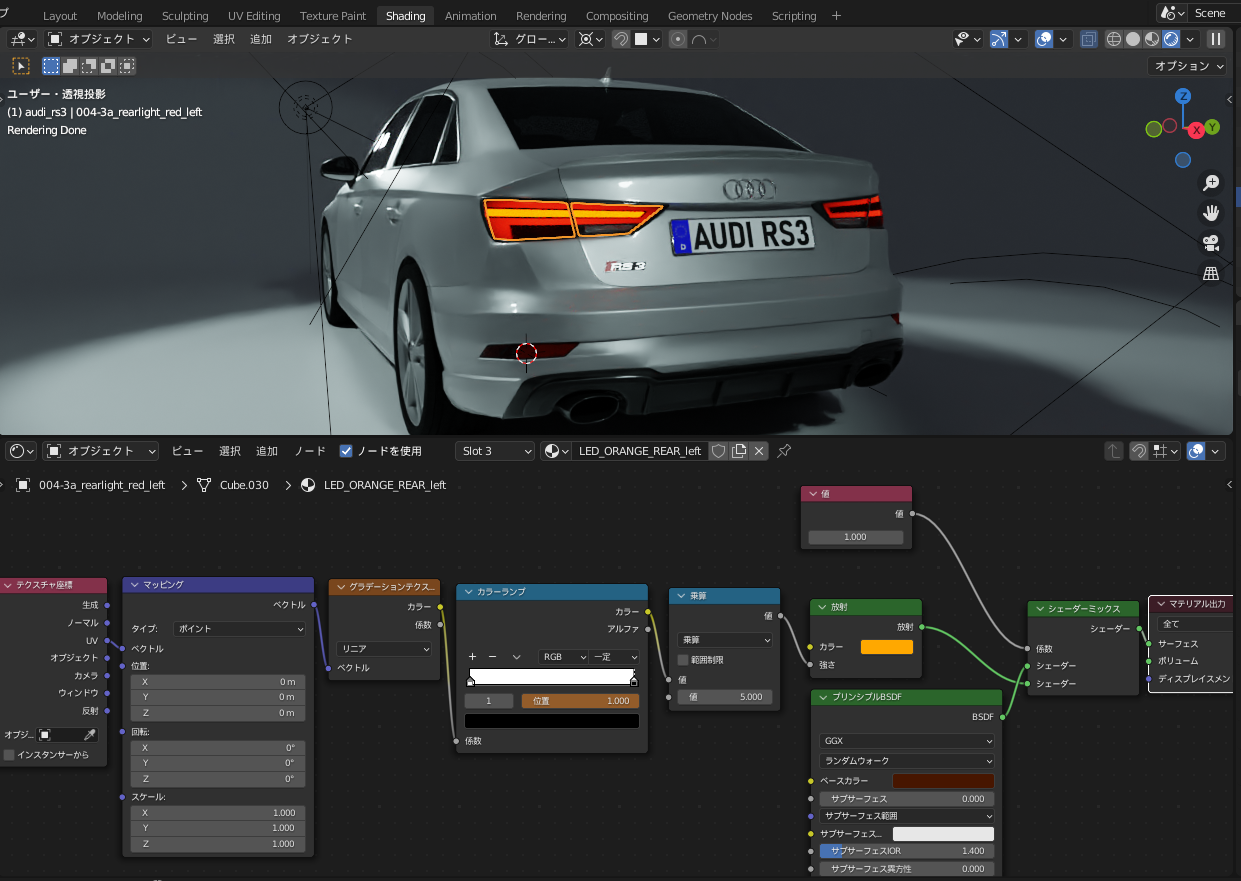
Rear Light Setup
For the rear lights, the turn signals and stoplights are separate. Therefore, transparency was unnecessary, resulting in the following simplified node structure:
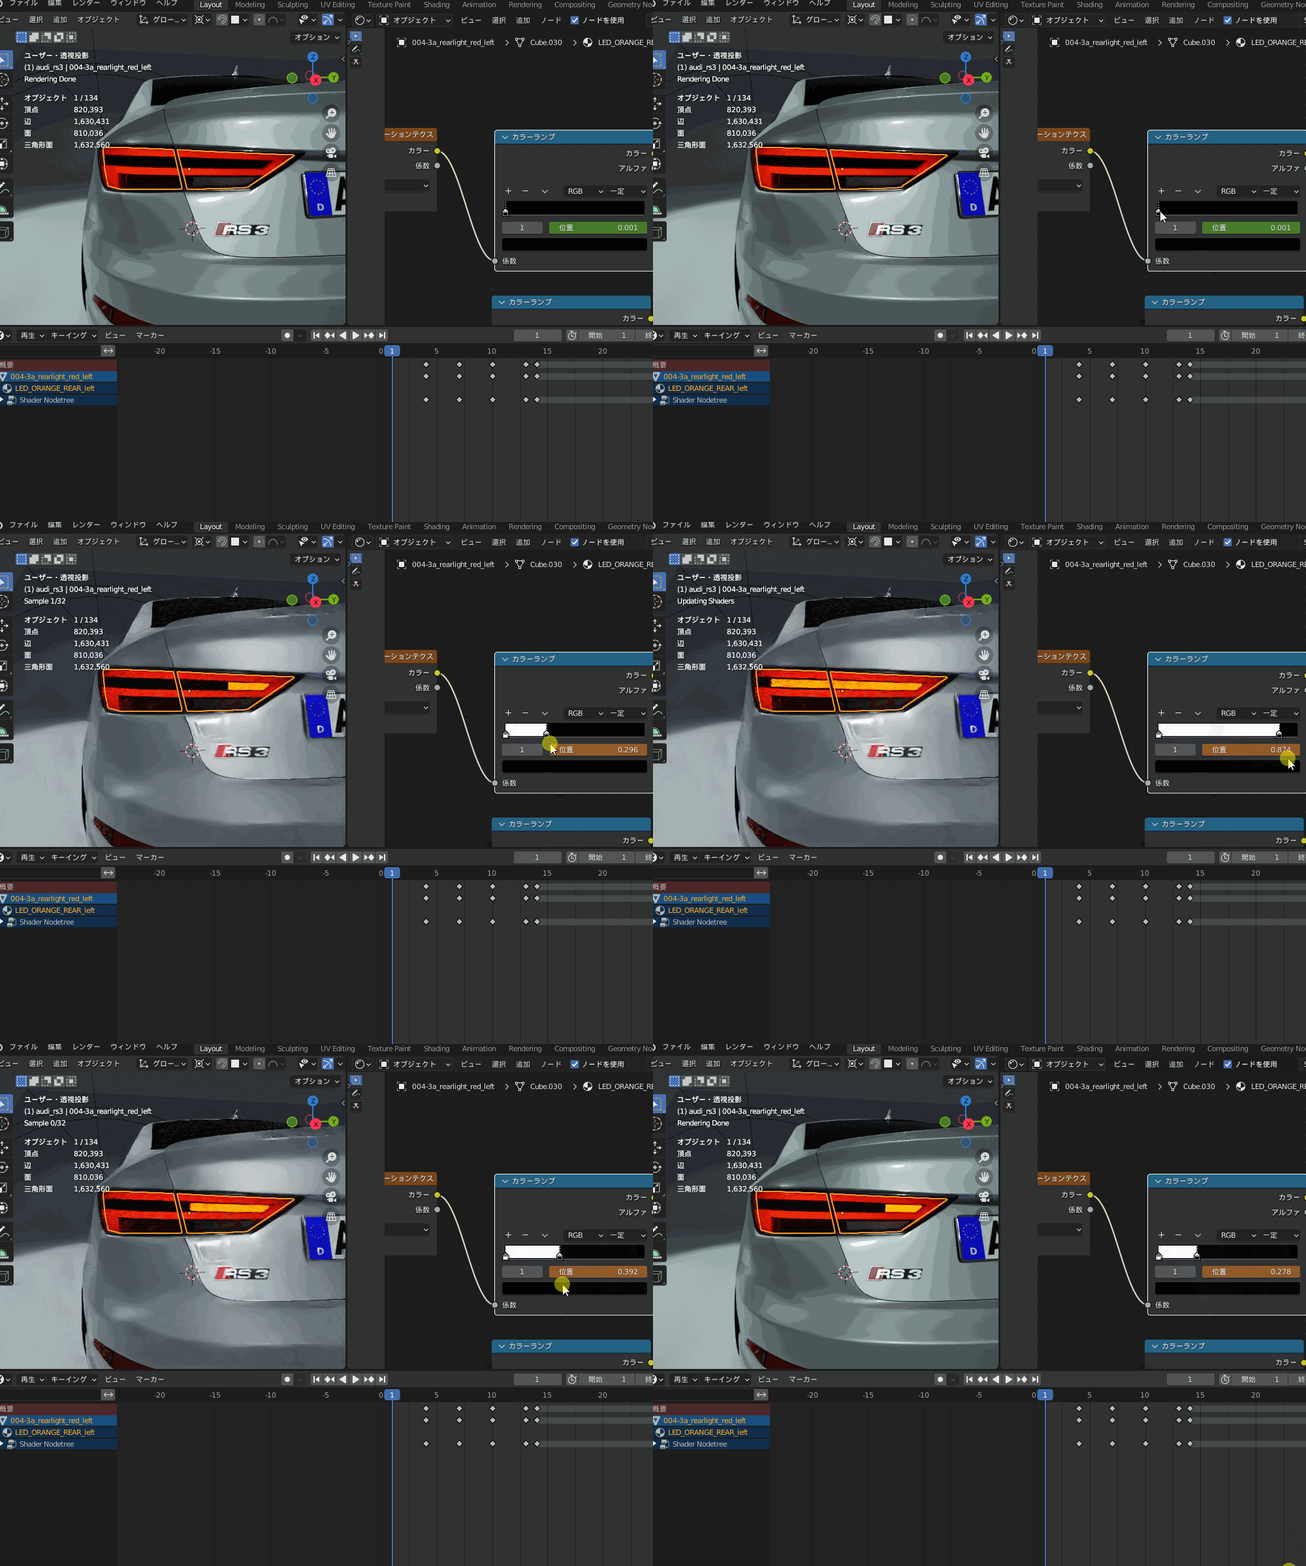
Color Ramp Configuration
The interpolation mode was set to Constant for a sharp distinction between the bright and dark areas.
The Color Ramp separates the colors into black and white for distinct brightness differences.
Effect of Moving the Color Ramp
By moving the Color Ramp, the illuminated portion transitions from left to right, creating the desired sequential lighting effect.
AD
Creating the Animation
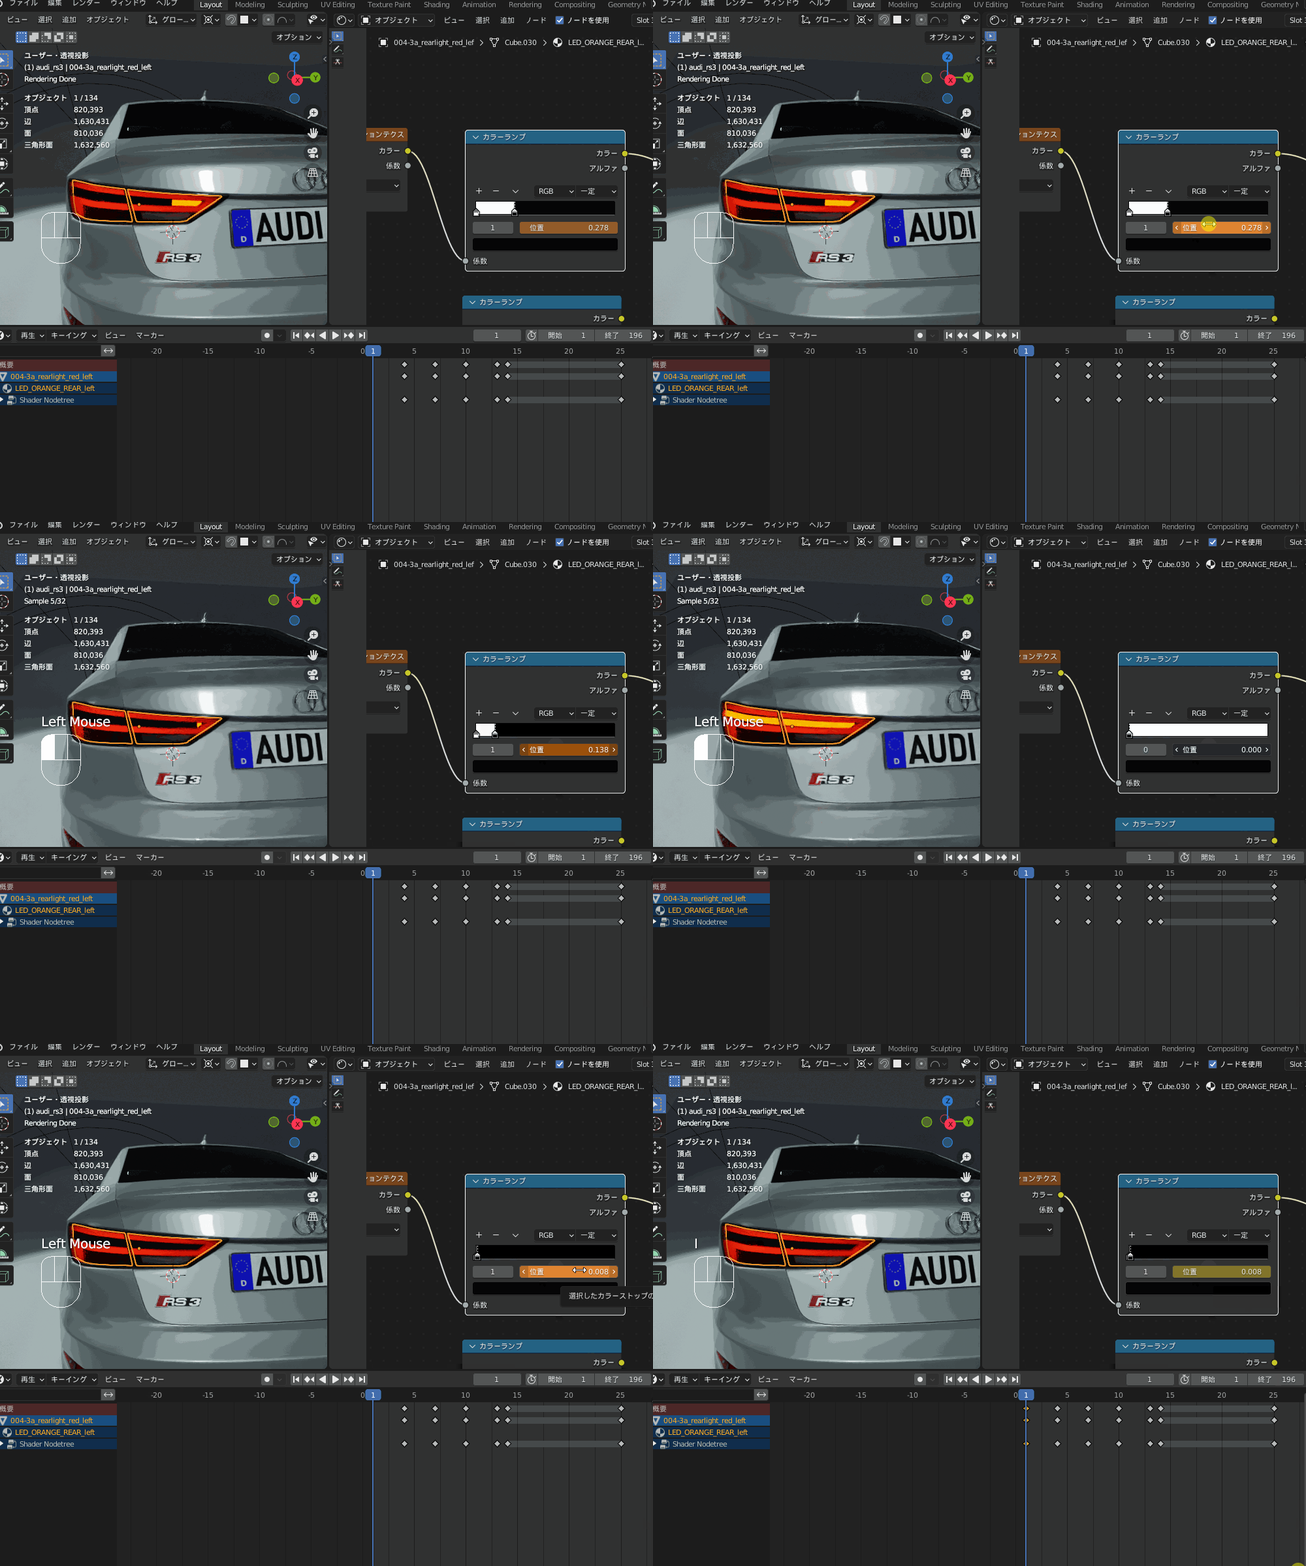
The final step involves adding keyframes to the Color Ramp’s position and animating it.
Adding Keyframes
Press the I key to add a keyframe.
Hover the cursor over the Position field of the Color Ramp.
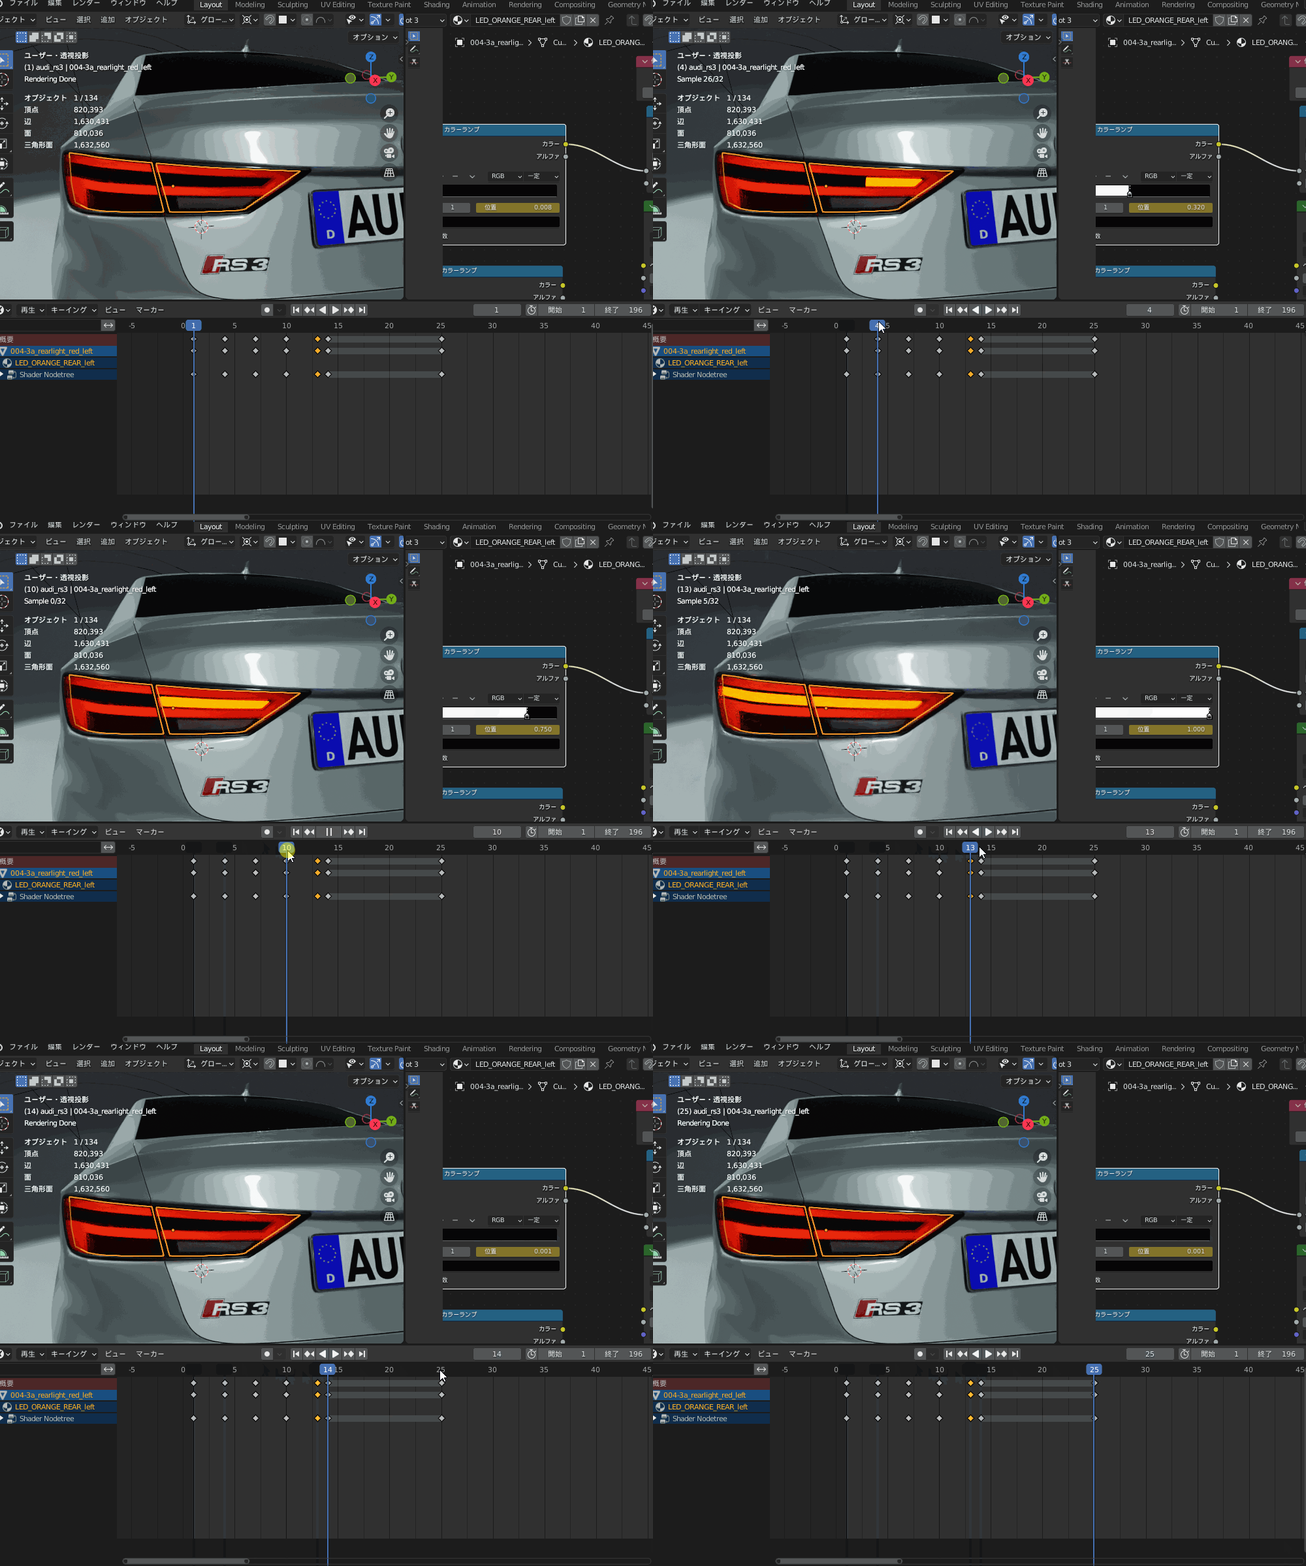
Timing the Animation
Adjust the keyframes to match the gradual lighting effect seen in sequential turn signals.
Refer to the lighting sequence of a real car for realistic keyframe placement.
Looping the Animation
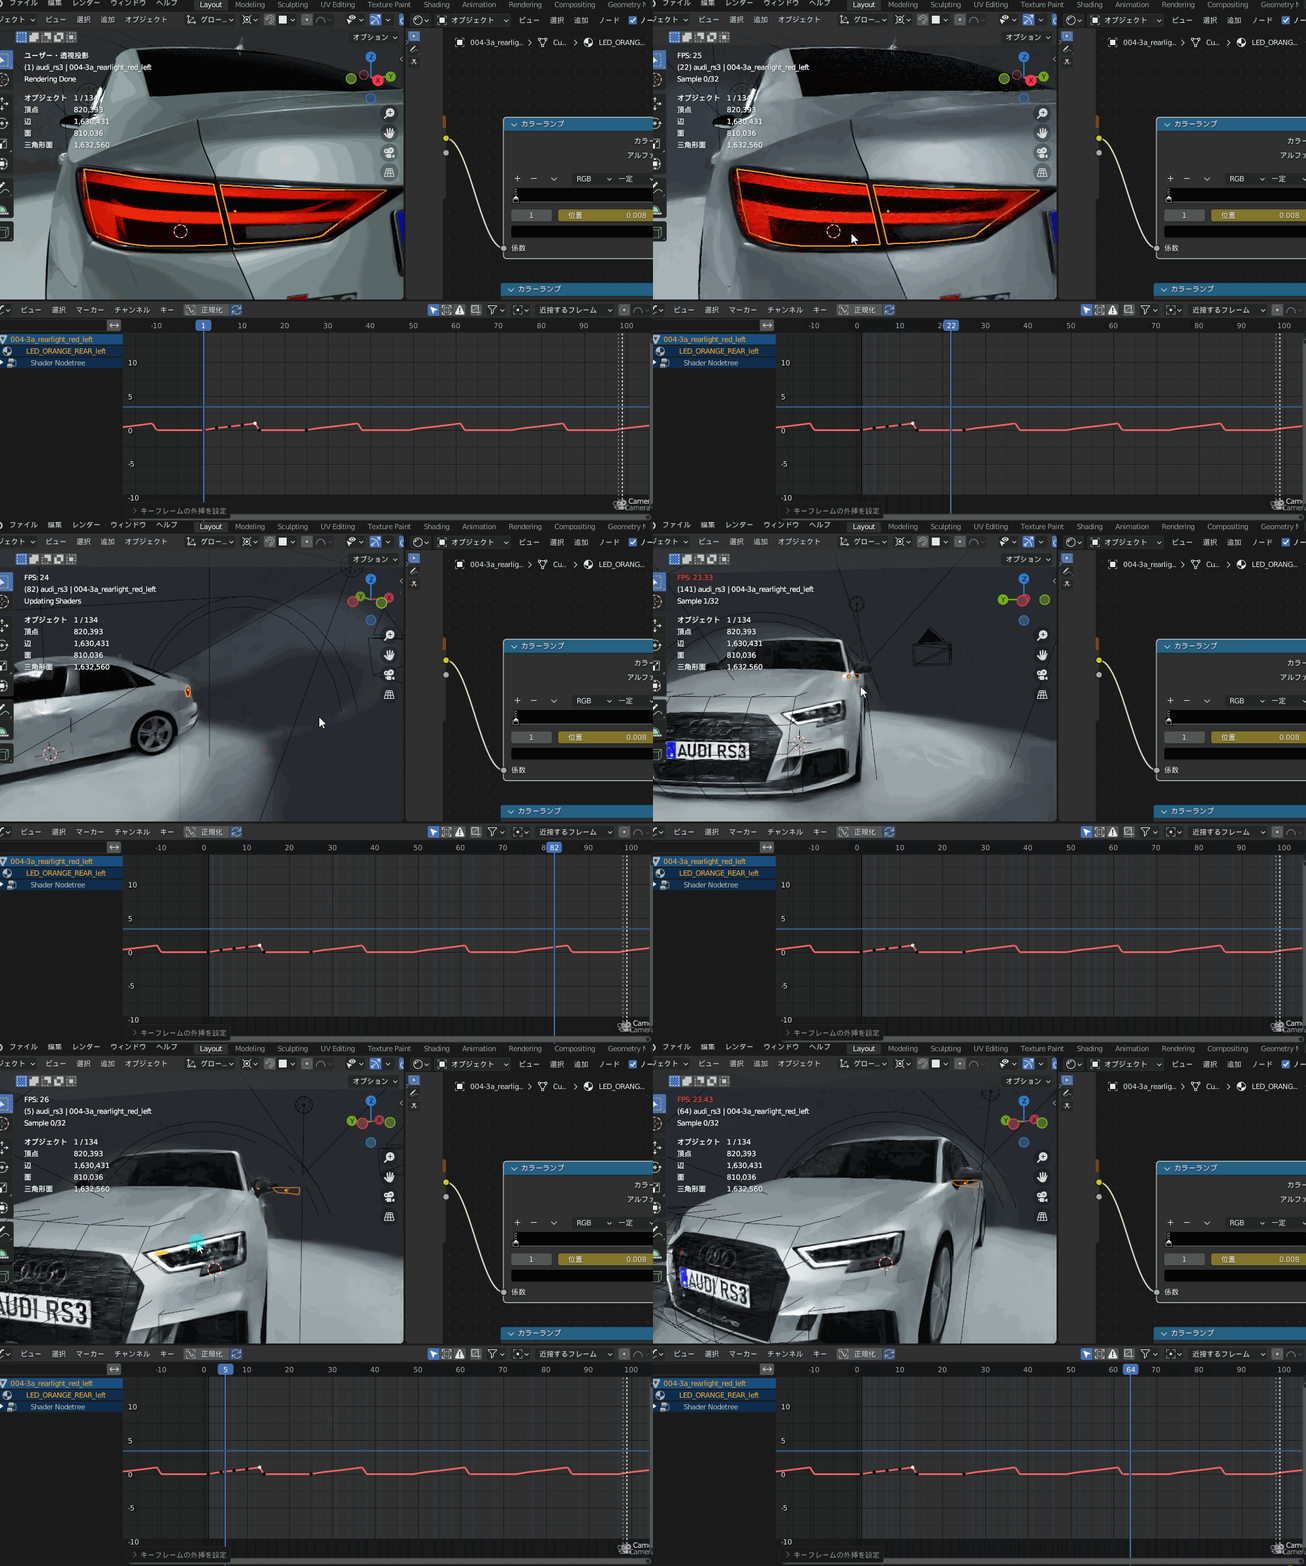
Set the Extrapolation Mode to Make Cyclic.
Open the Graph Editor in the Animation workspace.
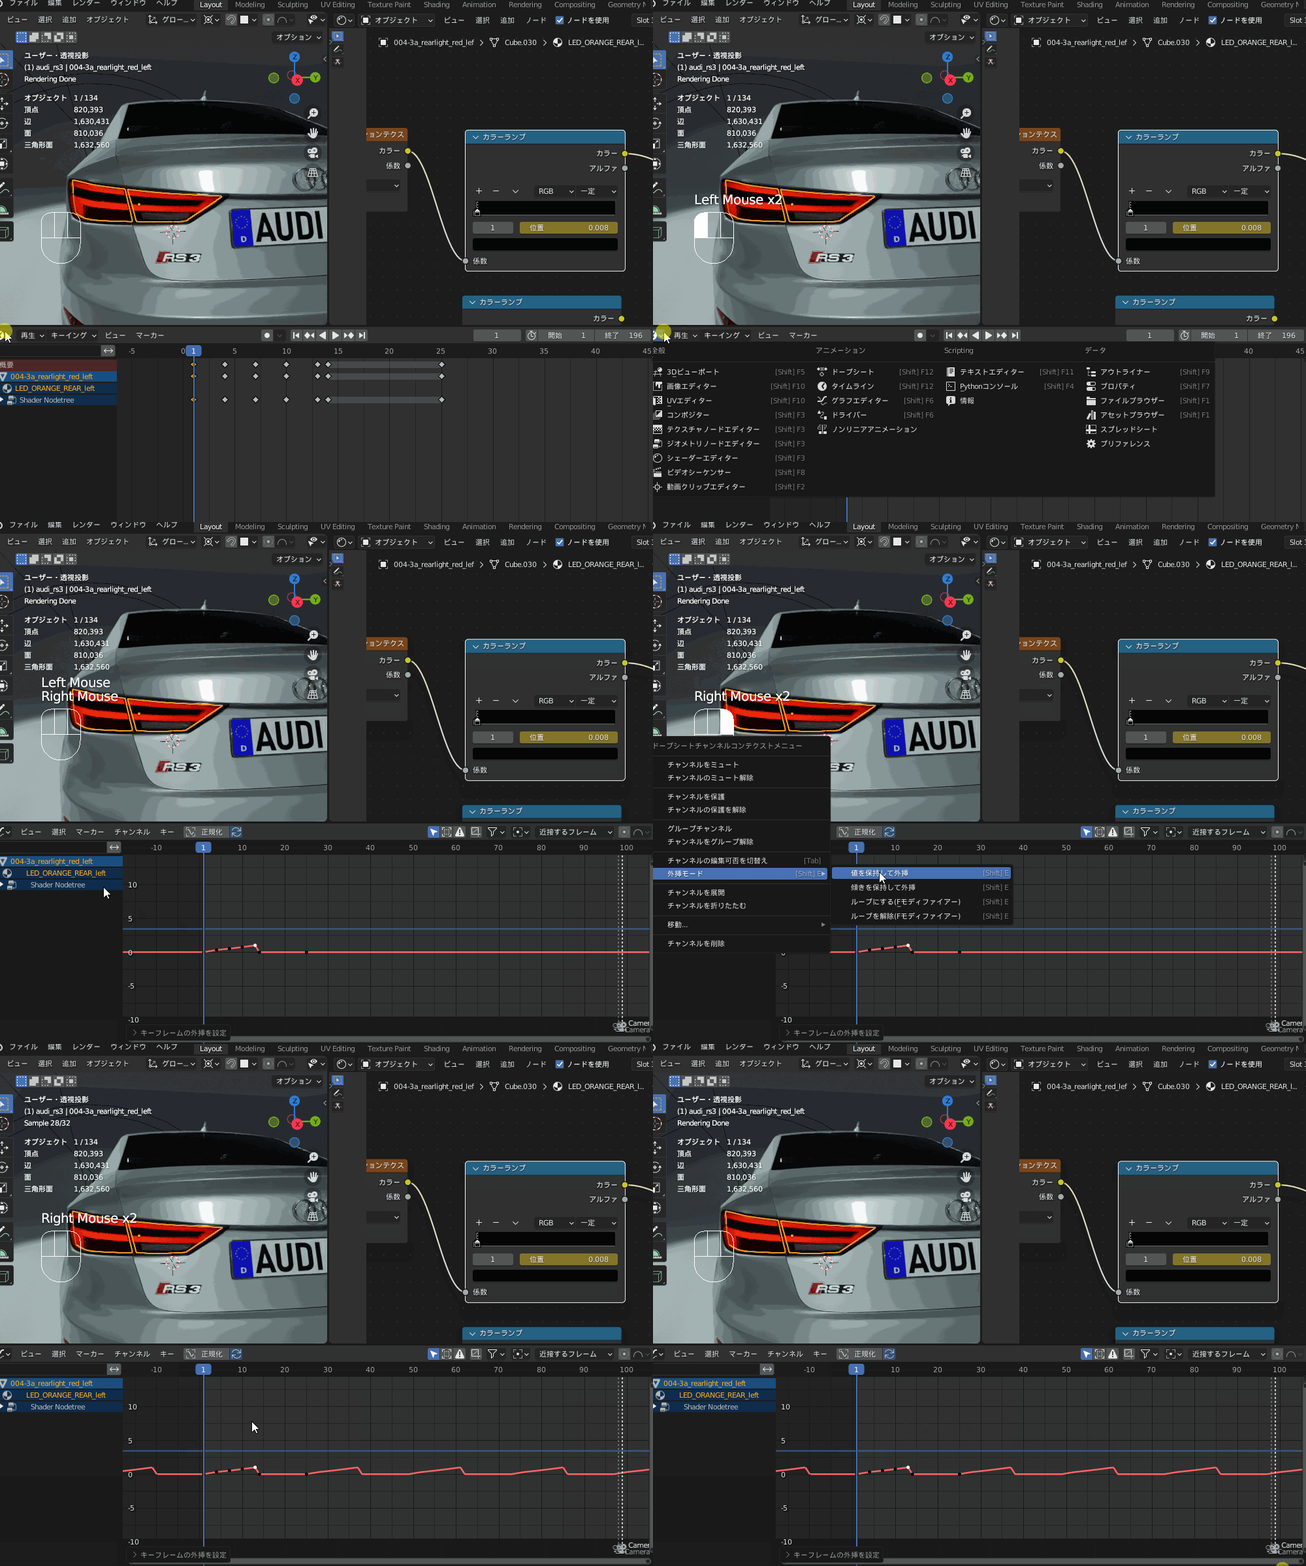
This setting allows the animation to loop continuously, creating the sequential lighting effect.
Finalizing the Effect
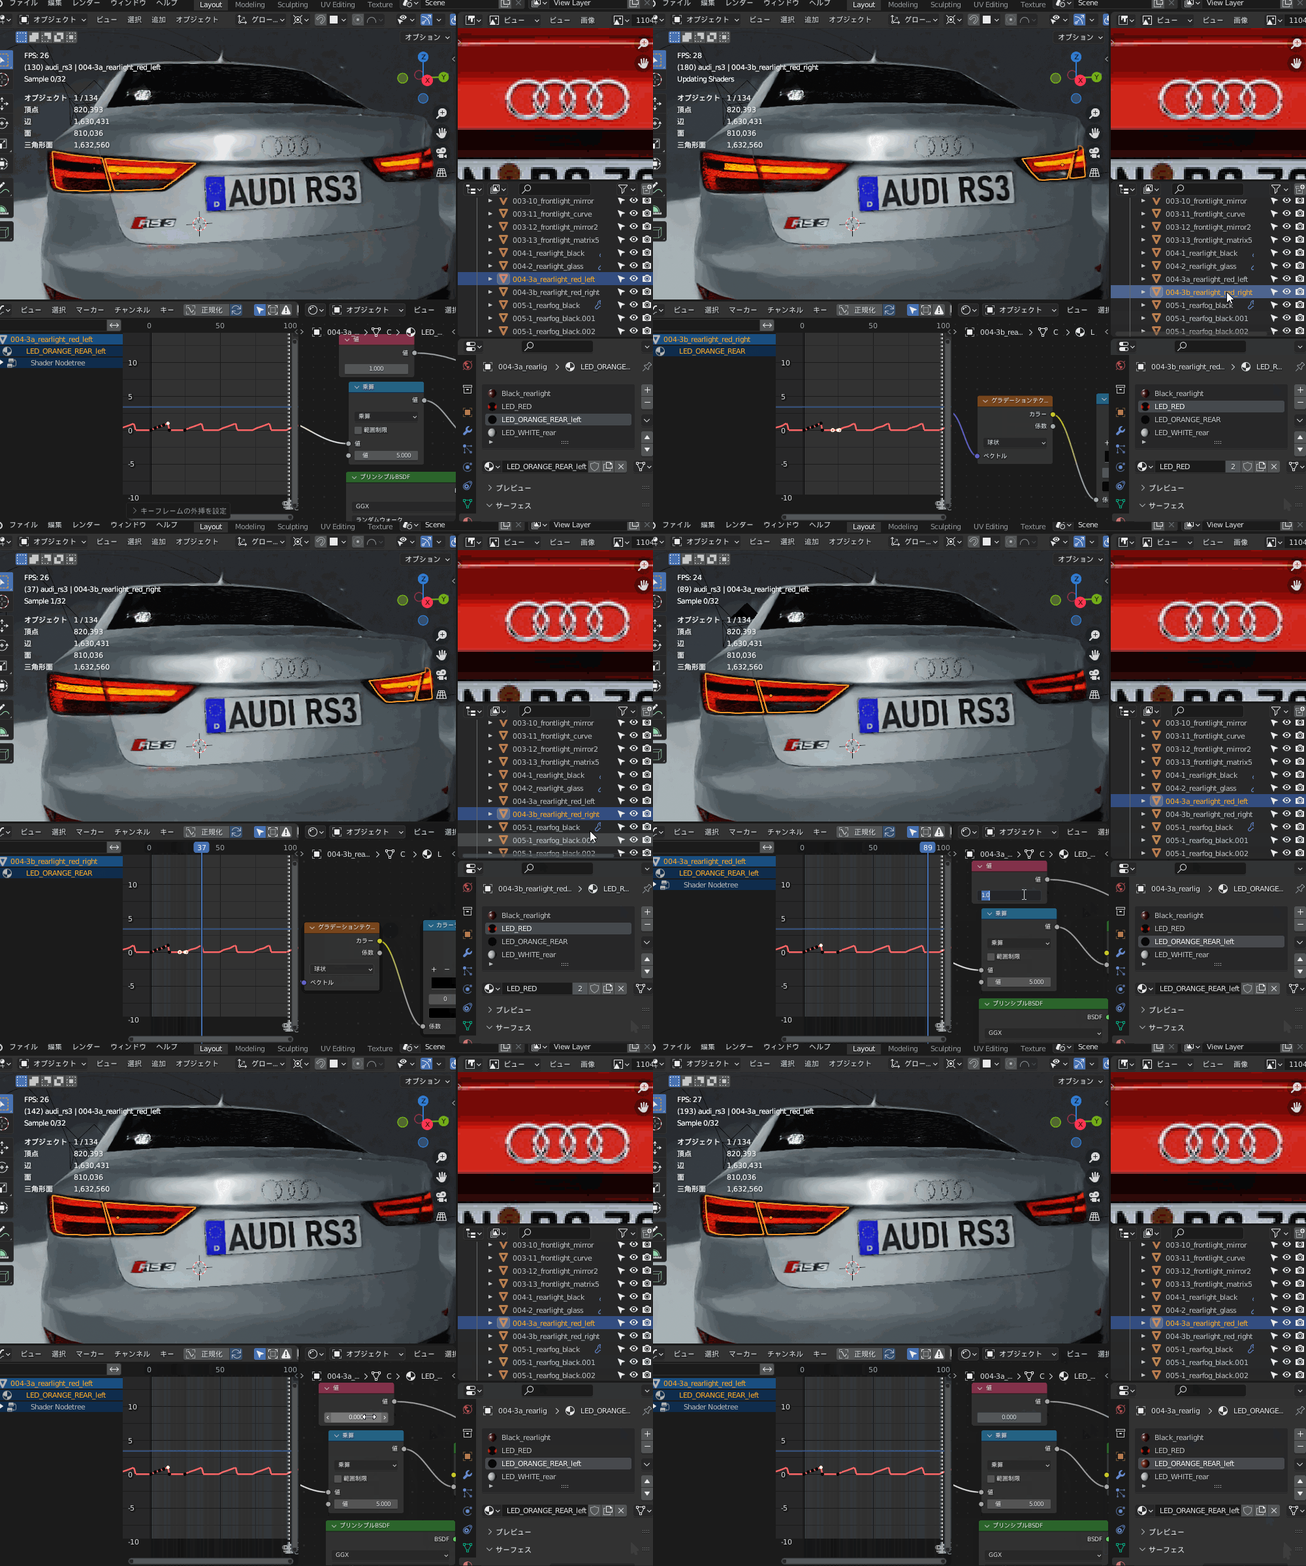
- Apply the Mirror Modifier.
- Make the materials single-user to customize the left and right sides independently.
With this setup, you can achieve an effect where only one side lights up at a time, as shown in the example below.
AD
Conclusion
This time, I wrote a somewhat niche and geeky article about creating sequential turn signals (flowing lights)!
Feel free to try lighting up your own sequential turn signals and enjoy the satisfying results with a smile! 😄
AD


