“Tokyo Cat CAT Kyoku” Anime-Style Music Video Production
Hello, this is Klala.
I had the opportunity to work on the music video for “Tokyo Cat CAT Kyoku”, a song by uyoco that was released on February 22 last year (Cat Day)!
I expressed the world and atmosphere of the song using animation created in Blender, so I’ve put together a summary of the production process and the techniques I used.
If you have any comments or questions, feel free to reach out via Klala’s Twitter(https://twitter.com/klala_lab).
広告/AD
About “Tokyo Cat CAT Kyoku”
“Tokyo Cat CAT Kyoku” is an original song by uyoco, a singer-songwriter who creates cat-themed music.
According to the artist, it’s simply a song where she “just wanted to say ‘Tokyo Cat CAT Kyoku,’” but it’s a groovy, feel-good track that brings to mind an image of cats gathering together with the streets of Tokyo as their backdrop.
Techniques Used
Here is a summary of the techniques used in this project.
Modeling
- Subdivision Surface Modifier
- Displacement Modifier
Materials
- Cel-Look Material (Eevee)
- Volume Material
- Shader Mixing
Particles
- Rotating Axis
- Brownian Motion
Graph Editor
- F-Curve Modifiers
Video Editing
- Video Sequencer
Workflow
This project was produced following Steps 1–4 below.
In the following sections, I will introduce an overview of each step.
- Storyboard Creation
- Shot Planning (Shot Breakdown)
- Scene Production
- Video Editing
Storyboard Creation
First, I created a storyboard while imagining each scene based on the lyrics.
Using drawing software such as GIMP and the Grease Pencil feature in Blender, I made rough sketches of cats dancing and running around with the streets of Tokyo in the background.
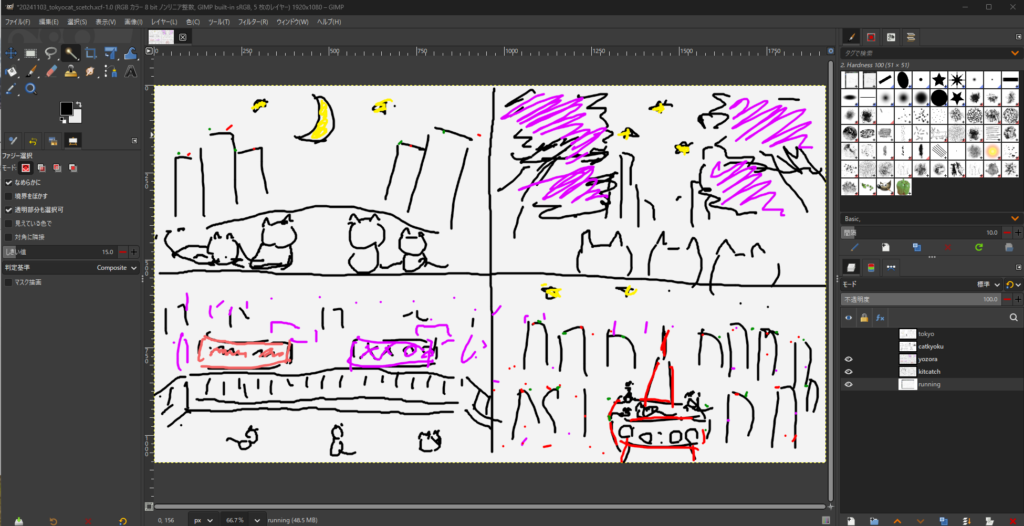
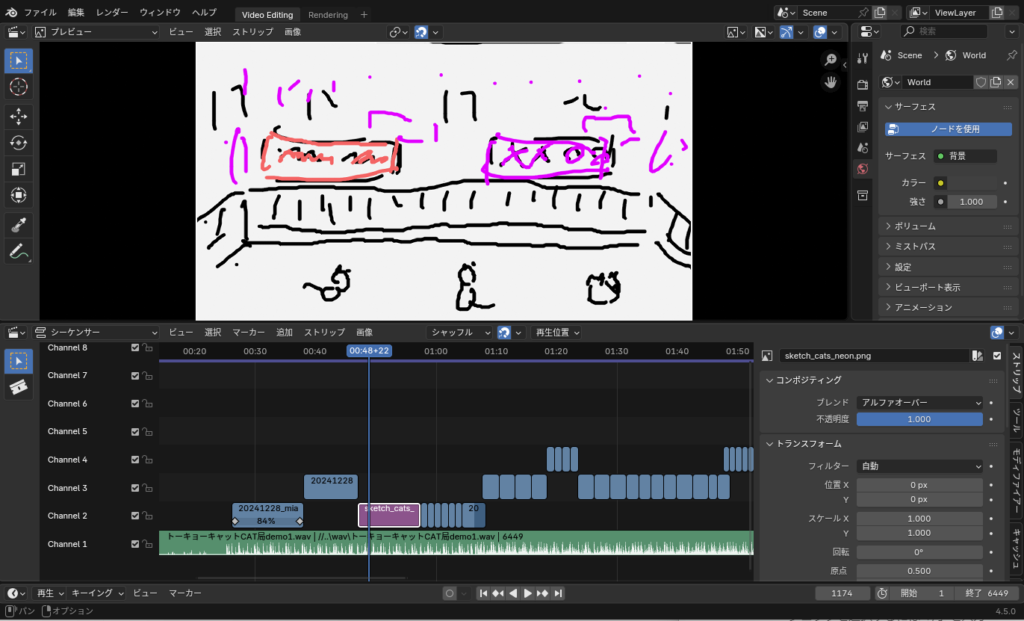
Shot Planning (Cut Editing)
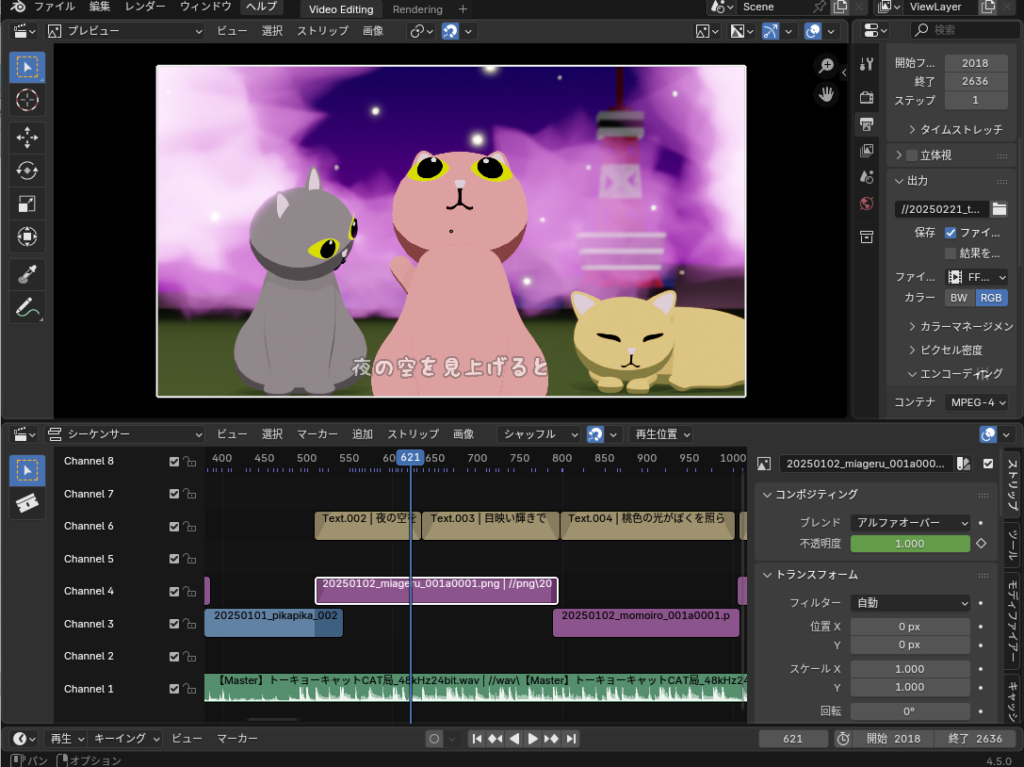
After creating sketches for each scene, I used Blender’s Video Editing feature to plan the shot sequence.
I added the audio track to Channel 1, then added the storyboard image files as strips on Channel 2 and above.
While repeatedly playing back the timeline in the Video Sequencer, I adjusted and refined the timing of each cut transition.
Creating Each Scene
For the 3DCG animation, I created separate .blend files for each scene.
Each scene was rendered as an animation using Eevee, and the results were exported as PNG image sequences.
Below, I’ll briefly explain the production methods for each scene and the key techniques and ideas I focused on while creating them.
Cherry Blossom Scene
This scene shows the cats in a park somewhere in Tokyo, looking at cherry blossoms against the night sky.
(Cherry blossoms don’t actually appear in the lyrics, but I imagined a night cherry blossom scene from the line “pink light is shining on me.”)
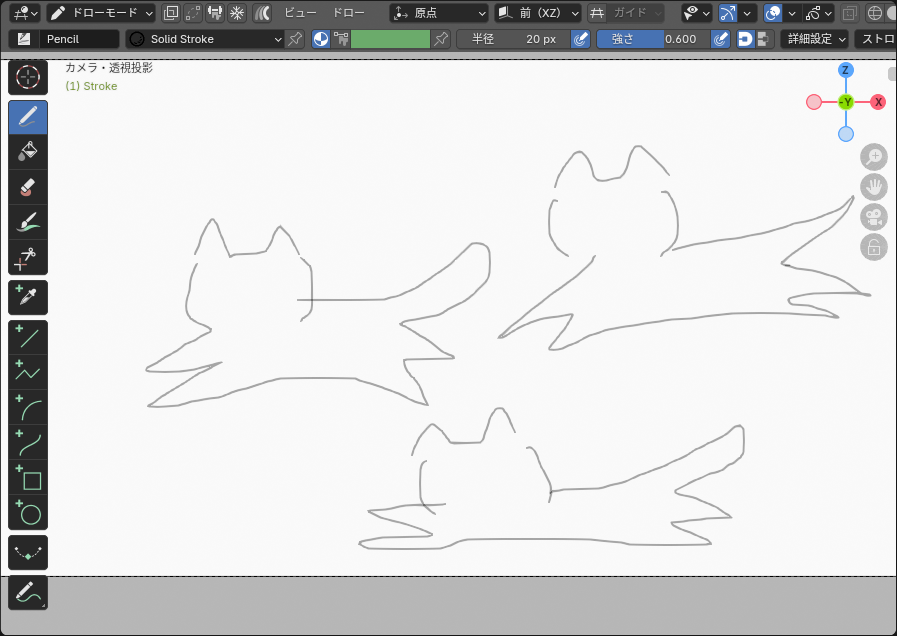
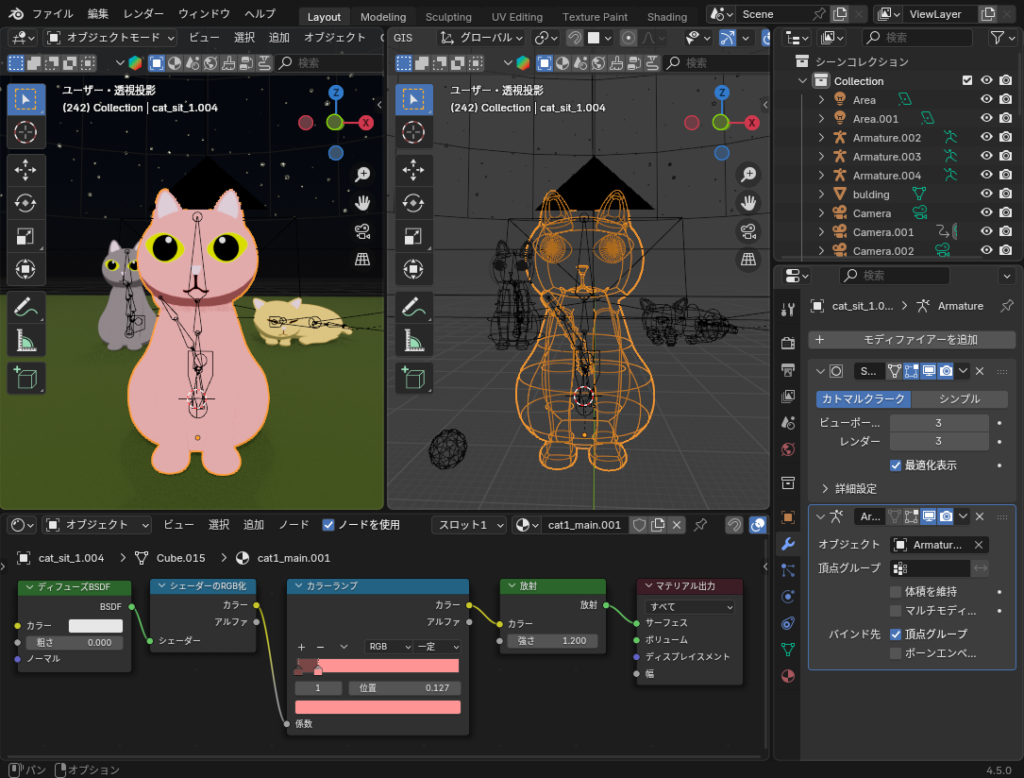
The cat model is shown below. It is based on a cube mesh, with a Subdivision Surface modifier applied to create a rounded shape.
For the material, I used a cel-look material (Eevee only) built with Diffuse BSDF, Emission shaders, and similar nodes.
The armature is very simple, with bones only for the parts that need animation: the neck, body, and tail.
By the way, these cats also appear later in the city scenes and daytime scenes.
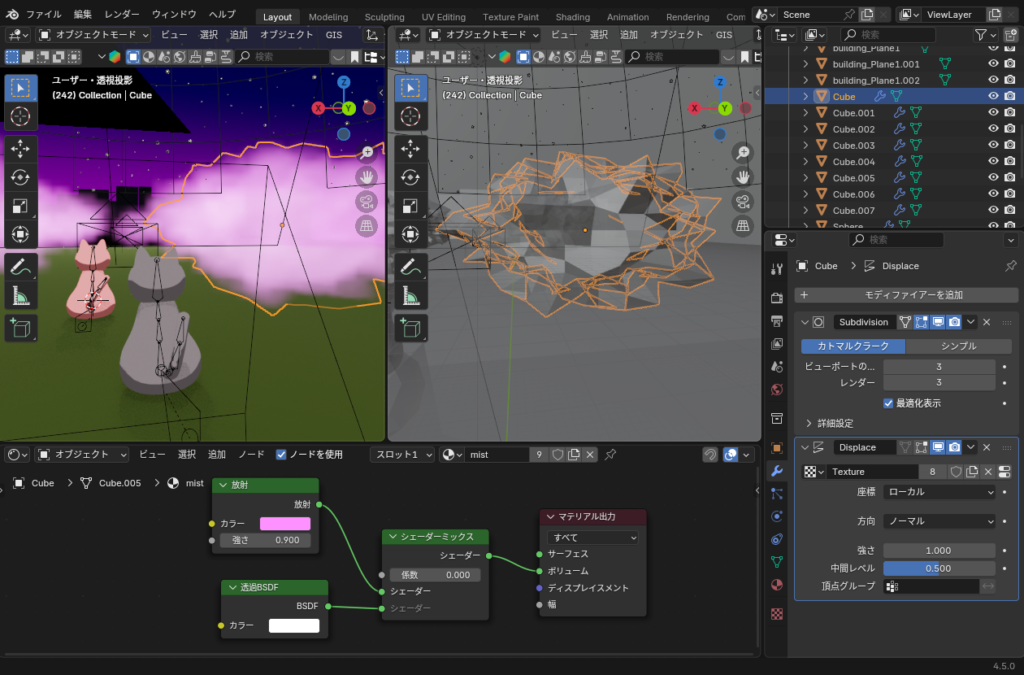
Next, about the cherry blossoms:
I started with a simple cube mesh, subdivided it using a Subdivision Surface modifier, and then applied a Displacement modifier with a cloud texture to create random surface deformation.
Since I wanted the cherry blossoms to look softly blurred and distant from the cats’ point of view, I mixed an Emission shader and Transparent BSDF, then connected it to the Volume input of the Material Output. This created a hazy, cloud-like cherry blossom tree.
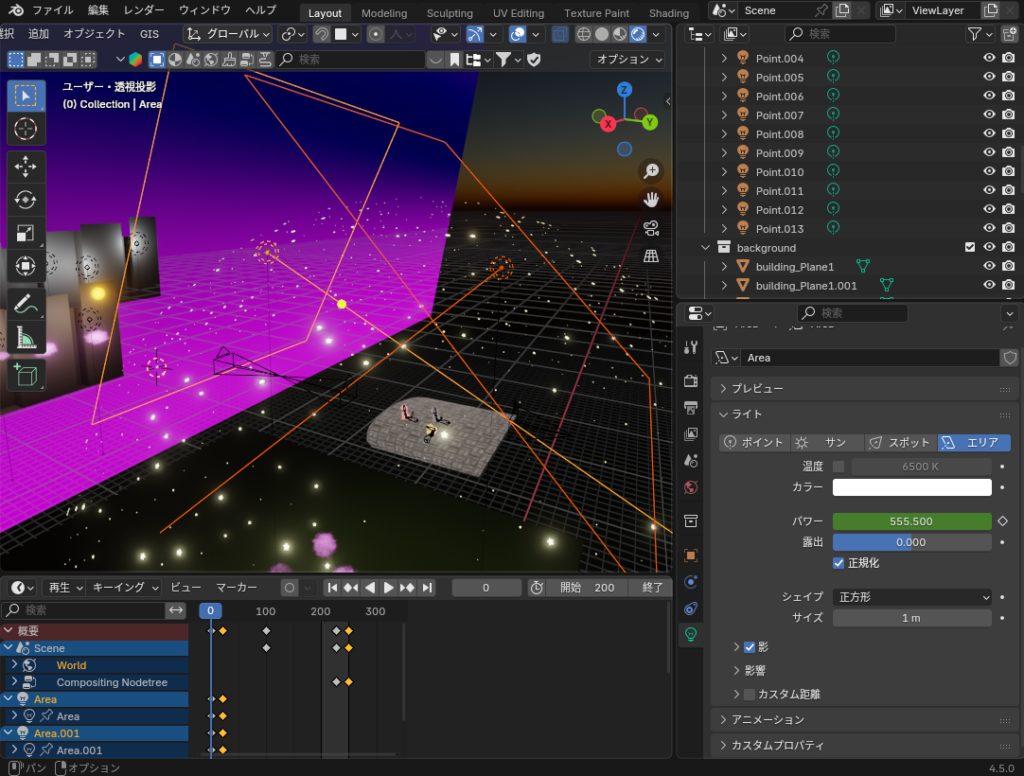
The night sky was created using a hemispherical emitter, with pentagram-shaped objects scattered using hair particles, as shown below.
By turning ON Advanced Settings in the particle properties, enabling Rotation, and setting the Orientation Axis to Normal-Tangent, the stars maintain a clean, consistent star shape.

City Scene
Set against a cityscape centered around Tokyo Tower, the cats gently sway and dance along to the melody of “Tokyo Cat CAT Station♪”.
To create a strong sense of depth, the city background was placed quite far back in the distance.
In addition, depth of field was enabled on the camera object to create a more realistic atmosphere.
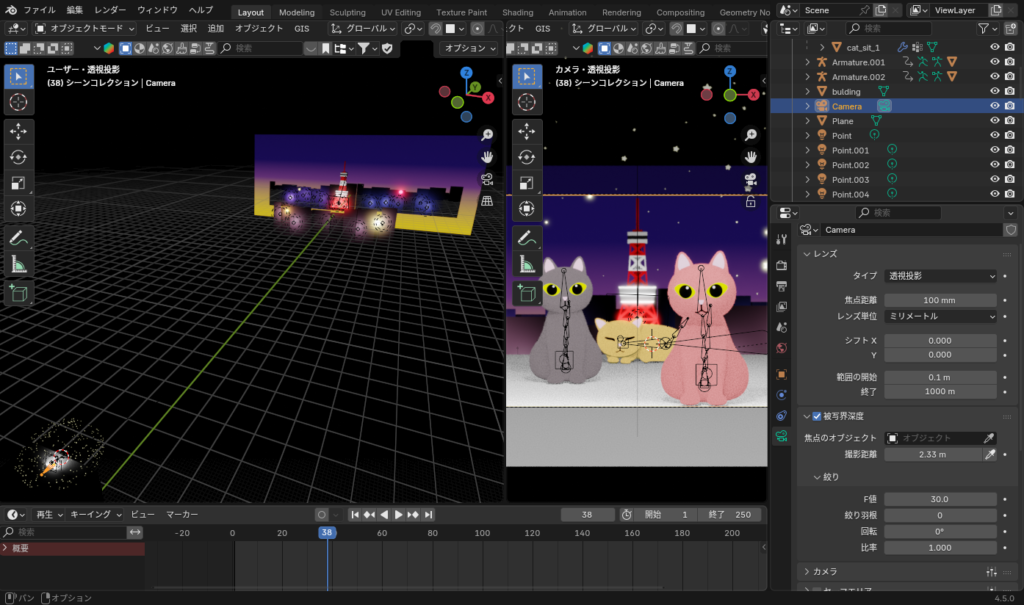
Tokyo Tower itself was modeled in full 3D. However, the buildings in front of and behind it were created using flat meshes, with extrusion applied in the depth and height directions to add surface variation.
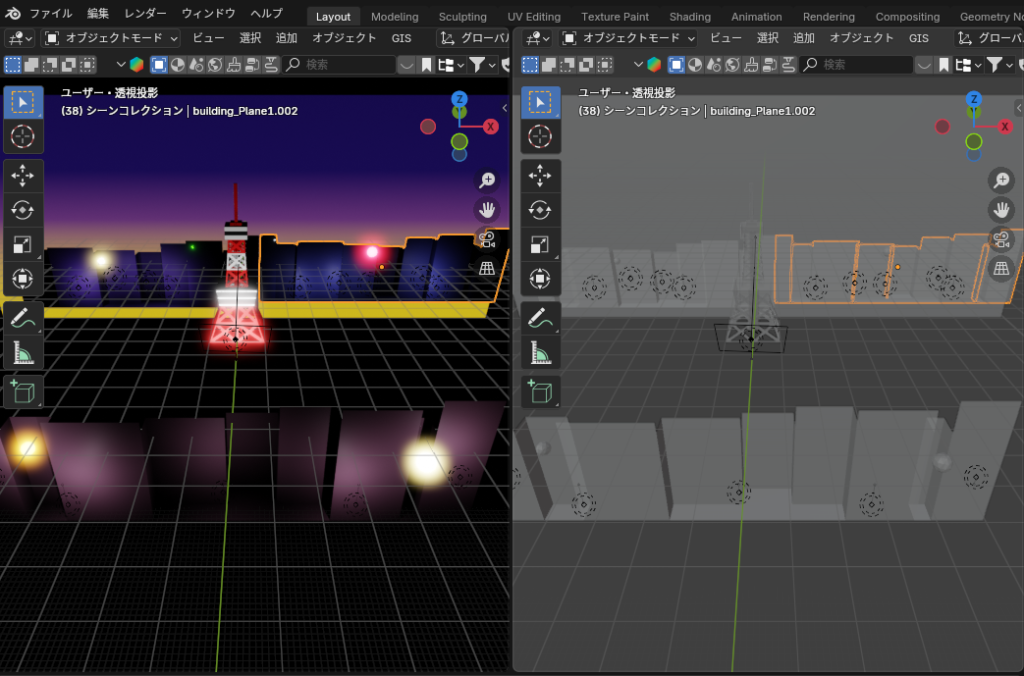
As for the city lights, the goal was to make them flicker like fireflies.
A volumetric material was applied to sphere meshes, with emission and transmission settings enabled. Then, F-curve modifiers were set in the graph editor so that the scale changes over time, creating a soft blinking effect.
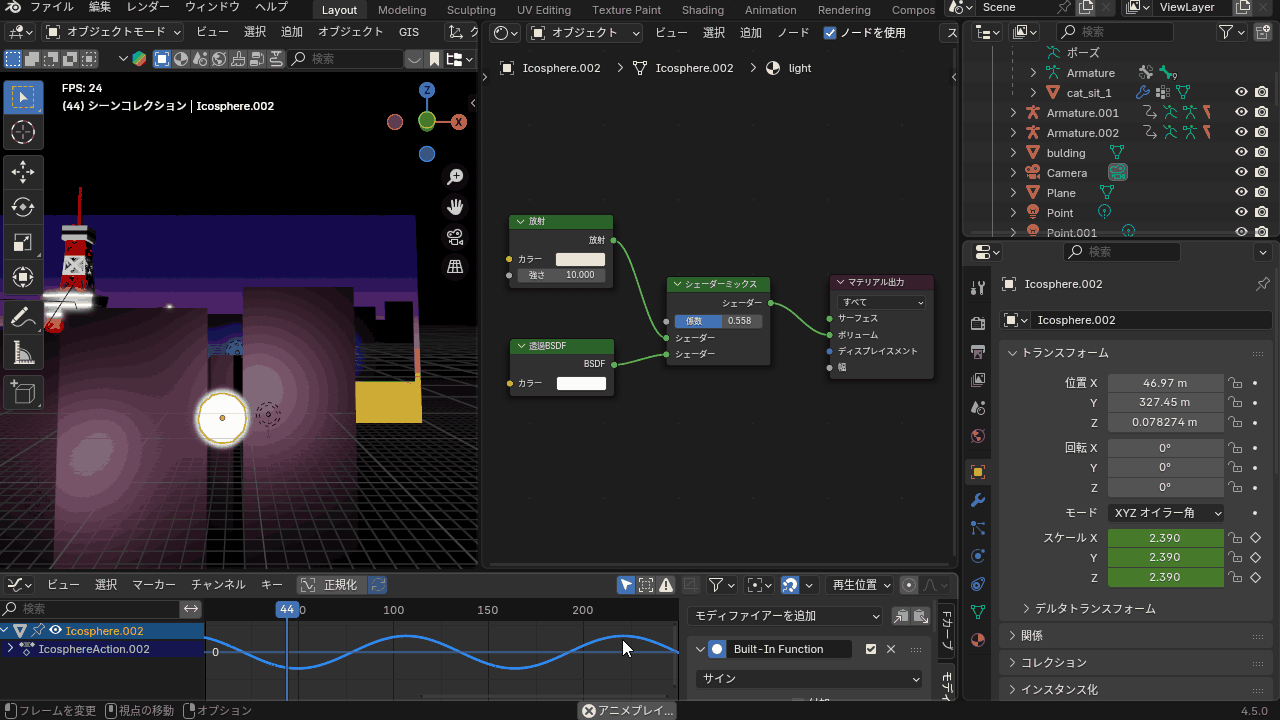
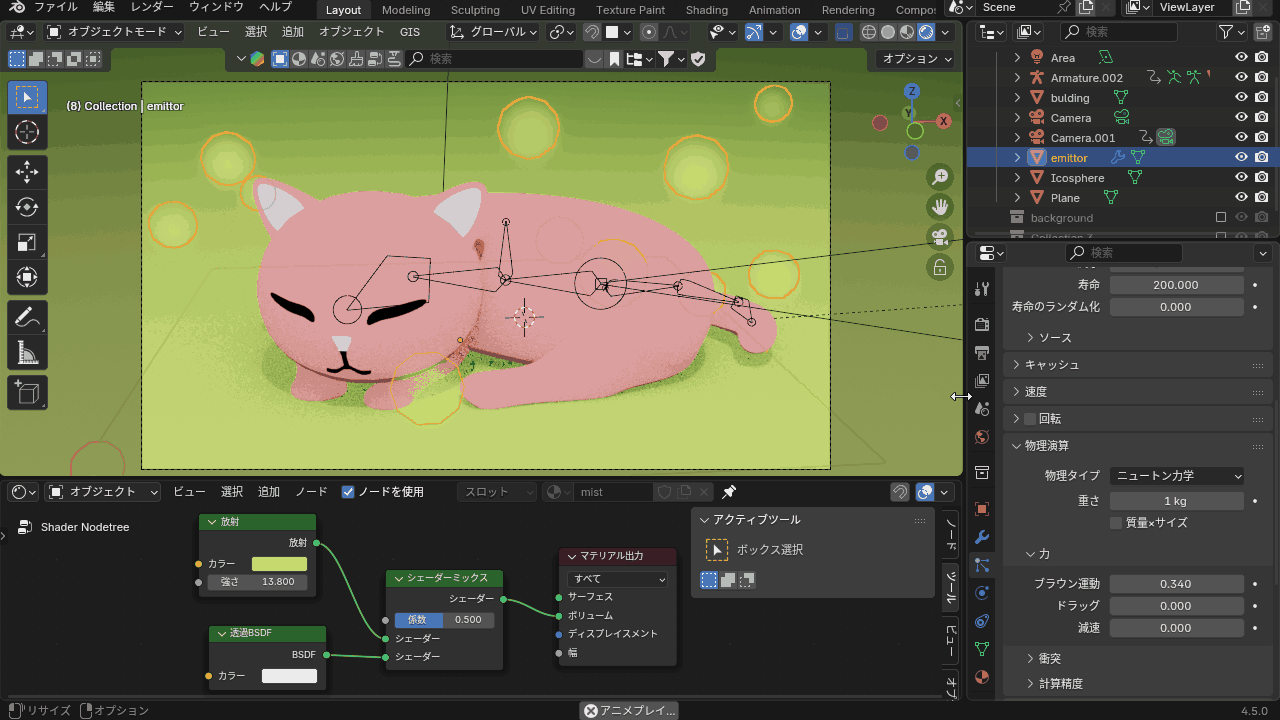
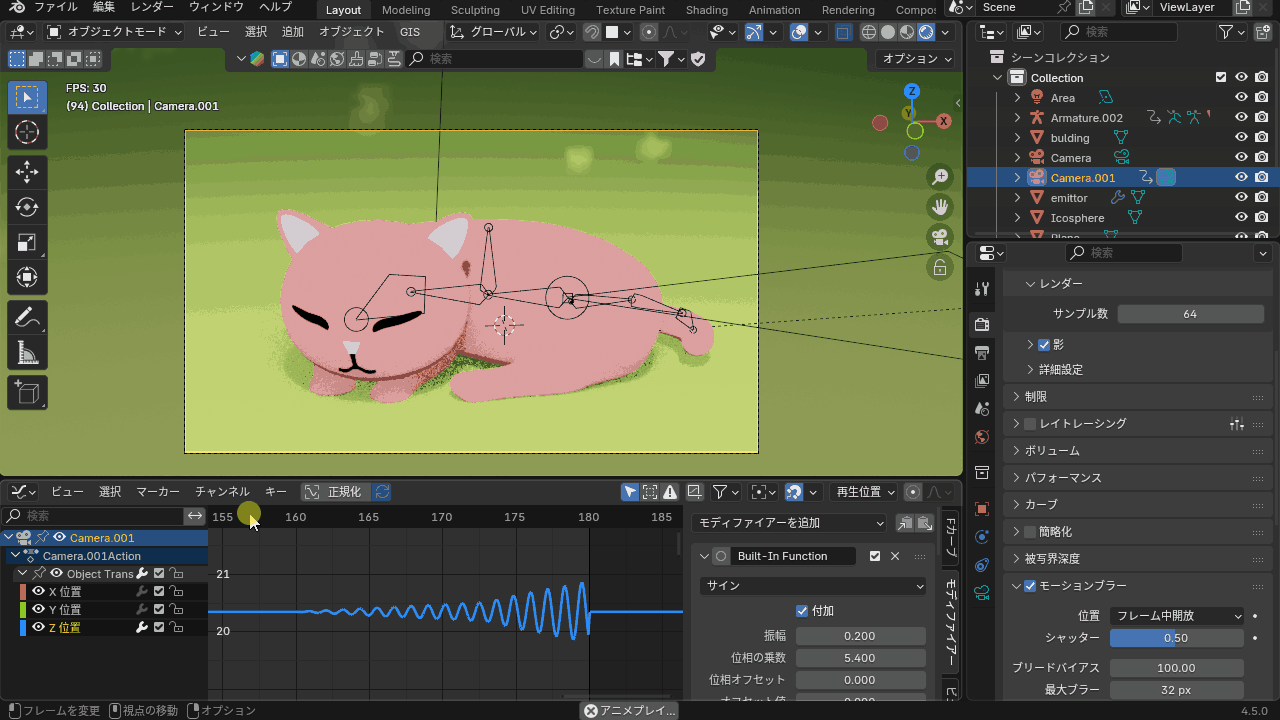
Daytime Scene
This scene shows a cat taking a nap on the grass in a park.
To express the cat sleeping soundly, an additional bone was added vertically at the center of the spine. By changing its scale using keyframe animation, the movement of the torso during breathing was recreated.

To create the feeling of a warm spring afternoon, floating light particles were added using a particle system.
To make the light particles sway irregularly, the Brownian Motion value in the particle properties was adjusted.
To match the audio effect for the phrase “so bright I can’t keep my eyes open,” a camera shake effect was added using an F-curve modifier to create a wavering field-of-view effect.
広告/AD
Dusk / Sunrise Scene
This section introduces the scene where, after the sun sets and darkness falls, the sunrise gradually appears, transitioning the sky from night into the colors of dawn.
For the moment when the sun sets and the light hitting the cats fades, keyframes were added to the Power value of the light object, gradually reducing it from its maximum value down to zero.
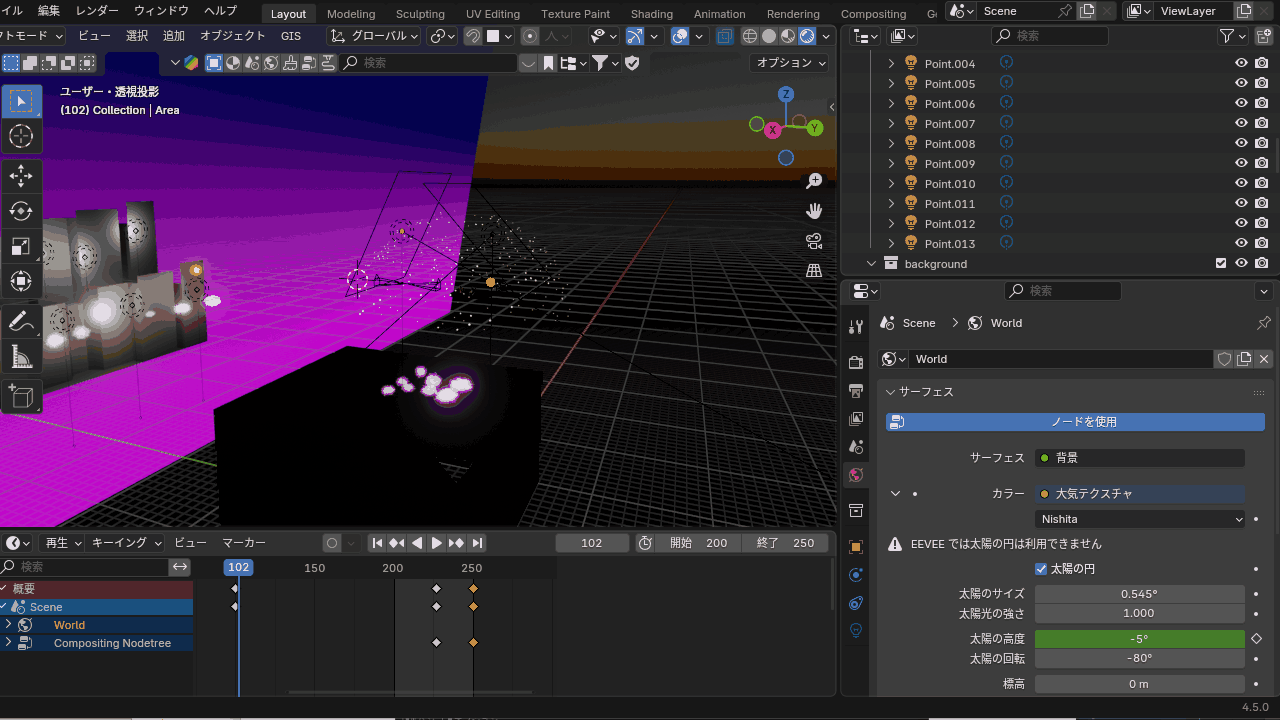
For the sunrise scene, the effect was created by gradually increasing the Sun Elevation parameter of the atmospheric texture set in the world background, raising it little by little from a negative value to +1 degree.
Symbol Animation
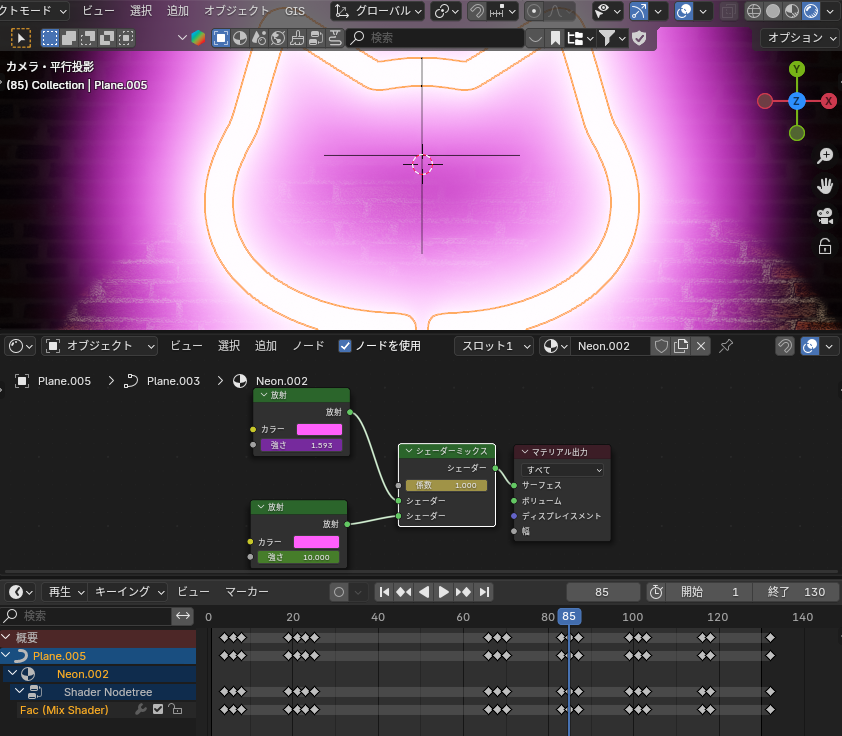
This section introduces the scene where the neon tube shaped like a cat’s face — the symbol of the song used in the jacket artwork — flickers on and off.
First, to express the irregular flickering of the neon tube, the following animation settings were applied:
- A driver was set on the Strength of the emission shader, configured to add the Y-axis location value of an Empty object to the default brightness.
- A noise modifier was applied in the Graph Editor to the Y-axis location of the Empty object.
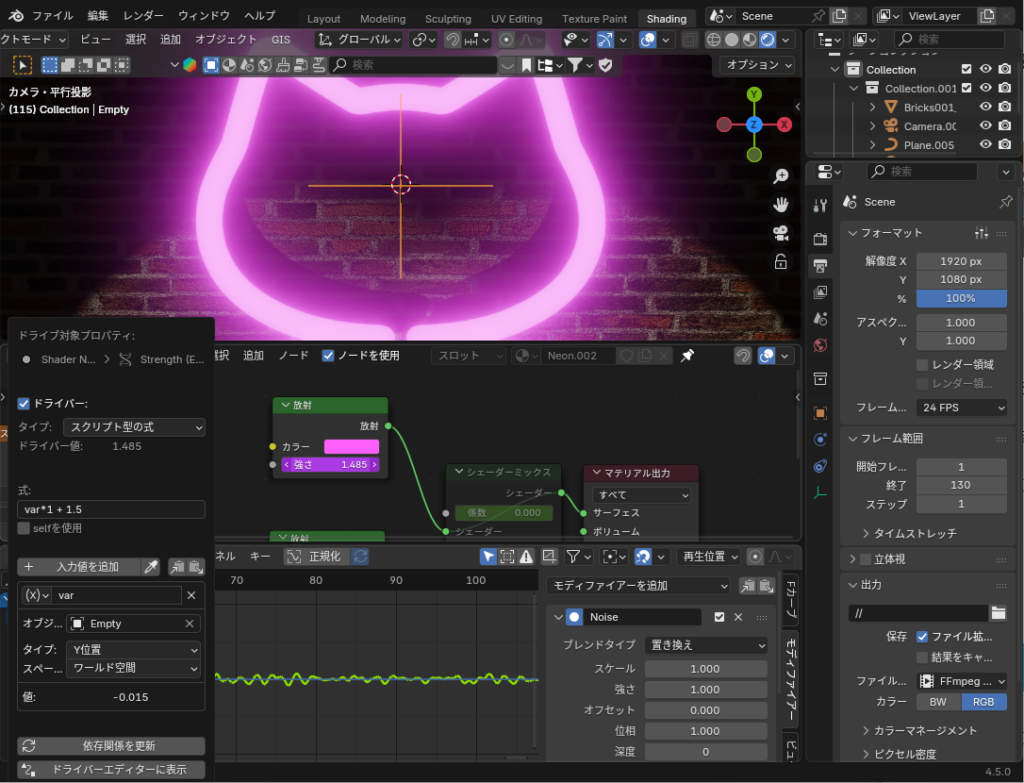
In addition, to vary the flickering pattern and make the neon occasionally glow more intensely, an emission shader and shader mix were added. Then, using keyframe animation, the emission strength was set to increase significantly at specific timings.
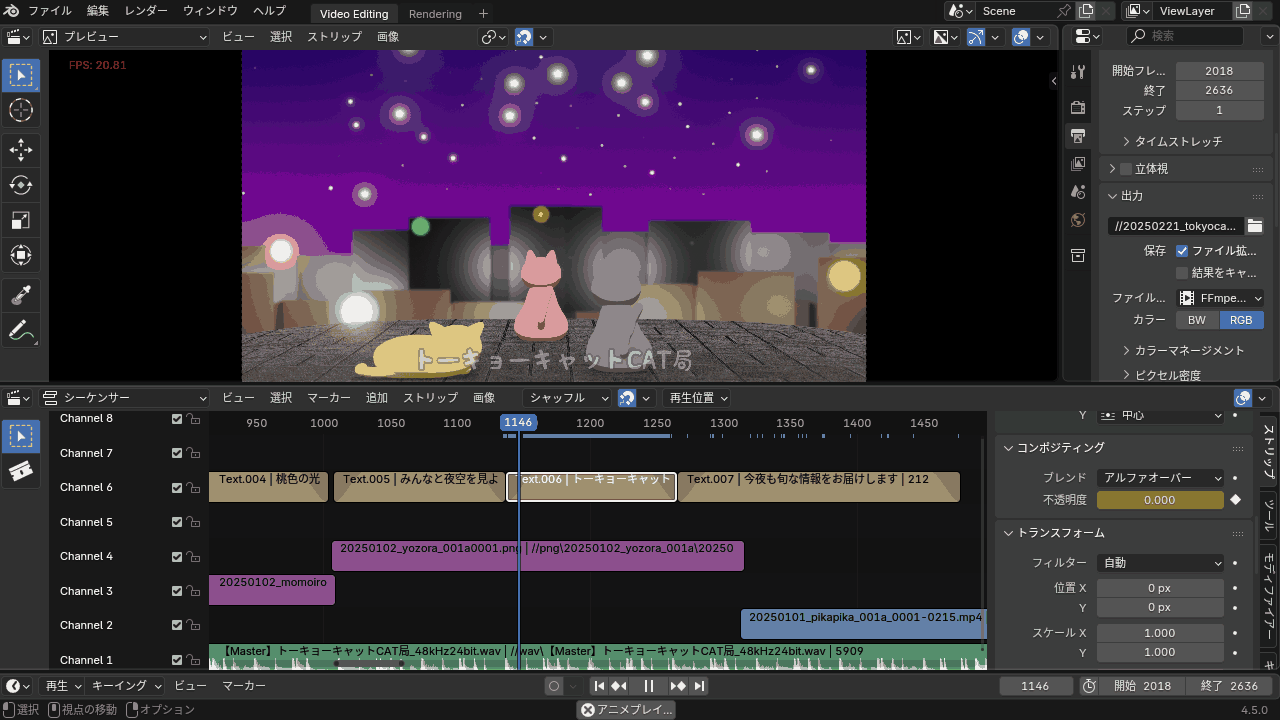
Video Editing
After completing all scene creation, the animations were combined into a single sequence and synchronized with the audio through video editing.
Below is a brief introduction to the content of each process and the key points I kept in mind.
Creating the Animation Sequence
I dragged and dropped the rendered PNG files into the Video Sequencer to create strips.
As mentioned earlier, during the “Shot Planning” step, I had already placed hand-drawn sketch strips on the Video Sequencer. These were then replaced with the final rendered results.
The start and end timing were adjusted frame-by-frame to ensure they stayed synchronized with the progression of the music.
Syncing with the Audio
The biggest focus in this MV production was synchronizing the animation timing with the music.
For example, in the “Tokyo CAT CAT Station~” scene, I adjusted the animation speed so that the cats’ swaying rhythm matched the tempo of the song.
In the Video Sequencer, you can go to Strip Properties → Time → Show Retiming Keys. By moving the start and end keyframes of the animation, you can adjust the playback speed.

Also, in the scene where the night sky stars light up one by one in sync with the lyrics “To-kyo-cat-ca-tt-kyoku”, I repeated the process several times:
Adjust keyframes → Render animation → Sync with audio in the Video Sequencer → Adjust keyframes → …
This iterative workflow helped align the animation precisely with the sound.
広告/AD
Adding Lyric Subtitles
When adding lyric subtitles, I used text strips in the Video Sequencer.
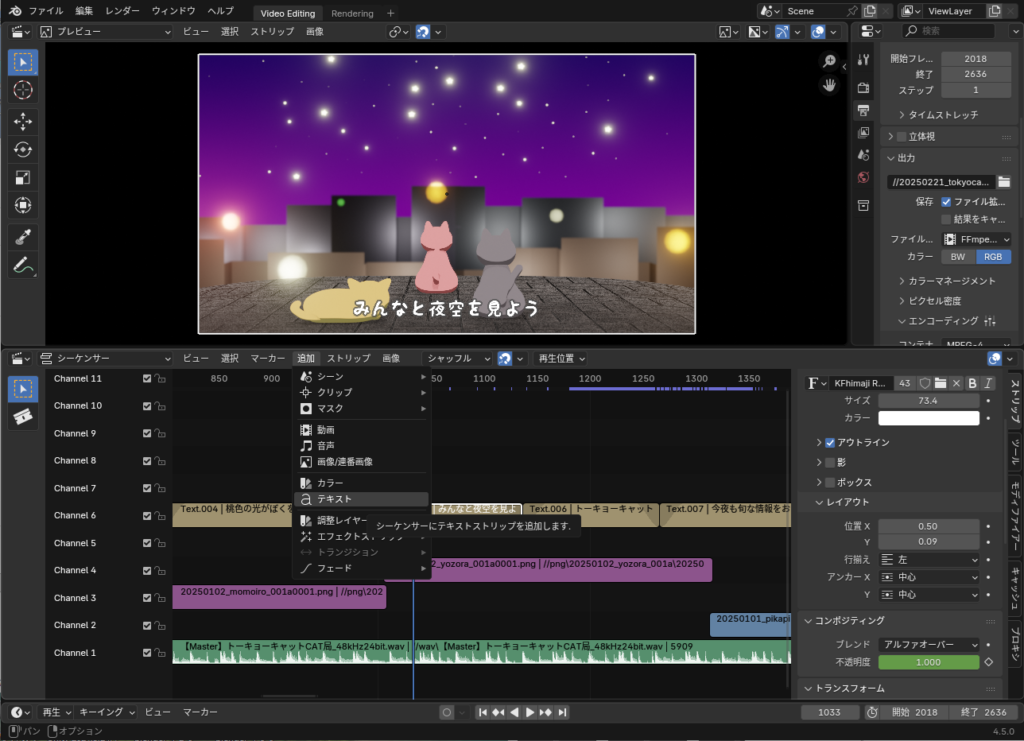
For the font, I used the Japanese font “KF Himaji” created by KF STUDIO.
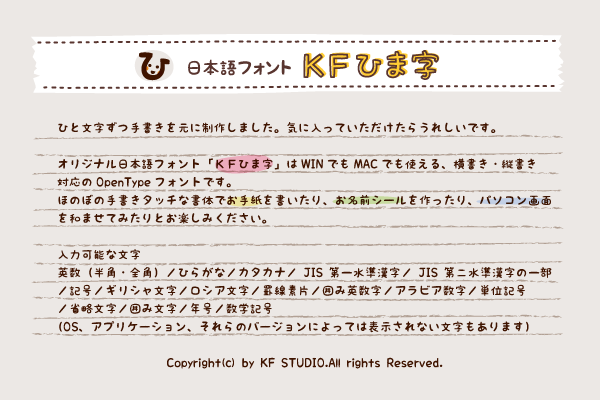
https://www.kfstudio.net/font/kfhimaji
Exporting the Video
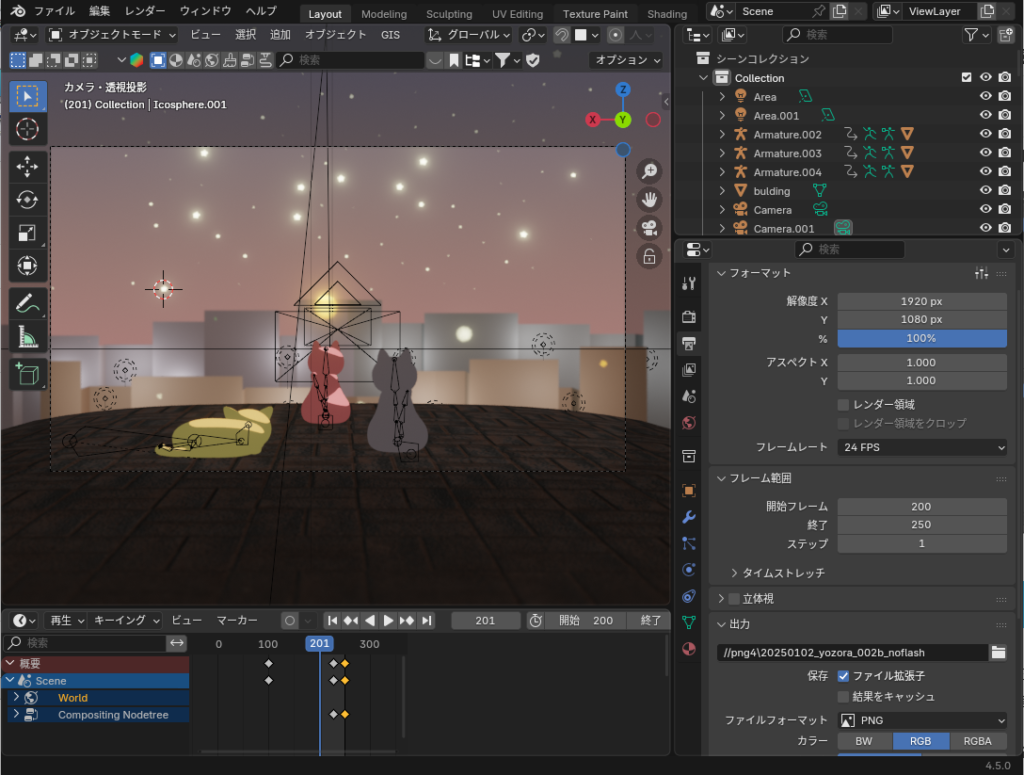
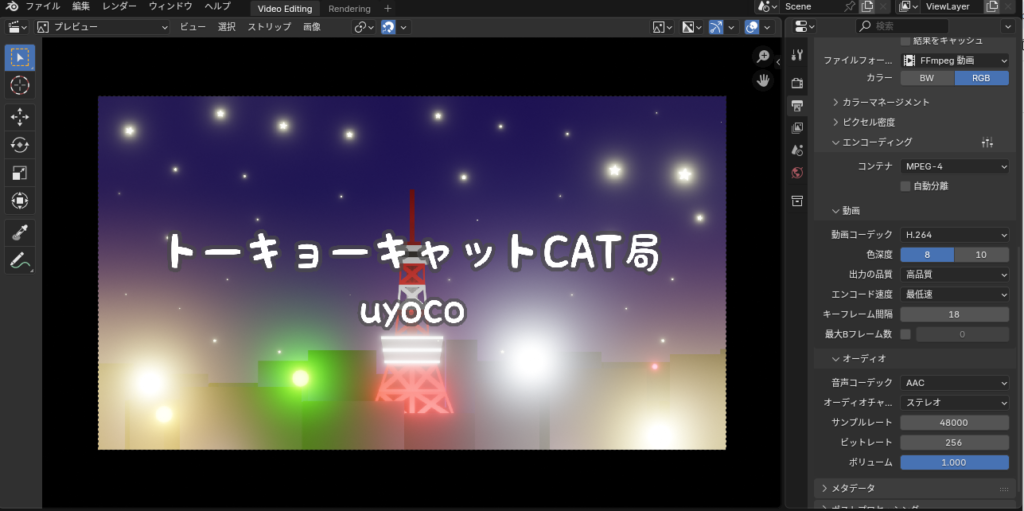
After completing the full video editing process, I exported the final video file in MP4 format.
The animation rendering settings for exporting the video with sound are shown in the figure below.
Conclusion
This article summarized the process of creating my first music video using Blender. What did you think?
I hope this article can be helpful as a reference for your own projects.
広告/AD