【Blender 4.2】Recreating the Pokémon Move “Moonblast” Effect
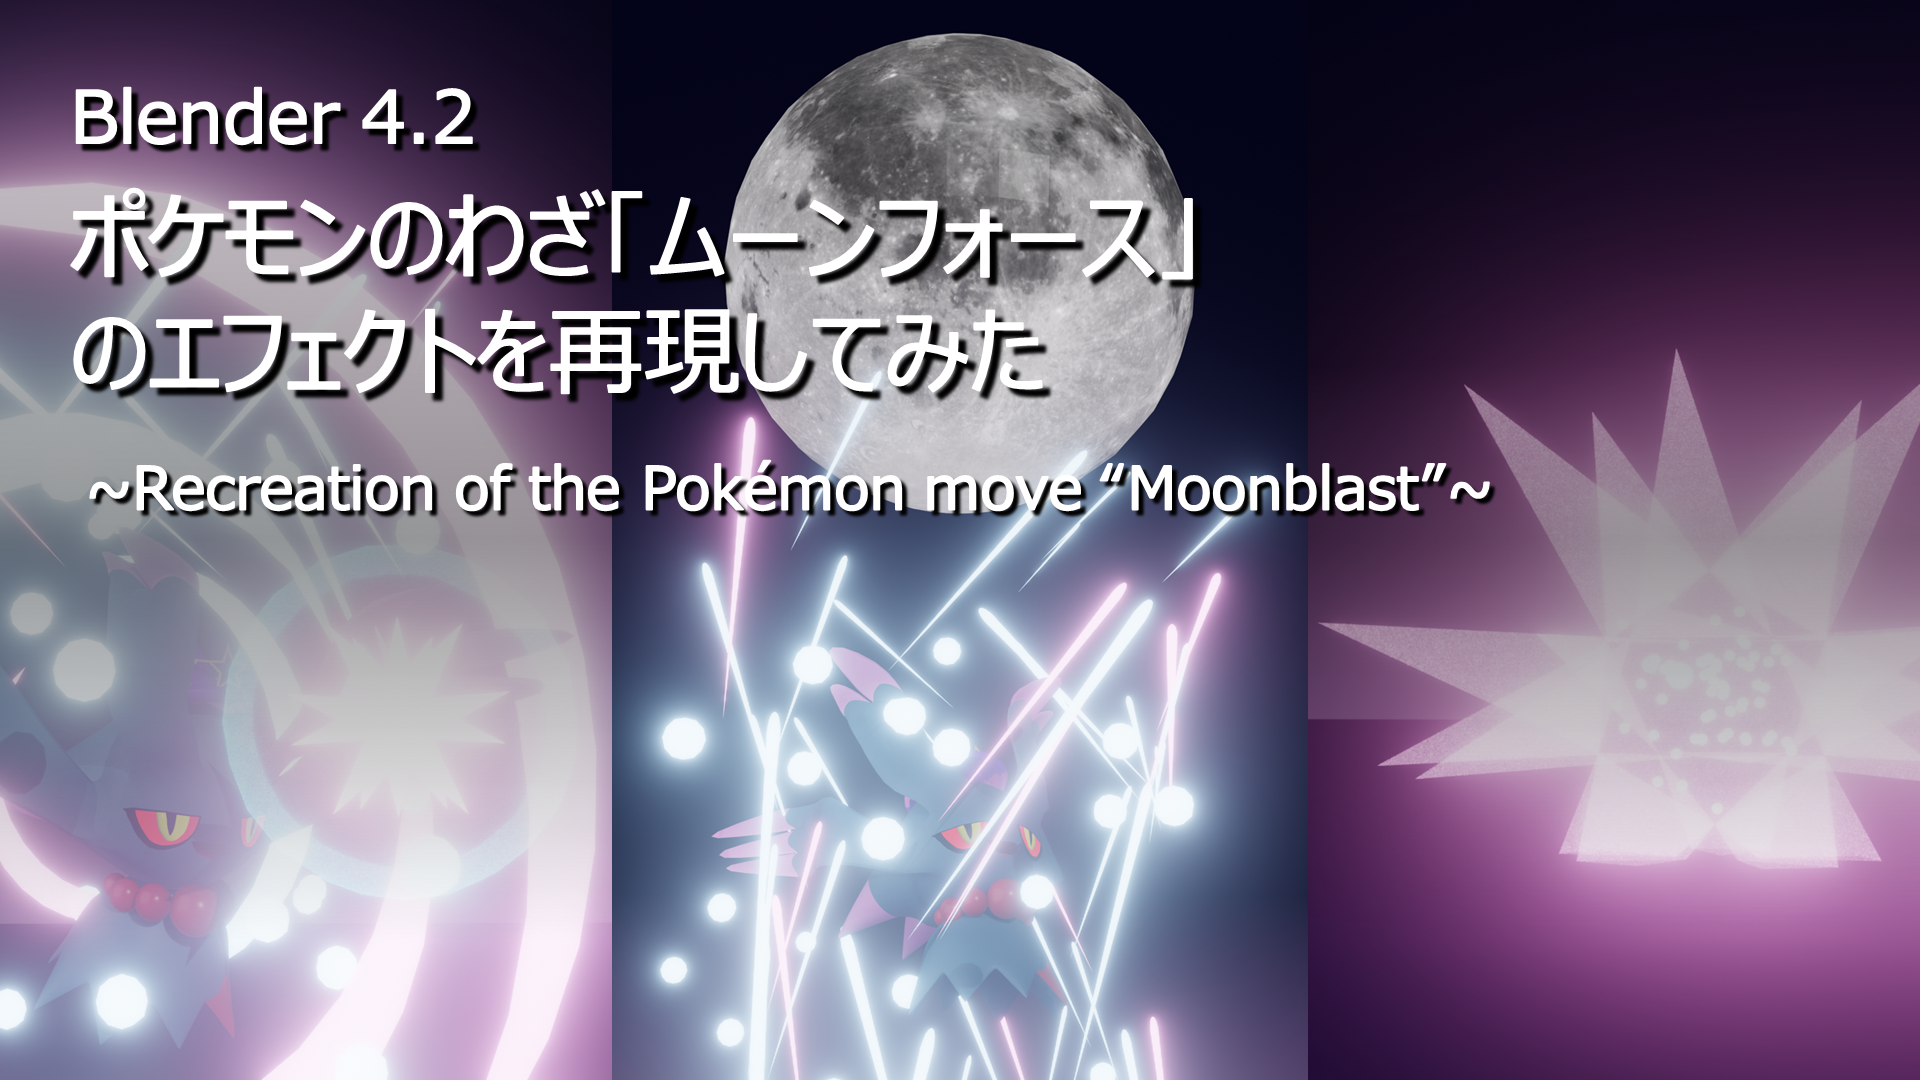
To celebrate Halloween, I shared an animation of the Ghost/Fairy-type Pokémon Flutter Mane on social media (X, formerly Twitter, and Instagram).
Using the free 3D CG software Blender, I recreated the move effect for Moonblast with the “Particle" and “Material Nodes" features. I’ve compiled this process into a brief article as a sort of personal log.
Check it out on X (formerly Twitter):
ハッピーハロウィン!🎃Happy Halloween!👻
— クララ/Klala (@klala_lab) October 28, 2024
からの眼鏡ムンフォ!🧚♀️#b3d #blender3d #3dcg #FlutterMane #ハバタクカミ #Pokemon pic.twitter.com/ILLWQPt3iw
Instagram:
https://www.instagram.com/p/DBq7HOHT6jp/?utm_source=ig_web_copy_link&igsh=MzRlODBiNWFlZA==
For comments or questions, feel free to reach out on my X account (formerly Twitter): https://x.com/klala_lab 😊
広告
Moonblast Effect Composition
First, I searched YouTube for “Moonblast move effect" and captured a video to analyze and outline the flow of the effect.
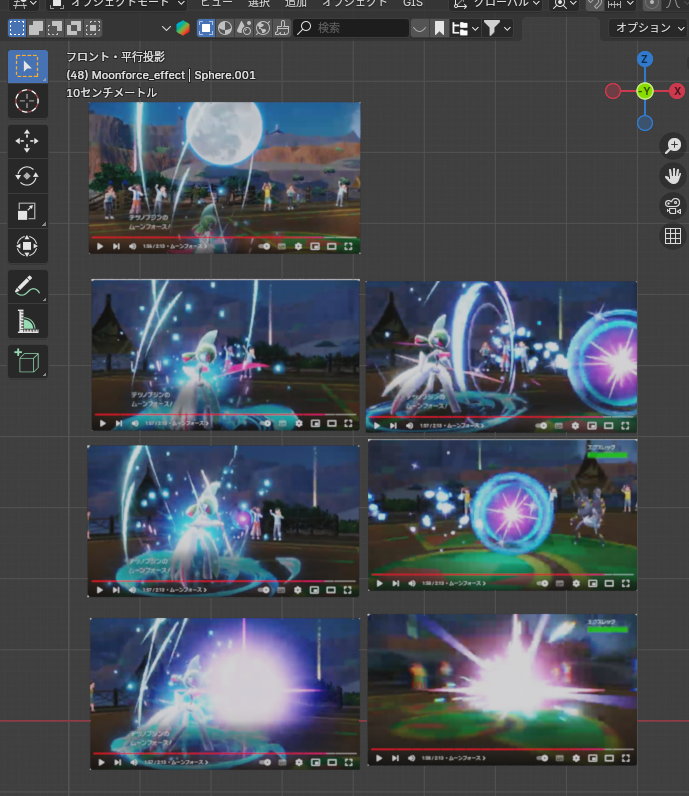
Based on the video, the Moonblast effect consists of the following components:
- Spiral streaks of light emerging from the ground
- Light particles
- Moon manifestation
- Double-layered glowing spheres
- Ripples generated during the projectile launch
Spiral Streaks of Light Emerging from the Ground
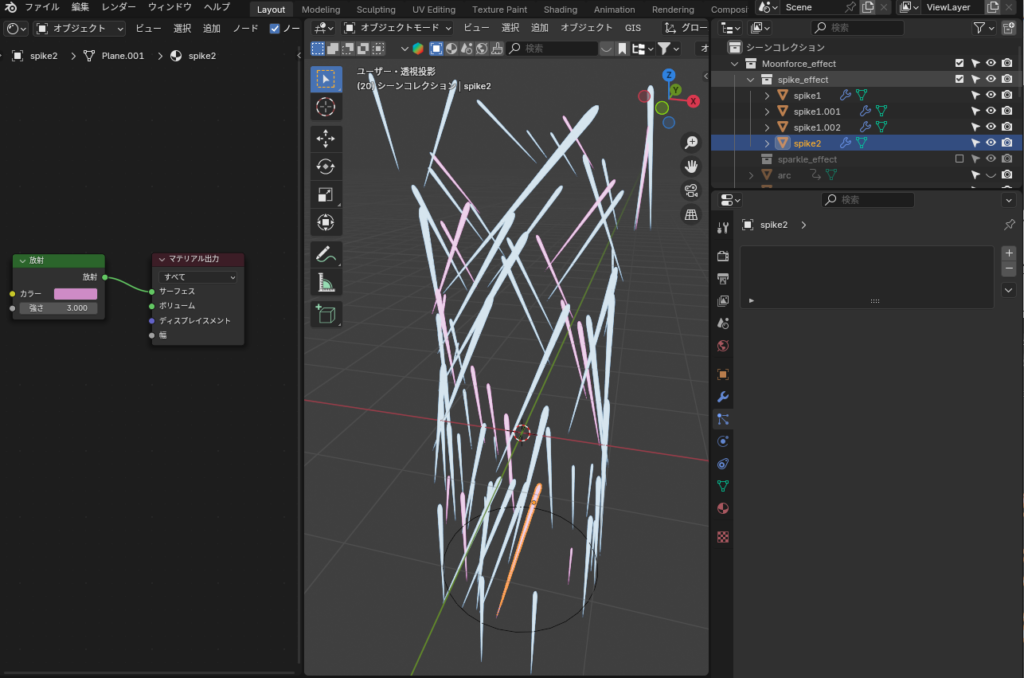
The first step was to create spiral streaks of light, like the ones shown below, which appear to rise from the ground.
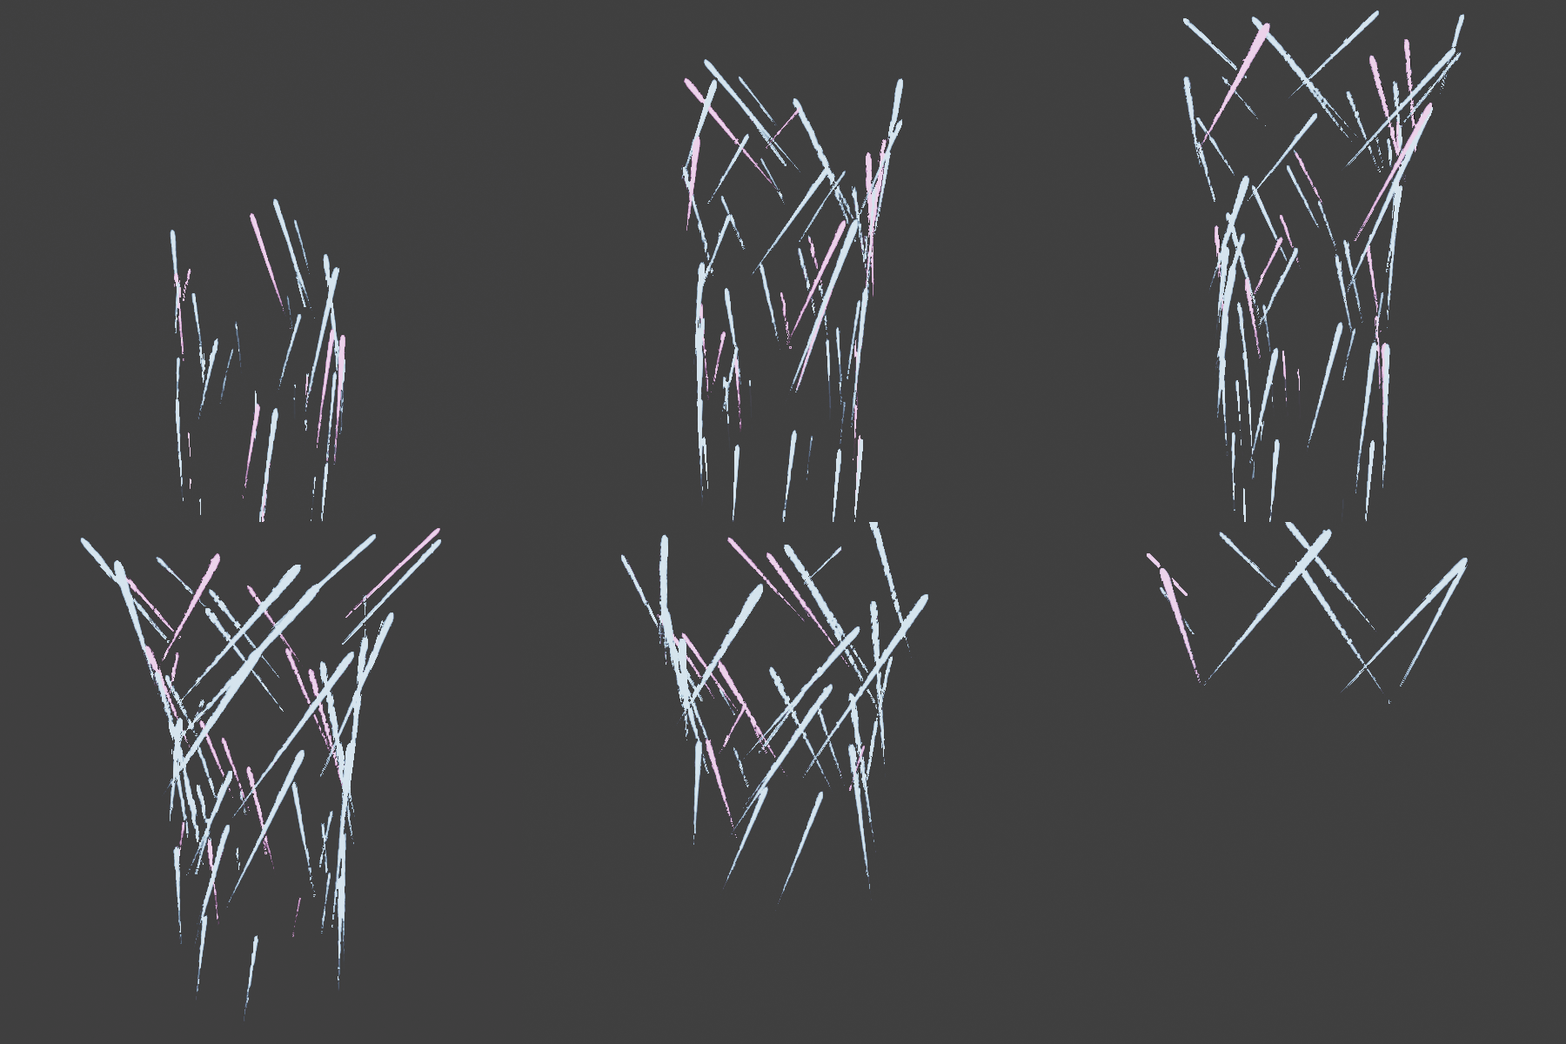
This effect was created using Blender’s Particle System, which allows for the animation of particle motion.
If you’re new to creating effects with particles, I recommend checking out the detailed article by CGBOX here.
https://cgbox.jp/2021/12/19/blender-cg-effect
Workflow for the Spiral Streaks of Light
Emitter Setup:
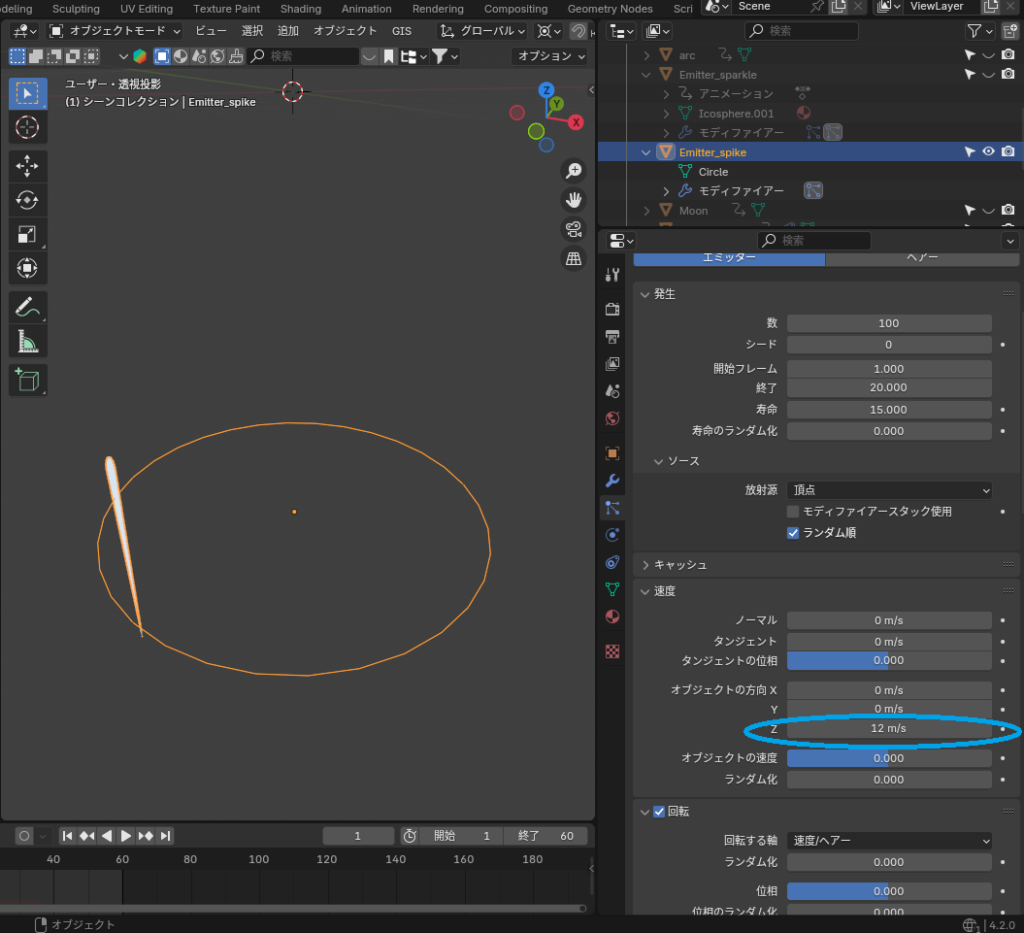
Adjust the particle emission speed under Velocity → Object Z Direction to 12 m/s.
Use a circular mesh object and set its vertices as the particle emitter.
Dynamic Rotation:
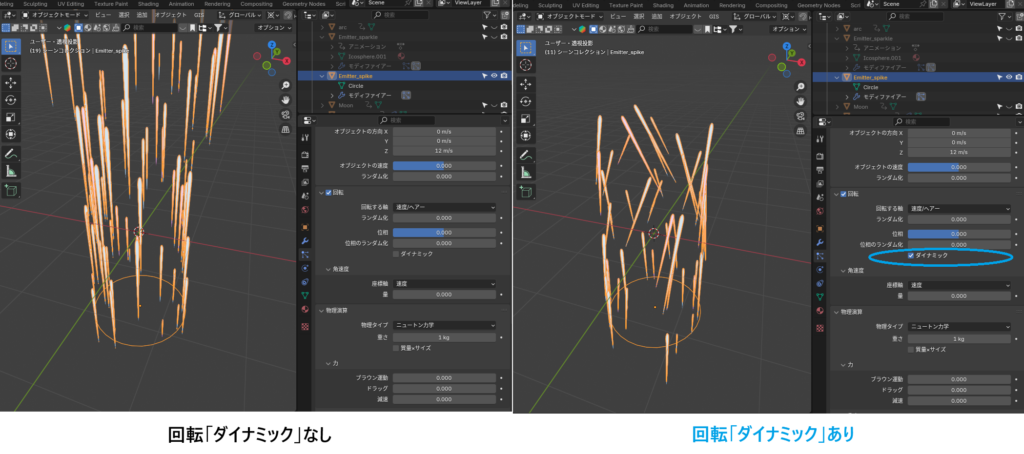
Enable Dynamic Rotation to allow the particles to follow the force field, giving the streaks their spiral shape.
Rendering:
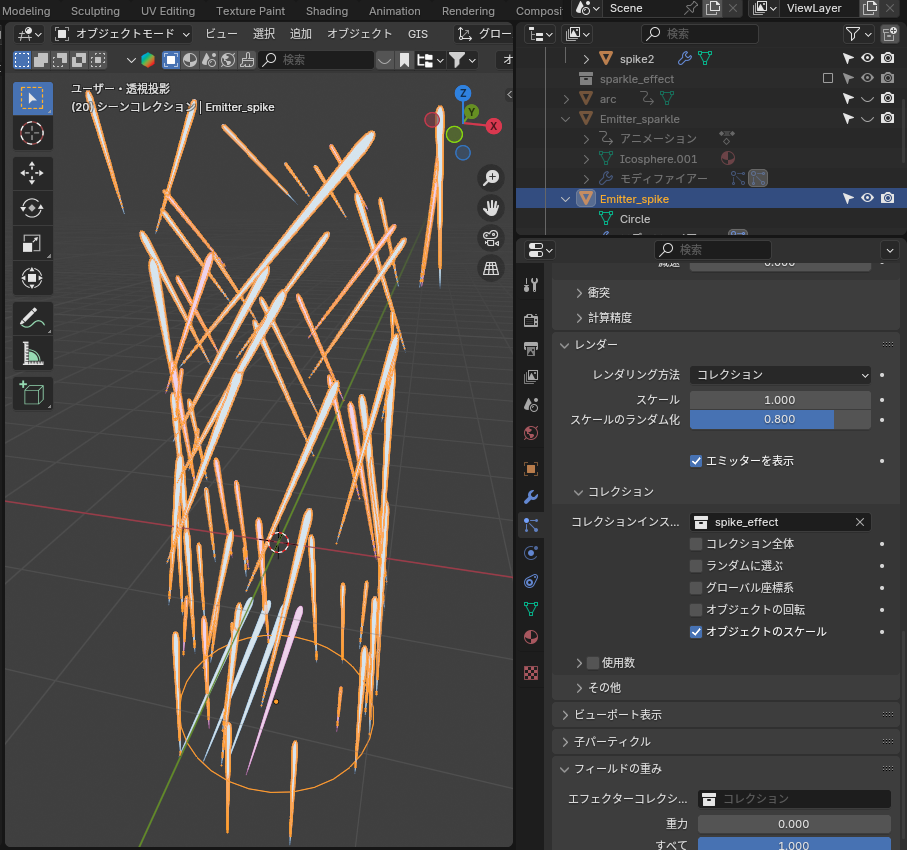
Use the Collection option under the Render settings to select a collection containing glowing mesh objects with an emission material.
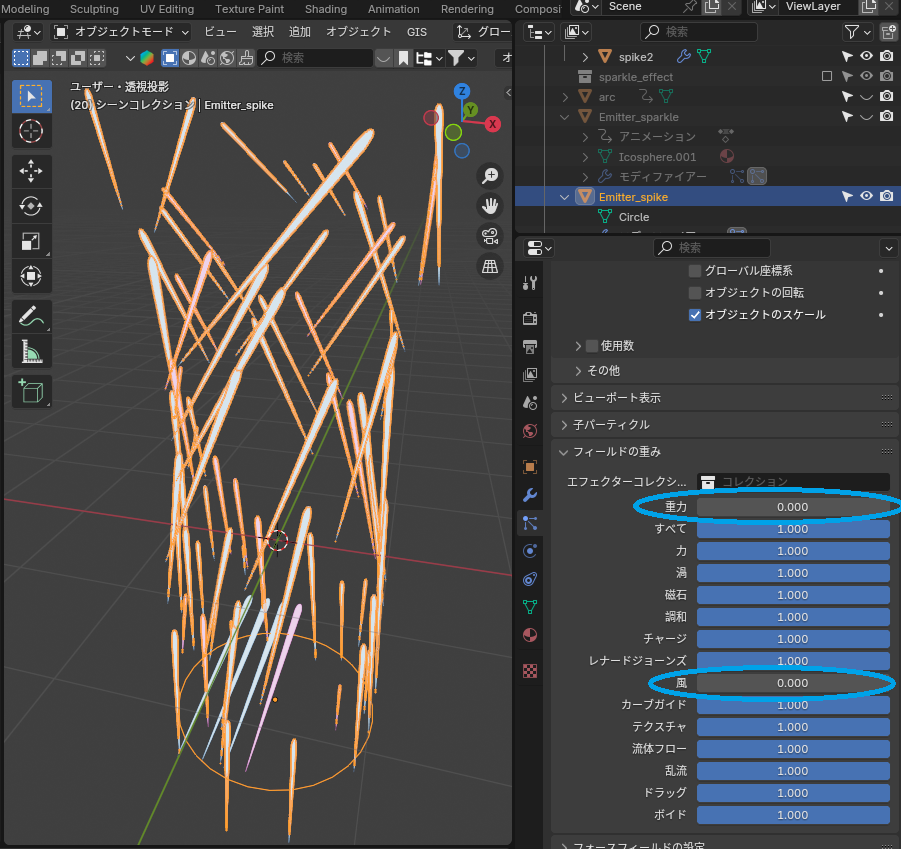
Gravity and Wind Settings:
Set the Field Weights for Gravity and Wind to 0 so the particles are not affected by these forces.
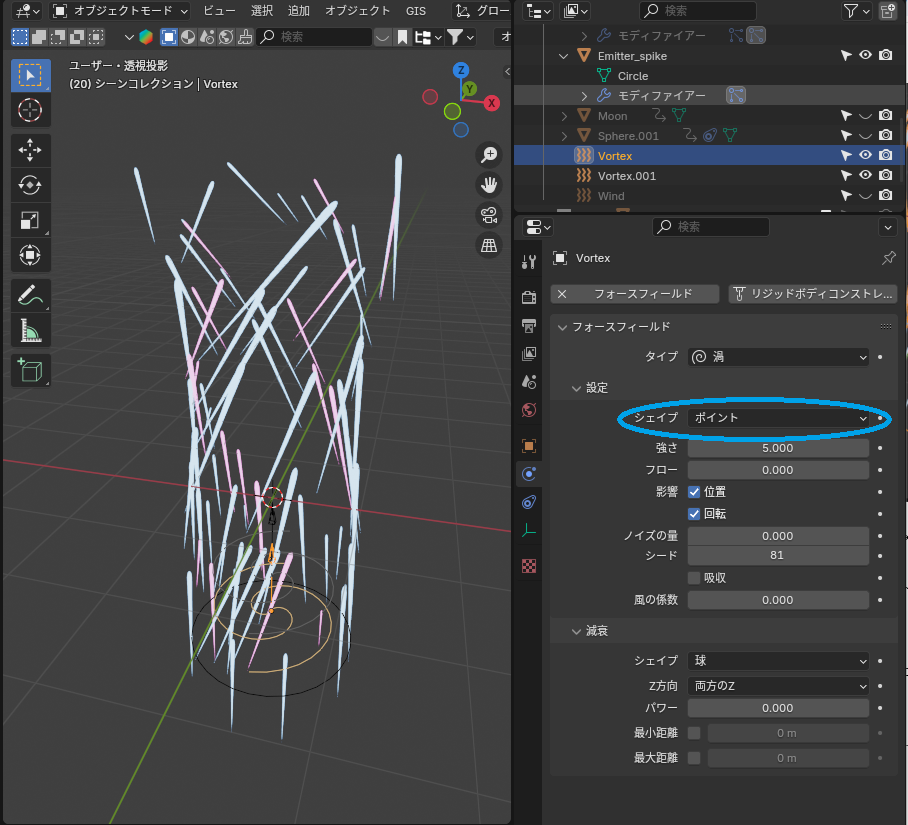
Adding a Vortex:
- Add a Force Field → Vortex to impart rotational velocity to the particles.
Shape Adjustments:
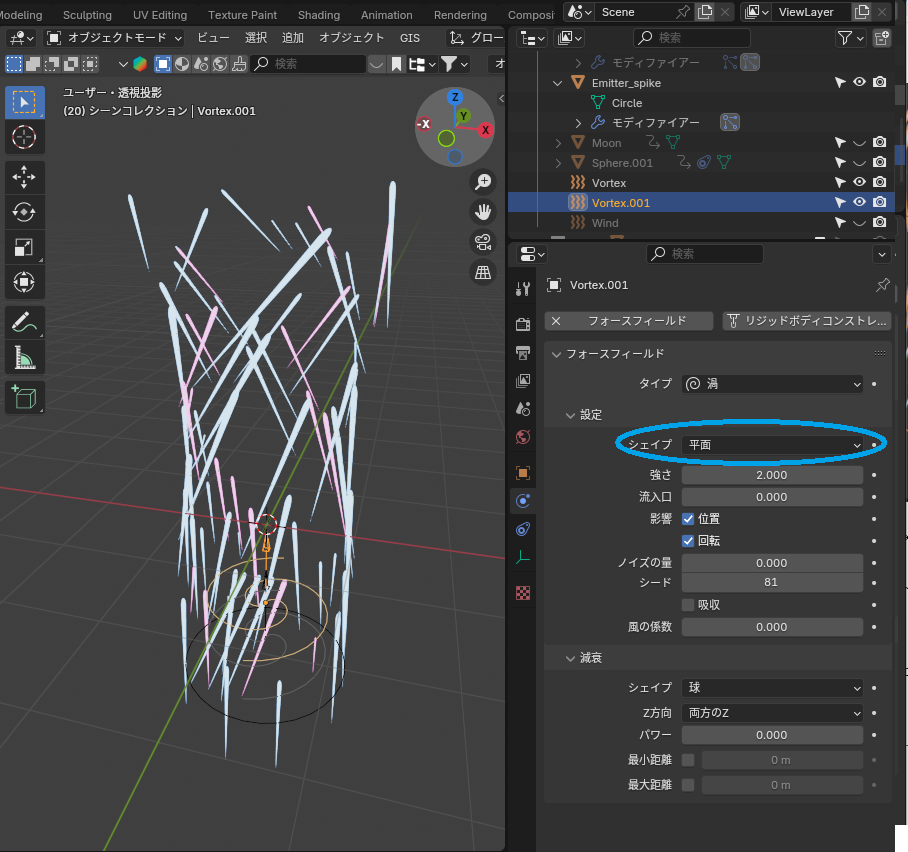
To achieve a gently spreading spiral, I experimented and added two vortex fields with Point and Plane shapes, respectively.
The vortex shape can be adjusted under the Shape settings:
Point: Creates a wide, outward-spiraling shape.
Plane: Produces a narrowing spiral effect.
Light Particles
To visually represent the gathering of light particles before the move is unleashed, I used an ICO sphere as the emitter with its Alpha set to 0, ensuring it was invisible. Particles were emitted from inside the ICO sphere.
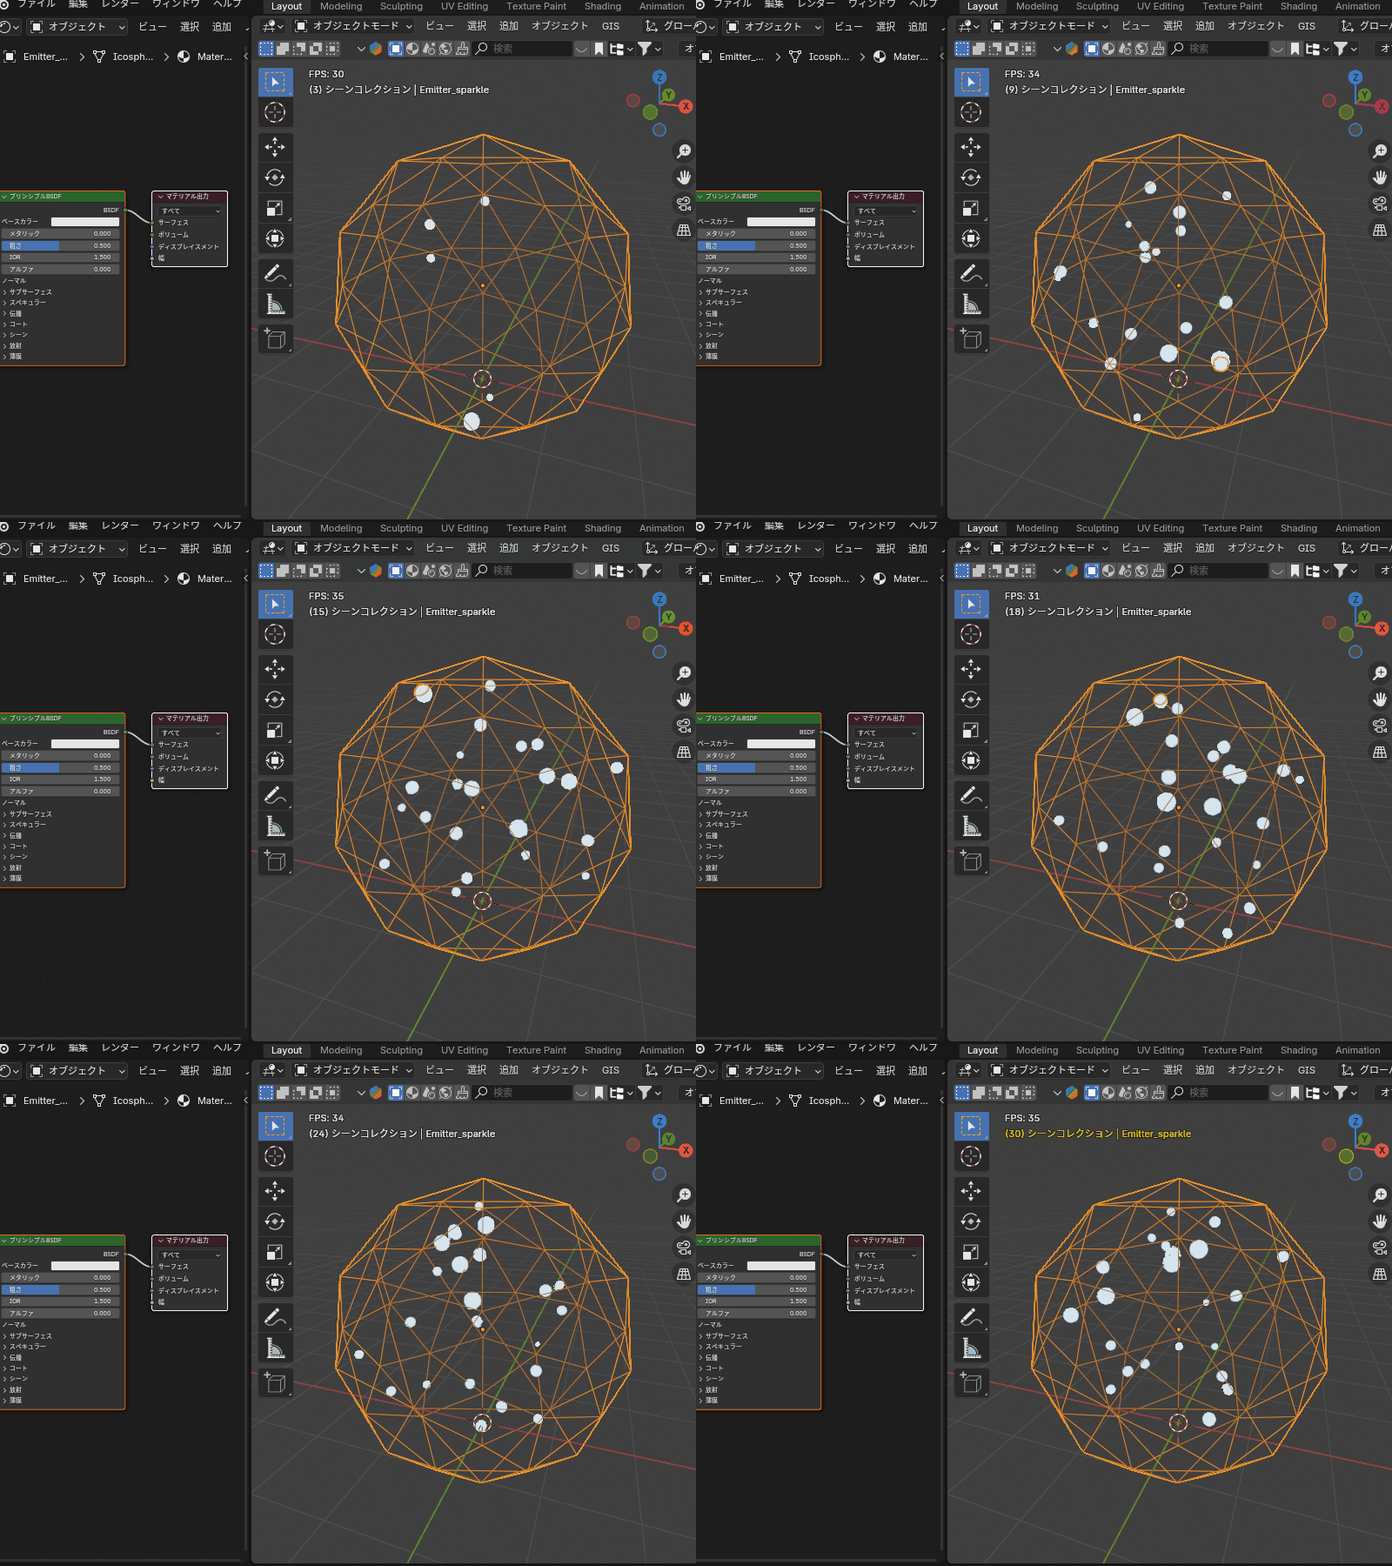
Initial Emitter Setup:
Emit particles from inside the sphere by setting Velocity → Normal to -3 m/s.
Use an ICO sphere and set it as the emitter.
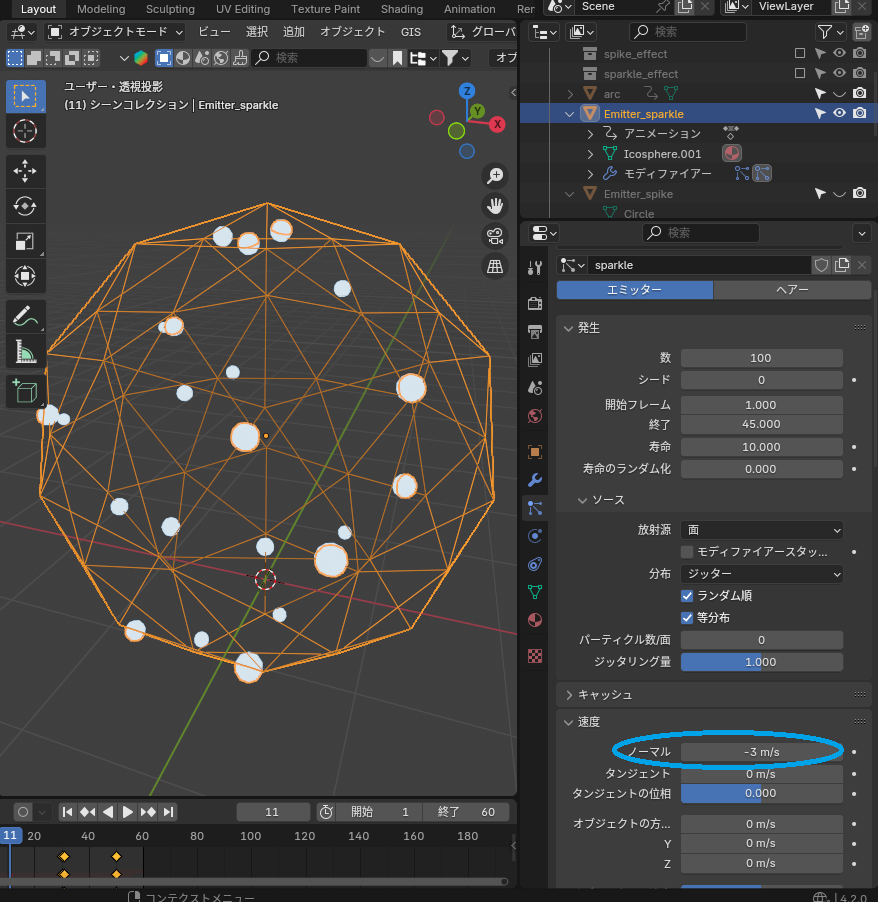
Field Weights:
Disable the influence of Gravity and Vortex by setting their Field Weights to 0.
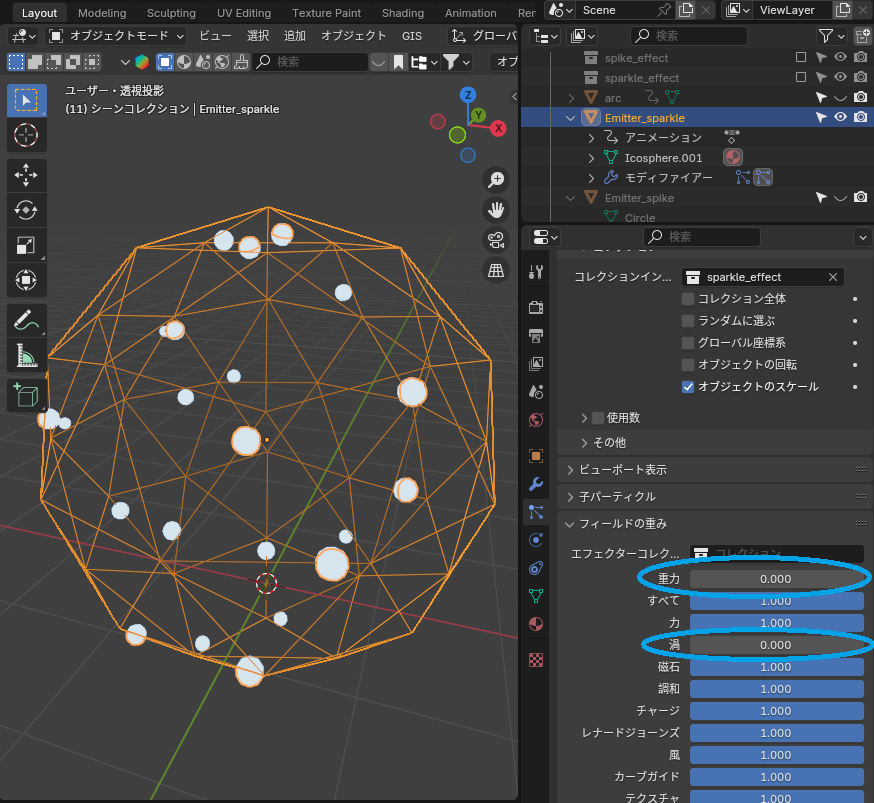
Parenting with the Light Sphere:
Since the “light particles" are also emitted from the “light sphere" during its launch, I set the emitter to be parented to the “light sphere."
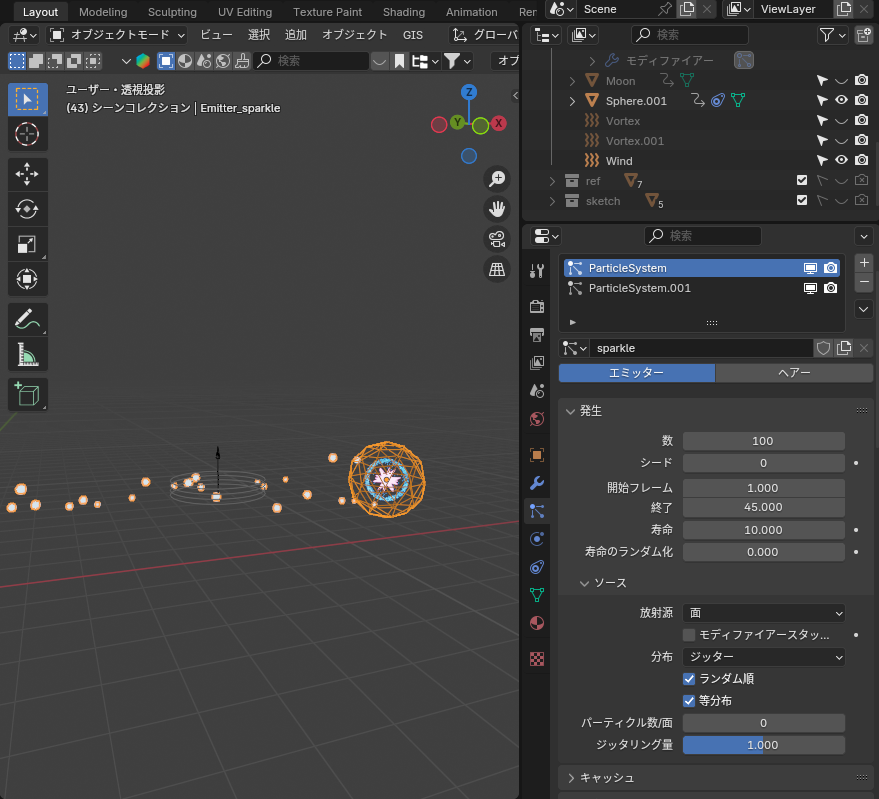
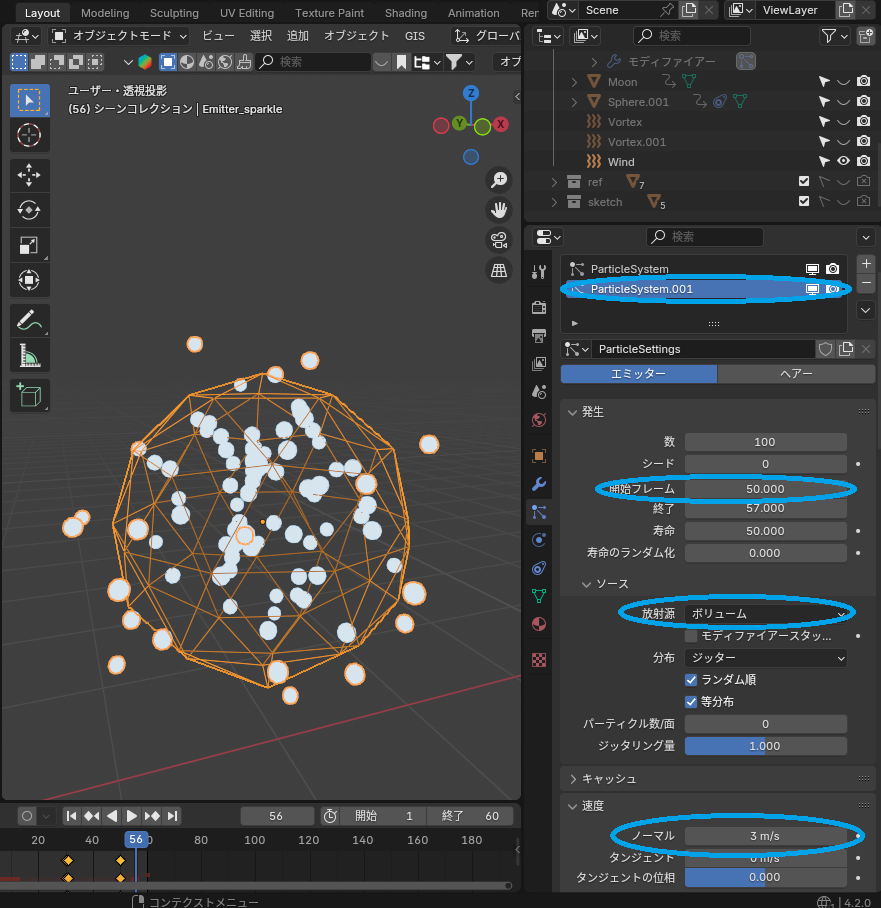
Adding a Second Emitter:
To create light particles that appear after the “light sphere" explodes, I added and configured a second emitter:
The emission source was set to Volume.
Velocity → Normal was set to 3 m/s for outward particle motion.
Moon Creation
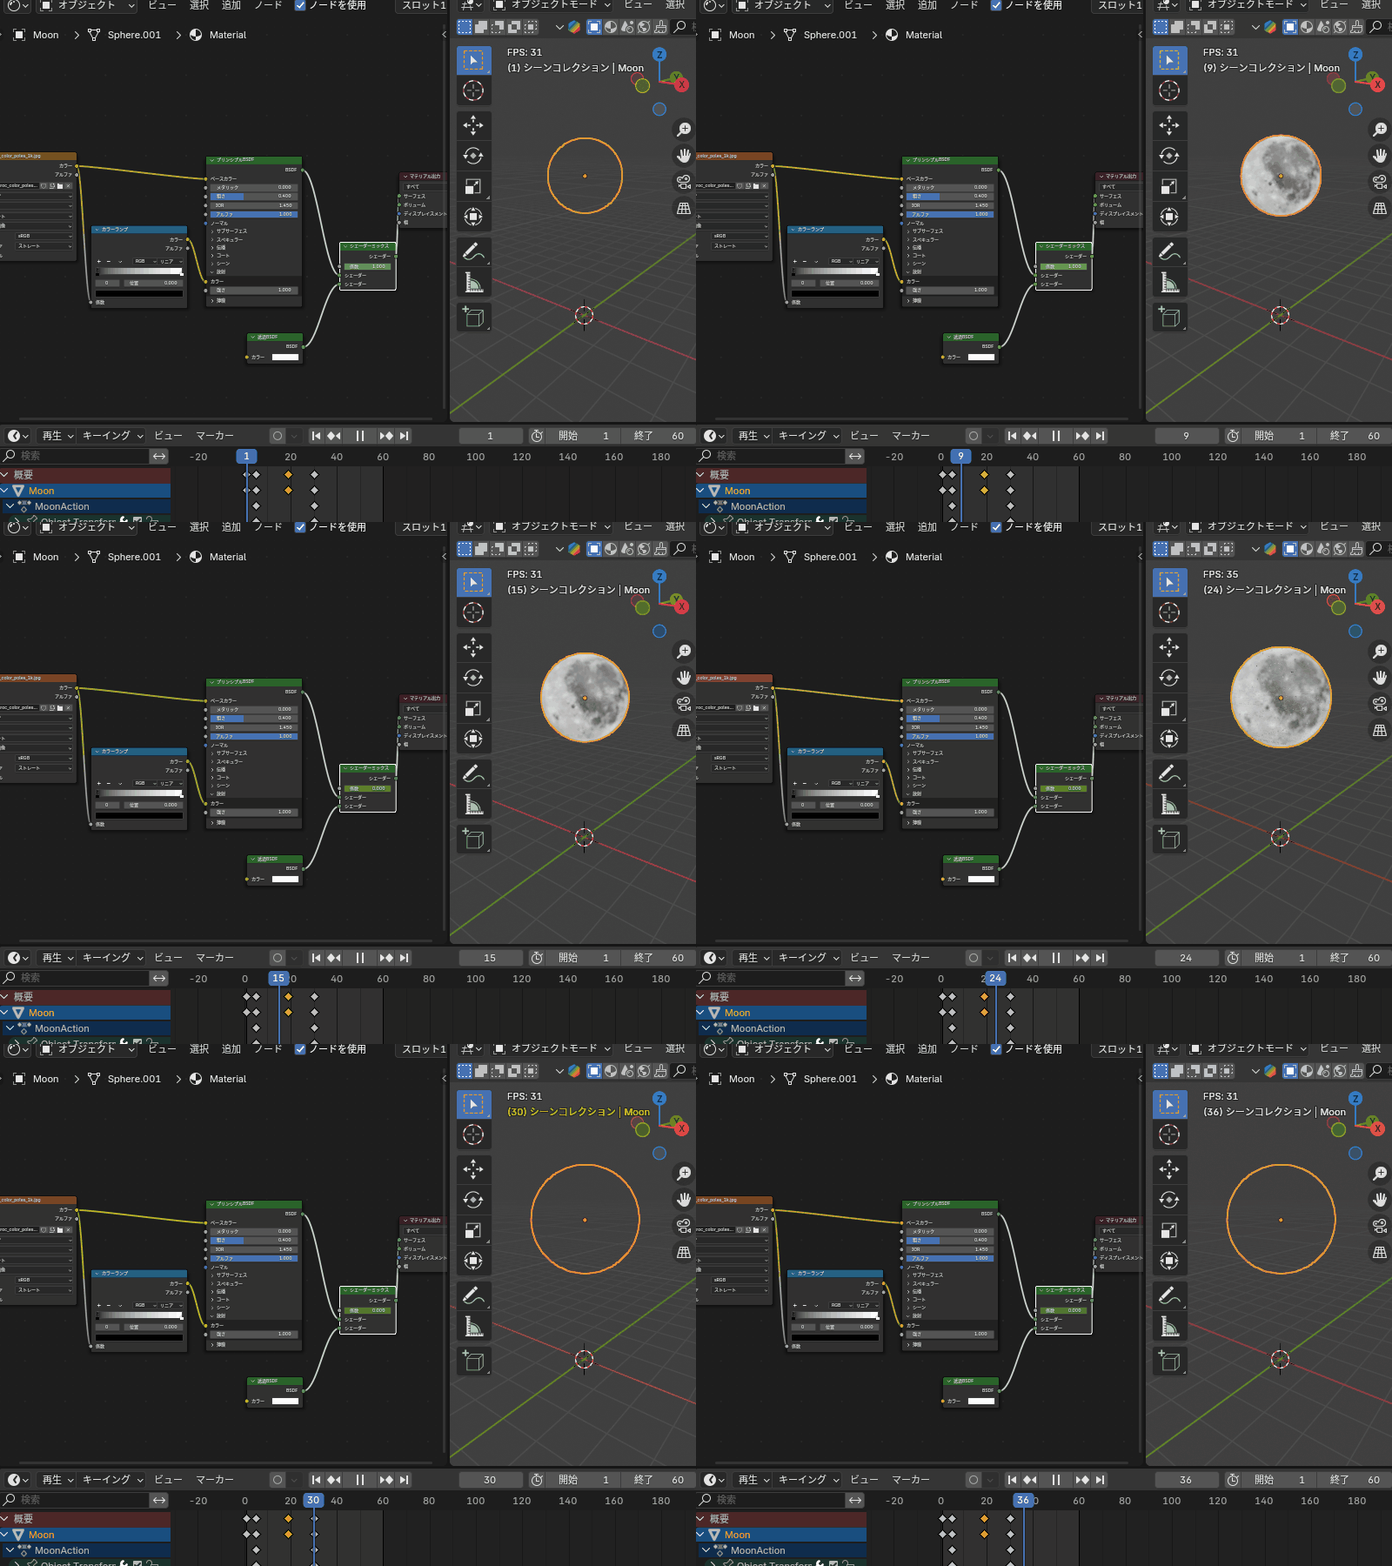
You can easily create a moon by applying a NASA-provided moon texture to a UV sphere. The texture is available for download here:
NASA Moon Texture
To create an effect where the initially transparent moon appears, grows larger, and then fades out:
- Connect Principled BSDF and Transparent BSDF to a Shader Mix Node.
- Add keyframes to the Factor of the Shader Mix Node to control the transition between opaque and transparent states.
AD
Double-Layered Light Sphere
When using Moonblast, a glowing sphere is launched with the outer layer resembling a blue soap bubble and the inner layer resembling a pink star.
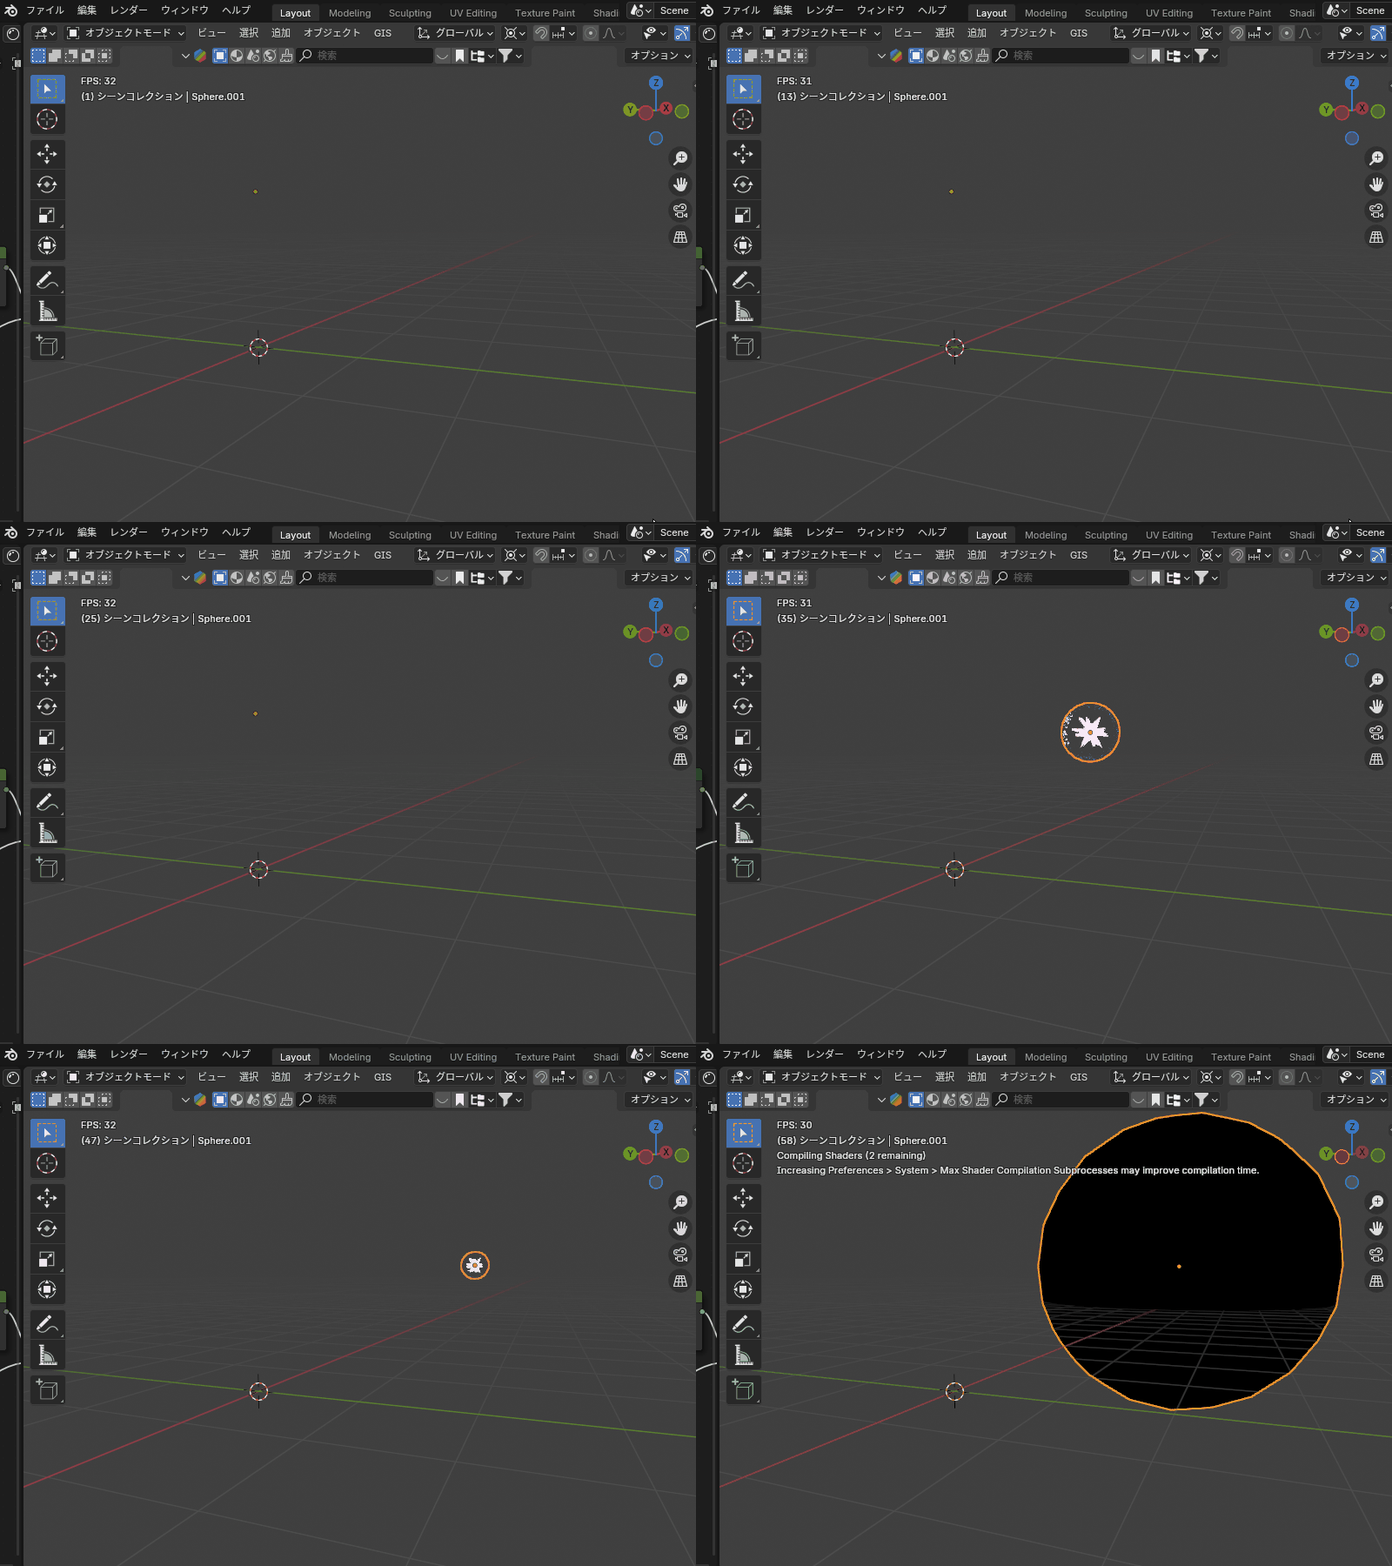
To create this effect:
Adjust the Emission Shader color to blue for a glowing effect.
Outer Sphere
Use an ICO sphere for the outer layer.
Set its material by mixing Principled BSDF and Transparent BSDF in a Shader Mix Node, with Fresnel as the factor to display only the outline.
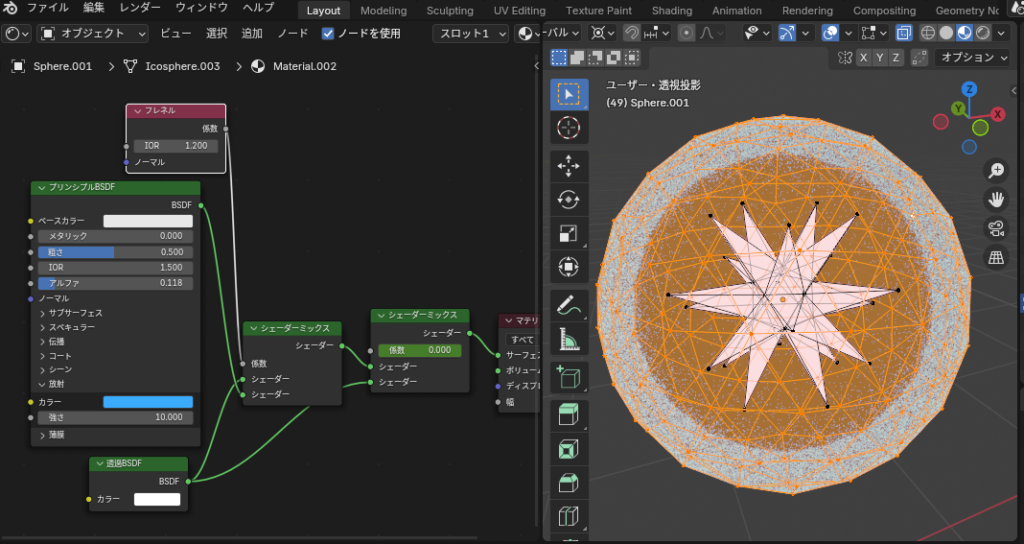
Inner Star Shape
Connect a Transparent BSDF and a Shader Mix Node, adding keyframes to the factor of the Shader Mix Node to make the object fade out after the explosion.
Create the inner layer using an ICO sphere, extruding its faces to form a star-shaped mesh.
Apply a pink Emission Shader for the material.
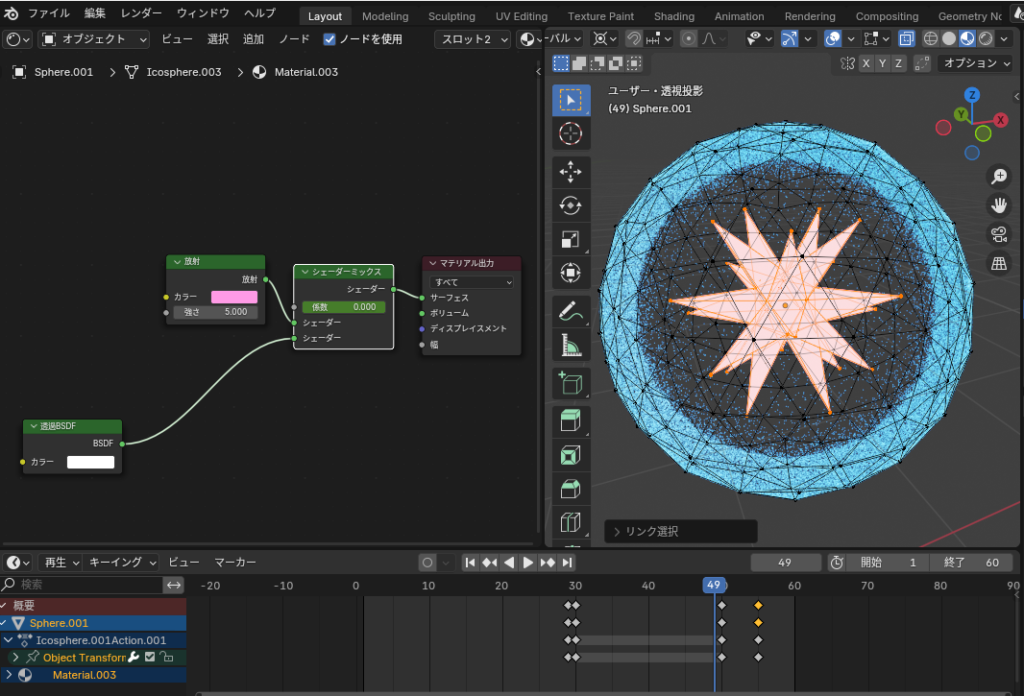
Scaling
Set the object’s scale to zero between frames 1–29 and then expand it after frame 50 to simulate the explosion.
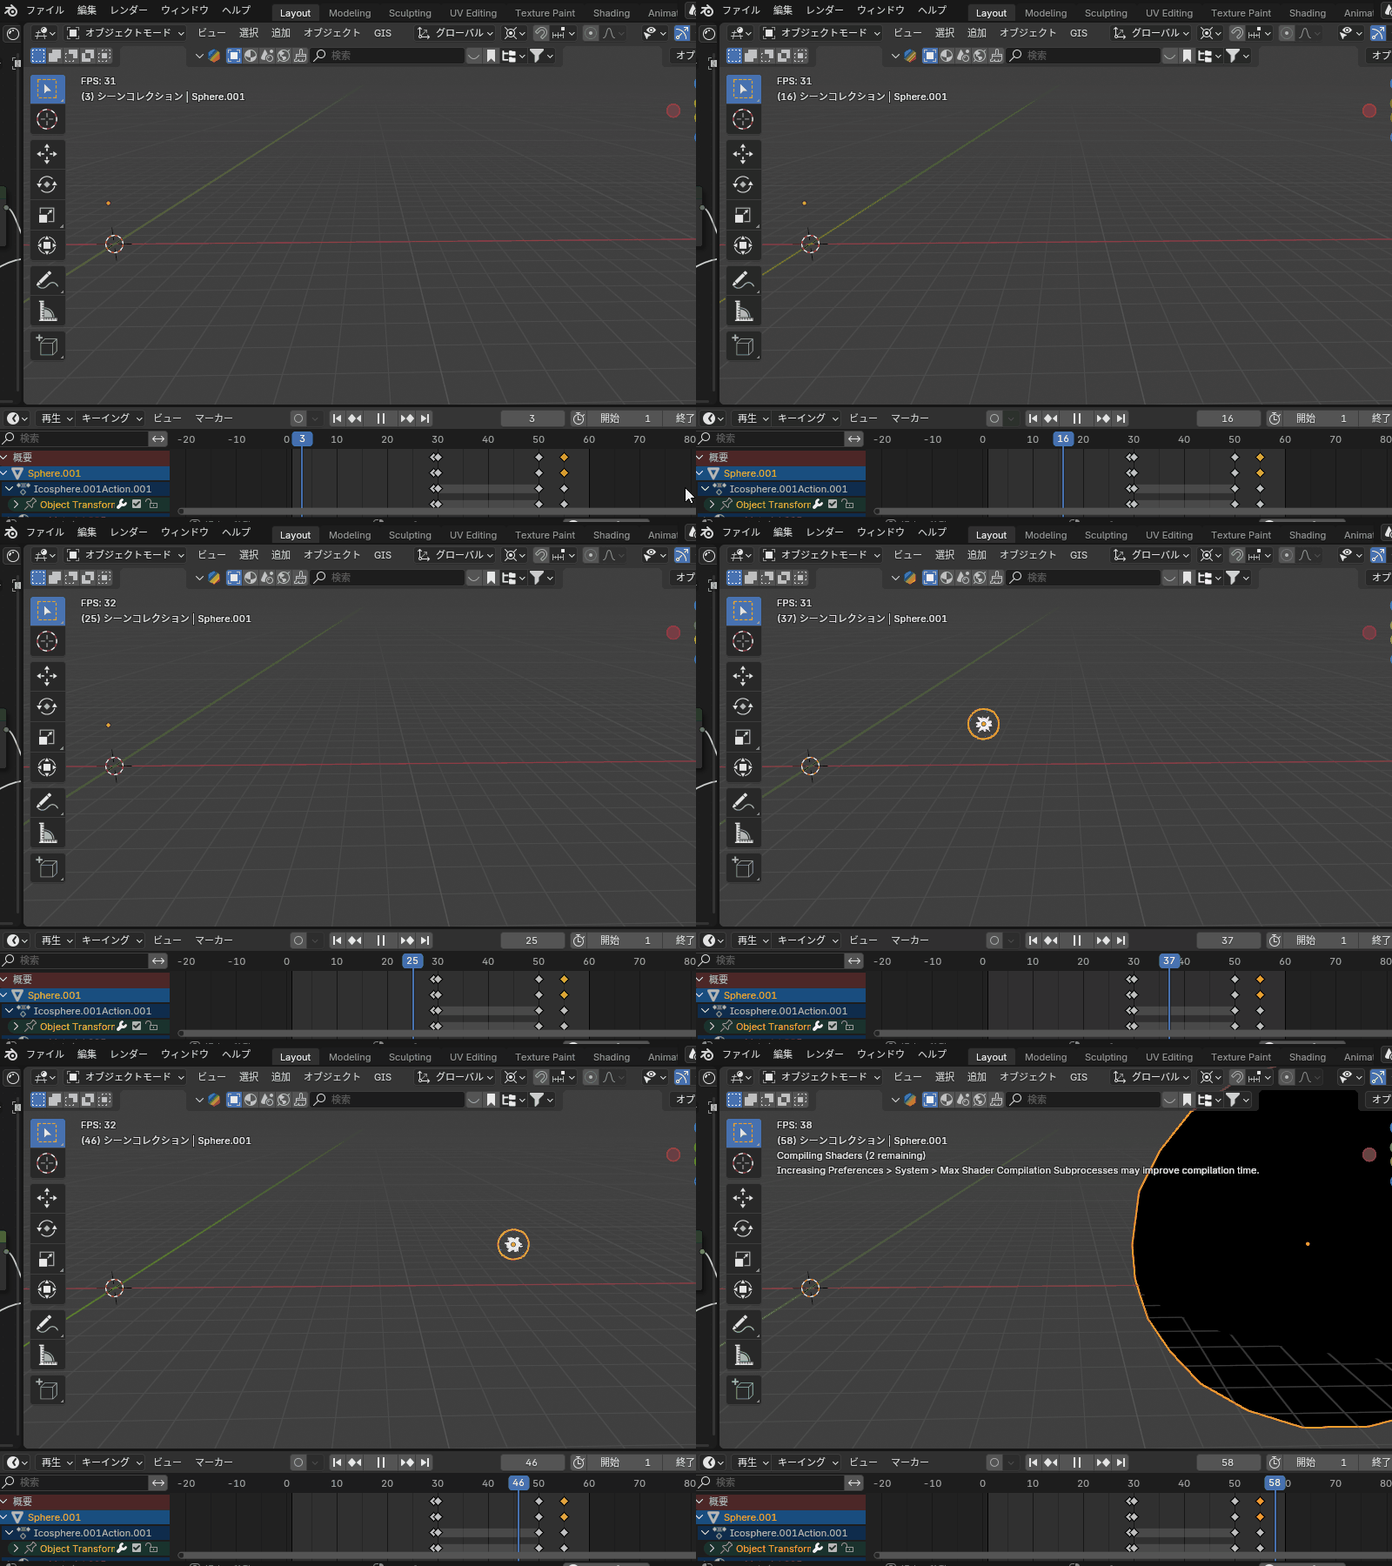
Ripples Upon Launch
To represent the shockwave created when the light sphere is launched, ripples were added as follows:
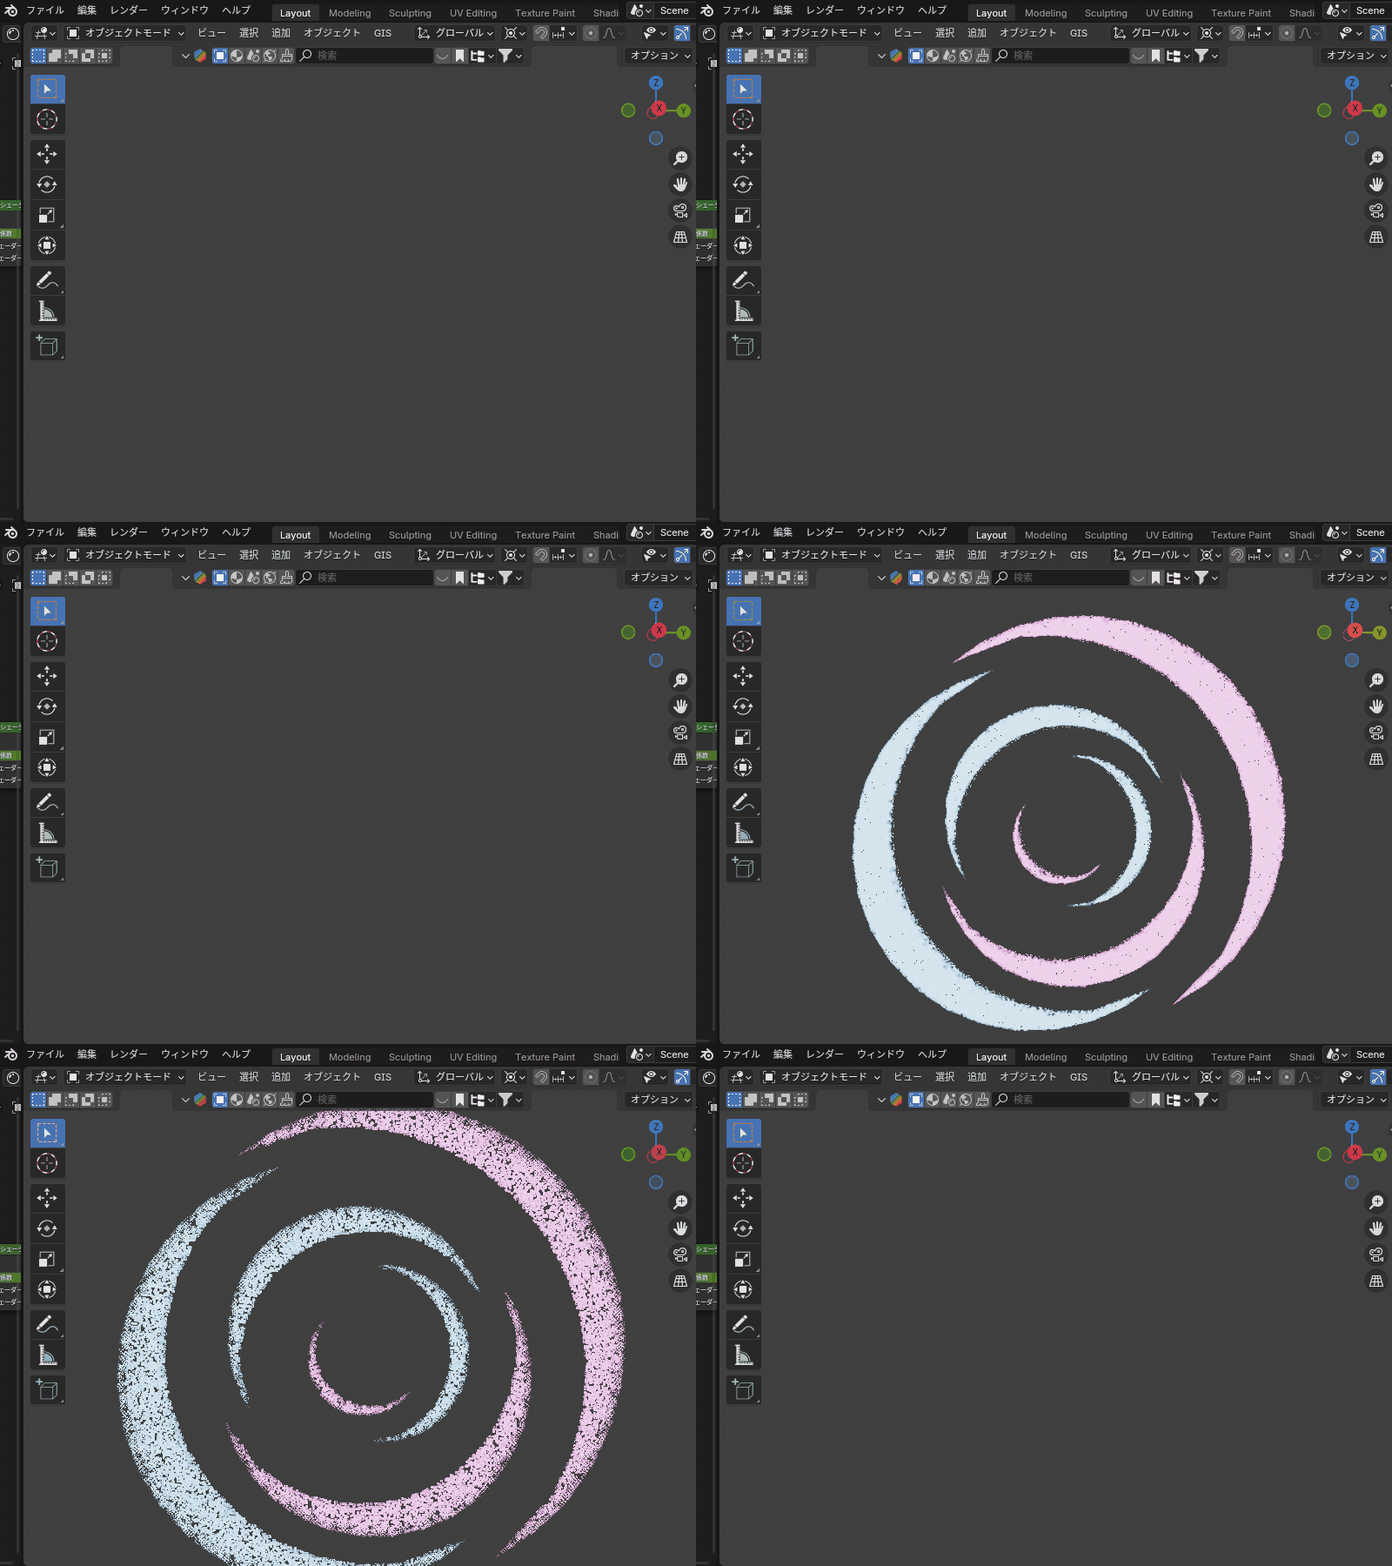
Create a ripple effect and assign blue and red Emission Shaders in the material slots.
Connect these shaders to a Transparent BSDF and a Shader Mix Node, adding keyframes to the factor of the Shader Mix Node to gradually fade the ripple effect.
Scale the object from zero between frames 1–29 to gradually expanding between frames 30–40.
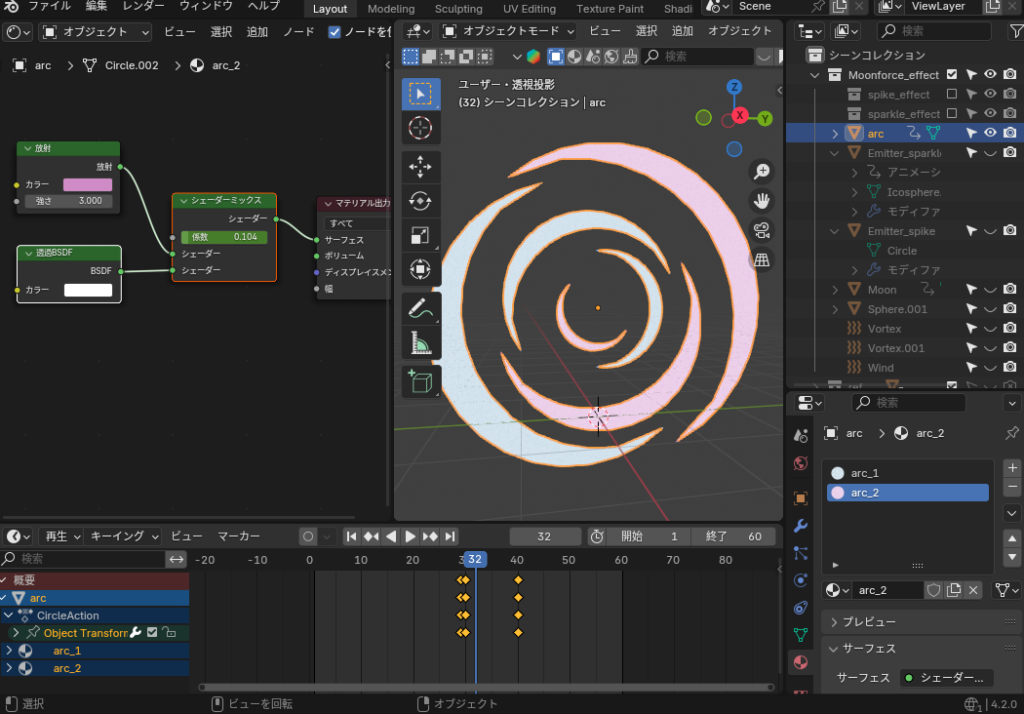
Having Flutter Mane Perform the Move
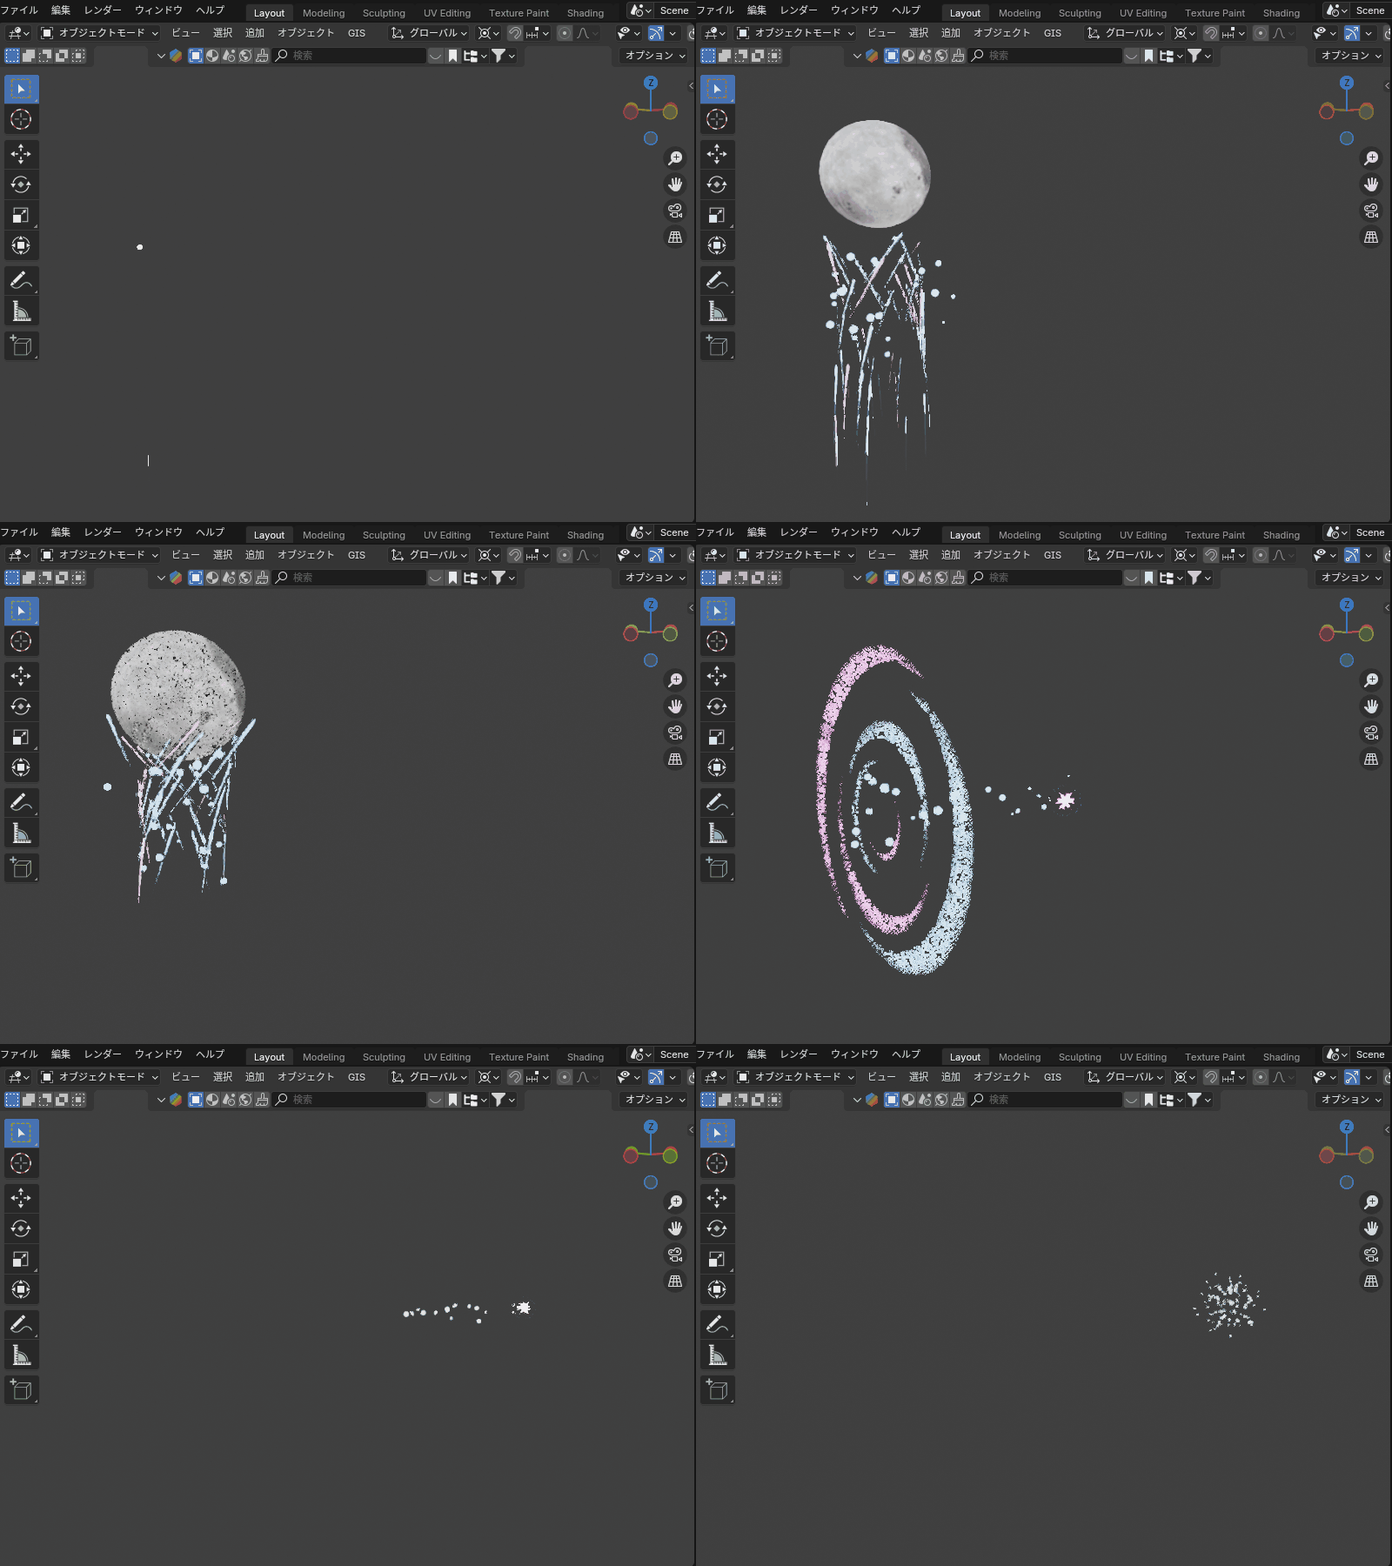
By combining the five effects, I created an animation of the Moonblast move, as shown below.
While some aspects are simplified compared to the original, I believe the effect still looks quite dynamic.
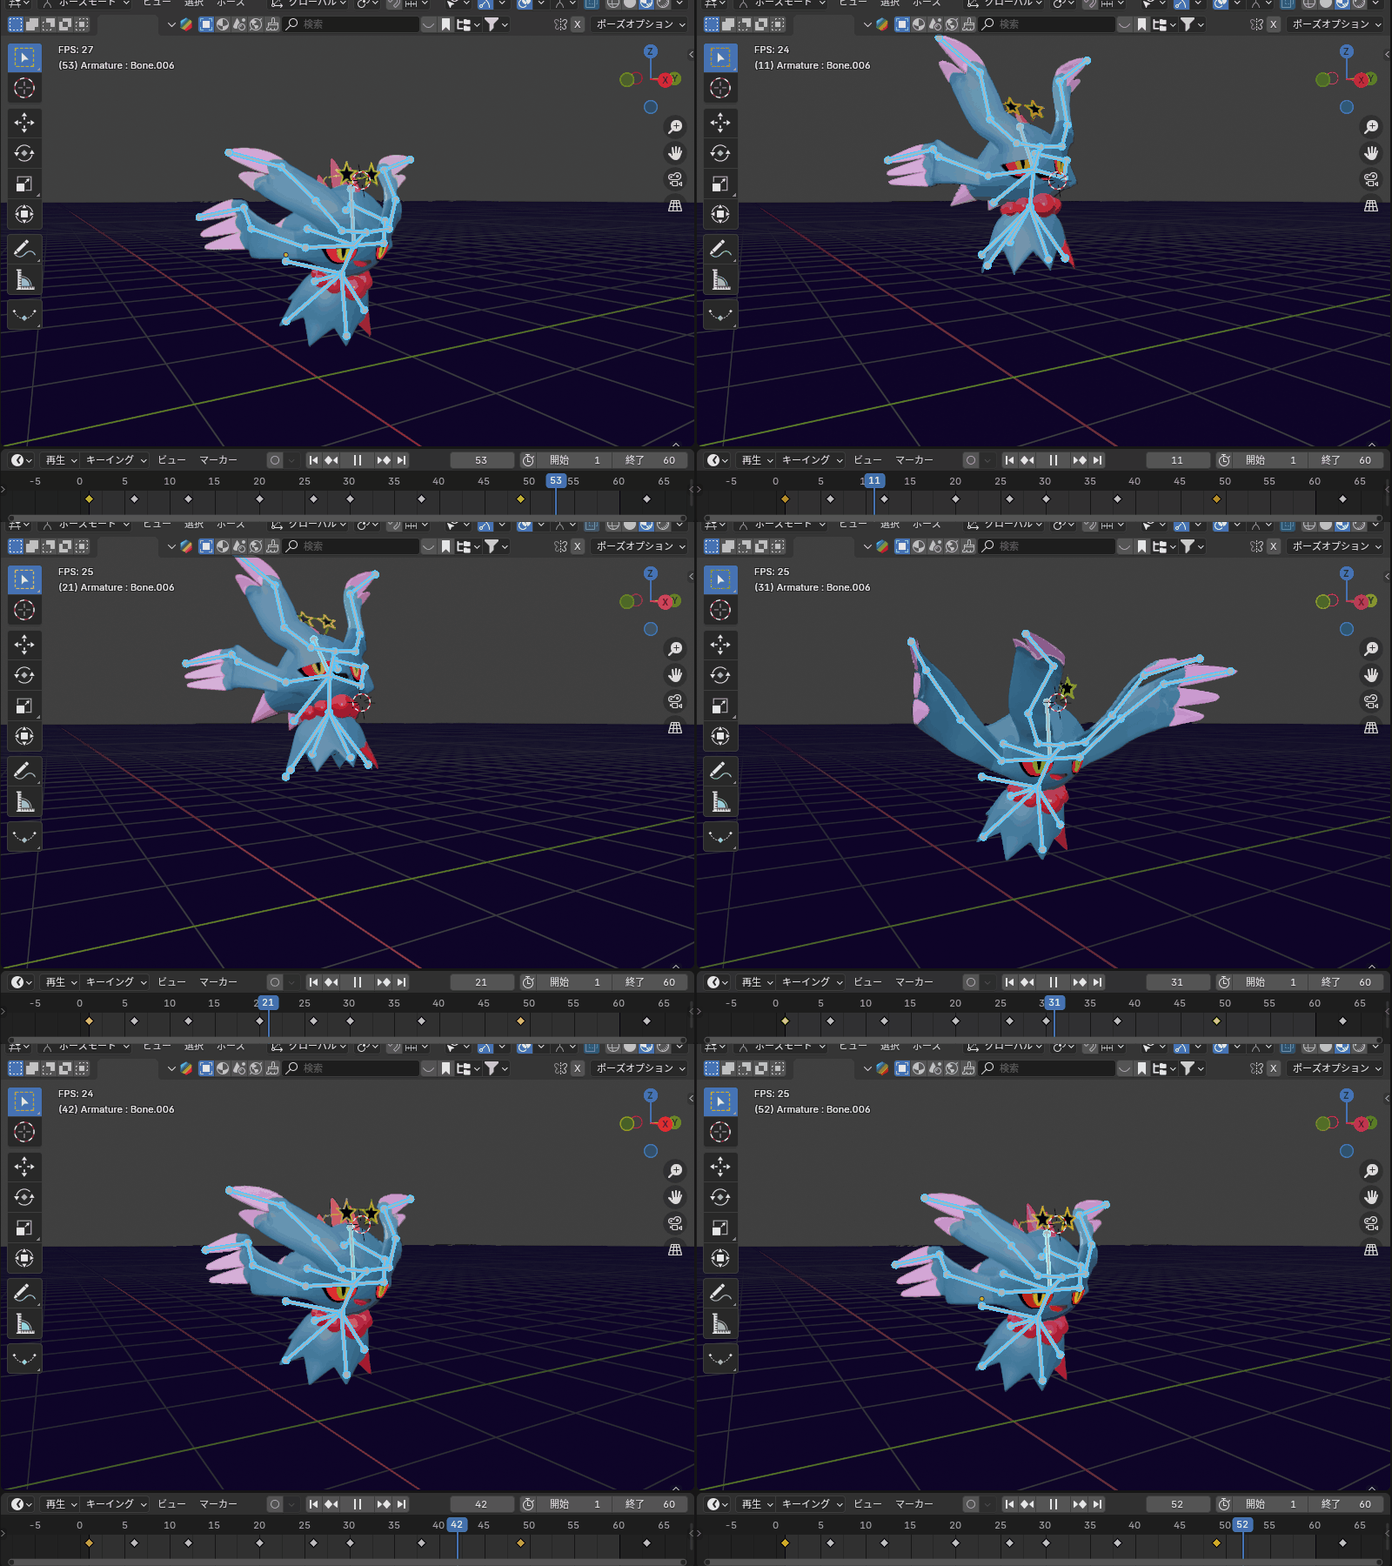
Additionally, I added an animation to the Pokémon model of Flutter Mane, creating a motion for executing the move.
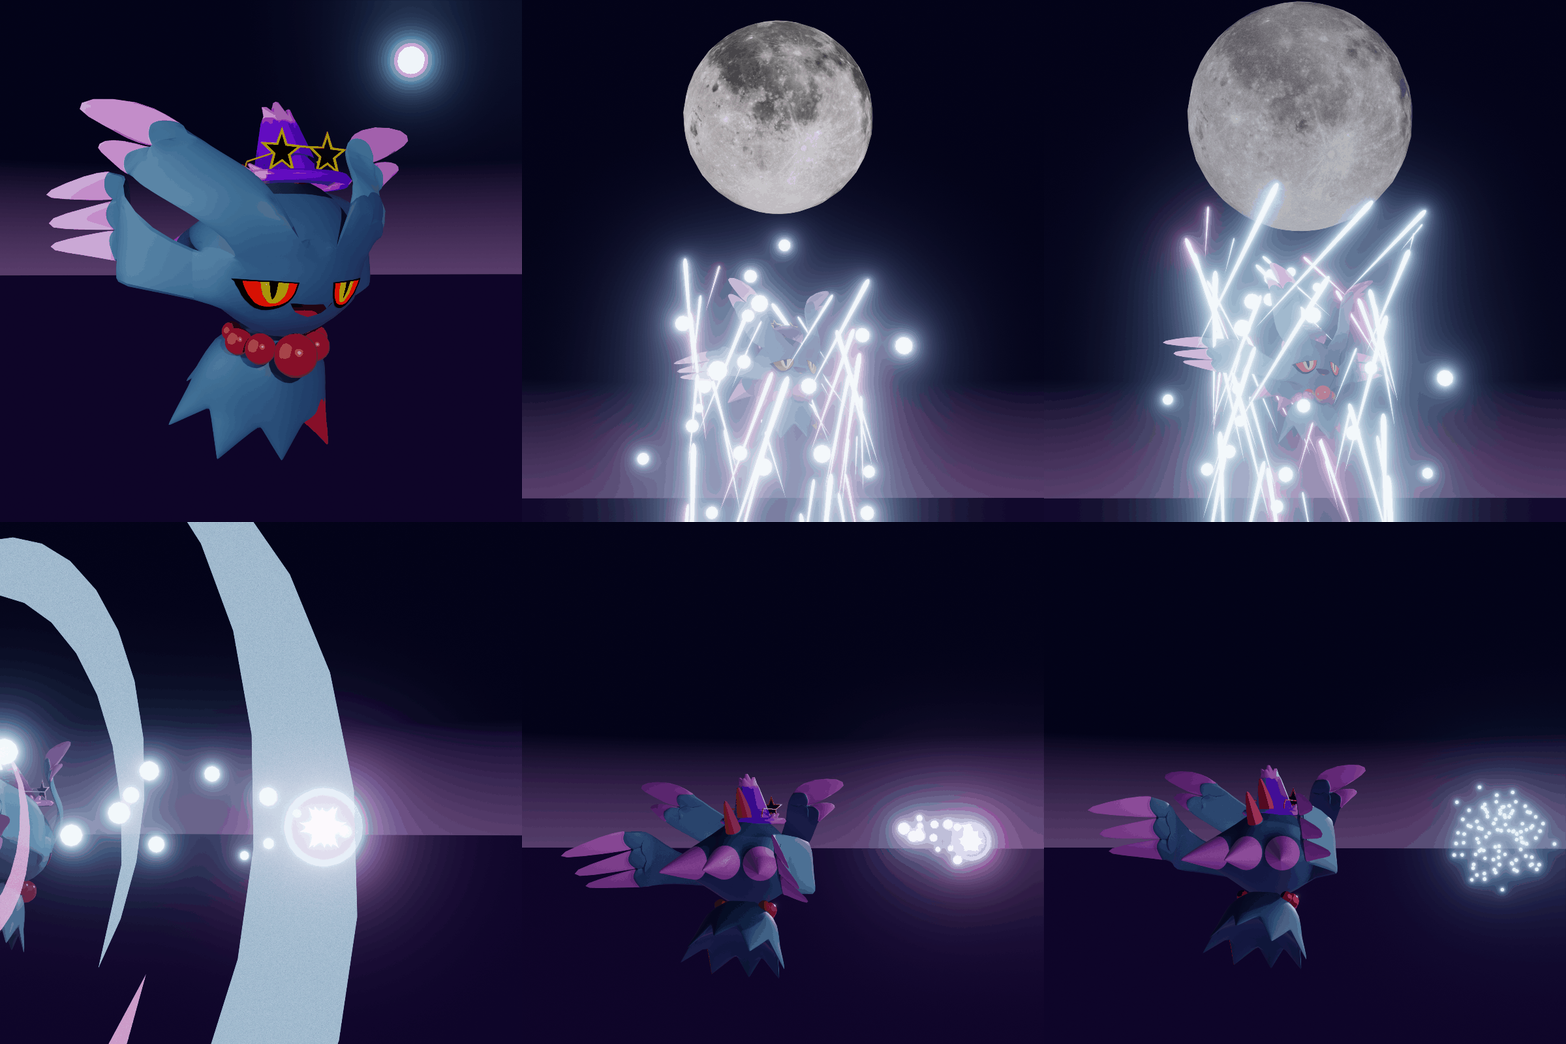
After adding lights and a camera, I rendered the final result, as seen here.
Using this approach as a reference, I’d like to try creating other move effects in the future if the opportunity arises!
AD

