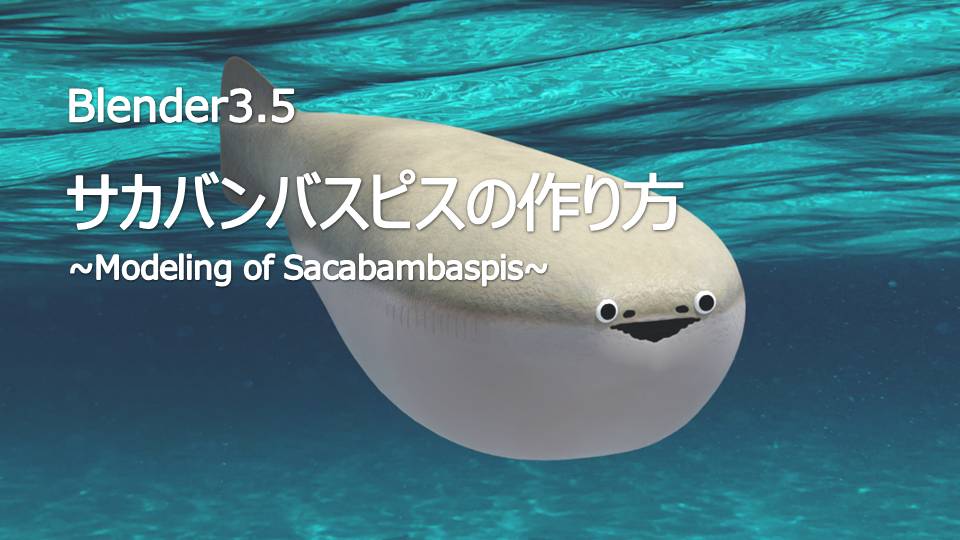
【Blender 3.5】How to Create a Sacabambaspis (Model)
2025-01-17
当ブログはアフィリエイト広告を利用しています。
This blog uses affiliate advertising.
Recently, the ancient fish “Sacabambaspis" has become an unexpected trend on Twitter.
It all started with a tweet highlighting the Sacabambaspis model displayed at the Helsinki Natural History Museum in Finland. The model’s seemingly pitiful appearance captured the internet’s attention. One visitor to the museum commented, “I nearly cried when I saw this little guy."
Sacabambaspis is known for having both eyes positioned at the front, a perpetually open mouth, and poor swimming abilities.
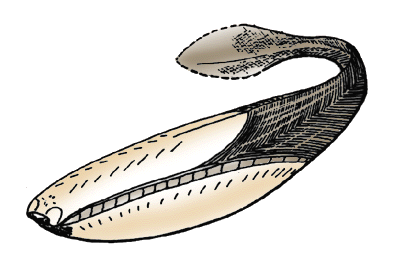
However, this particular model is not an entirely accurate recreation of the fossil. In reality, Sacabambaspis likely had a front half covered by a carapace, resembling the body of a shrimp.
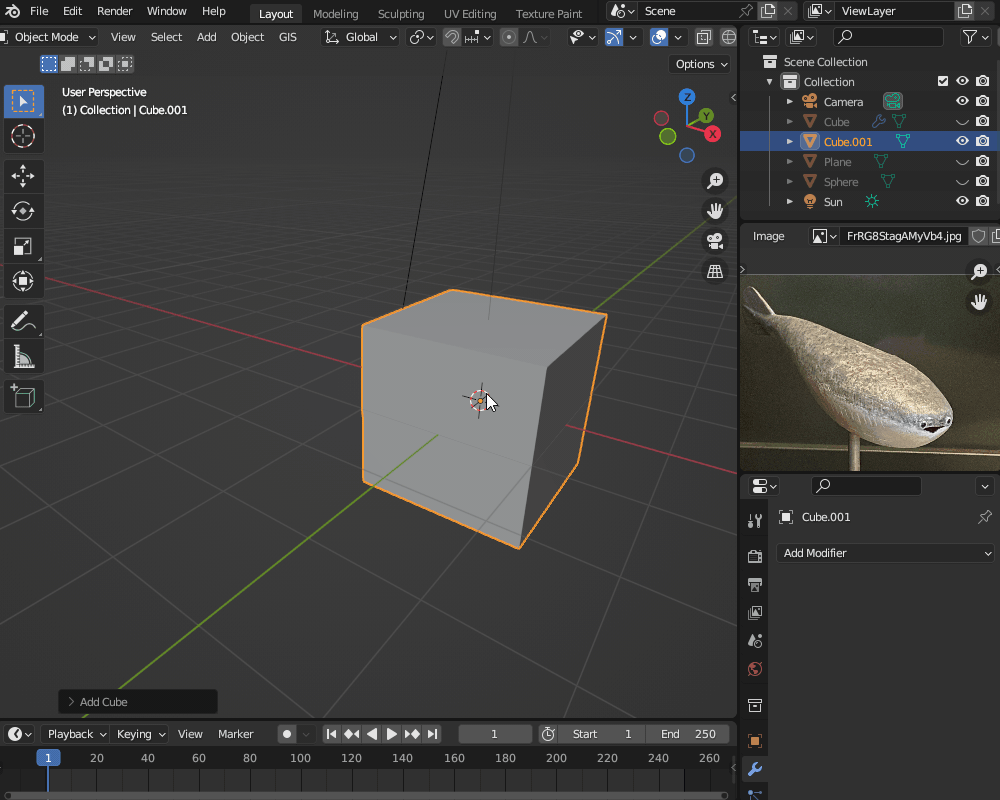
For this project, I used the free 3D software “Blender" to bring Sacabambaspis to life.
This article outlines the process, from modeling to UV unwrapping, texture painting, rigging, and animation. Hopefully, you’ll find it useful as a reference.
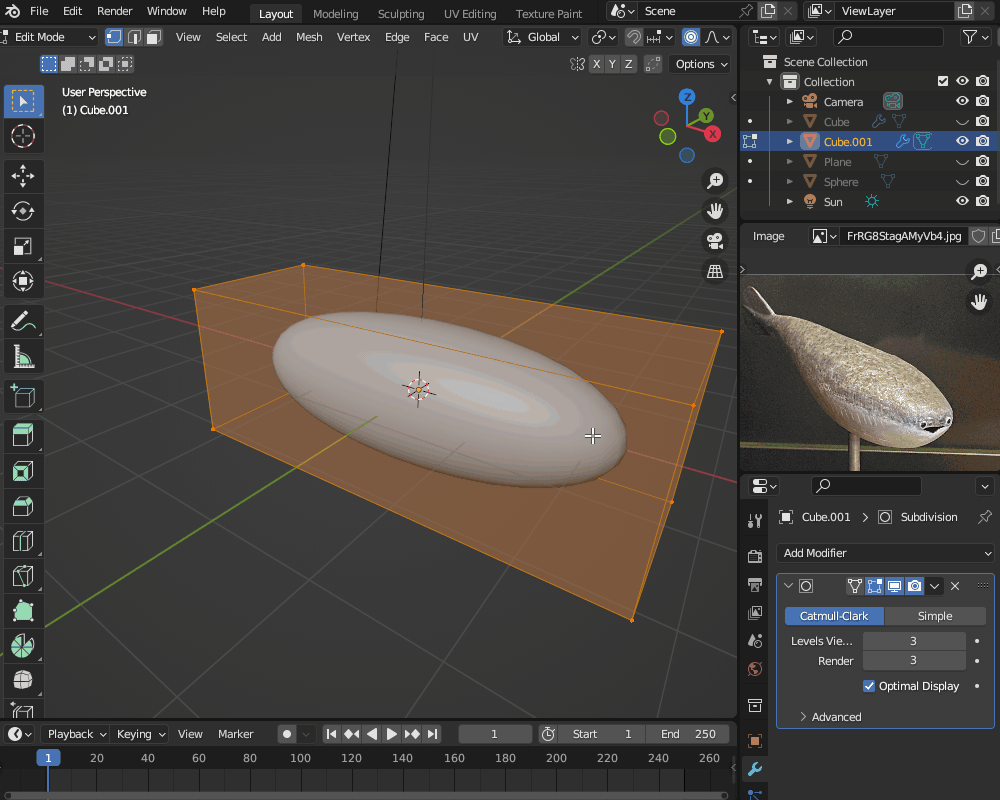
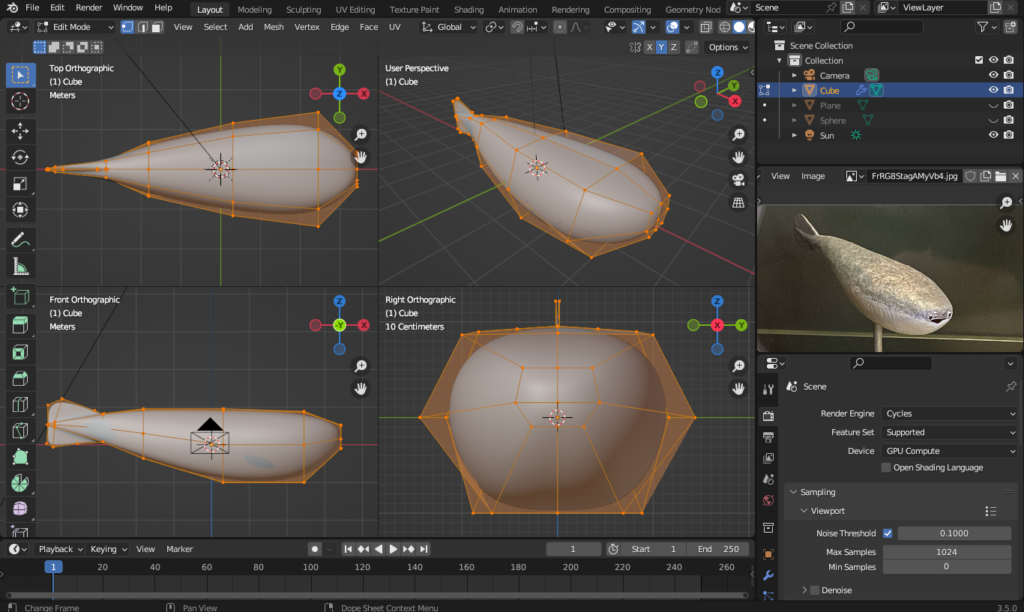
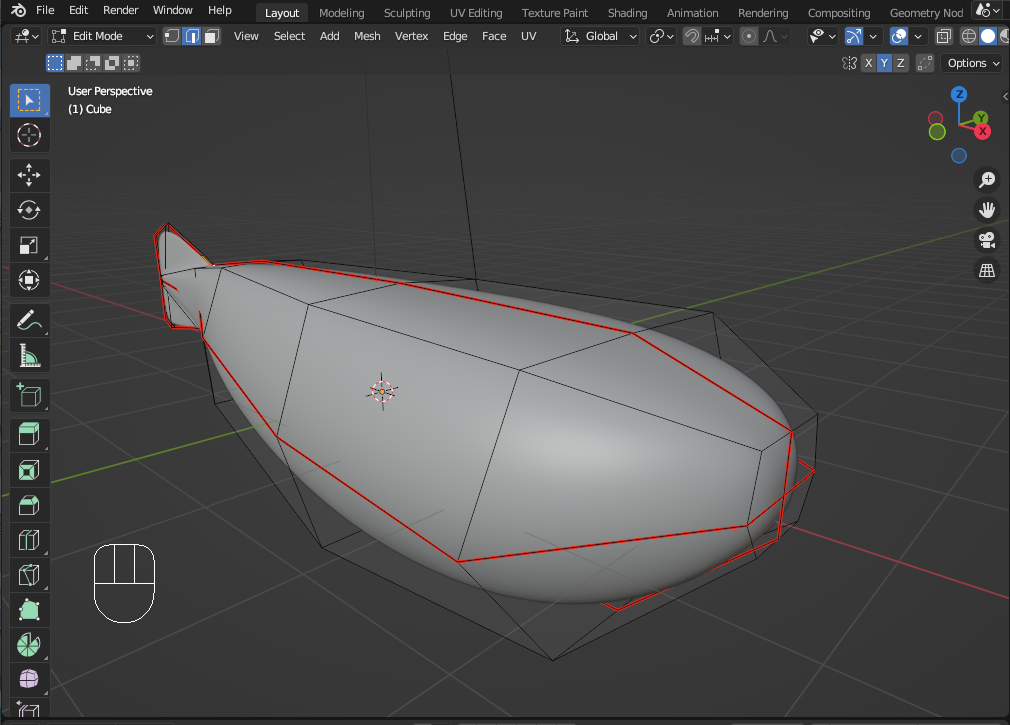
Due to its simple shape, Sacabambaspis is an excellent subject for beginners to practice 3D modeling.
Before diving into the specific steps, let me introduce a useful tool for texture painting.
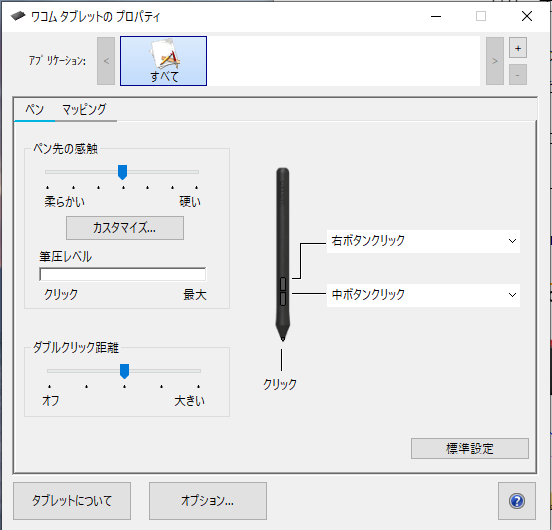
Since texture painting involves delicate operations, I highly recommend using a pen tablet like the one shown here.
Using a pen tablet allows you to intuitively move the brush as if you were drawing on paper with a pen.
Additionally, pen tablets are pressure-sensitive, so you can adjust the strength of the brushstroke depending on how much pressure you apply with the pen.
There are two main types of pen tablets:
Non-display tablets, like this one, where you draw on the tablet while looking at your computer screen.
Display tablets, which come with a built-in screen, allowing for more intuitive operation.
isplay tablets are more intuitive since you can draw directly on the screen, making them the preferred choice for professional creators and illustrators. However, due to the built-in screen, their price is usually over 30,000 yen (~$200 USD), making them a more expensive option.
Personally, I don’t sculpt frequently, and I’ve found that a non-display tablet is more than sufficient for tasks like sculpting and texture painting. For this reason, I use a non-display tablet.
Since Wacom is a Japanese brand, their products are reliable, and their customer support is trustworthy. Additionally, this tablet is reasonably priced at around 5,000 yen (~$35 USD).
If you’re interested, here’s a link to the product on Amazon for your consideration:
Pen tablets come with pens that typically have two buttons. These buttons can be customized with different functions. My personal settings are as follows:
Button 1: [Your assigned function, e.g., right-click or middle-click]
Button 2: [Your assigned function, e.g., pan or undo]
Although getting used to these settings might take some time, once you’re accustomed to them, you’ll be able to perform all the same operations as you would with a mouse—such as moving objects or editing them—entirely using the pen tablet.
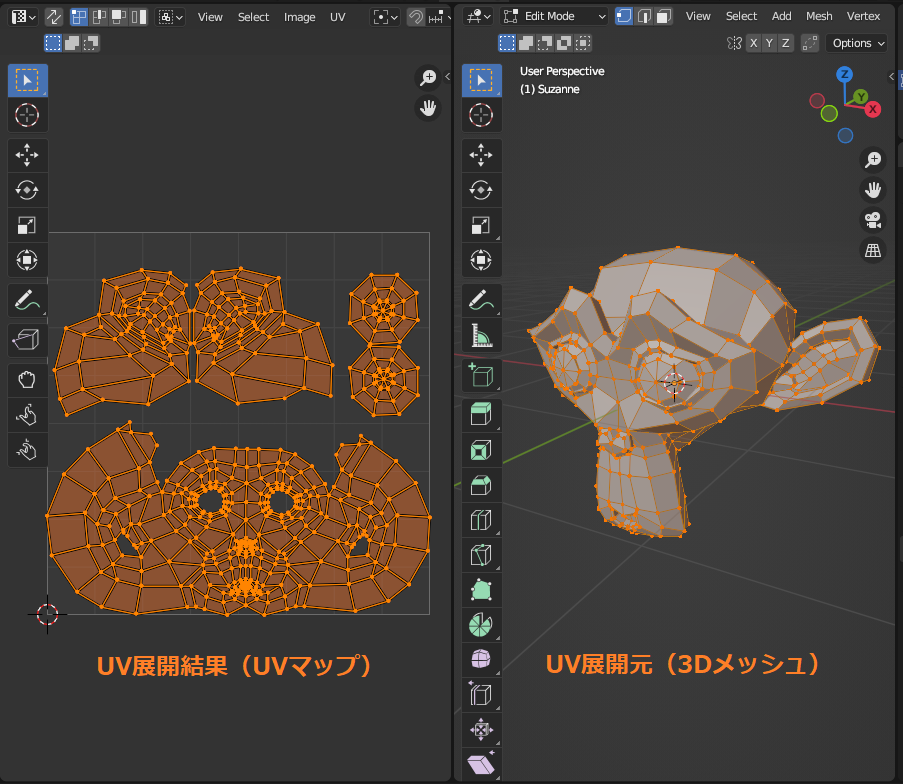
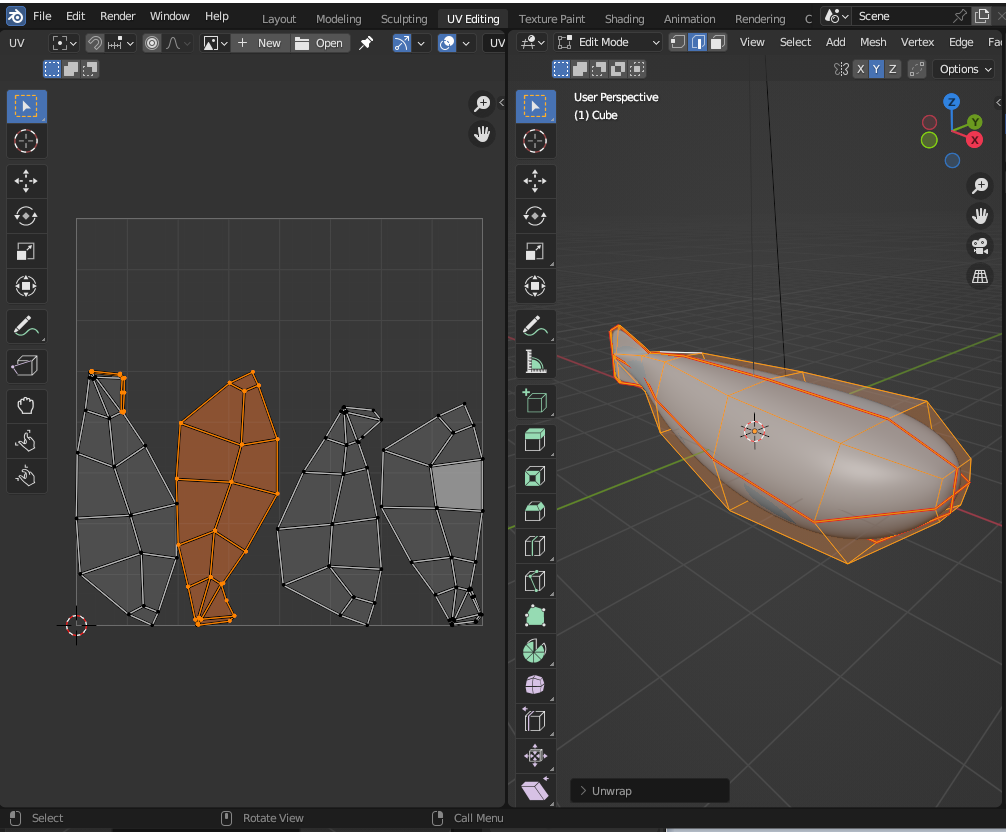
How to Texture Paint
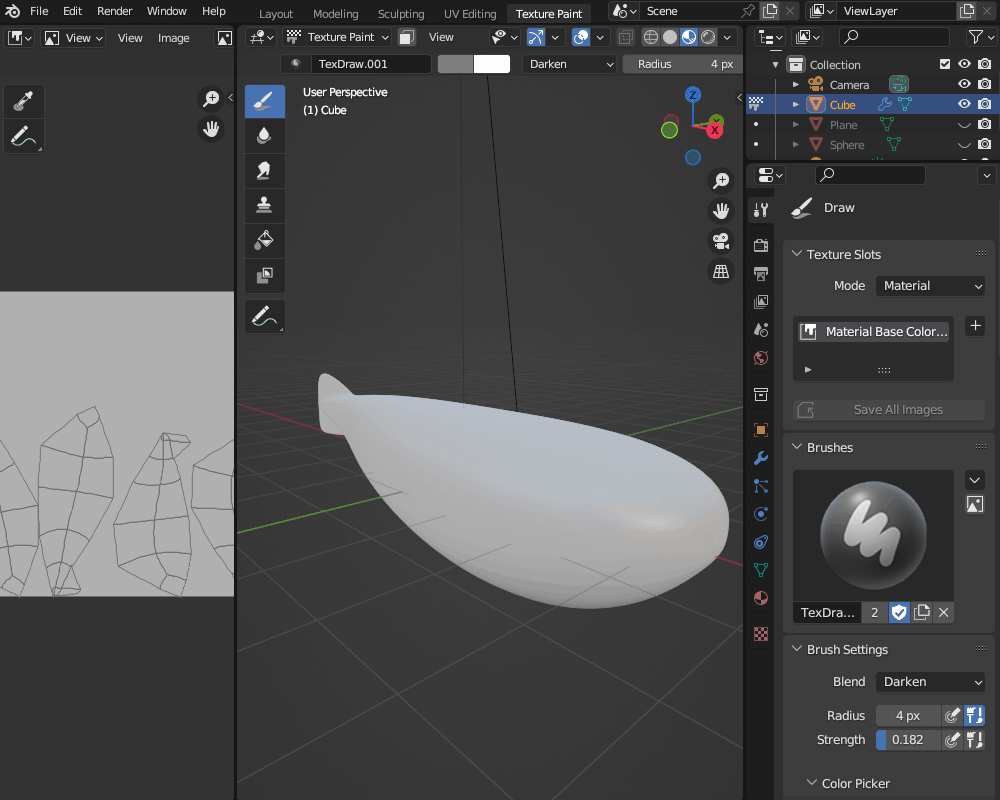
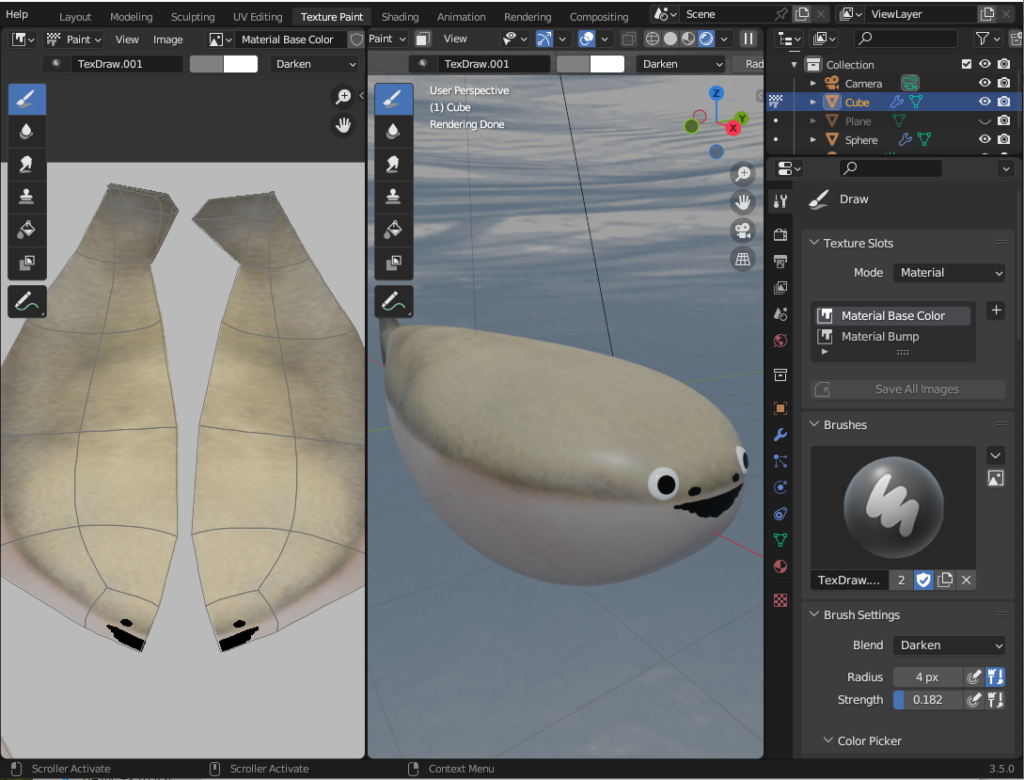
Switch to the Texture Paint workspace, then go to Active Tool and Workspace Settings to add a paint slot (Base Color).
Once the texture is added, the paint results will reflect on the body color of the model.
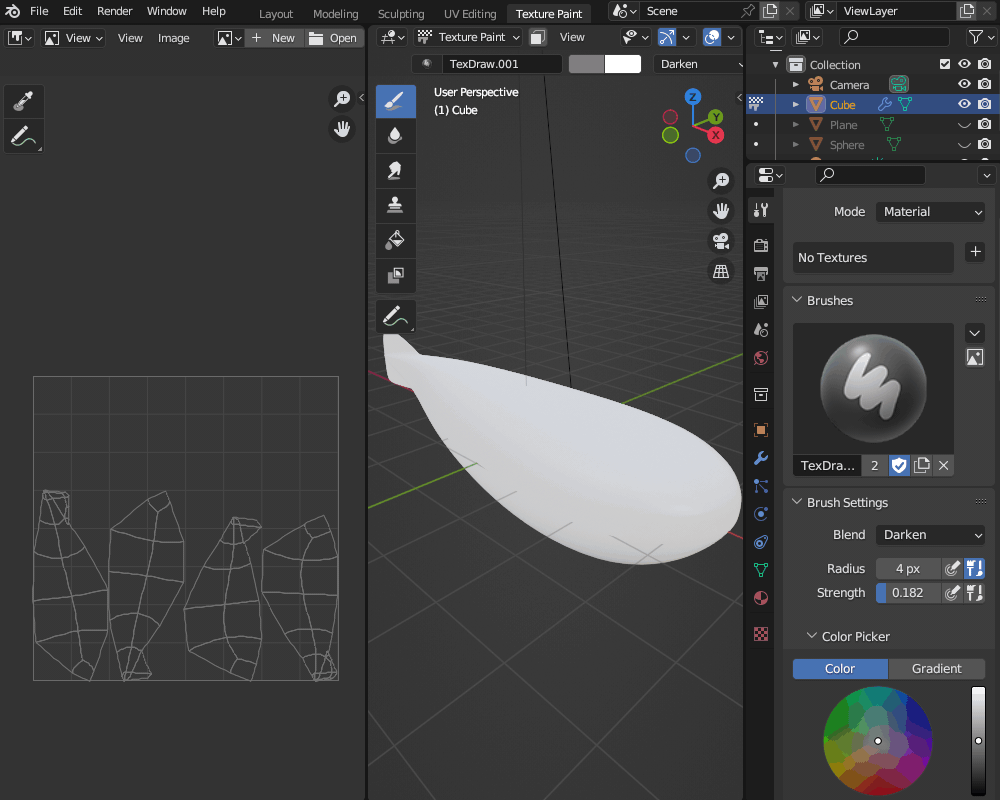
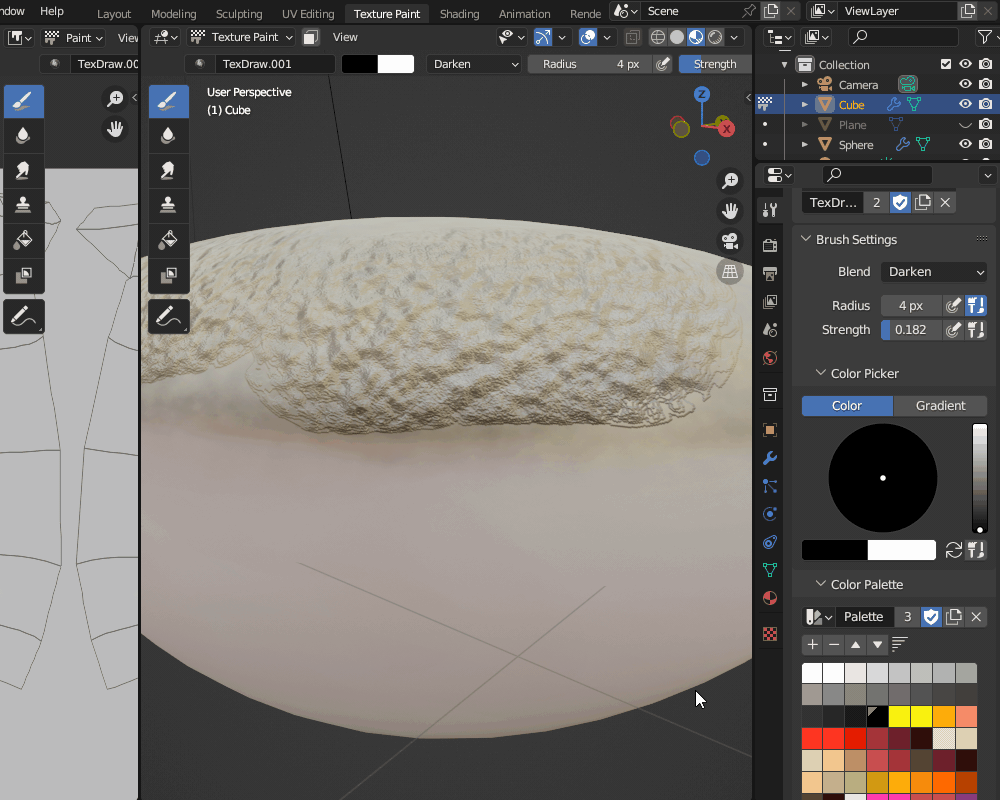
Using reference images, start painting the colors. In this case, I used a texture brush for painting.
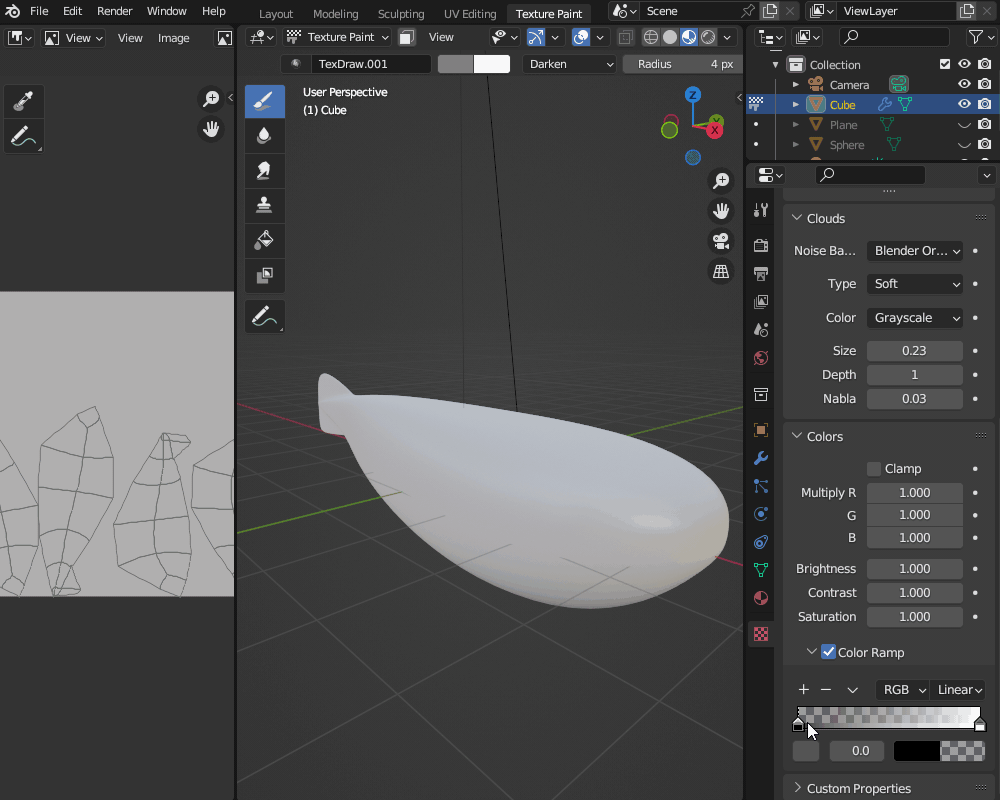
From the brush settings, add a texture and select Clouds in the texture properties.
By adjusting the texture colors and brush colors, you can create a realistic mottled appearance, as shown here.
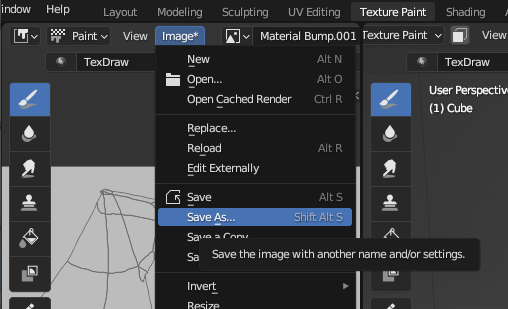
To prevent data loss, I recommend frequently saving your painted results as an image file.
Since colors can appear slightly different between the Material View and Render View, it’s a good idea to check the render view with proper lighting while working.
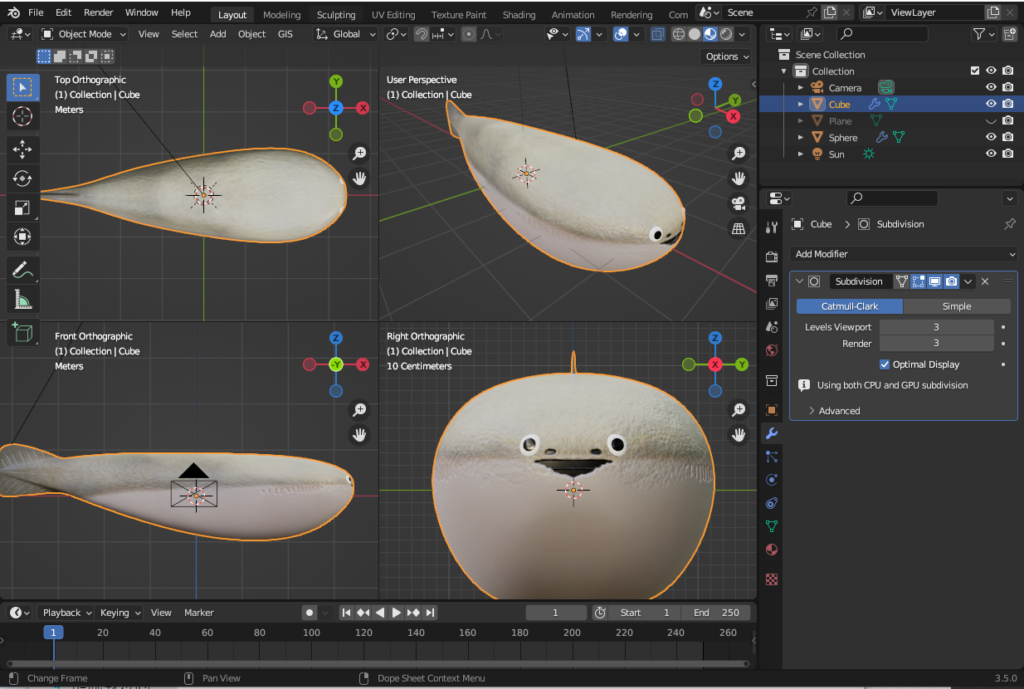
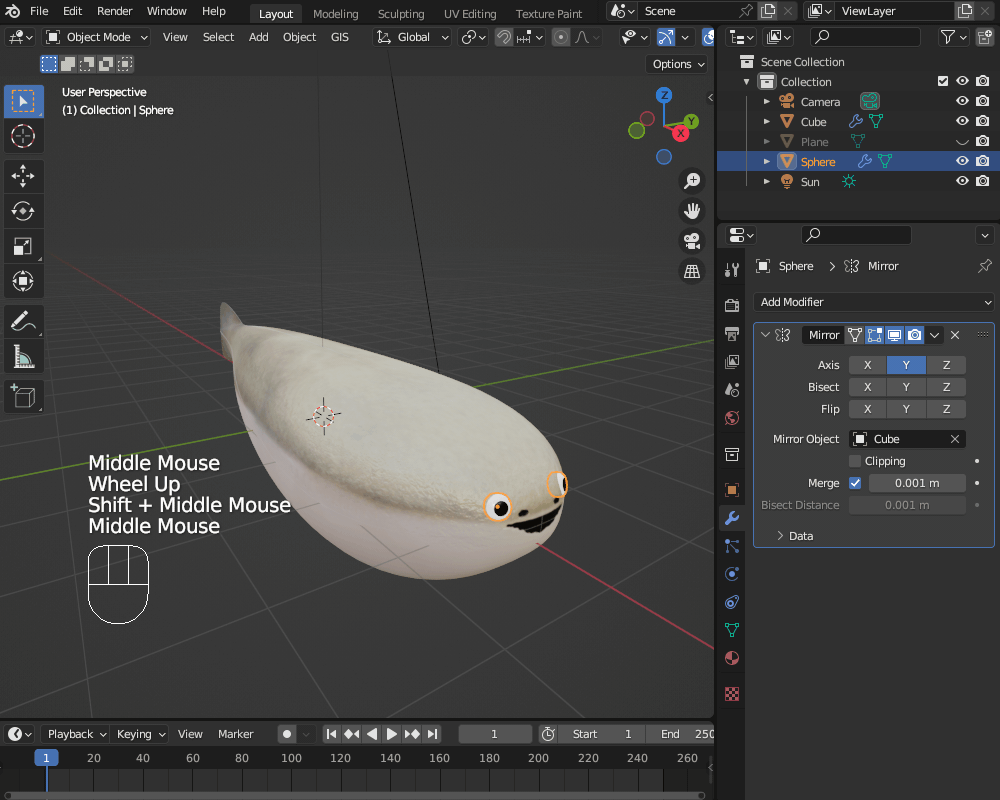
Here’s the final Base Color, as shown below (the eyes were created using UV spheres and a Mirror Modifier).
Adding Bumps with Texture Paint
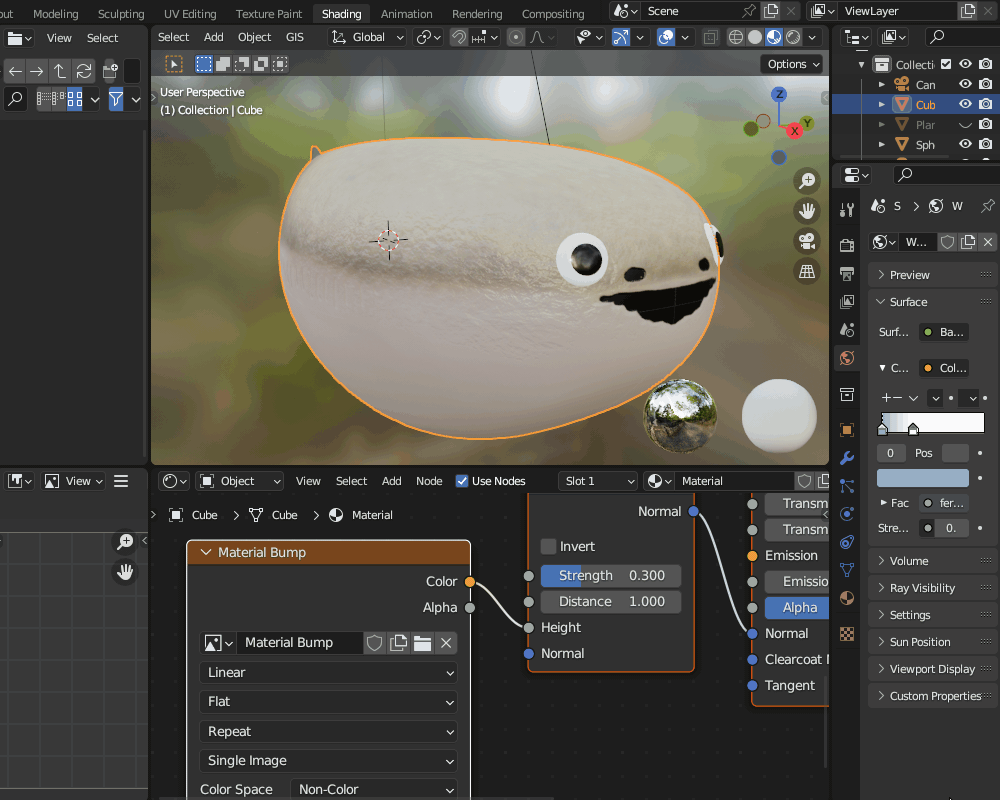
Texture painting can also be used to add bumps for surface detailing.
To do this, add a new paint slot and select Bump.
Once the bump map is added, you can use the brush to create surface relief effects.
I used this method to indent areas like the gills, nose, and mouth.
The bump intensity can be adjusted in the Shader Editor.
Here’s the final result after applying the bumps.
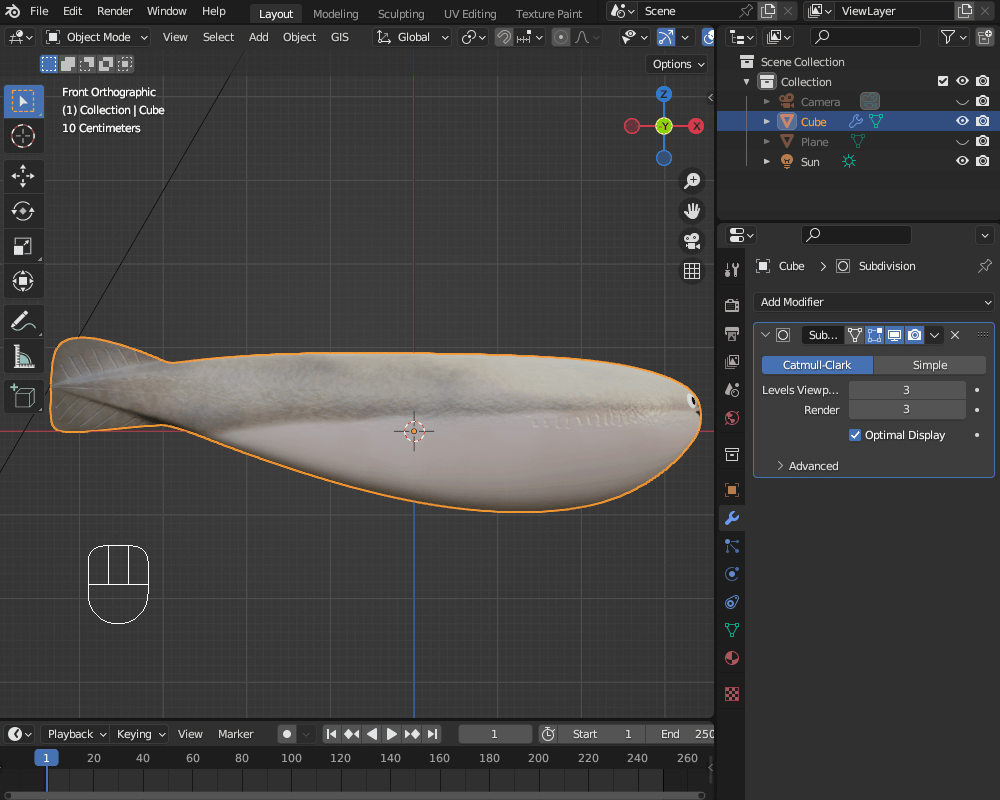
With this step, the modeling and coloring are complete.
Since I don’t plan to animate the eyes, I applied the Mirror Modifier to the eye objects and combined them with the body object using Ctrl+J.
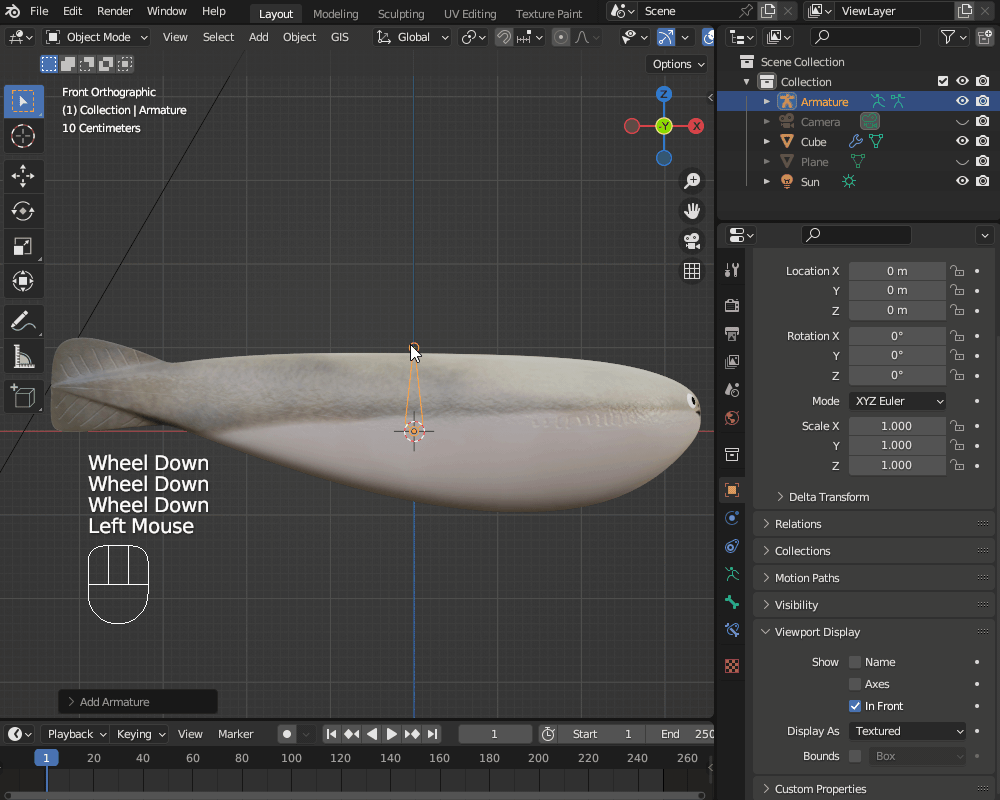
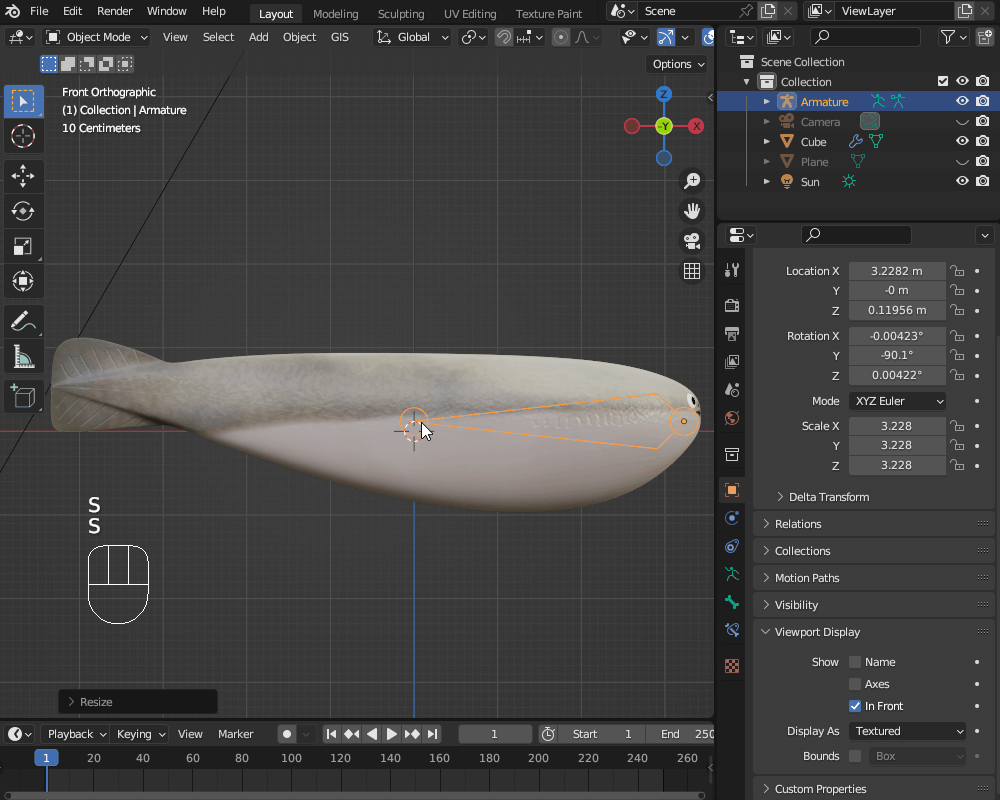
Rigging
To animate the model, we will add the skeleton structure, called an Armature, and apply the IK constraint (rigging).
For more details on the rigging process, you can refer to this previous article I wrote. Please feel free to check it out.
Start by adding a single bone. In Viewport Display, set it to In Front so that the bone is always visible.
2. Positioning the Bone
Place the single bone from the head toward the center of the body.
3. Extruding More Bones
Switch to Edit Mode (Tab key), and use the E key to extrude the bone towards the tail.
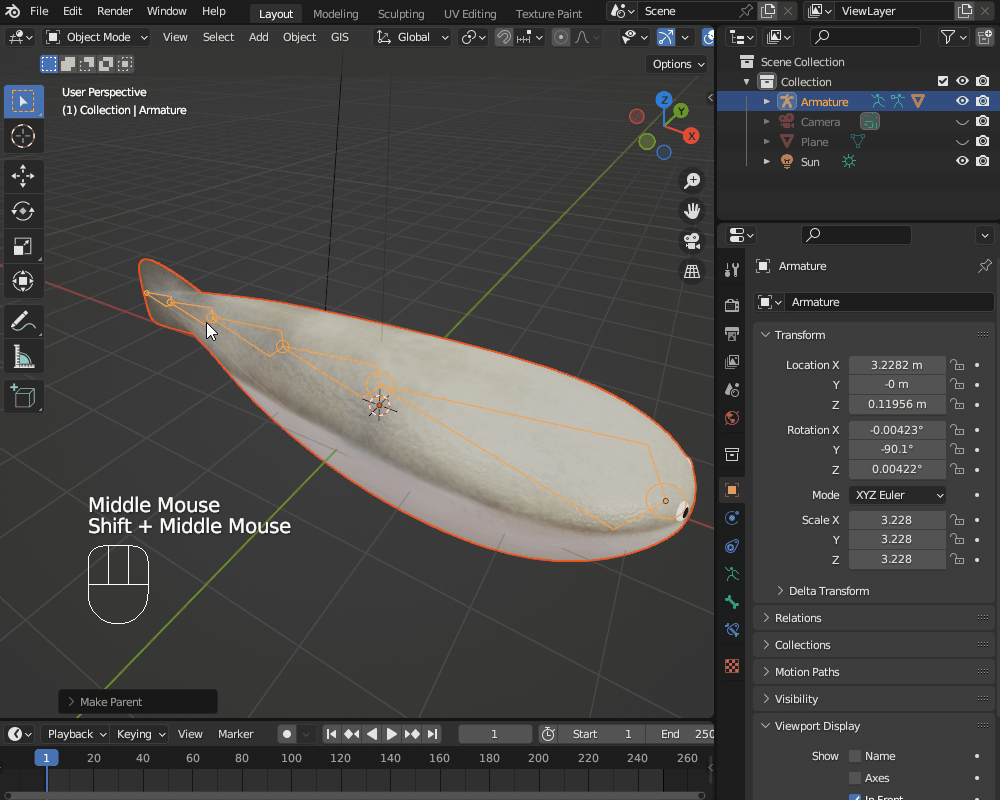
4. Parenting the Armature to the Mesh
Switch to Object Mode. Select the mesh object first, then select the armature while holding Shift.
Press Ctrl+P, then choose Armature Deform, and select With Automatic Weights. This links the mesh to the armature.
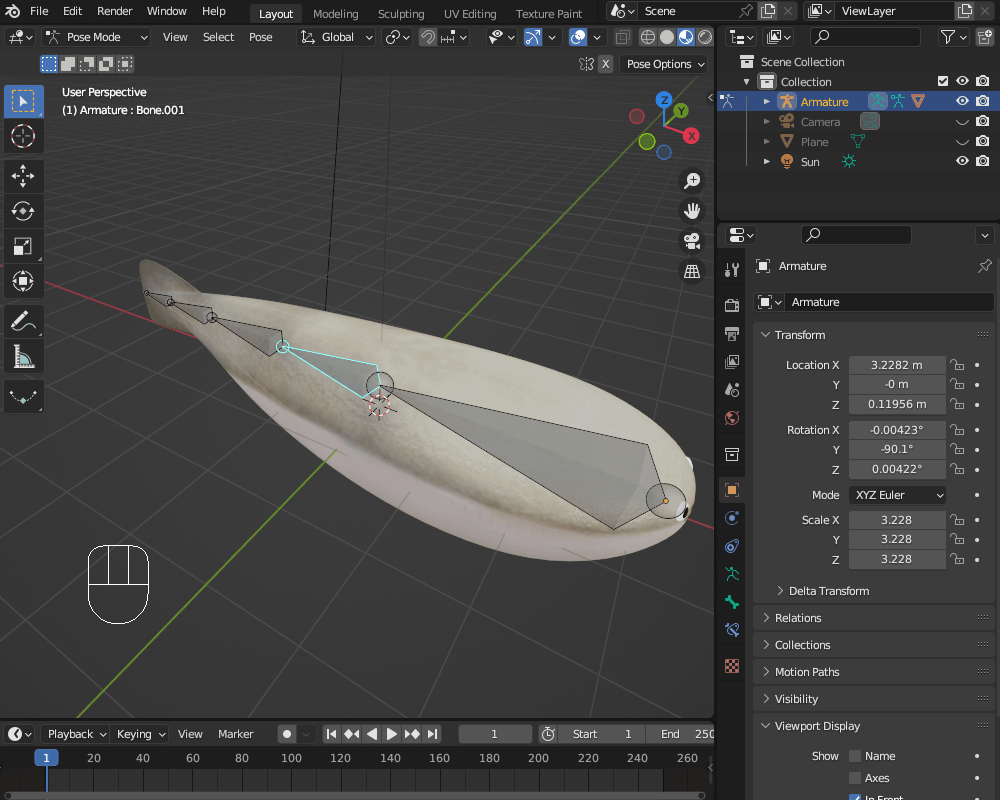
In Pose Mode, moving the bones will make the tail move along with it.
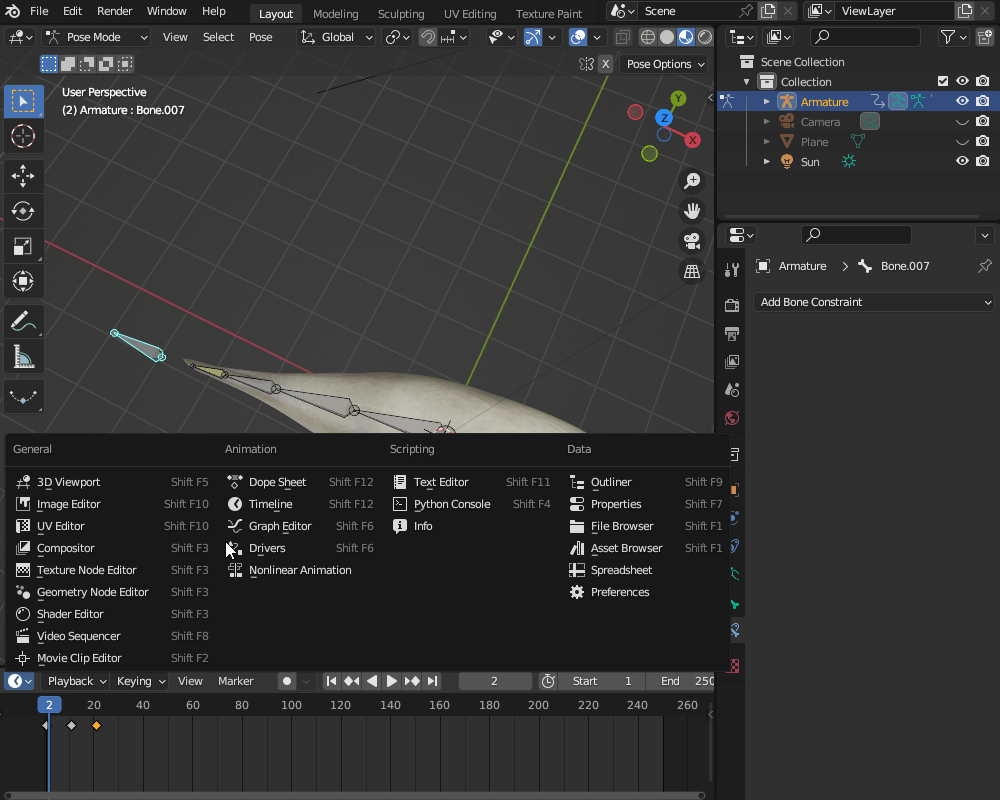
Adding an IK Constraint
1. Creating an IK Control Bone
In Edit Mode, extrude a new bone using the E key, then separate it with the Y key.
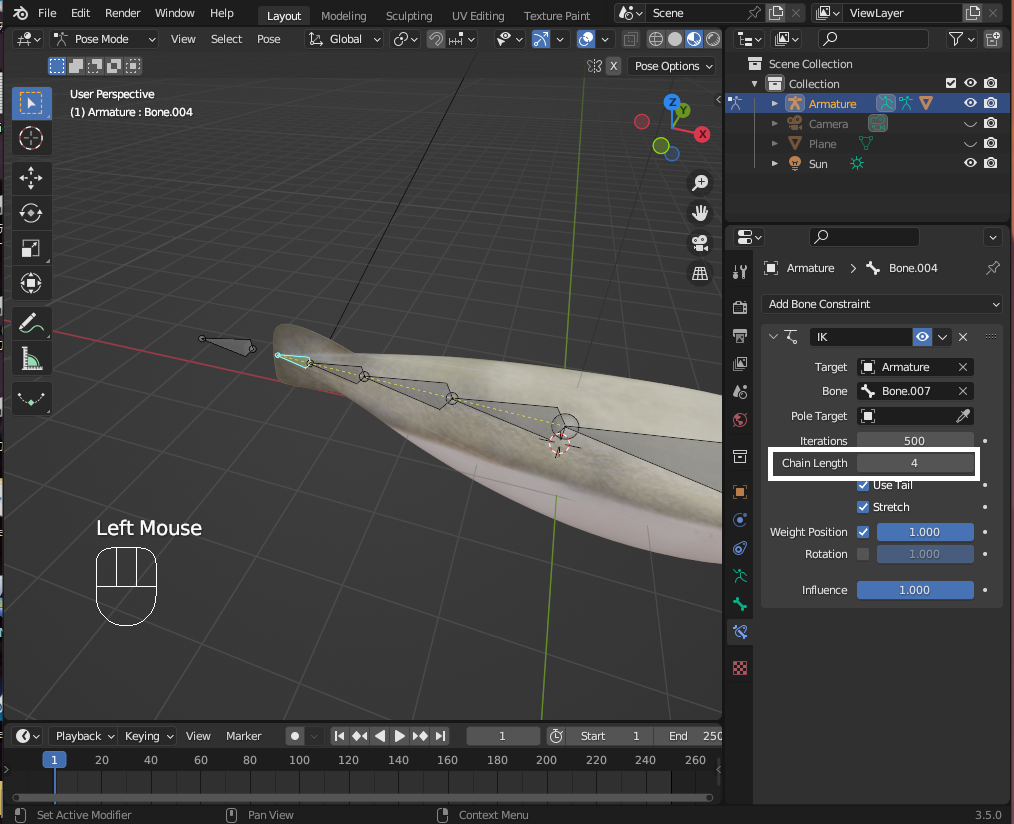
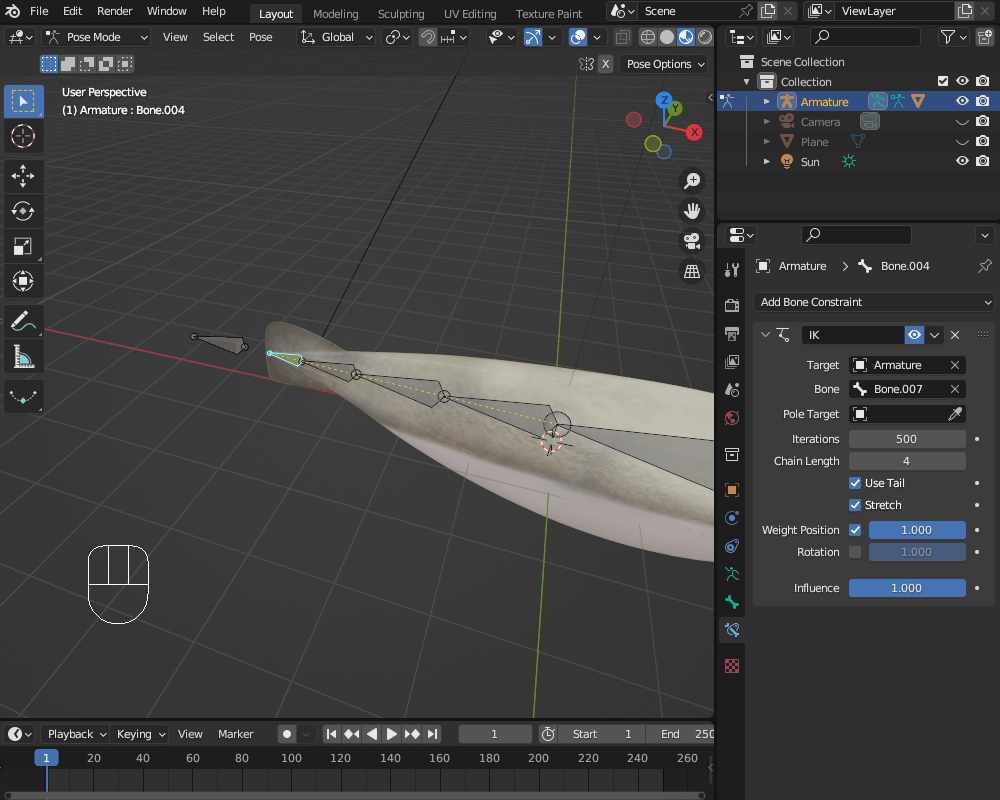
2. Setting the IK Constraint
Switch to Pose Mode (Ctrl+Tab). Select the bone at the tip of the tail, add an IK Constraint, and set the target to the separated bone.
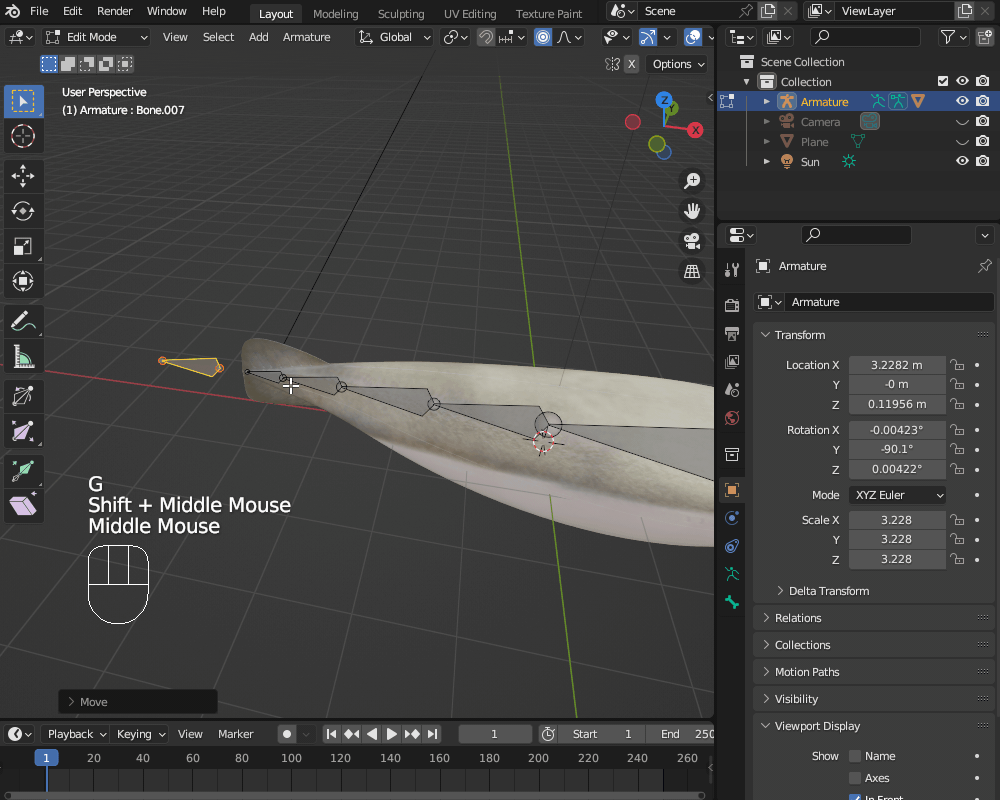
3. Configuring the IK Chain Length
Set the Chain Length to 4, which will apply the IK to all bones from the tip to the base of the armature.
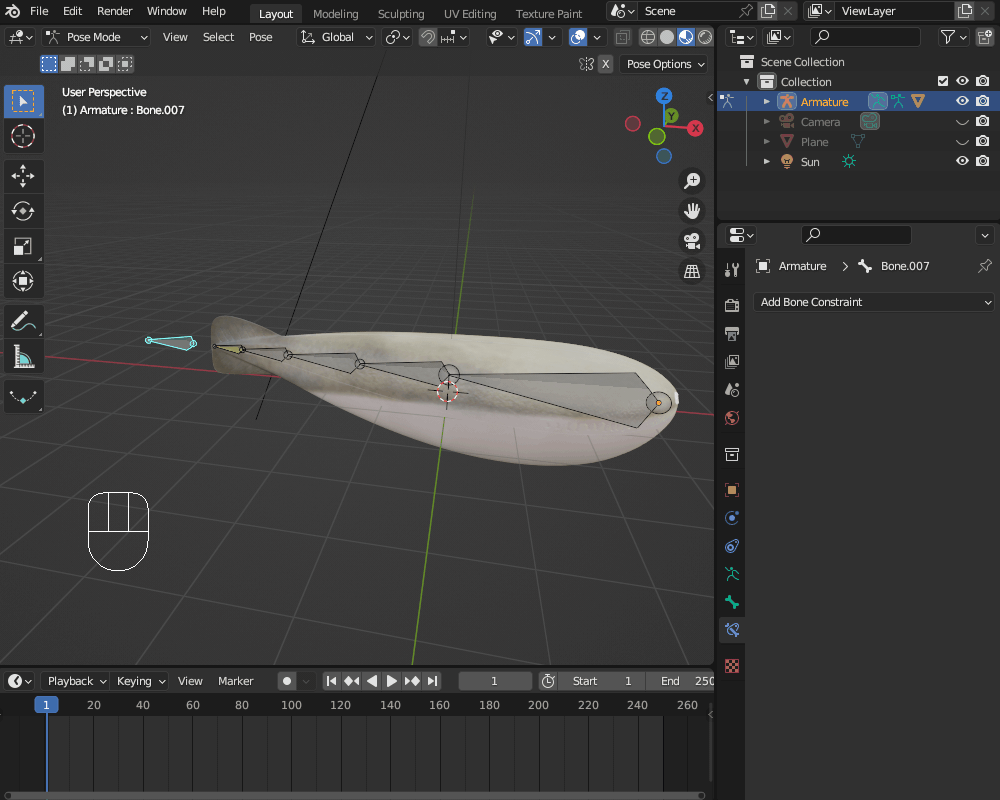
Now, by moving the separated IK control bone, the tail will move in response.
With this setup, the rigging is complete. The armature is fully functional, and the tail can be animated easily using the IK system.
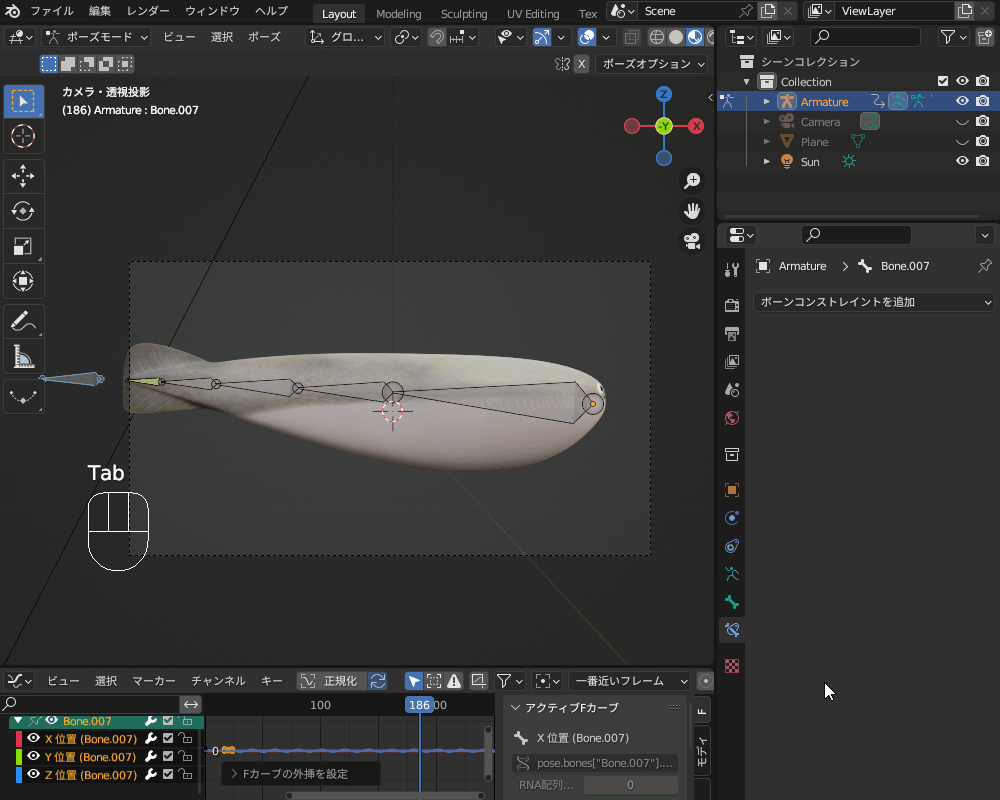
Keyframe Animation
We will add keyframes to the bones and create an animation where the fins move left and right.
1. Setting the Initial Position
Set the timeline to frame 1 and move the IK target bone in the Y direction.
Press I and select Location to add a keyframe at the bone’s position.
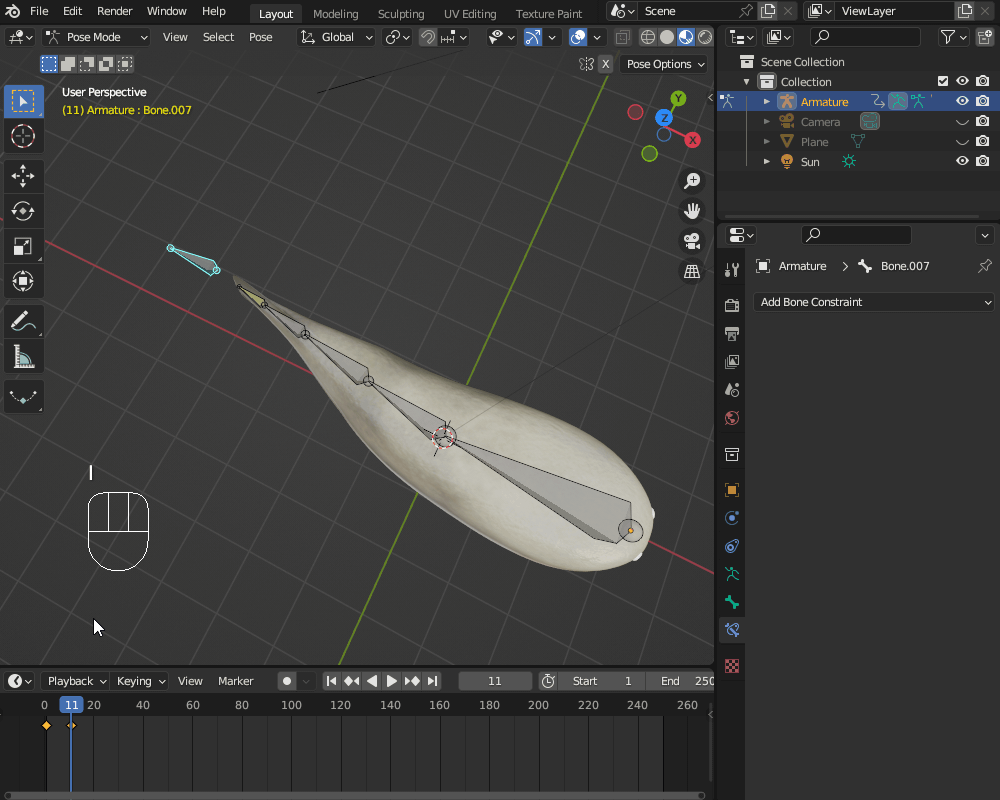
2. Adding the Second Keyframe
Move the timeline cursor to frame 11, then move the IK target bone in the opposite direction and add another keyframe.
3. Duplicating Keyframes
Select the keyframe at frame 1, then press Shift+D to duplicate it and place it at frame 21.
When you slide the timeline cursor from frame 1 to frame 21, you will see the fins move left and right.
4. Creating a Looping Animation
Switch to the Graph Editor from the timeline, right-click on the left side of the screen, then choose Extrapolation Mode → Make Cyclic.
Press Spacebar to play the animation, and the fins will continue to move back and forth.
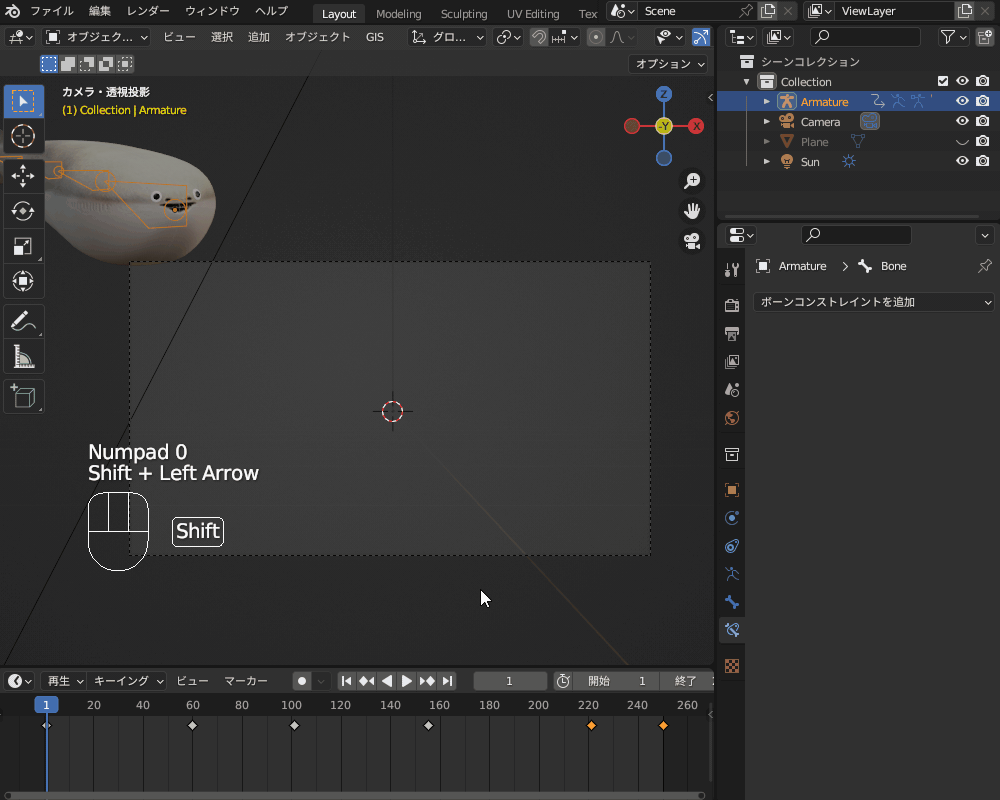
Adding Keyframes for the Whole Body Movement
To represent the movement of the entire body, switch to Object Mode, then add keyframes for the Location and Rotation of the entire armature.
By adding several keyframes, you can create an animation of the Sacabambaspis swimming by.
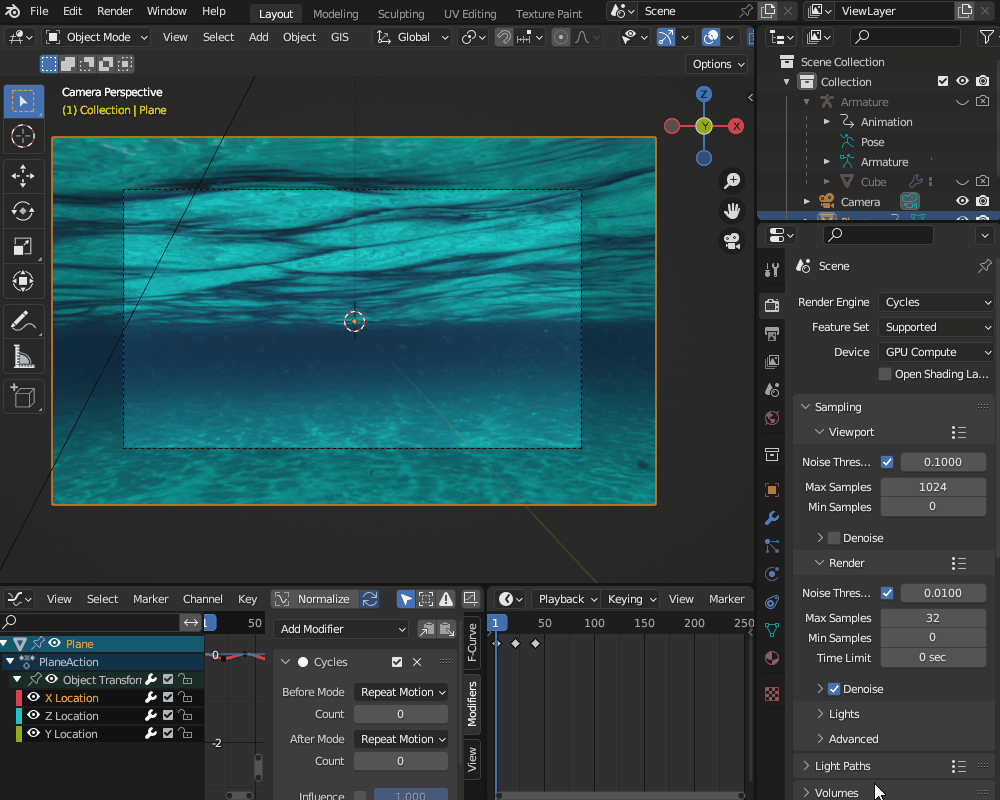
5. Animating the Background
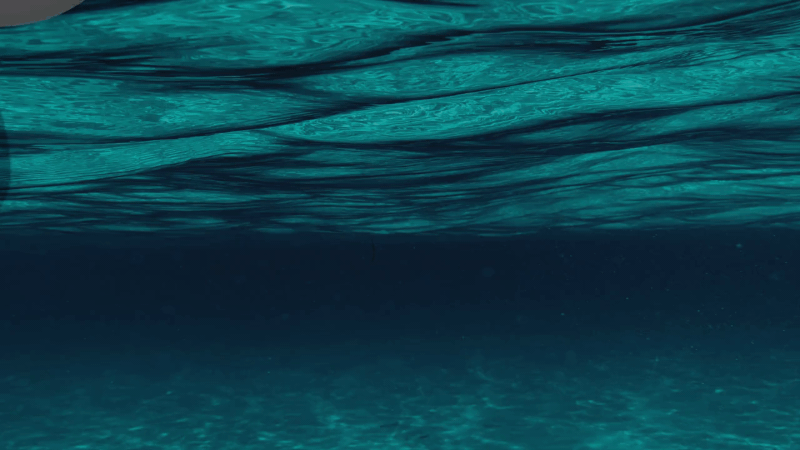
For the background, I used a still image. To simulate water movement, I also animated the background image slightly.
Rendering
We will set up the lighting.
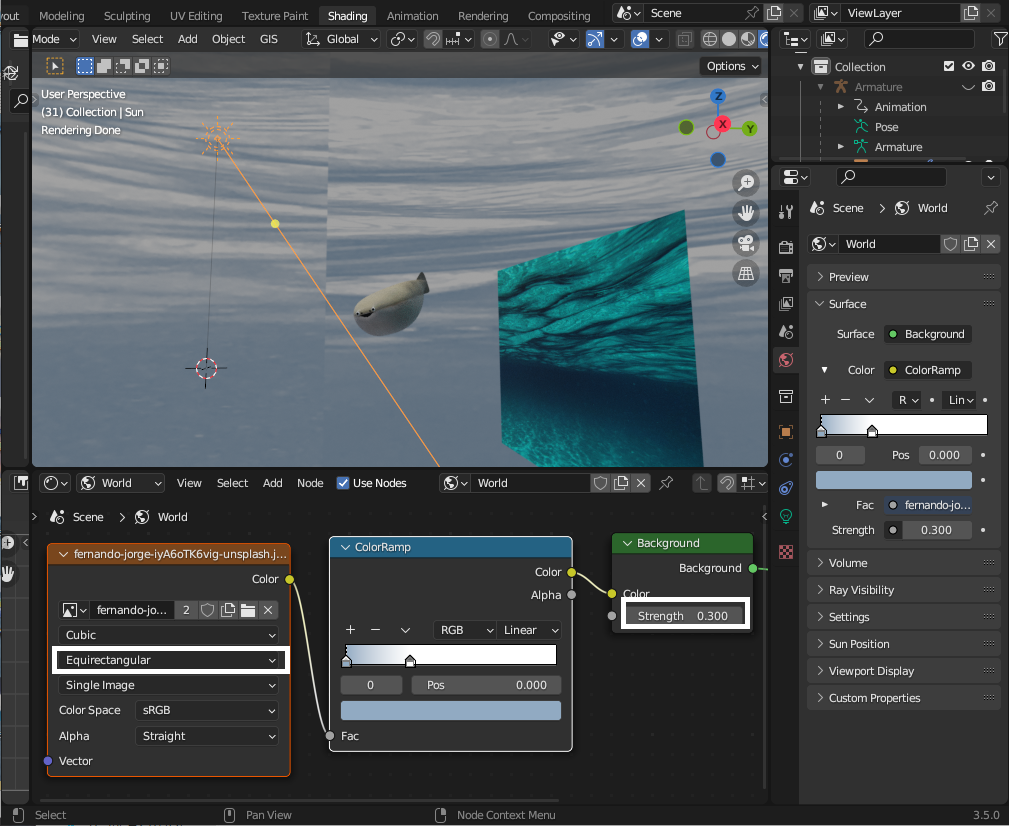
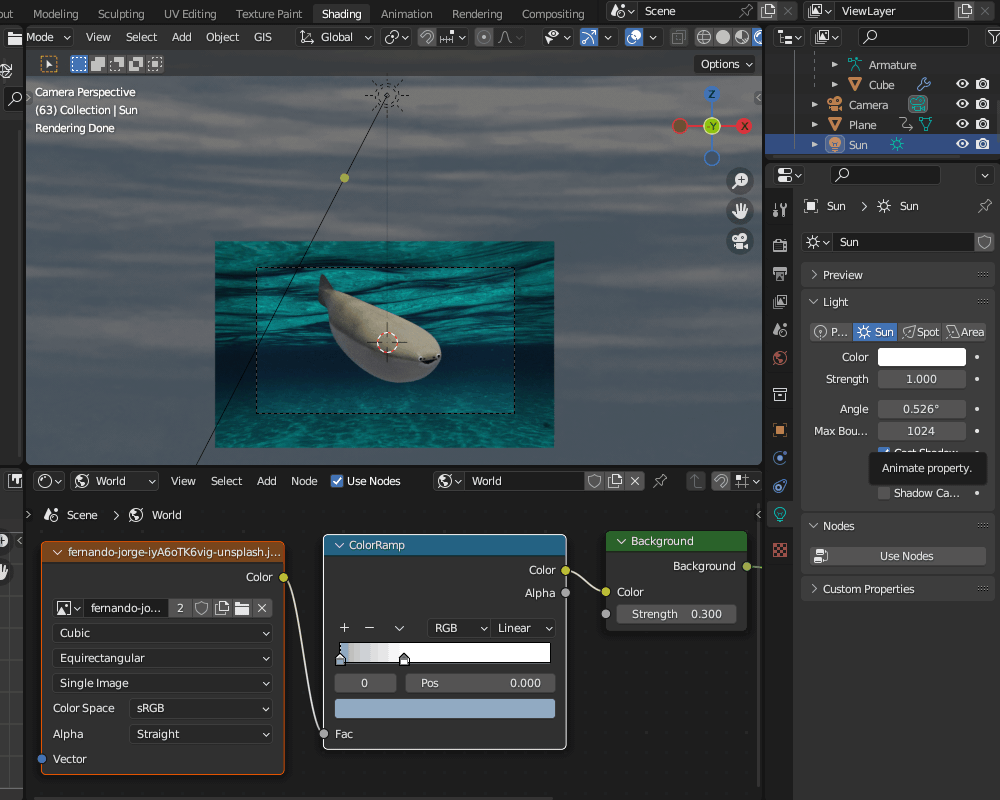
For the world background, I set the same image as the background image and selected the projection method as Equirectangular.
Since the light intensity was too high and made the object appear too blue, I reduced it to 0.3 for a more subtle effect.
To ensure highlights are visible on the object, I used sunlight for lighting.
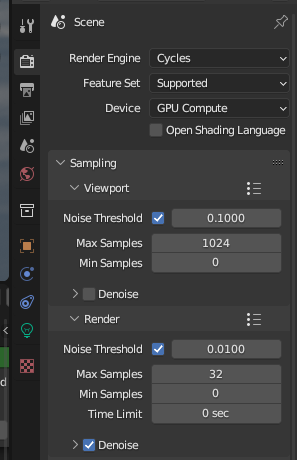
Rendering Settings
Here are the rendering settings. To keep the rendering lightweight, I set the sample count to 32, which is a lower number, but since denoising is applied, noise is not noticeable.
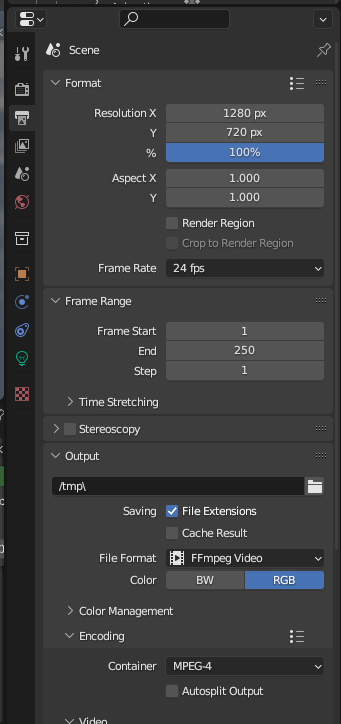
The scene properties settings are as follows:
Finally, I pressed Ctrl+F12 to output the final video.
The rendered result is saved as an MP4 file in the C:\tmp folder.
AD
Conclusion
This time, I briefly introduced how to make the currently popular “Sacabambaspis" (an ancient fish) model.
It’s easy to create, so I encourage everyone to try modeling the Sacabambaspis and get some relaxation from its smiling face! 😊


