[Blender 2.9] Creating an Animation of ‘Clouds Viewed from an Airplane’
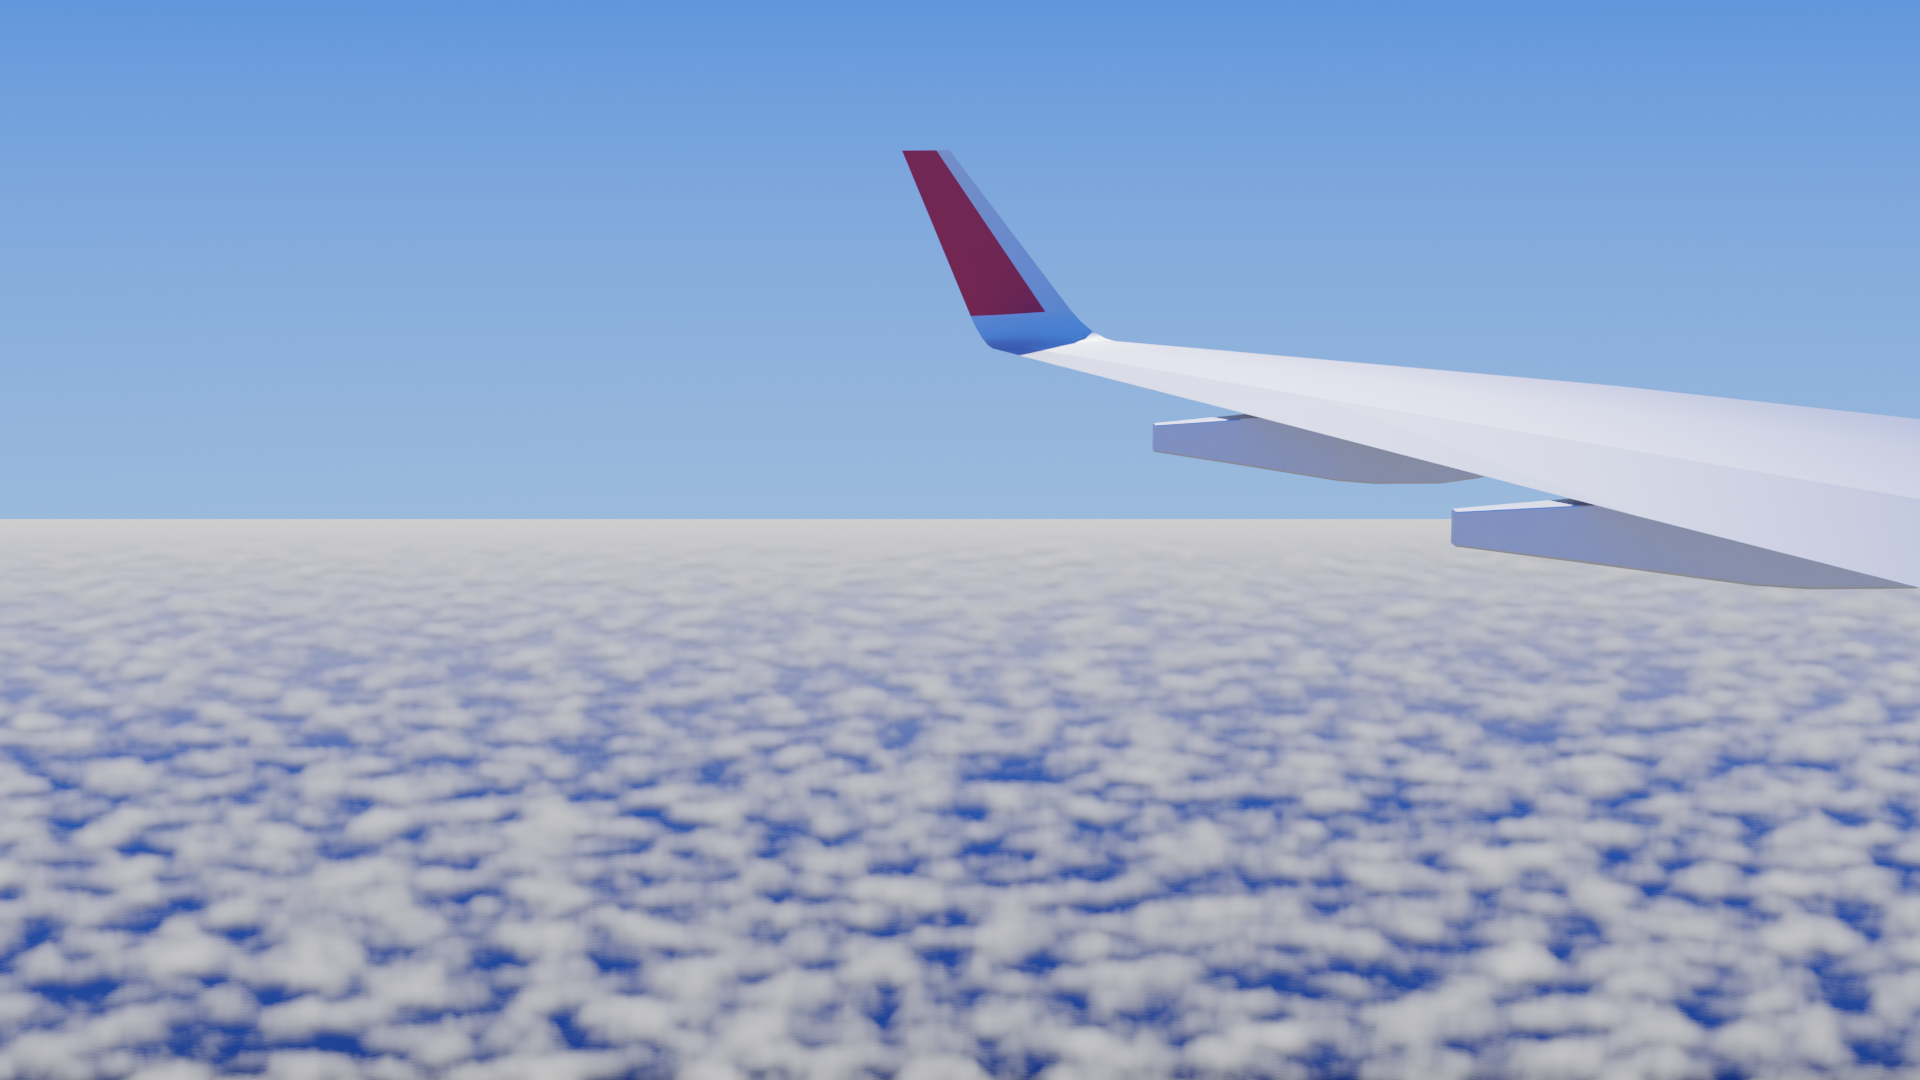
Here’s an explanation of the “Clouds Viewed from an Airplane” animation I created on February 20, 2021.
This project was inspired by ML/Ch’s tutorial video on “Flat Clouds.”
Below, I’ll share the process, challenges, and key points of creating this animation.
If you have any questions or feedback, feel free to reach out to me on Twitter: @klala_lab 😊
AD
Concept Behind the Work
After watching ML/Ch’s tutorial video on “Flat Clouds,” I was inspired to create a landscape that stretches endlessly into the horizon.
Additionally, I wanted to capture the perspective of looking down at the clouds from above.✈️
Techniques Used
- Noise Texture: Used to generate the cloud patterns.
- Transparent BSDF: Applied for creating realistic transparency effects in the clouds.
- Shader Mix: Combined different shaders to achieve a natural cloud appearance.
- Keyframe Addition: Animated the movement of clouds by adding keyframes.
- Graph Editor: Adjusted and fine-tuned the animation curves for smoother transitions.
Creation Process
Here is an explanation of each element: Sky, Clouds, Wings, Lighting, and Animation.
Sky
Before creating the clouds, I first prepared the background sky.
I used assets provided in a tutorial video by Lara Pastel (link below):
🙇♂️ Thank you for the resources!
(This video is also highly informative—please check it out!)
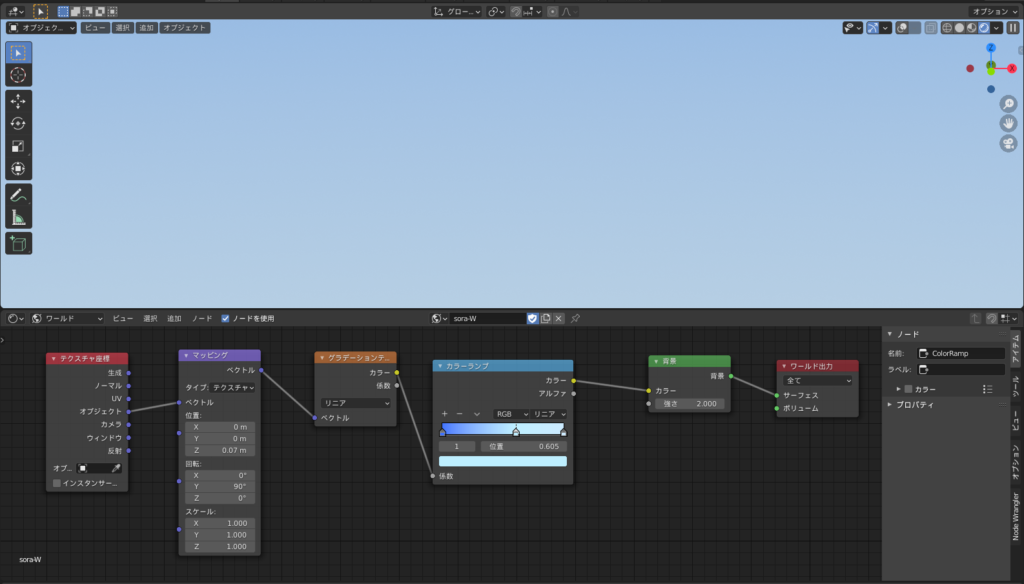
After downloading “Sora-W" from the description section of the video, follow these steps to apply it as the background:
- Go to File → Append and locate the downloaded file.
- Inside the file, select “World" and click Append.
- In the World Properties tab, choose Sora-W as the world.
To adjust the colors, gradients, or other elements, follow these steps:
- Open the Shader Editor.
- Change the mode from Object to World.
- Modify the values in Color Ramp and Mapping nodes to adjust the colors, gradients, and horizon position.
Now the sky background is ready! 😄
Clouds
Now, onto the main feature! 🍽️
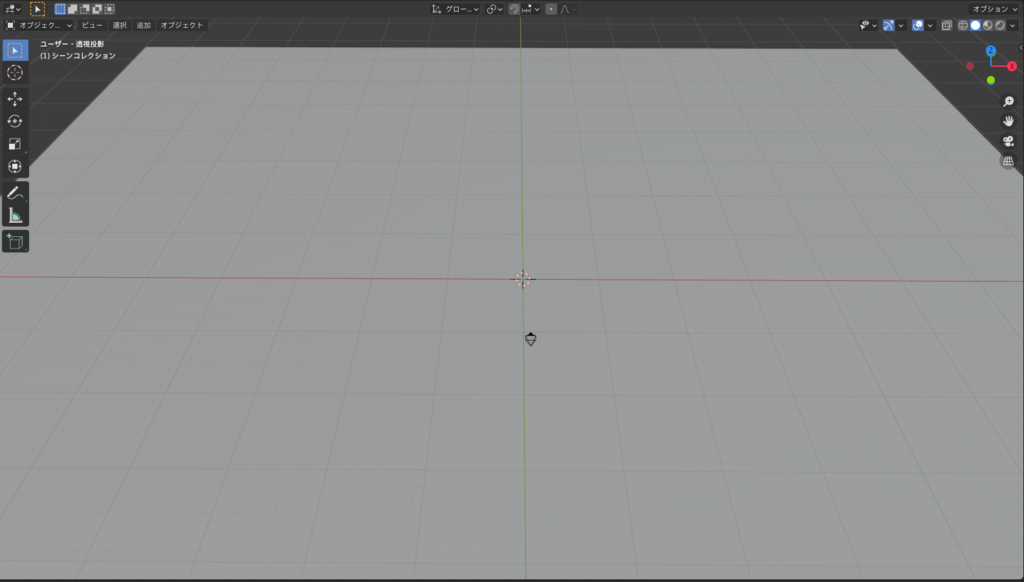
Add a Plane Mesh Object:
Start by adding a plane mesh object to serve as the base for the clouds.
Scale Up the Plane:
To create a vast, expansive sky, scale the plane significantly. In this case, I made it approximately 200 meters wide and long to convey a sense of open space.
For detailed steps on setting up the cloud material, please refer to the following video:
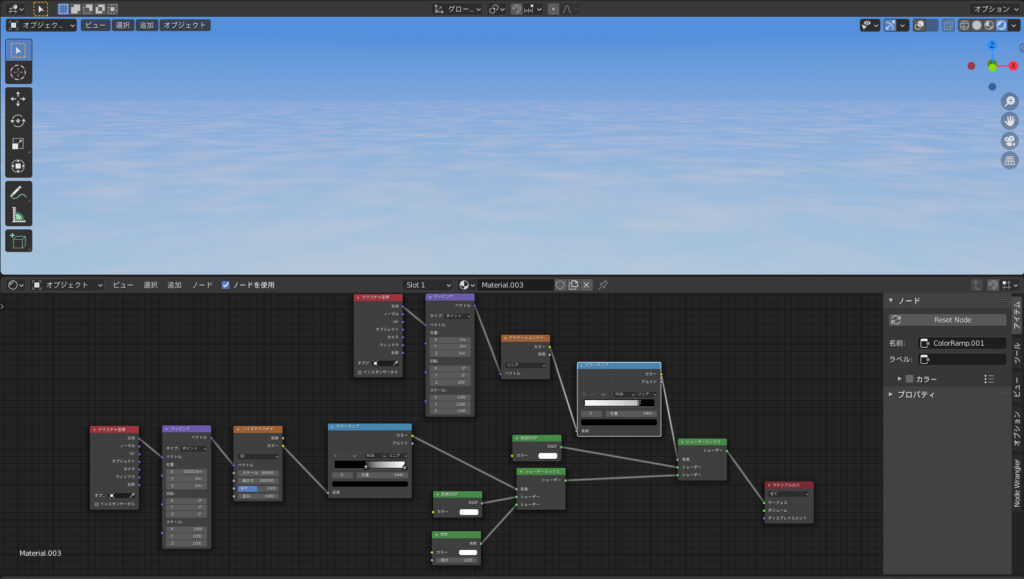
Here’s a summary of the steps. While it might seem a bit complex for beginners, following the video step by step should help you achieve the desired result 😅:
- Create a New Material
- Use either “Principled BSDF" or “Emission Shader." I chose “Emission" to make the clouds appear brighter.
- Open the Shader Editor
- Add a “Shader Mix" node between the material and the “Material Output" node.
- Add a “Transparent BSDF" Node
- Connect it to the “Shader" input of the Shader Mix node.
- Add a “Noise Texture" Node
- Connect it to the “Factor" input of the Shader Mix node.
- Connect Texture and Adjust
- Link “Texture Coordinate," “Mapping," and “Color Ramp" nodes to the Noise Texture node.
- Adjust the Cloud Pattern
- Modify the “Detail," “Scale," and other properties of the Noise Texture to adjust the size and appearance of the cloud pattern.
- Add Another “Shader Mix" Node
- Place it between the first Shader Mix node and the Material Output node.
- Add Gradient Transparency
- Connect a “Gradient Texture" and a “Color Ramp" to the second Shader Mix node’s “Factor" input. Connect another “Transparent BSDF" node to its “Shader" input.
- Adjust the Gradient
- Link “Texture Coordinate" and “Mapping" nodes to the Gradient Texture node.
- Fine-tune the Gradient
- Adjust the Color Ramp and Mapping values so that the clouds become more transparent as they recede into the distance.
Here’s how the shader setup and the output image look like:
AD
Arrangement
To express the group of clouds floating above the sea, I added the following arrangements:
- Adding a Navy-to-White Gradient
- Layering Clouds to Add Depth
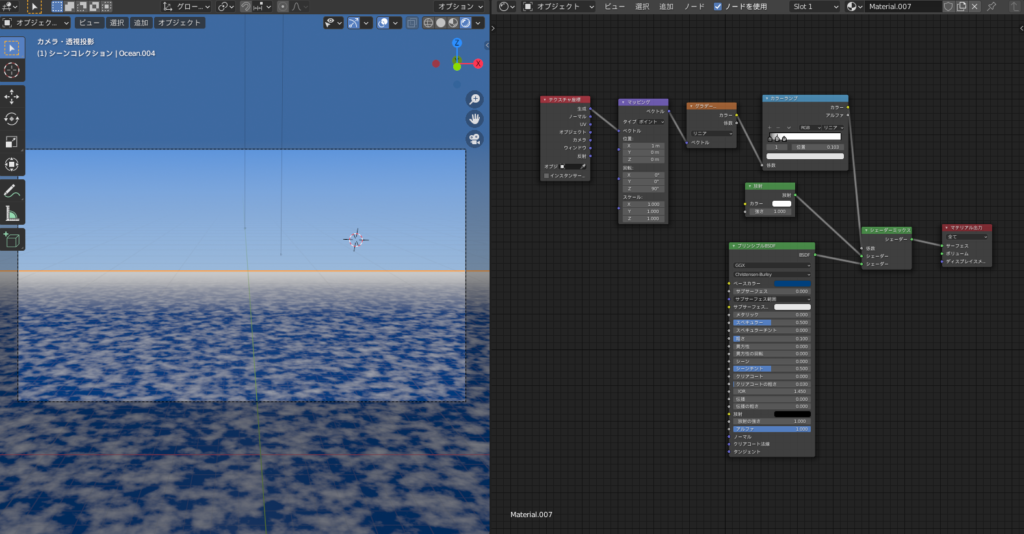
1. Adding a Navy-to-White Gradient
After looking at some photos of cumulus clouds online, I noticed that the clouds in the distance appear blurry and white.
To express this, I added a plane mesh beneath the clouds I created earlier.
Using a Gradient Texture, as shown in the image below, I made the background white, while the foreground represents the sea visible between the clouds, which I made navy blue.
2. Layering Clouds to Add Depth
Since the clouds were flat, I copied the mesh about 7 times and slightly shifted each copy along the Z-axis to create a sense of depth.
I adjusted the Color Ramp values so that the clouds get smaller as they go higher.
Additionally, I tried darkening the bottom clouds to add shading and enhance the 3D effect.
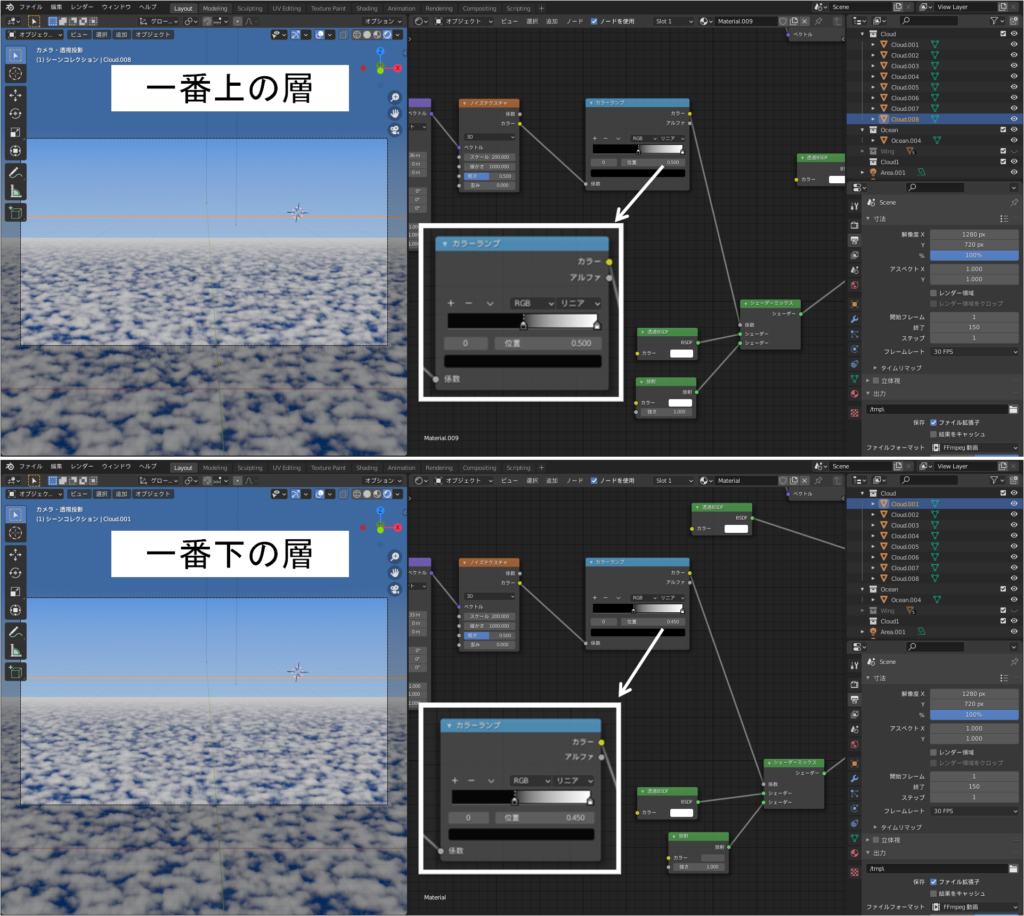
These adjustments helped give a more natural and dynamic look to the clouds, making them appear as if they are floating above the ocean, with the sea peeking through them and the clouds layering to add depth.
Wing
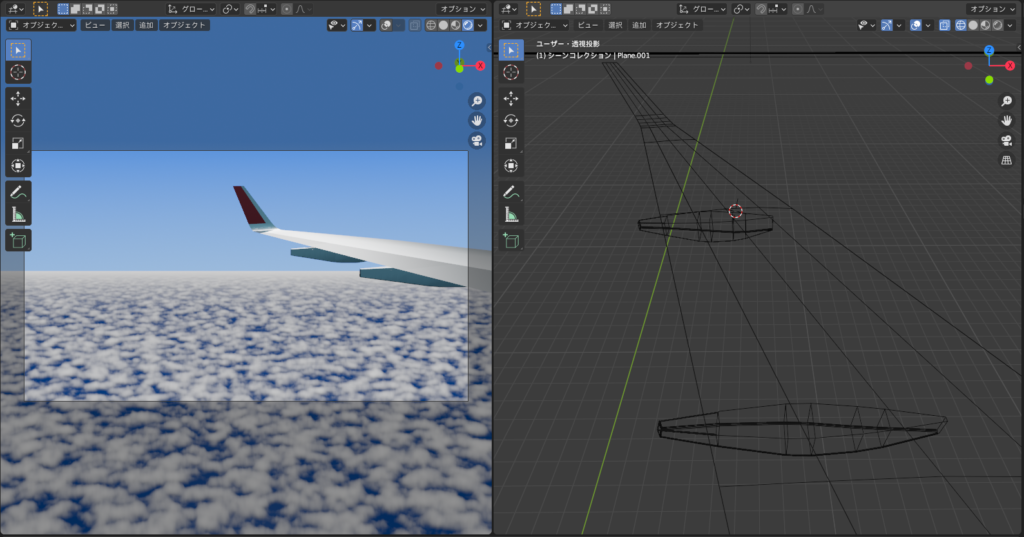
I deformed a plane mesh and added color to create the wing. I also made the box-shaped parts under the wing, such as the “flap, track, and fairing."
For the coloring, I based it on a Japan Airlines (JAL) aircraft.
Lighting
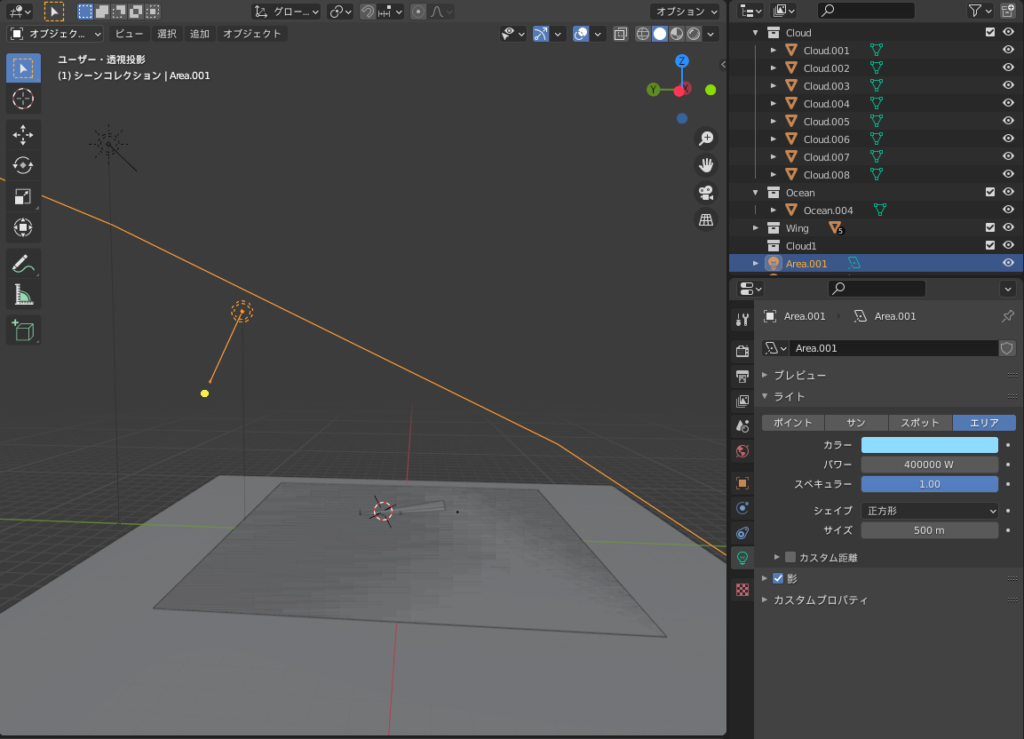
I added a sunlight to illuminate the entire scene and an area light to light up the wing from the front.
(By the way, when I created this, I mistakenly set a very large area light as shown below, but it’s fine as long as the area light covers the wing.)
Animation
I created an animation where the clouds move along with the airplane.
Since the animation runs at 30 frames per second for 4 seconds, it totals 120 frames.
By moving the bar at the bottom of the screen, you can edit any frame you want.
I changed the mapping position values connected to the noise texture every 30 frames and added keyframes using the I key.
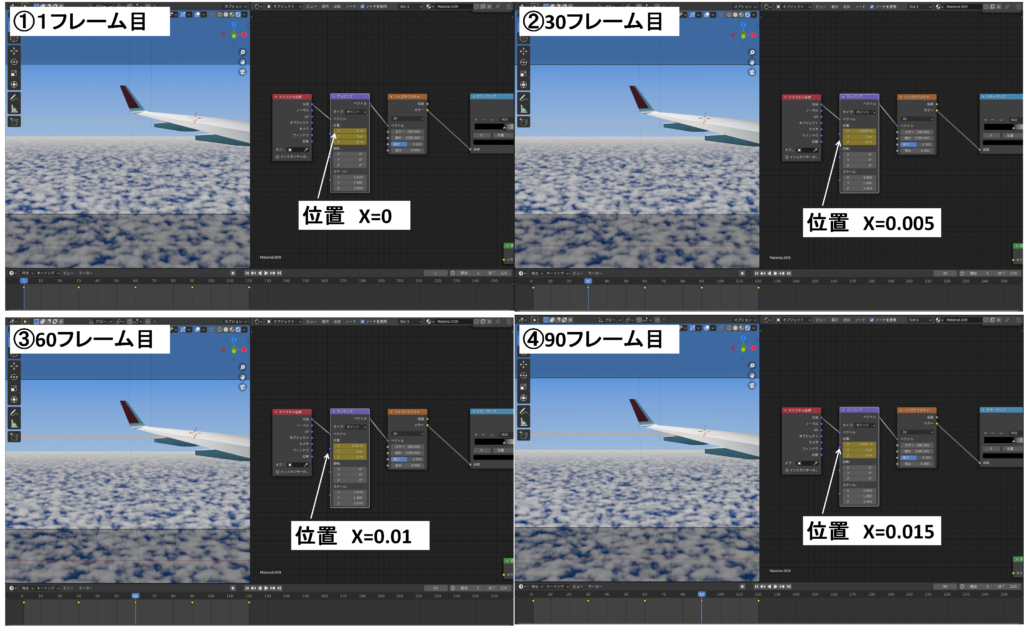
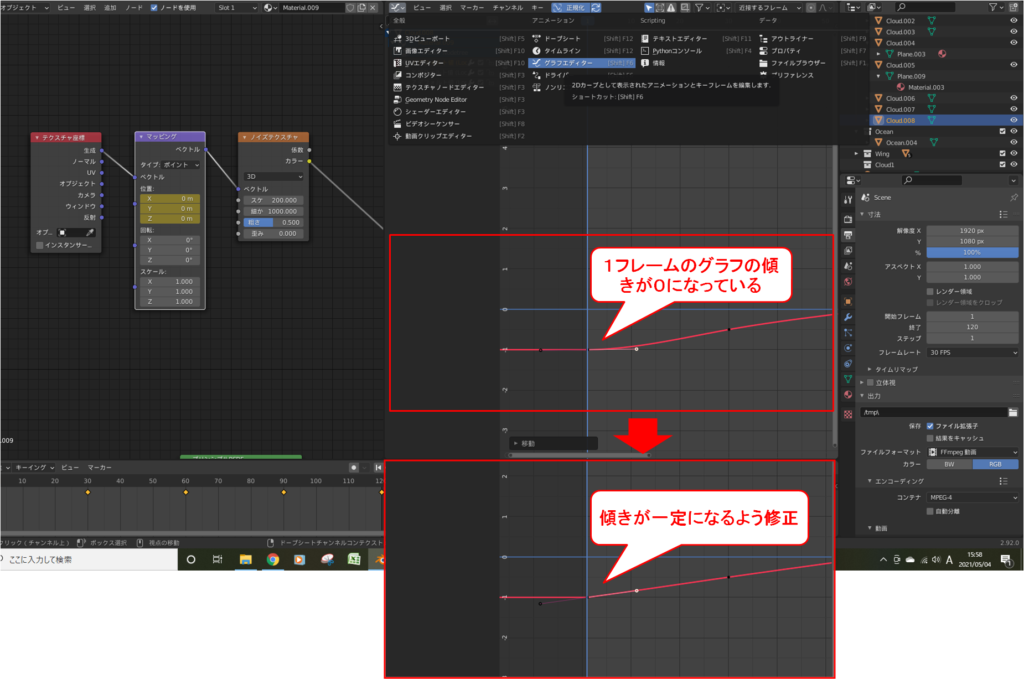
With the initial settings, the animation starts with zero speed and gradually accelerates.
To make the movement appear uniform, I corrected the motion using the Graph Editor, changing the slope of the graph at the 1st and 120th frames so that it forms a straight line.
Here’s the result.
Challenges/Reflections
At first, when I tried to create depth by stacking lots of clouds, the screen ended up turning completely black for some reason (laughs). The number of layers and their distances were the result of trial and error 💦.
Since the clouds created with the noise texture tend to appear blurry, I think I could create a higher-resolution image by modeling the clouds in the foreground as meshes.
Also, since I started modeling practice afterward, the creation of the airplane’s main wing was quite rough 😅.
AD
Conclusion
Creating this project made me realize that I need to improve my modeling skills to add more detail.
Since this is a motif I personally enjoy, once I level up my skills, I’d like to revisit it and give it another go ✈️🌈.
Reference Tutorials
Here are three tutorial videos by ML/Ch that I found helpful 👍⭐⭐⭐:
Blender 2.8 How to Create Blue Skies and Clouds / Flat Clouds Edition
Reference Animation Tutorial:
Blender 2.8 How to Create a Yuru-Chara CG #4 / Animation Edition – Starting 3D CG with Koo-Suke
World Background Tutorial:
Blender 2.8 Rain / Basic Use of Particles / Particle Edition 1 – Starting 3D CG with Koo-Suke
Cloud Creation Article:
Here’s the article on how to create clouds, which I have shared on the blog.
https://klala-lab.net/20210619-cloud
https://klala-lab.net/20210704-cloud
AD
