【Blender 2.92】 Modeling a “Cassette Tape”
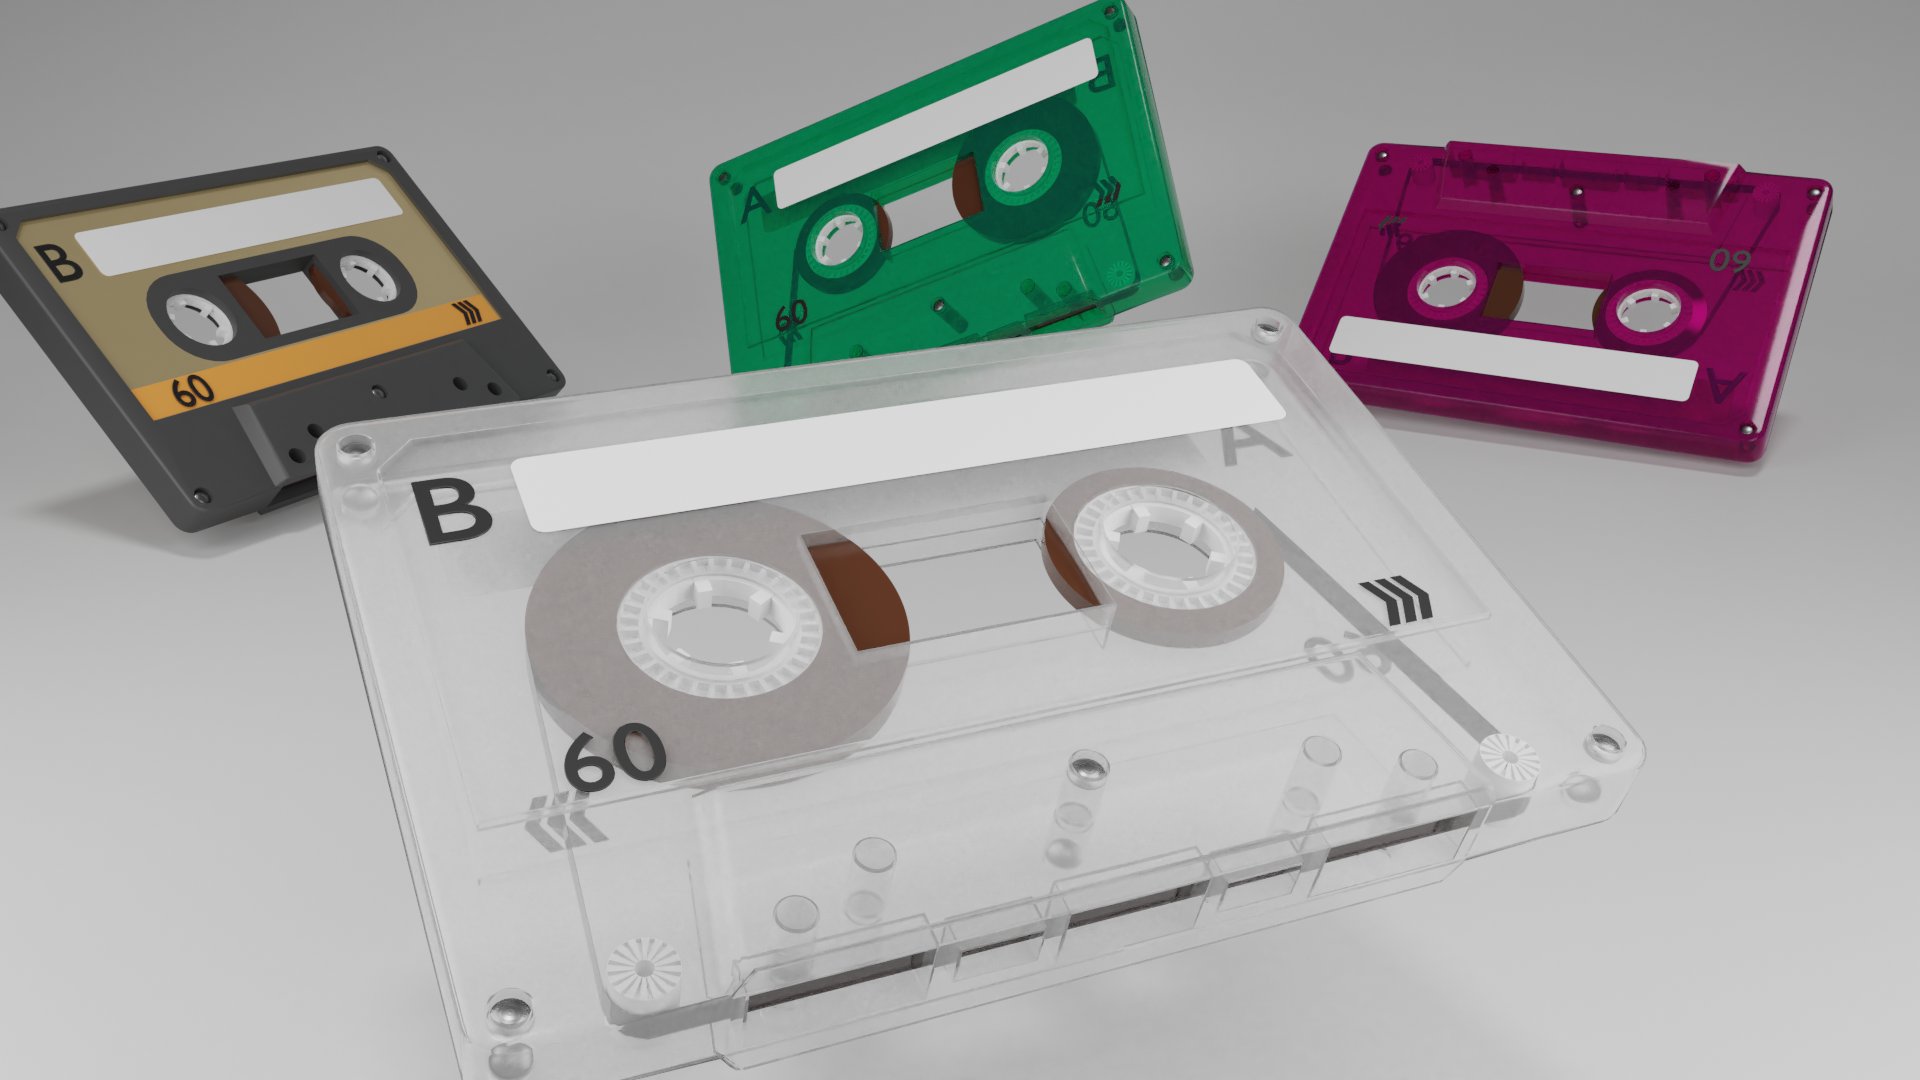
This is an explanation of the “Cassette Tape" I created on May 5th.
I used Boolean, Mirror Modifier, and Knife Projection, and compared to the tutorials I’ve worked on before, it was slightly more challenging 😅
I’ve summarized a brief explanation of the “Cassette Tape," the creation process, and the difficulties I faced.
For any feedback or questions, feel free to reach out to my Twitter (https://twitter.com/klala_lab) 😊
↑で失敗したカセットテープを再トライしました!
— クララ/Klala (@klala_lab) May 5, 2021
Mdesignさんhttps://t.co/LI28RlBY1v
動画を見ながら慎重に作ったので、ブーリアン・ナイフ投影・ミラー問題なしです👍
構造の理解のために、スケルトンも作ってみました😎
が、なぜかEeveeだとテープまで透明に😓#blender #b3d #3dcg #blender初心者 pic.twitter.com/4MmyFRqVLN
AD
Intent behind the project
When I saw the thumbnail for the tutorial video on “Cassette Tape," I thought, “How nostalgic!" and decided to give it a try 😊
Additionally, I added an original element by creating a “skeleton" version of the cassette tape.
By the way, when I was younger, I used to dub CDs borrowed from the library onto cassette tapes (hereafter referred to as “cassettes") and listen to them. Over time, it transitioned from cassettes → MDs → MP3s → smartphones.
I imagine that many in the younger generation today may not have ever seen a cassette…
Techniques Used
- Mirror Modifier
- Boolean Modifier
- Knife Project
Cassette Tape Structure
Before explaining the creation process, some of you may be wondering, “What is a cassette tape?" So, let me briefly explain (if you’re already familiar with the structure of a cassette, feel free to skip this part).
The Compact Cassette, also commonly called a cassette tape, audio cassette, or simply tape or cassette, is an analog magnetic tape recording format for audio recording and playback. Invented by Lou Ottens and his team at the Dutch company Philips, the Compact Cassette was released in August 1963.
Wikipedia ”Cassette Tape"
The cassette tape has the following structure
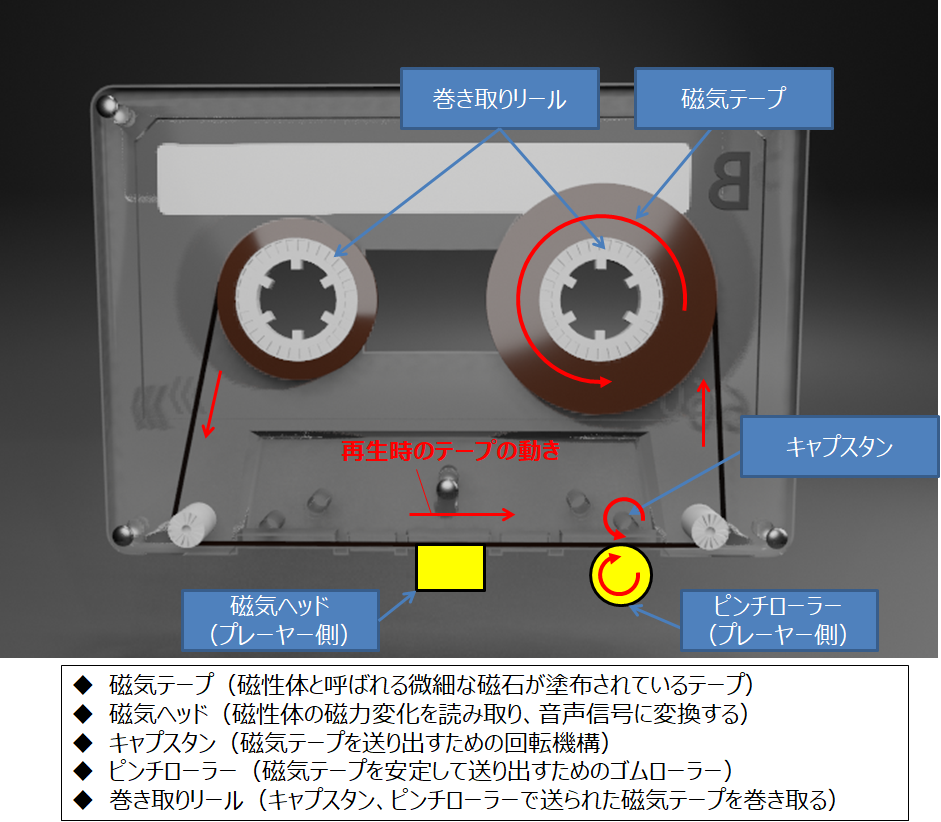
Reference website:
https://fabcross.jp/category/make/20191105_cassettetape_dj.html
By the way, according to Wikipedia, the official name of the cassette tape we are creating is “Compact Cassette."
Creation Process
I will explain the process in three parts: “Cassette Body," “Tape & Reels," and “Skeleton Version."
Cassette Body
I followed Mdesign’s tutorial video to create this part.
Here’s an overview of the process:
- Modify a cube to create the right half of the cassette (temporarily delete the vertices of the left half).
- After adding a loop cut, extrude the area where the magnetic head contacts the tape (only on the front side).
- Use the Boolean modifier to carve out the cassette’s window (square) and the reel (circle).
- Extrude the label area in the negative direction to create a recessed area.
- Create a small circle, use knife projection, and extrude in the negative direction to create the bolt hole.
- After adding a loop cut, delete the vertices on the back half of the right side that were not extruded in step 2.
- Mirror the front-to-back side of the mesh using the Mirror modifier. Recreate the window and reel faces using F. → Apply the modifier.
- Mirror from right to left using the Mirror modifier.
- Separate the mesh at the part where the magnetic head contacts the tape (using P), and use knife projection and extrusion to create the square indentation.
- Modify a circle mesh to create the bolts at each corner. Create the label as you prefer.
- In Mdesign’s video, they applied an image to the label using UV mapping. However, I didn’t feel like preparing an image, so I used a flat mesh and a text object instead. 😅
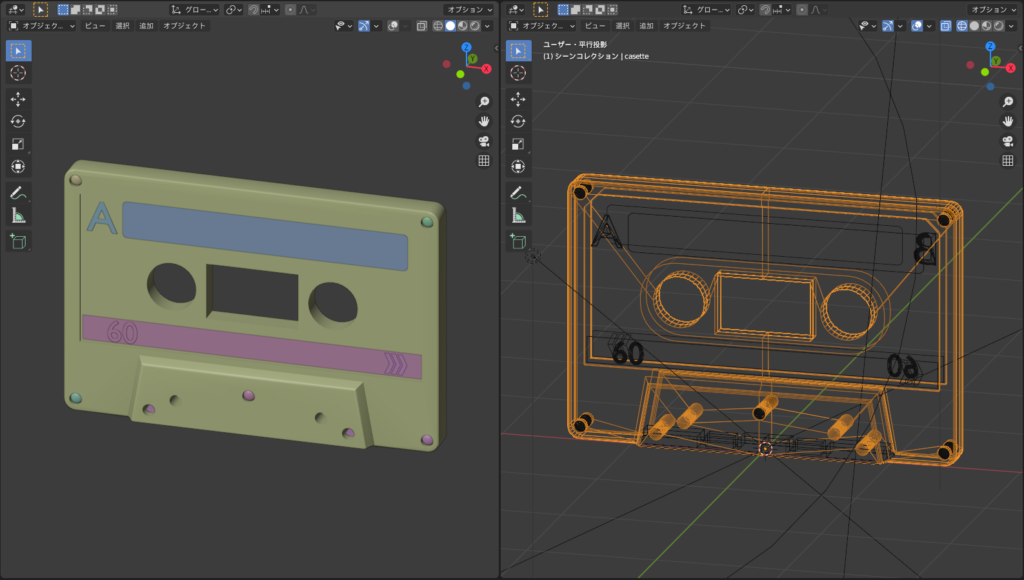
Here’s what the mesh looks like after completion.
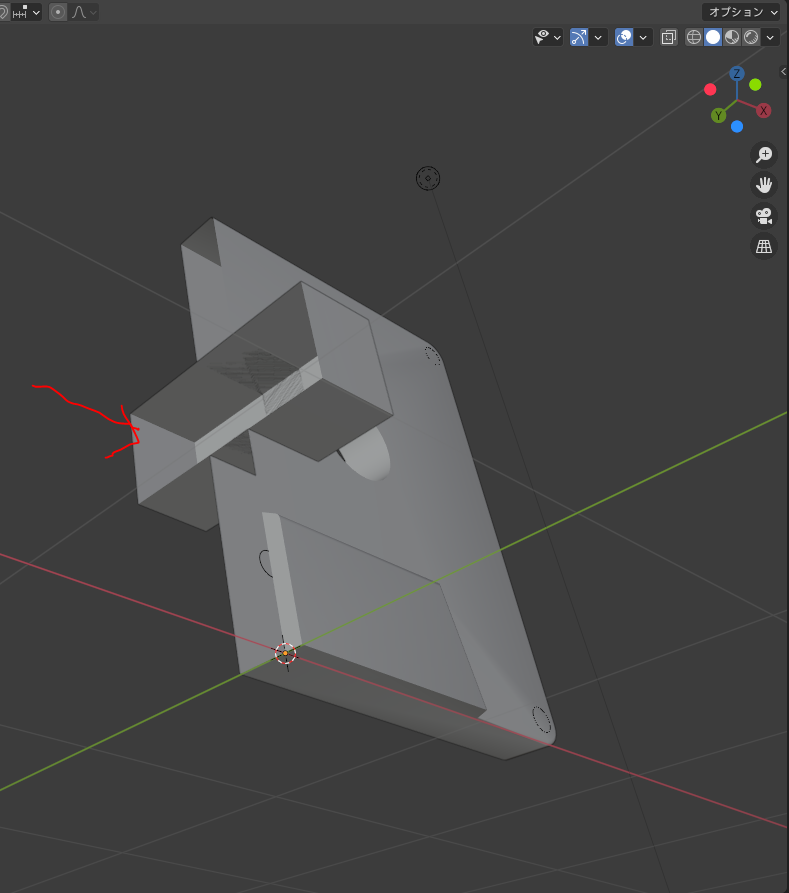
Note 1: About Boolean
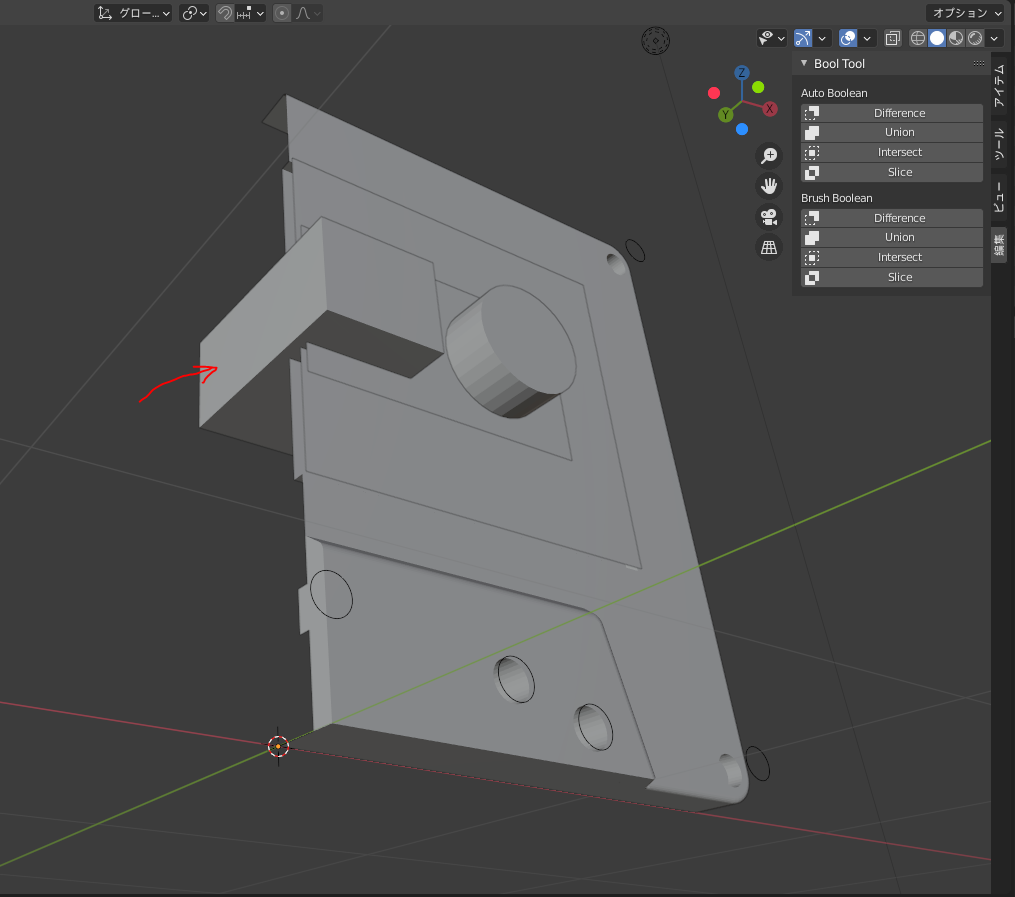
When performing the Boolean operation for creating the square window in step “3" of the creation process, it’s necessary to delete the left half of the vertices for both the “cassette body" and the “Boolean tool object."
When I did this the first time, it didn’t work properly. At that time, I had not deleted the left half of the vertices of the “Boolean tool object." (Left image: when it didn’t work, Right image: when it worked properly)
I still don’t fully understand how the Boolean system works, but I believe that if the mesh you’re cutting out isn’t closed, you need to adjust the topology of the tool object accordingly.
Note 2: About Mirroring
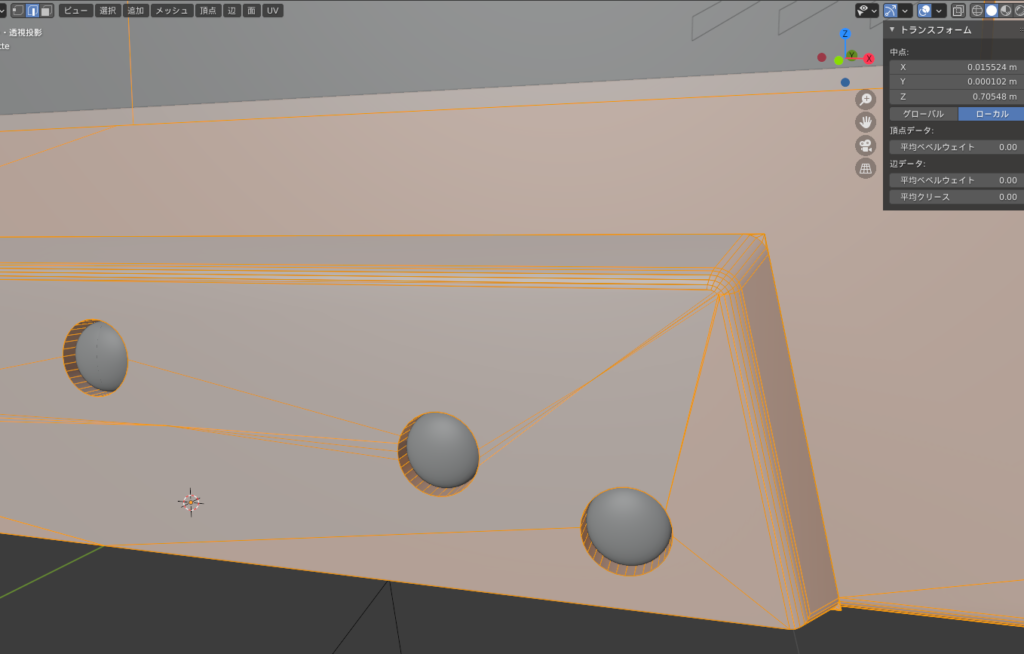
When performing the mirroring in the creation steps “7" and “8," you need to make the following adjustments to prevent gaps in the mesh:
- Turn on the “Clipping" option in the Mirror modifier.
- Adjust the vertex positions and the object’s origin so that they overlap when mirrored (move them to the section’s center).
- To adjust the object’s origin position, you can either use the addon mentioned in Mdesign’s video or move the 3D cursor to the vertex by pressing “Shift+S → Move 3D Cursor to Selected," and then go to “Object → Set Origin → Origin to 3D Cursor."
By the way, the first time I created this, I didn’t make the necessary adjustments, and after mirroring, gaps appeared. To fix this, I had to patch the mesh around the bolt holes. 😅
AD
Tape & Reel
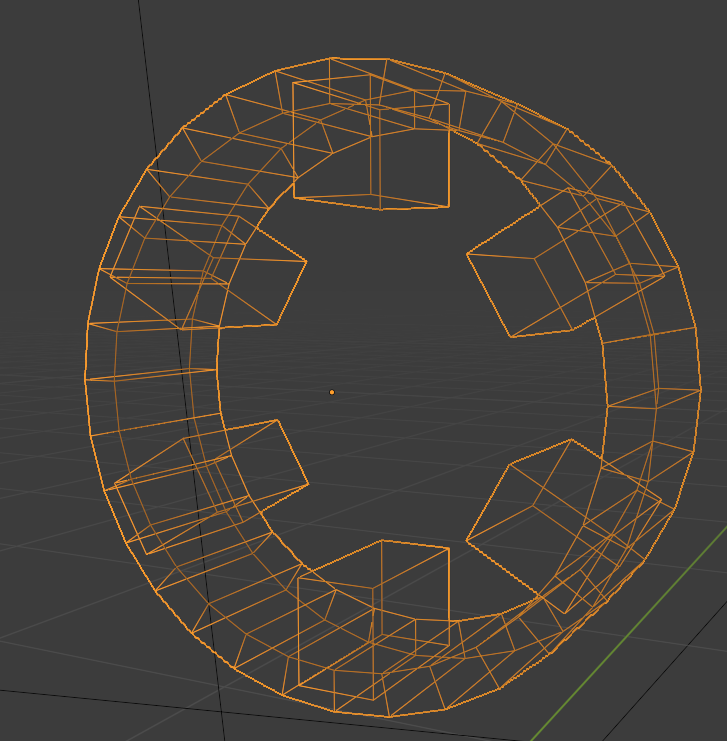
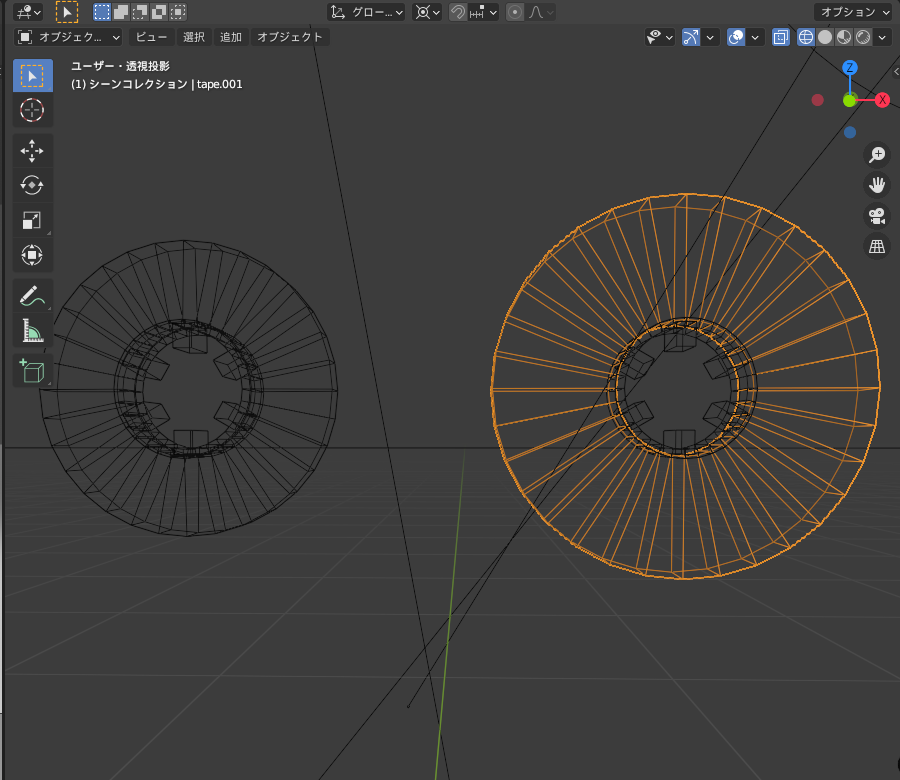
For the reel, I followed Mdesign’s tutorial and created a hollow cylinder by extruding a circle, then combined it with a cube to form the reel.
Additionally, I added a hollow cylinder on the outside of the reel to create the tape.
Skeleton Version
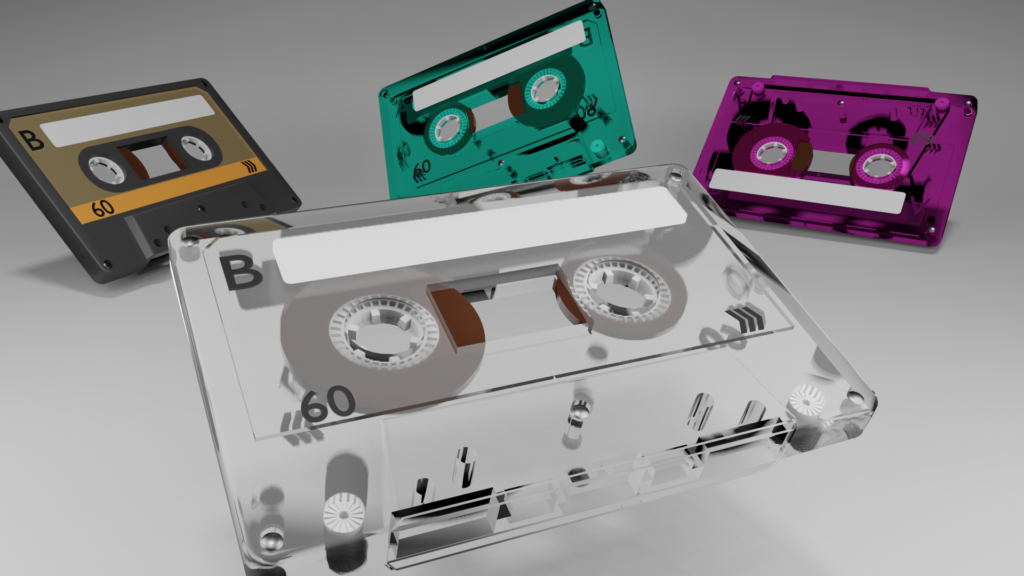
I also tried creating a “skeleton" cassette tape, which was quite common in the past (perhaps?).
When making the cassette body transparent, I had to create additional parts that weren’t included in the tutorial video, so I added the following:
- Addition of internal rollers (?)
- Modification of the reel shape
- Addition of tape
1. Addition of internal rollers
First, I added the rollers (though I’m not sure if that’s the correct term, but I’ll call them rollers for now) indicated in orange in the image below.
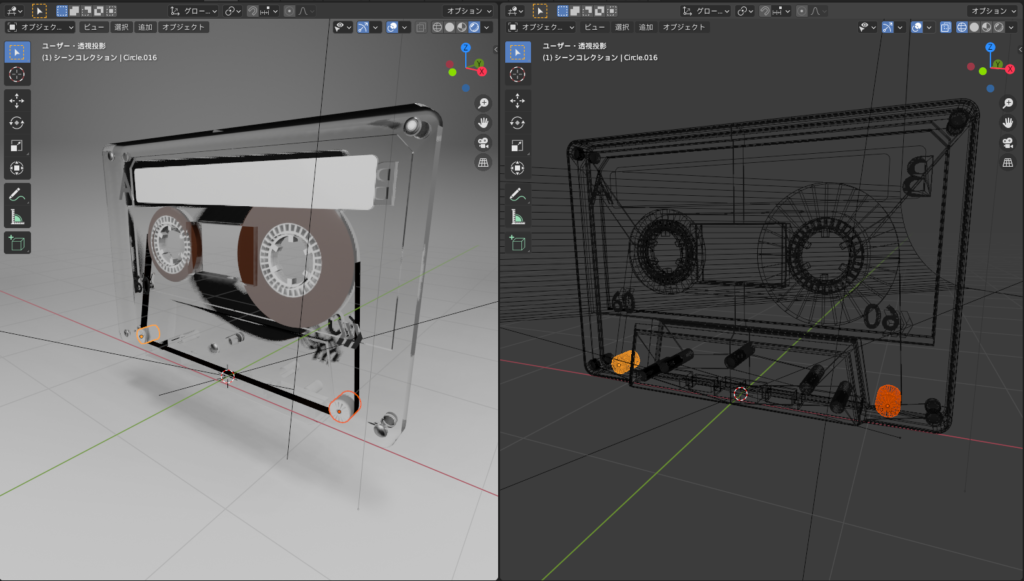
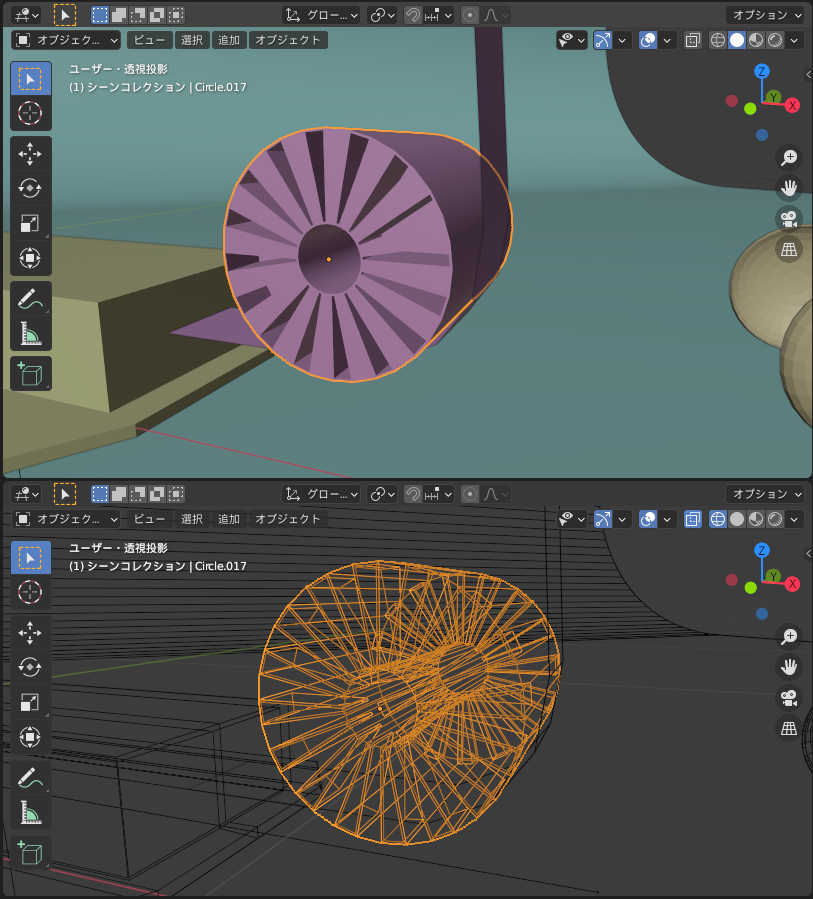
After extruding a circle to create a hollow cylinder, I selected every other face with “Checker deselect," then used the “I" key to inset (push in) and extruded it in the negative direction to create a concave shape.
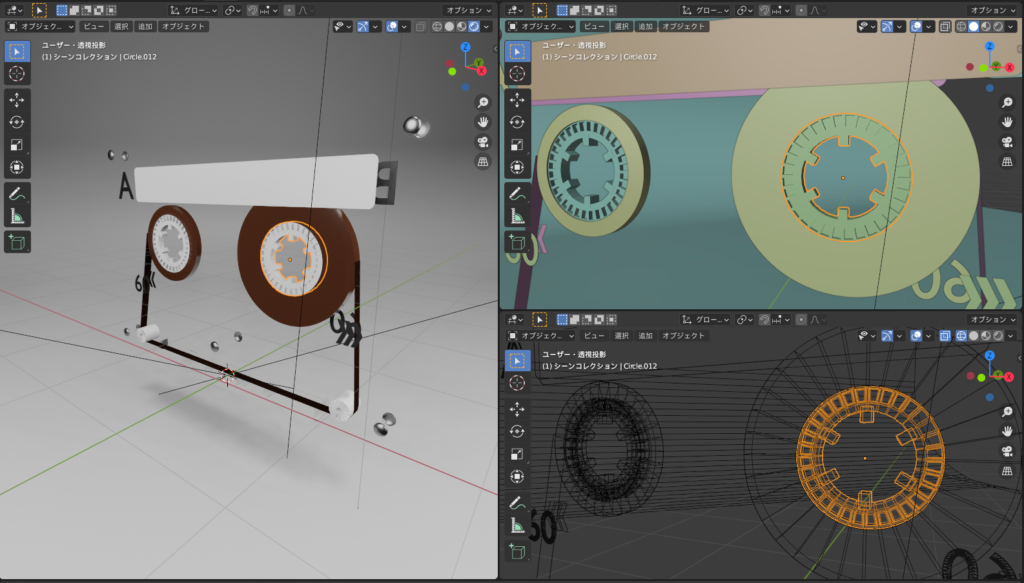
2. Modification of the reel shape
For the reel, I referred to online photos and added thickness and indentations. The process is the same as with the “rollers" in step 1.
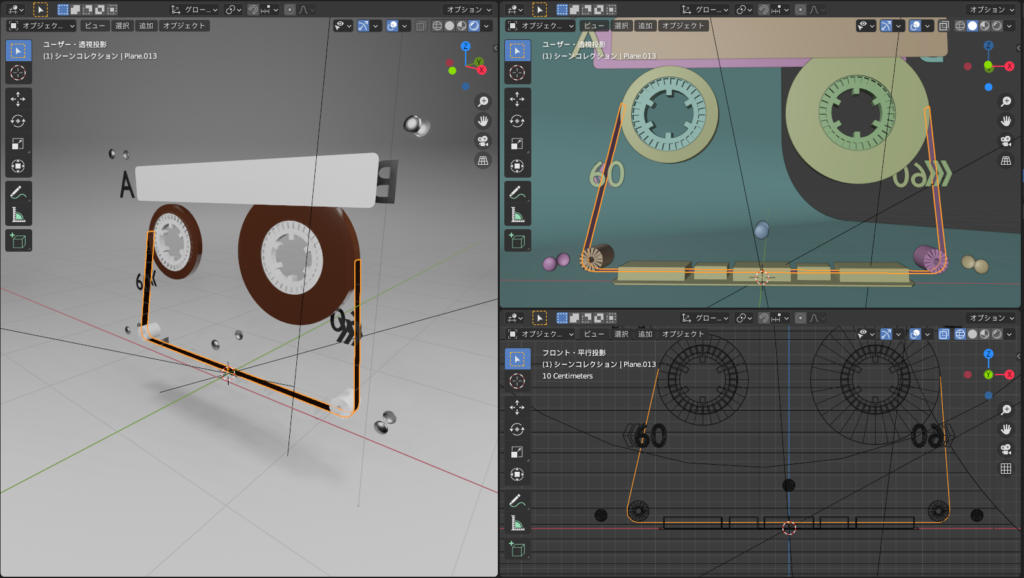
3. Addition of tape
I created the tape to connect from the left reel, through the rollers, and to the right reel.
By selecting edges of a flat mesh, I simply extruded them repeatedly to make the tape look smooth.
With the additions above, I was able to create a skeleton tape!
When I added color, it turned out to be vibrant and nice!!

Struggles and Reflections
As mentioned at the beginning, this tutorial involves a lot of steps and requires careful adjustments. So, when I made it for the first time, it didn’t turn out well, but I was finally satisfied with the result on the second attempt.
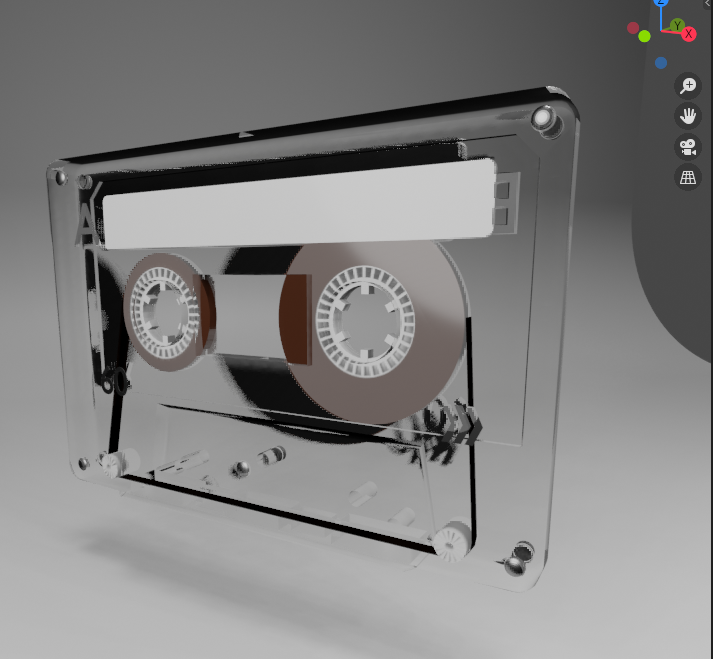
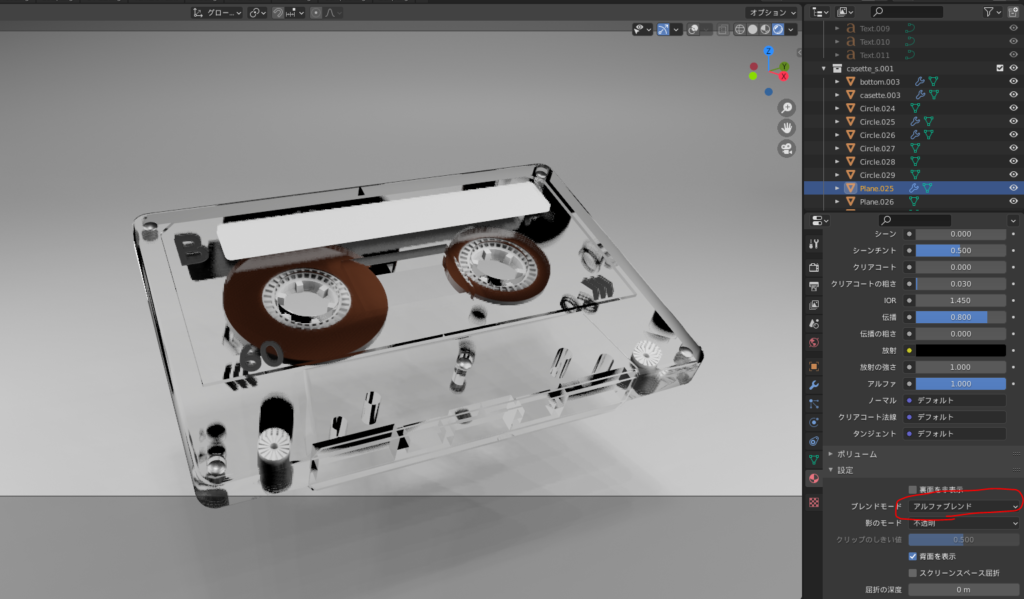
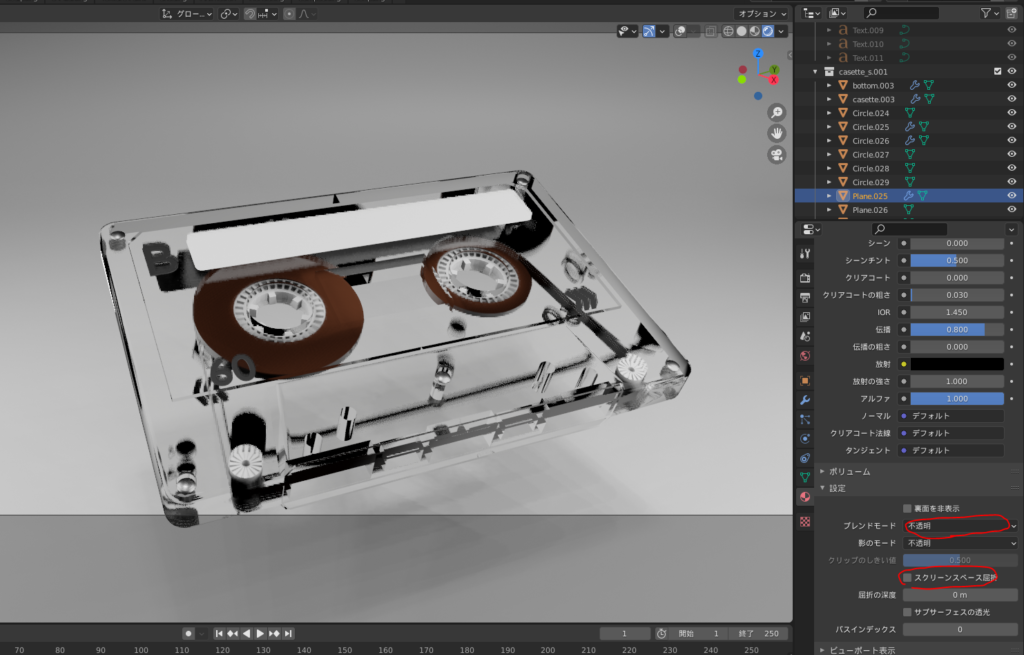
By the way, the picture above is rendered with Cycles, but when I rendered it with Eevee, the tape became invisible, as shown below.
After some investigation, I found that changing the material’s blend mode for the tape from “Alpha Blend" to “Opaque" made it visible again. My handling of Eevee still needs a lot of improvement! 😅
AD
Conclusion
Using Mdesign’s tutorial, I was able to practice using “Boolean," “Knife Project," and “Mirror Modifier."
I believe these are essential techniques for modeling industrial products like cars and airplanes, which I’d like to focus on in the future. I plan to continue practicing to improve my skills! 👨🎓
Additionally, I found it interesting to learn about the structure of a “cassette tape" through this tutorial! 😆
Reference Tutorial
Mdesign – [Beginner-Friendly] Model a Cassette Tape in 15 Minutes! [Blender 2.8] [3DCG]
AD
