【Blender 2.92】Creating “Dice Animation”

Explanation of the “Dice Animation" created on May 15th.
I learned about Blender’s physics animation using “Rigid Body" through Ume-chan’s (@zero_blender_) Udemy course.
As an application of this knowledge, I created a dice animation.
2021 Latest Edition: [Introduction to Physics] Learn Physics Animation by Creating
Udemy Course Link
I’ve summarized the creation process and key insights.
If you have any feedback or questions, feel free to reach out on Klala’s Twitter:
https://twitter.com/klala_lab
↑の続きです。
— クララ/Klala (@klala_lab) May 15, 2021
サイコロ2コを衝突させて遊んでみました😃⭐️
弾性係数・摩擦係数をいじるとはじき・転がり具合を微調節できることが解りました😊 pic.twitter.com/iPveRcFIbT
AD
Purpose of Creation
The Udemy course “Learn Physics Animation by Creating” by Ume-chan, introduced earlier, teaches the basics of physics animation techniques.
Using what I learned, I created an original animation using the Rigid Body feature.
(Note: Rigid Body is a physics simulation tool used for rolling or colliding solid objects.)
When I thought about “hard and rolling objects," dice immediately came to mind, so I decided to create an animation featuring them.
After creating a single-die rolling version, I found the dynamic motion fascinating and decided to make a two-dice version as well.
Methods Used
- Physics Simulation → Rigid Body
- Keyframe Insertion
Creation Process
The process is divided into three parts:
- Animating Two Dice
- Creating the Dice & Bowl
- Animating a Single Die
Creating the Dice & Bowl
Dice:
The base shape of the die was created using a cube with beveling applied.
The dots on the dice were made using circular objects with knife projection.
Mesh Details:
The mesh design is as shown below. To keep the vertex count as low as possible, subdivision was not applied.
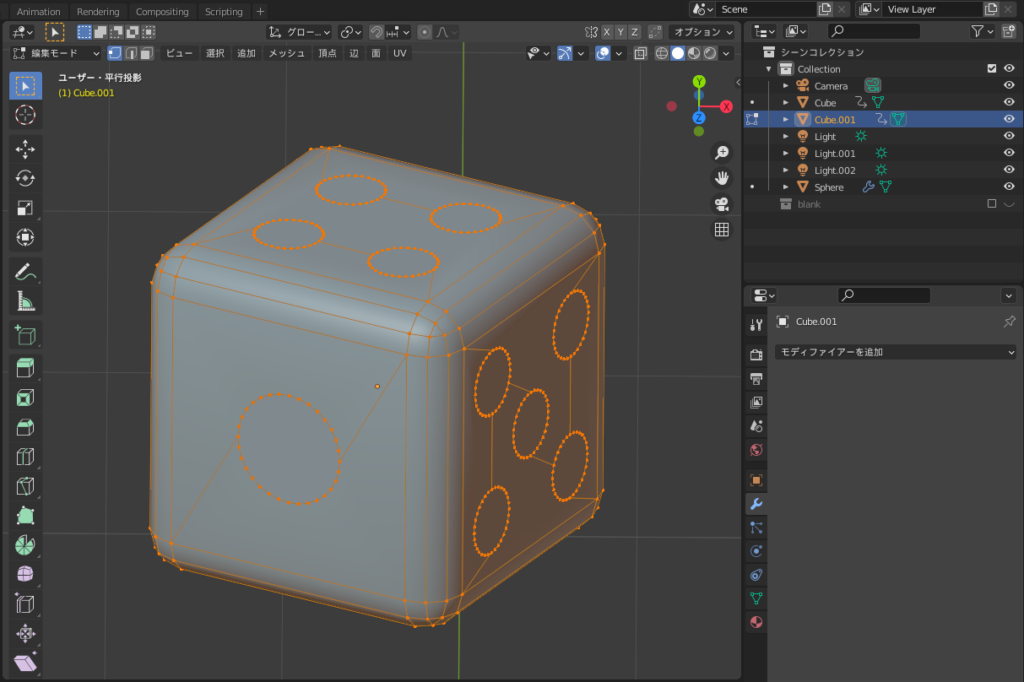
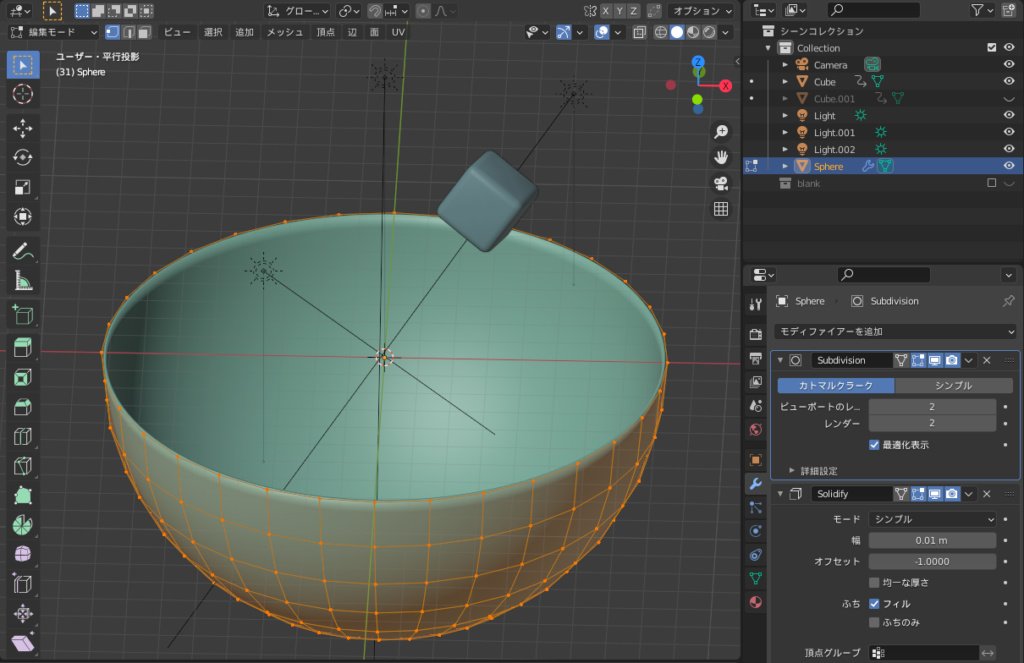
The bowl for rolling the dice was created using a UV sphere. The resulting mesh is shown below.
UV Sphere Creation:
Generate a UV sphere.
Delete the top half of the vertices.
Add a Subdivision Surface Modifier (Viewport Level 2) to ensure the rolling surface is smooth while maintaining a minimal subdivision level.
Adding Thickness:
To avoid the bowl appearing too thin, a Solidify Modifier was applied to give it some thickness.
AD
Single Dice Animation
Using Ume-chan’s Udemy course as a reference, I created the animation following these steps:
Steps to Create the Animation
To disable physics simulation, check the “Animated” box and insert a keyframe for it.
1. Frame 1 Setup:
In the viewport, press “I" to insert keyframes for the dice’s position and rotation.
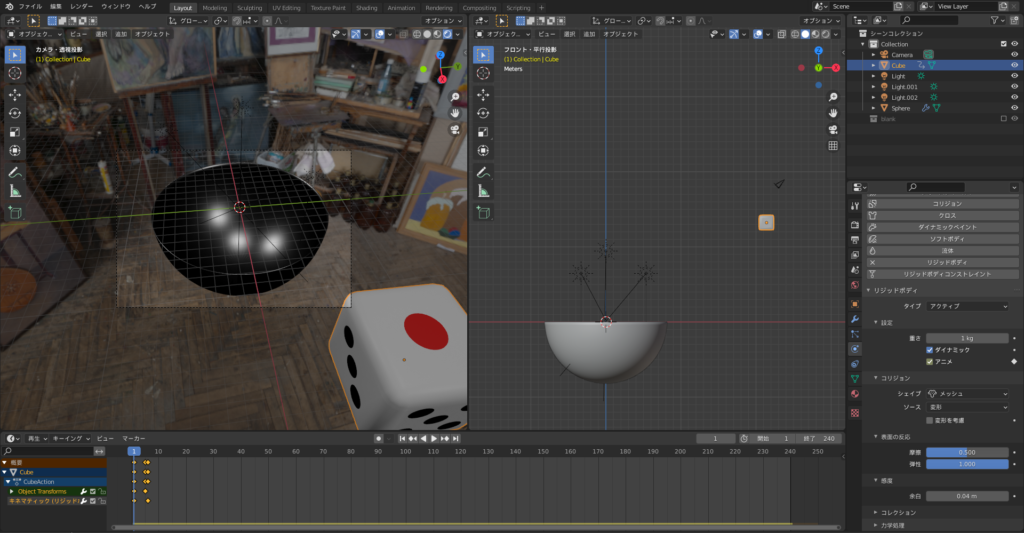
Configure the dice’s initial position and rotation.
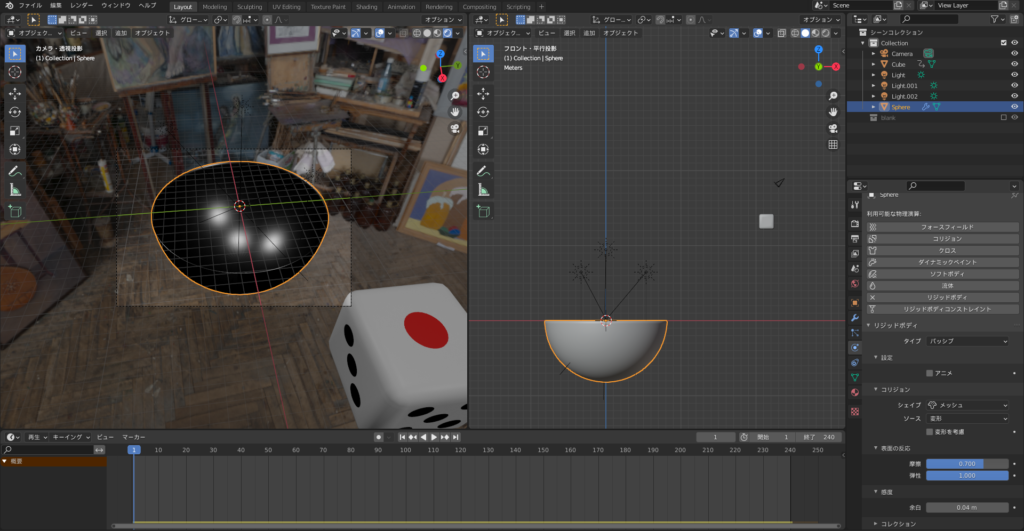
Ensure the bowl is positioned correctly to allow smooth rolling.
2. Frame 5 Setup:
Represent the motion of “throwing” the dice by moving it closer to the bowl and adding a slight rotation.
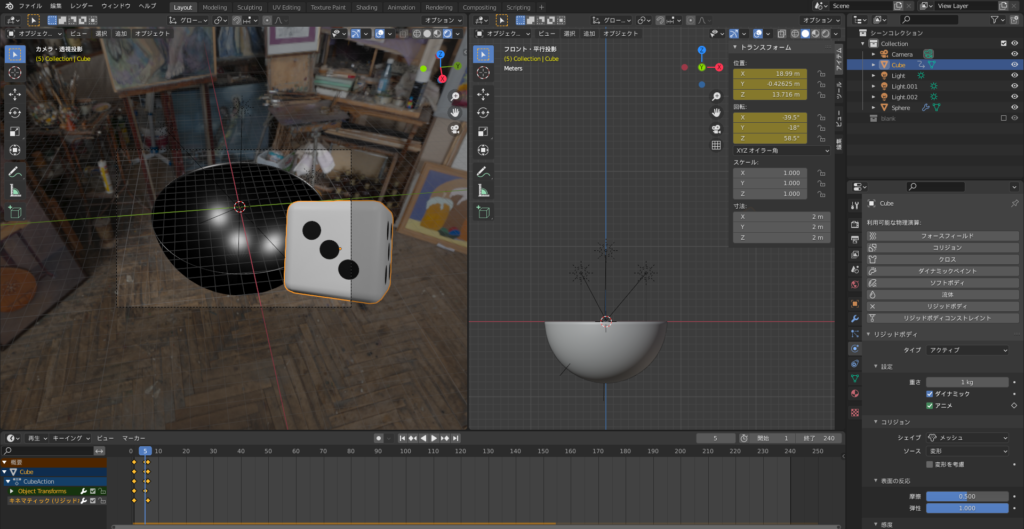
3. Frame 6 Setup:
To simulate the moment when the dice is released, uncheck the “Animated” box and insert a keyframe for it.
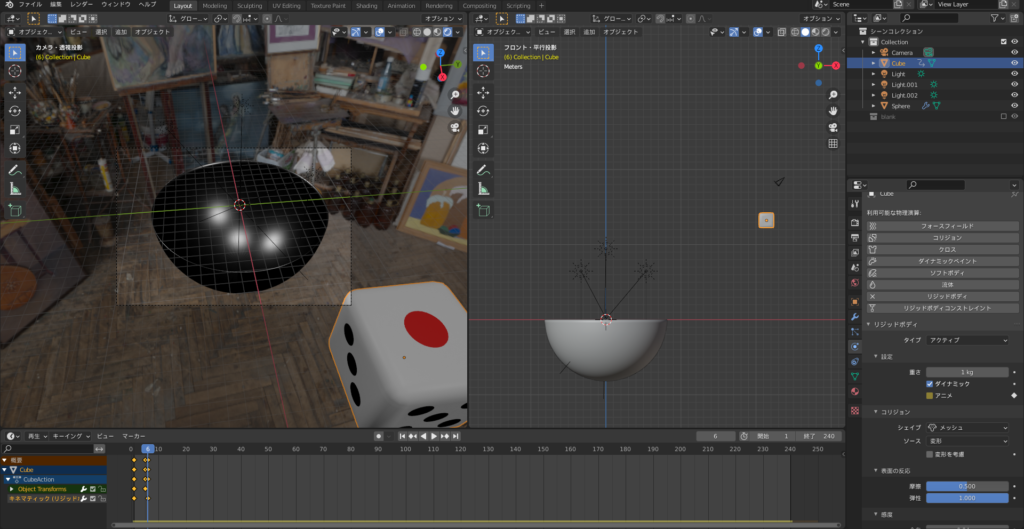
Adjust the positions in Steps 1 and 2 to ensure the dice rolls properly inside the bowl.
Additional Camera Animation
While the dice rolls inside the bowl, I wanted to zoom in, so I added keyframes to the camera’s focal length at Frames 50 and 150:
- Frame 50 Focal Length: Adjusted to create a closer view.
- Frame 150 Focal Length: Set back to the original view.
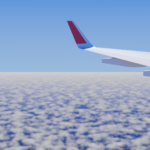
In Blender, you can add keyframes to various parameters (see my earlier article, “Clouds Viewed from an Airplane“ for more details).
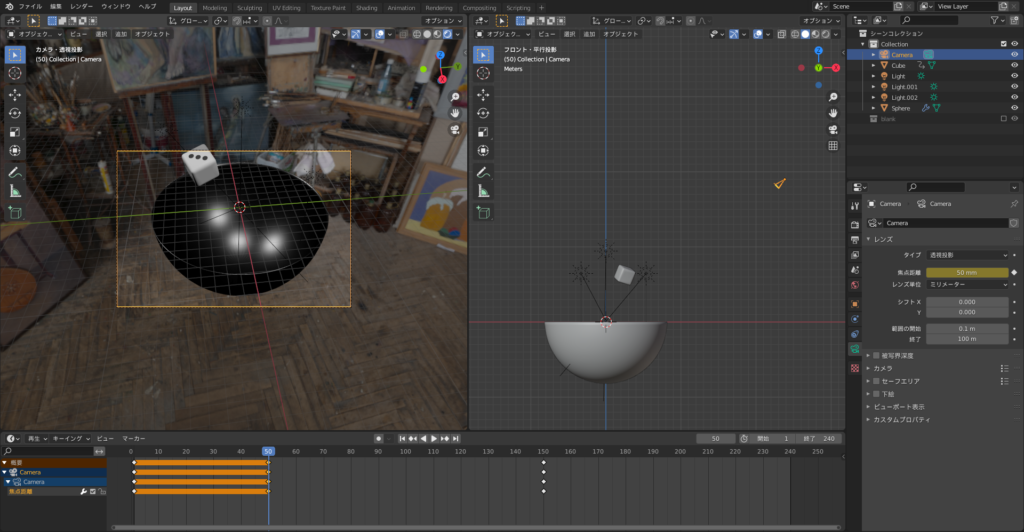
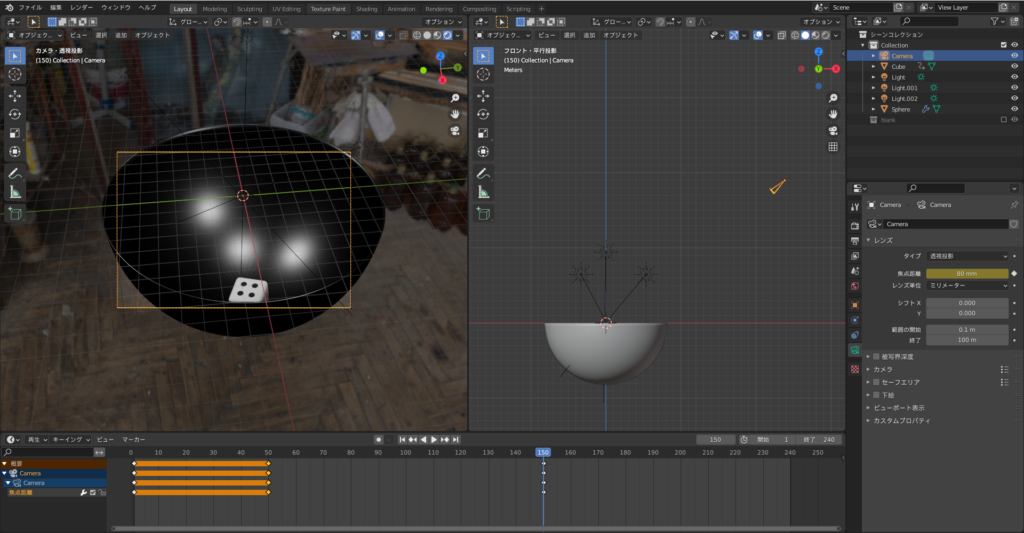
Rendering the Animation
The animation was rendered in 720×480 resolution and exported in MPEG4 format.
(I chose a smaller image size to speed up rendering and accommodate Twitter’s auto-compression feature.)

Here’s the result:
(After posting on Twitter, I realized I forgot to add color to the six-dot face…)
Notes:
- Frame settings and keyframing offer versatility for precise animations.
- Adding color or additional details beforehand can save time during post-production.
Double Dice Animation
For a more dynamic motion, I added a second die to the scene.
The second die (navy blue) was set to collide with the first die (white) at a 90-degree angle.
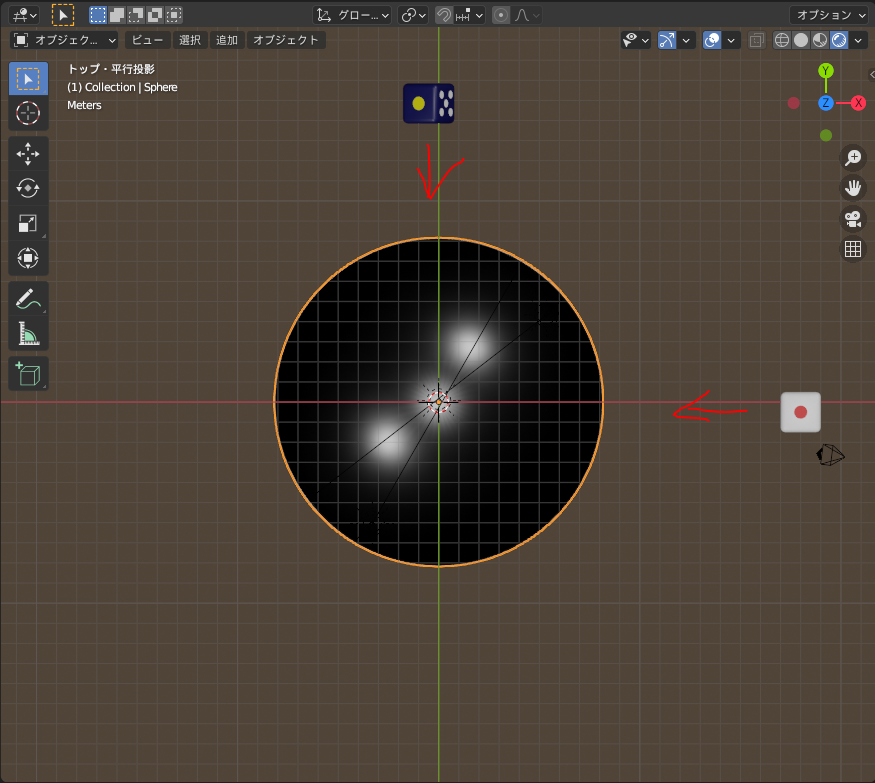
Animation Setup
The method for setting up the animation was similar to the single-die animation. However, during repeated testing, I adjusted the following parameters to refine the motion:
- Elasticity Coefficient: Changed from 1.0 to 0.9 (to prevent the dice from bouncing excessively).
- Friction Coefficient for the Bowl: Adjusted from 0.7 to 0.426 (to fine-tune the sliding behavior).
Challenges in Motion Setup
The way the dice roll is heavily influenced by their initial positions, velocities, and rotational speeds. Incorrect settings can cause issues, such as the dice flying out of the bowl (as seen in one of my test runs—oops! 😂).
Final Result
After trial and error, I successfully achieved double sixes (“snake eyes”) with the dice! 😊💦
AD
Conclusion
Using the rigid body techniques I learned from Ume-chan’s “Learn Physics Animation by Creating It" course, I was able to create and enjoy making dice animations in Blender. 😊
Ume-chan’s course is highly recommended for its clear and beginner-friendly explanations of the fundamentals. 👍
The course also includes lessons on simulations for “fluid" and “cloth," which I plan to explore further. 🧐
Reference Tutorials
Ume-chan (@zero_blender_)
2021 Edition: Learn Physics Animation by Creating It
Udemy Course Link
ML/Ch
[Blender 2.8] How to Create Yuru-chara CG #4/Animation Edition: Starting 3D CG with Kuu-suke
AD

