【Blender 2.92】How to Create Shell Patterns (Shell Texture)【Material Node Consideration】
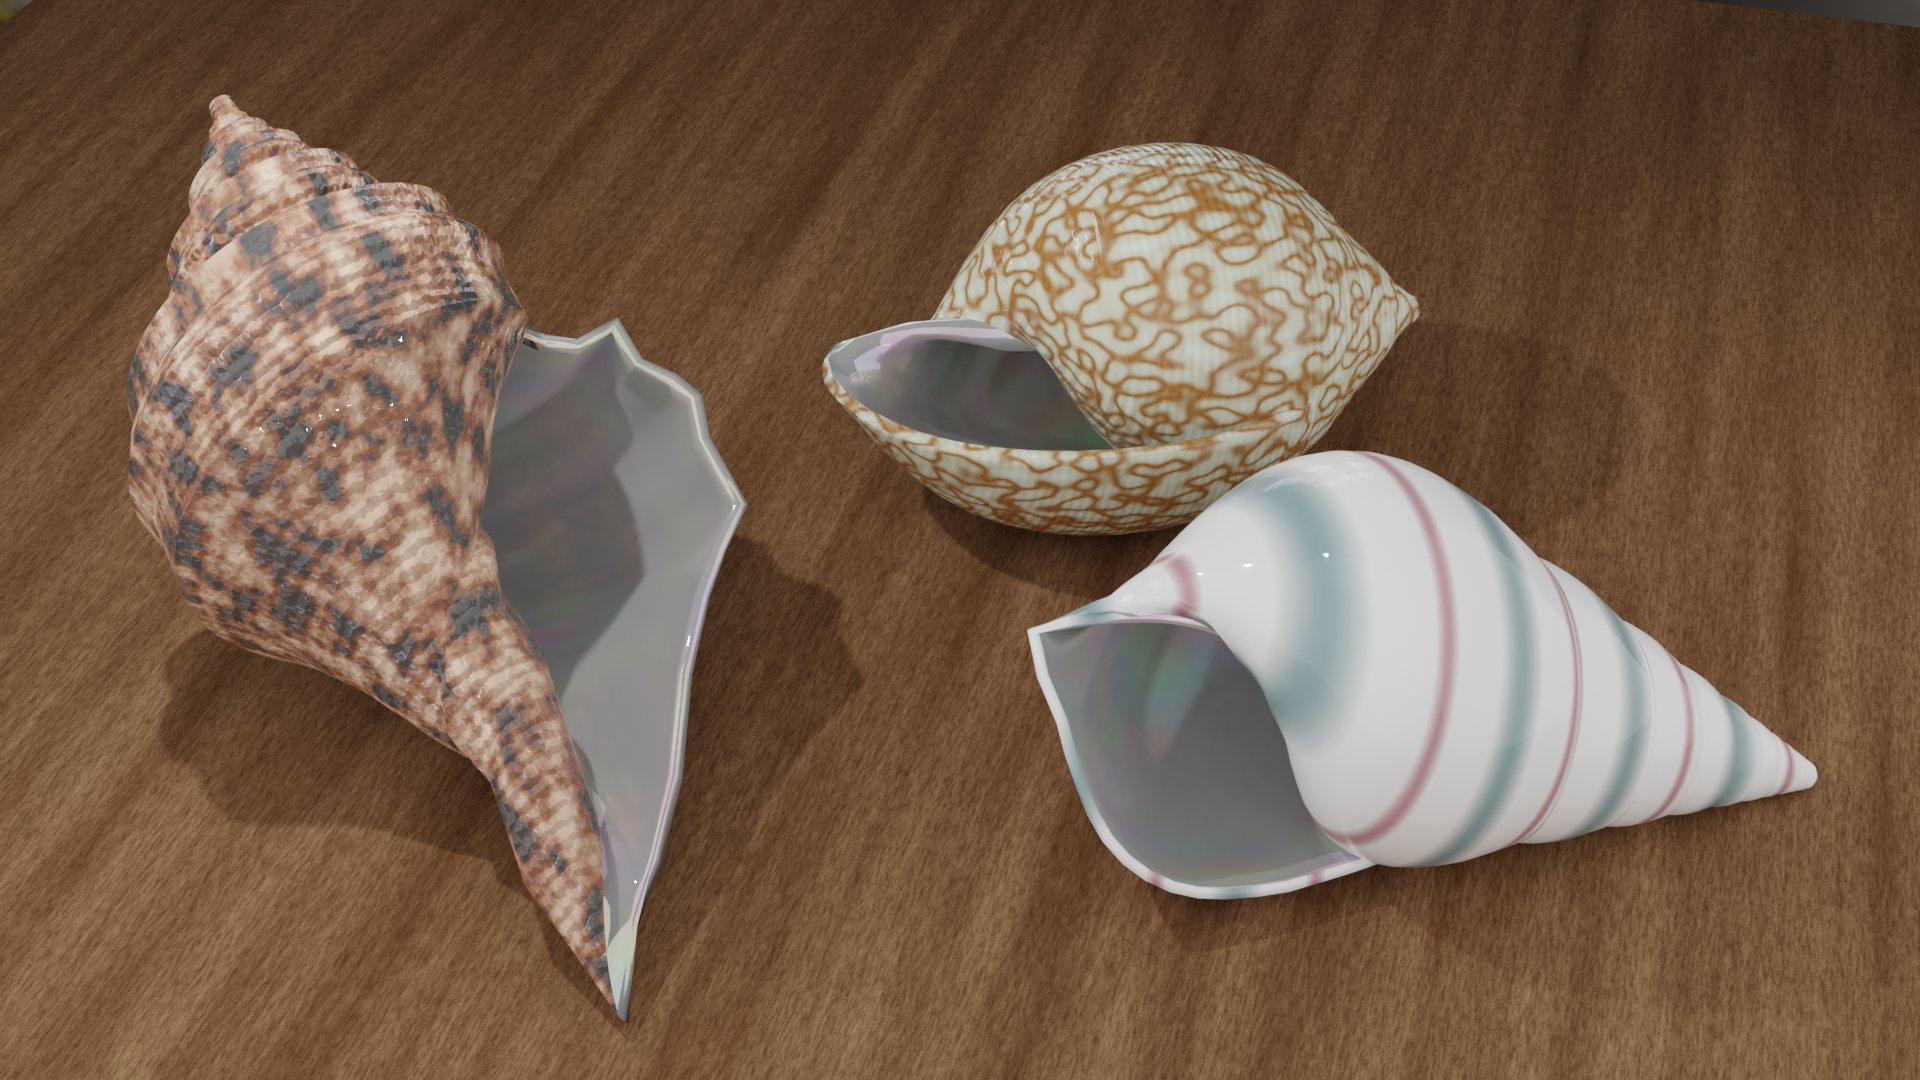
On June 5th, I summarized how I arrived at creating the “shell" pattern, reflecting what I thought and how I approached it (mainly for my own reference).
By effectively combining textures such as noise, waves, and Musgrave, even beginners in Blender can create a “shell-like" pattern 🐚.
If you have any comments or questions, feel free to reach out on Klala’s Twitter (https://twitter.com/klala_lab) 😊/
ささらさん(@sasara_Bch)の動画と、ぷるぷるさん(@purupuru_connyu)のツイートを参考に、巻貝を作ってみました。
— クララ/Klala (@klala_lab) June 5, 2021
Blender M01-072【巻貝の謎】https://t.co/2pqTM7qKC0
マテリアルノードで遊んでいたら、それらしい模様ができたのが収穫です😊#blender #b3d #3dcg #blender初心者 pic.twitter.com/rBj5IwyKxe
AD
Creation Process
I learned how to create a spiral shell using arrays and empties by watching Sasara Bch’s YouTube video “The Mystery of the Spiral Shell."
Having become able to easily create realistic shell models, I then thought about using material nodes to design patterns that would make them look even more realistic.
Techniques Used
In this article, I will only explain how to create the pattern and bumps on the spiral shell (the texture), and I will not touch on the modeling method for the spiral shell itself (laughs) 💦
For the modeling of the spiral shell, please refer to the video by Sasara Bch linked above, as it provides a clear explanation 🙇
- Material Nodes
- Noise Texture
- Wave Texture
- Musgrave Texture
- Bump
- Shader Mix
How to Create the Spiral Shell Pattern and Bumps
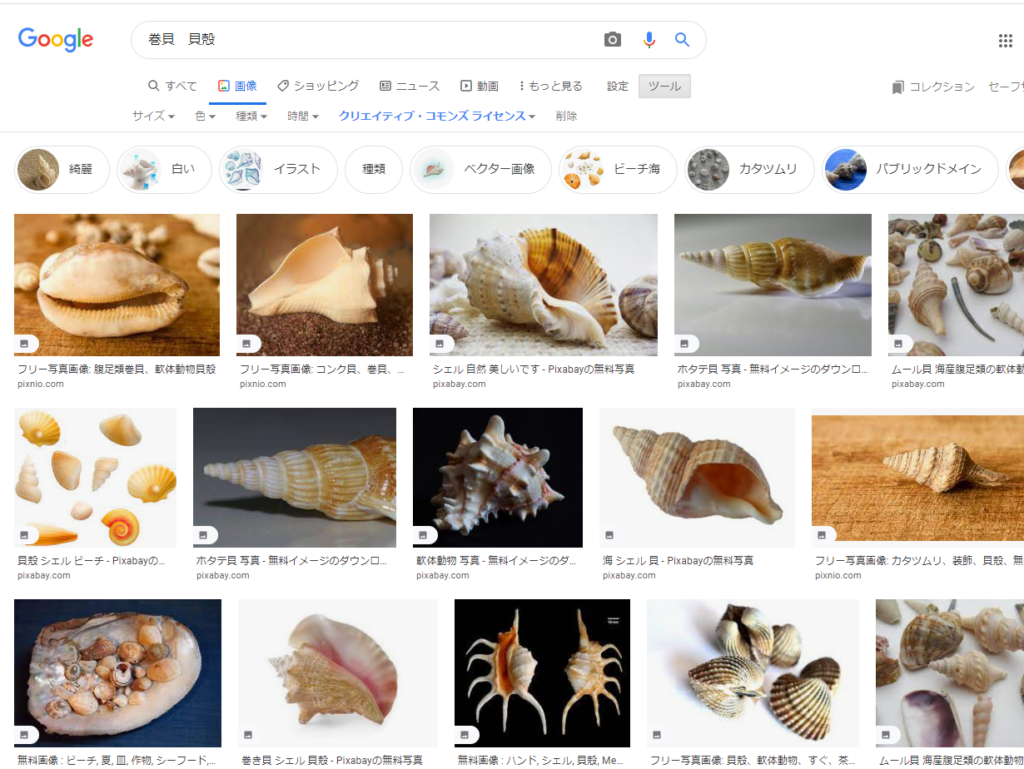
When you search for terms like “spiral shell pattern," “conch shell," or “巻貝 模様" (spiral shell pattern in Japanese), you’ll find a variety of spiral shell patterns. I examined these images to figure out how to use material nodes to create the patterns seen on spiral shells.
(Google search results of conch shell images only displayed under Creative Commons licenses)
Spotted Pattern → Noise Texture
First, I tried using the Noise Texture to create the spotted pattern often seen on shells in the search images.
After applying a material to the shell, I added a “Noise Texture" (Shift+A → Texture > Noise Texture) in the Shader Editor and connected it to the “Principled BSDF" color.
As a result, a blurry, rainbow-colored pattern appeared, which is the default color of the Noise Texture.
Note: The inside of the shell already has a separate material slot assigned. I’ll explain how to create the texture for the inside of the shell later.
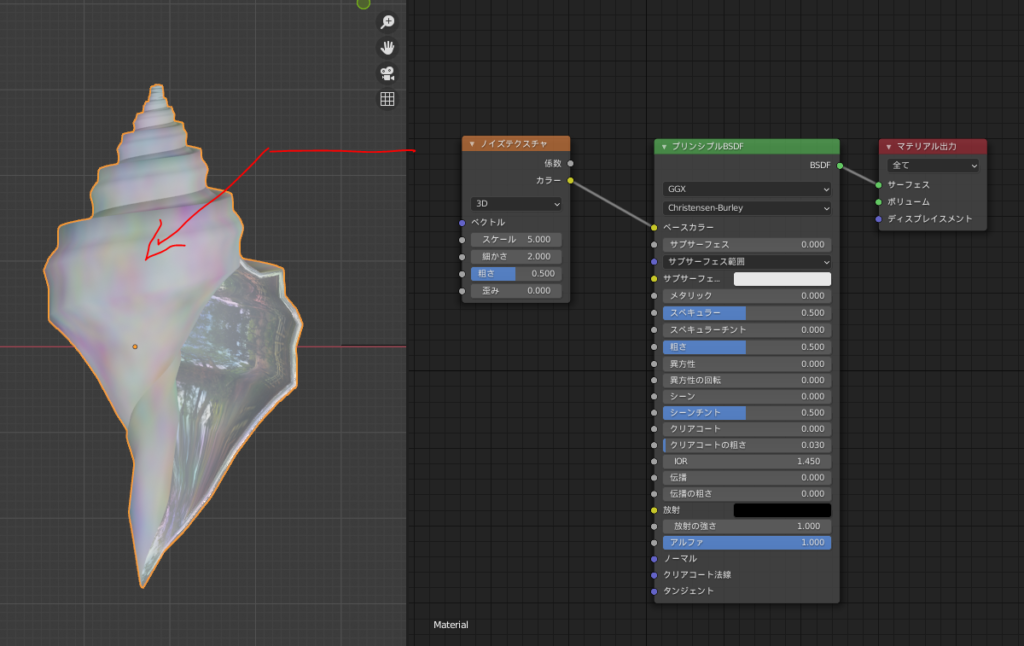
Next, I changed the color of the Noise Texture.
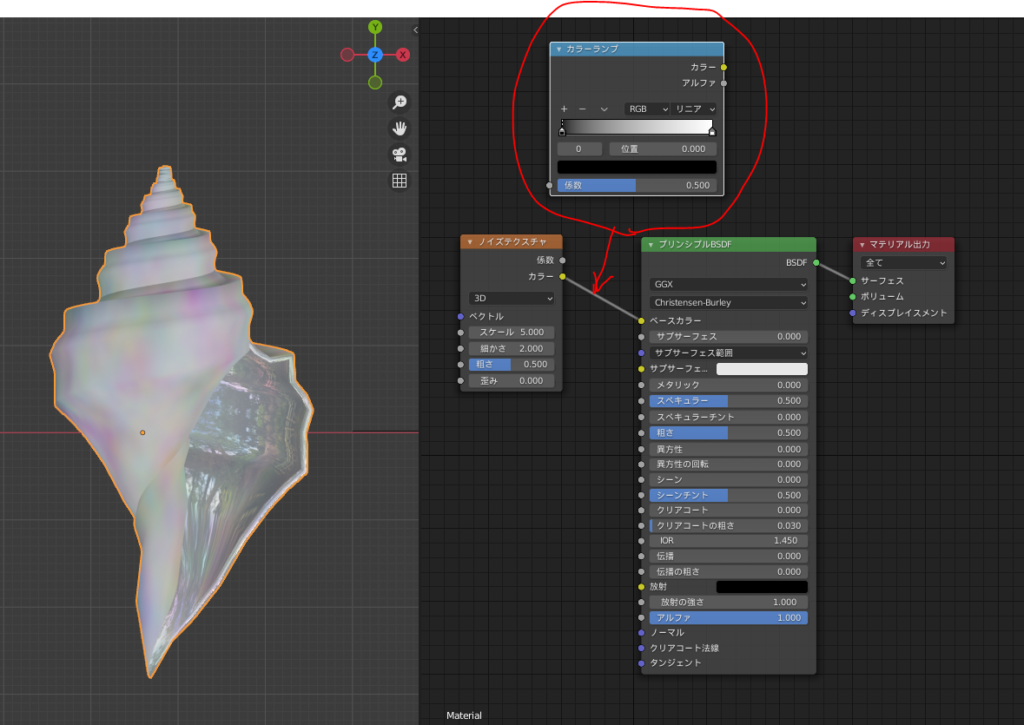
I added a “Converter > ColorRamp" and dragged it to the middle, between the Noise Texture and the Principled BSDF node.
Now, as shown in the diagram, the shell color changed from rainbow to black-and-white. This is because the ColorRamp is set to black and white by default.
By adding the ColorRamp, the pattern of the Noise Texture becomes more defined in black and white.
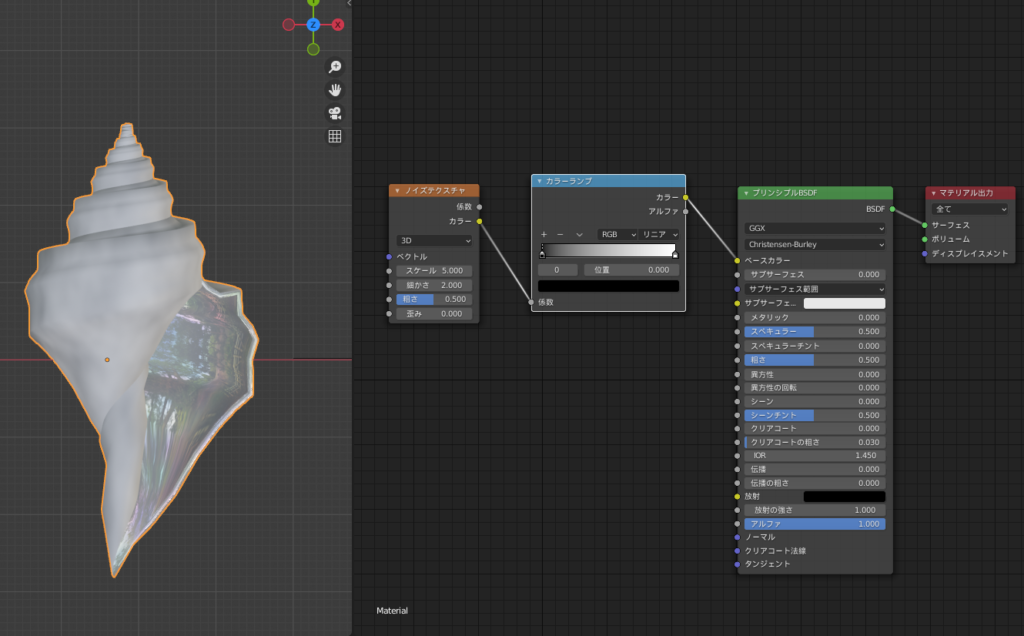
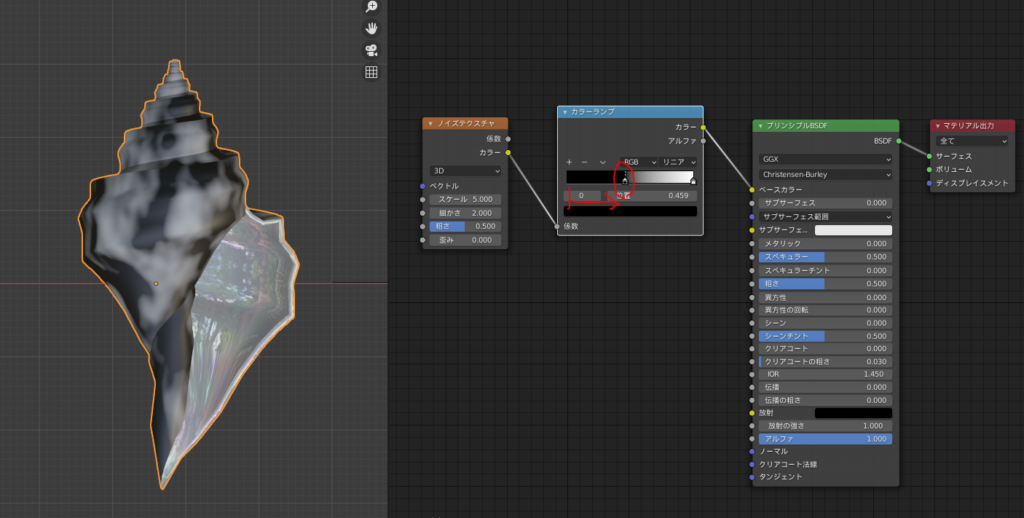
Next, I adjusted the parameters of both the Noise Texture and the ColorRamp.
(Top-left of the diagram) Moving the black arrow (not sure what it’s called) on the ColorRamp to the right expands the black area.
(Top-right of the diagram) Increasing the “Scale" value of the Noise Texture makes the pattern finer.
(Bottom-left of the diagram) Lowering the “Roughness" value of the Noise Texture makes the pattern sharper.
(Bottom-right of the diagram) Increasing the “Roughness" value of the Noise Texture makes the pattern blurry.
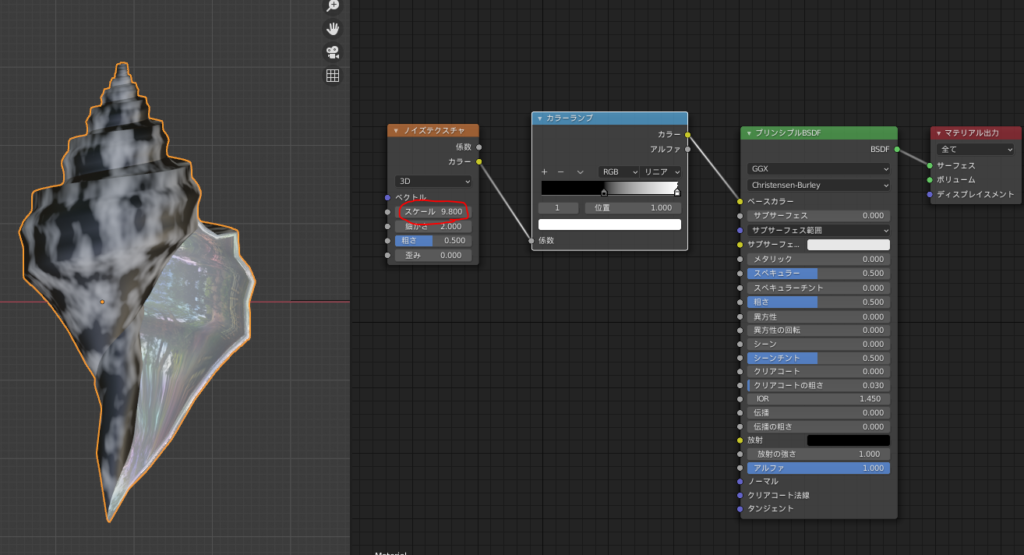
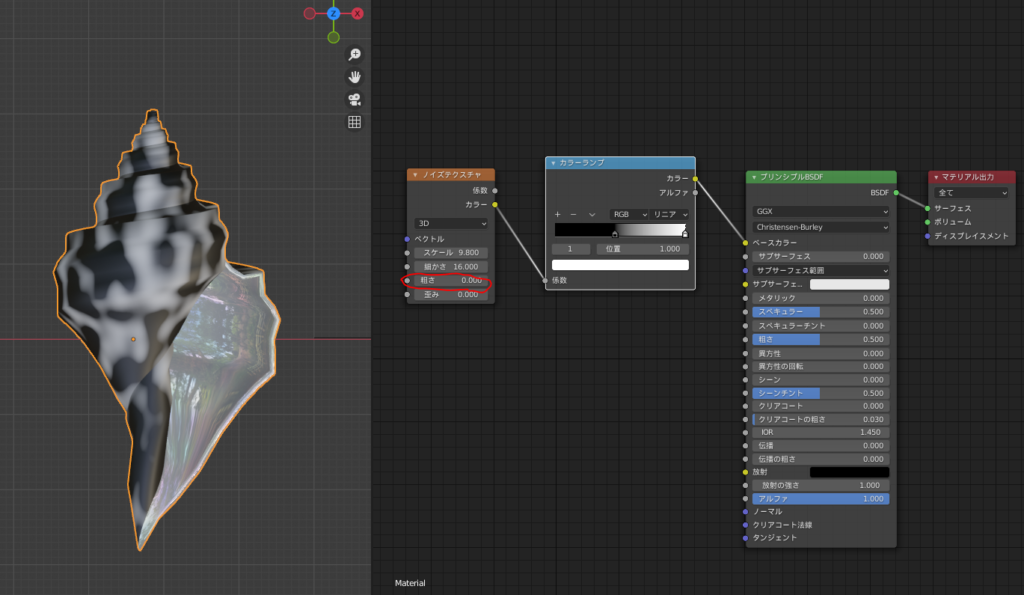
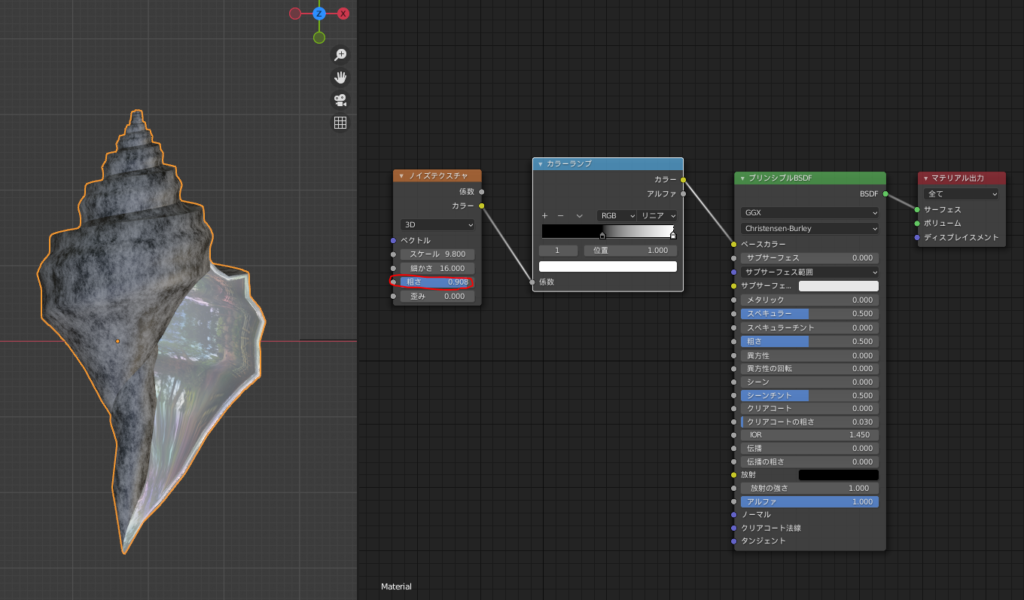
If you increase the “Distortion" value, the pattern becomes distorted (it looks a bit creepy… haha).
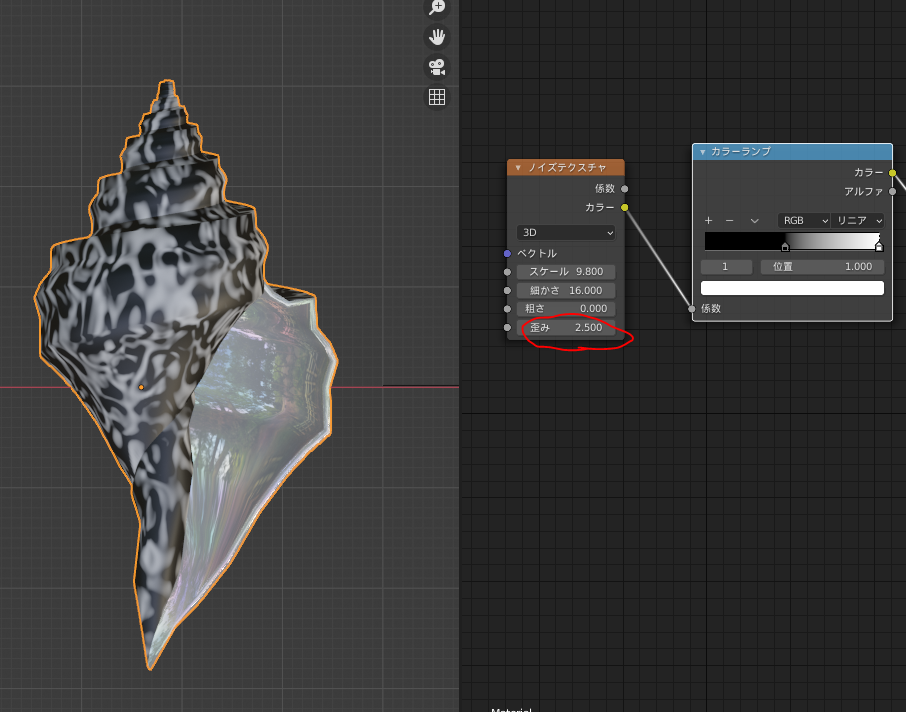
Additionally, if you click on the arrow in the ColorRamp and then click the color below it, you can change the color as shown in the diagram.
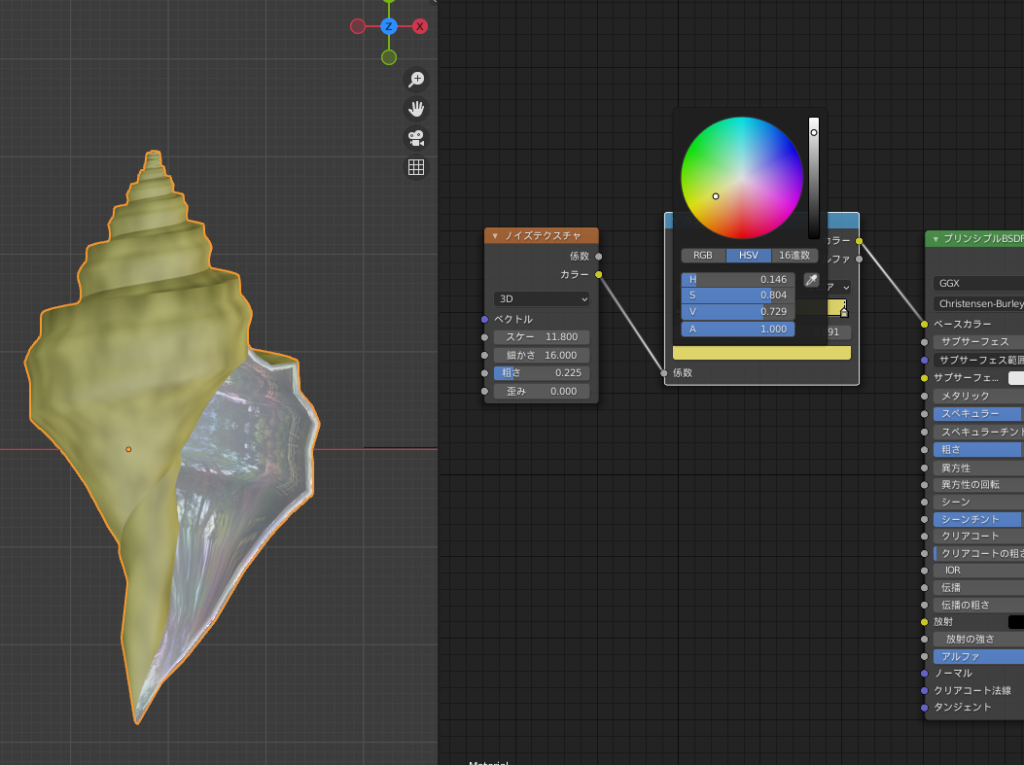
By clicking the “+" button in the ColorRamp, you can add a third color and beyond.
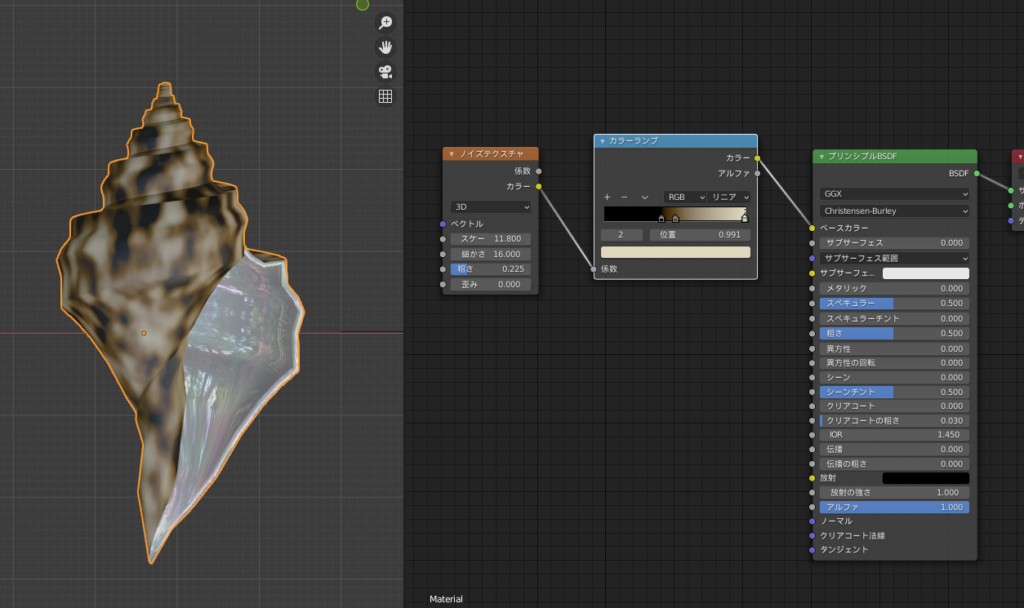
By using three colors, I created a shell-like spotted pattern as shown below.
AD
Striped Pattern → Wave Texture
Next, I tried creating a striped shell pattern.
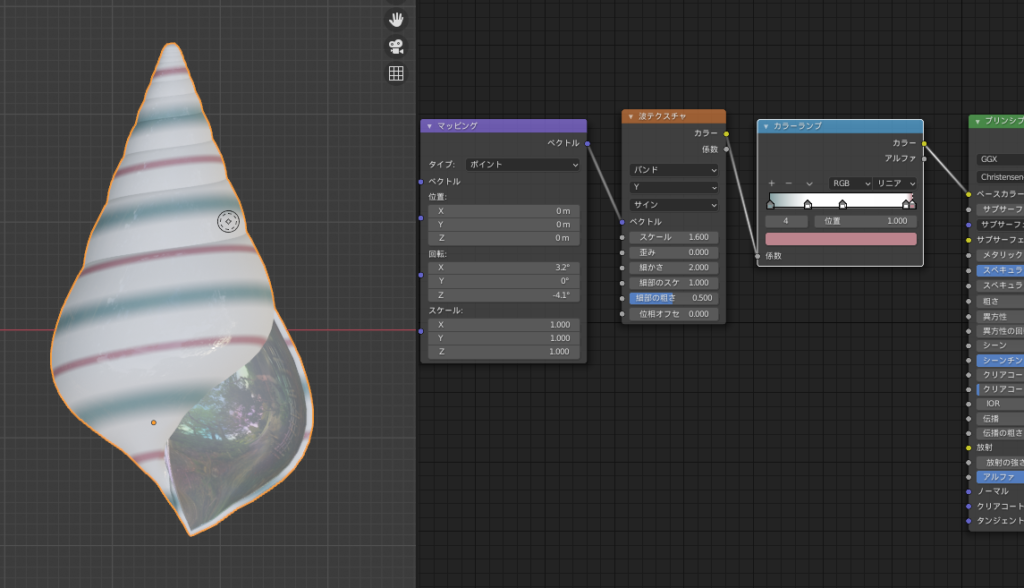
Stripes can be created using the Wave Texture, so I connected “Texture > Wave Texture" to the base color of the Principled BSDF.
As a result, vertical stripes appeared as shown below.
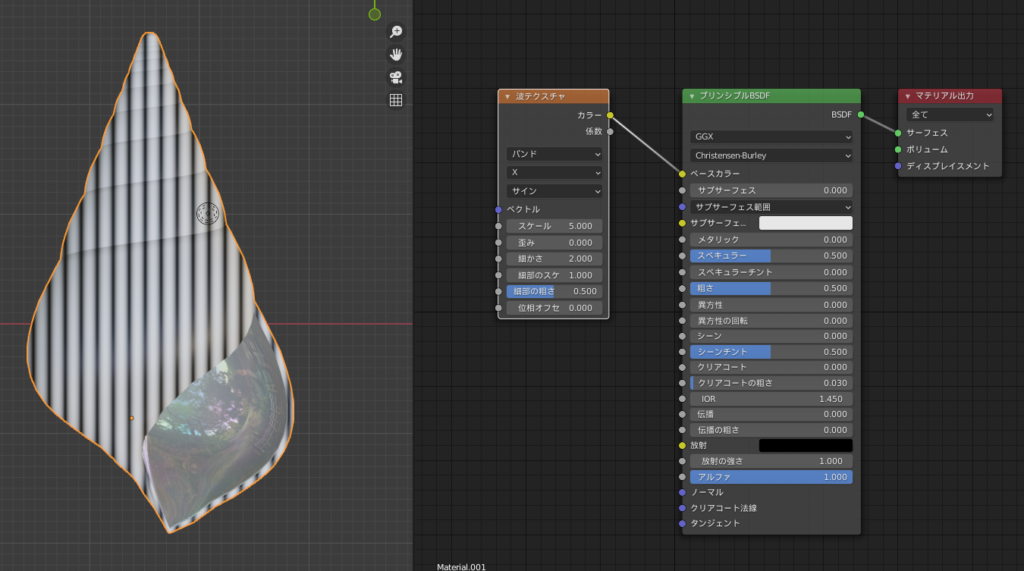
Since I wanted the stripes to follow the direction in which the shell is spiraled, I needed to tilt the stripes.
By changing the coordinate axis of the Wave Texture from X to Y, the stripes turned horizontal, as shown below.
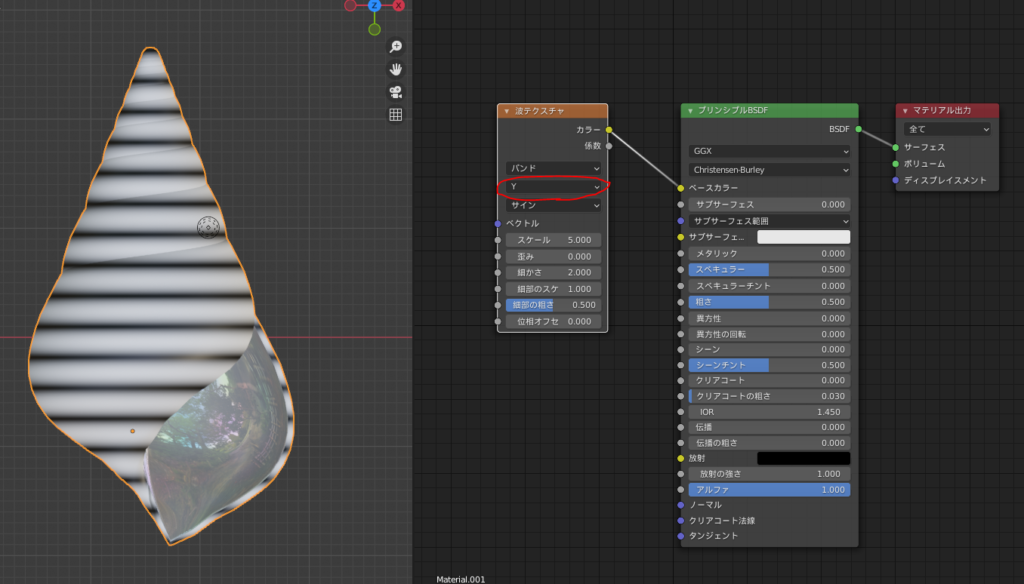
To tilt them slightly, I added “Texture Coordinate" and “Mapping" nodes.
If you enable Blender’s free addon “NodeWrangler," you can generate them instantly using the shortcut “Ctrl + T," which is very convenient (I also mentioned this in my previous article about the “Police Mark & Police Box” ).
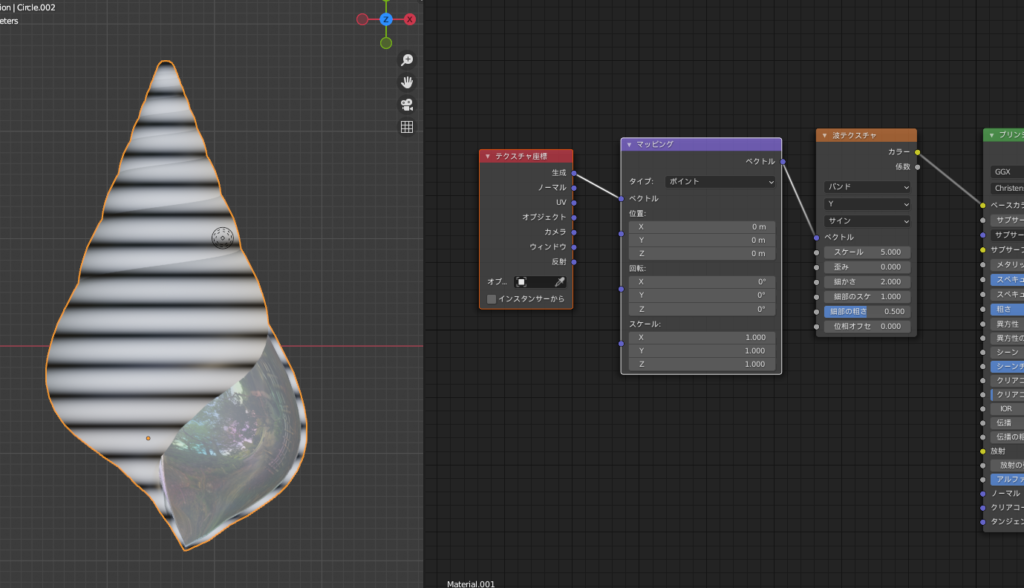
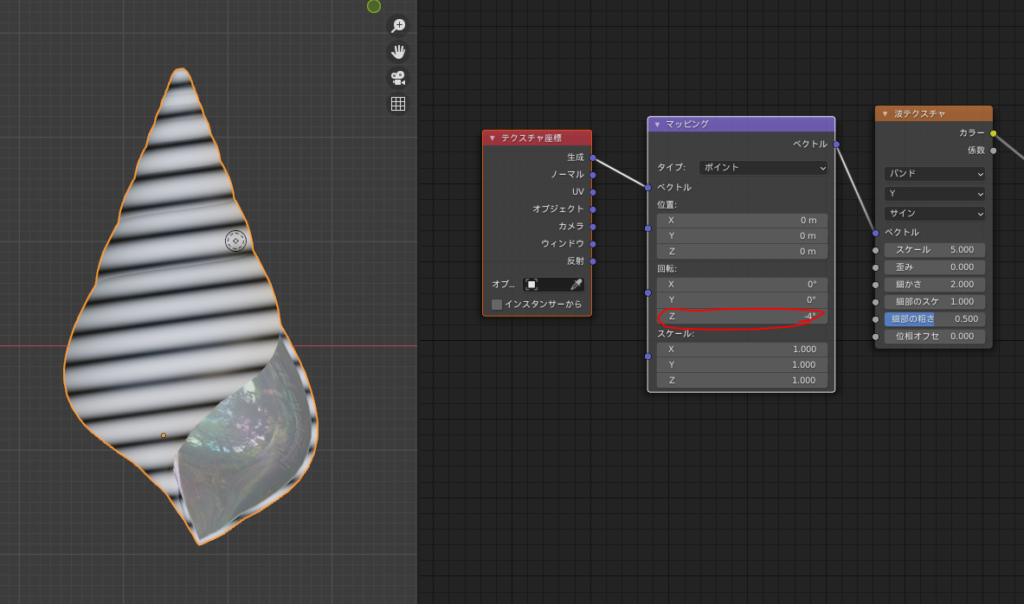
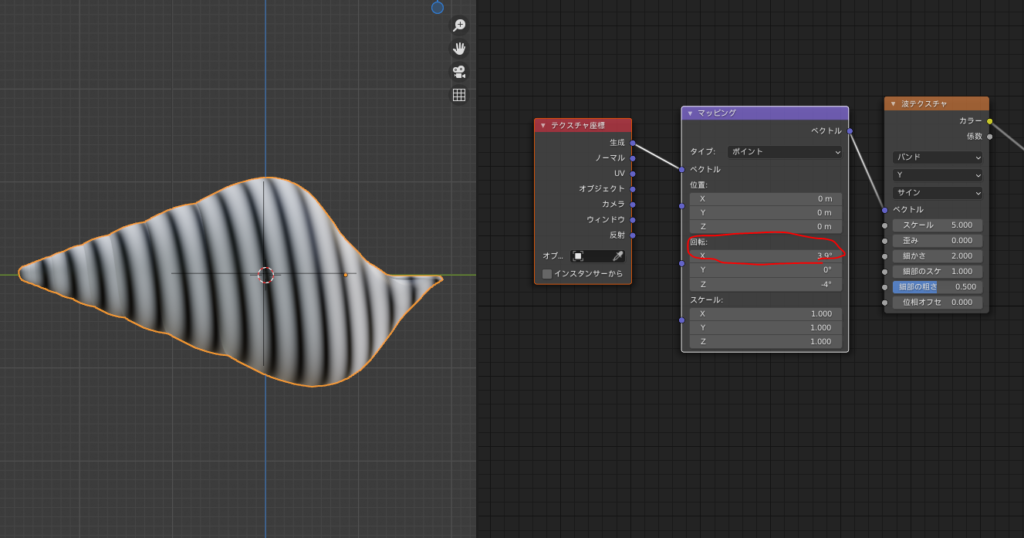
By viewing the shell from above or the side, I adjusted the Z and X rotation angles of the “Mapping" node to align the stripes with the spiral direction of the shell.
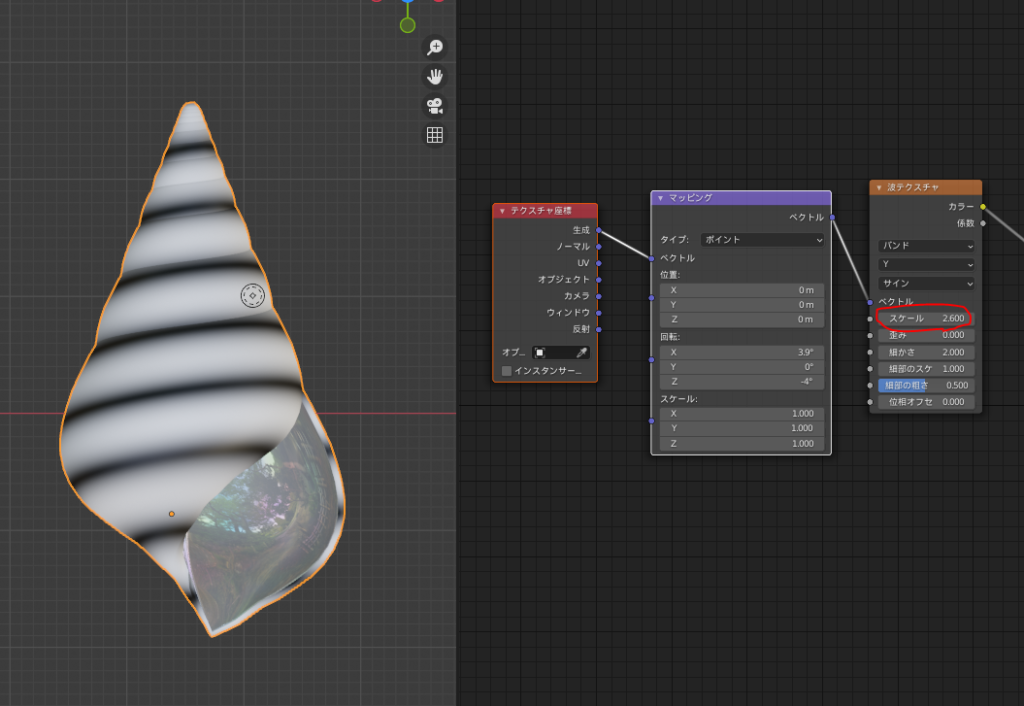
The spacing of the stripes can be adjusted using the “Scale" value of the Wave Texture.
Finally, similar to the previous Noise Texture, I added a ColorRamp between the Wave Texture and the Principled BSDF, and adjusted the colors.
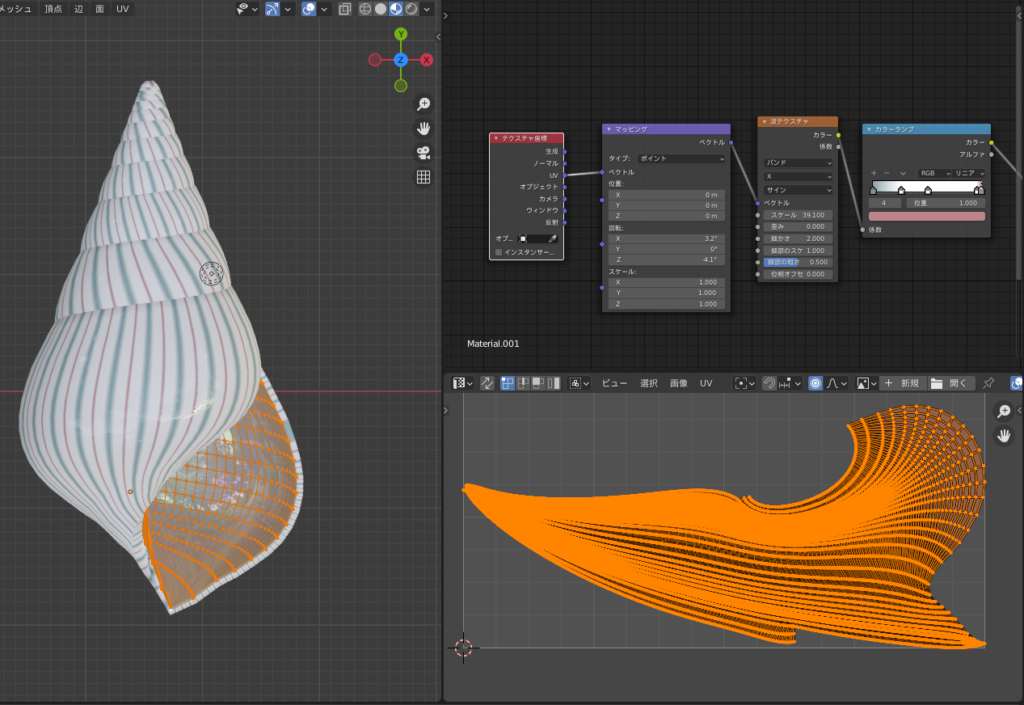
As a side note, if you unwrap the UV (making a seam from the shell entrance to the tip as shown in the diagram) and connect the “UV" from the Texture Coordinate to the Mapping node, you can create stripes that are perpendicular to the spiral direction, as shown below.
Camouflage Pattern → Musgrave Texture
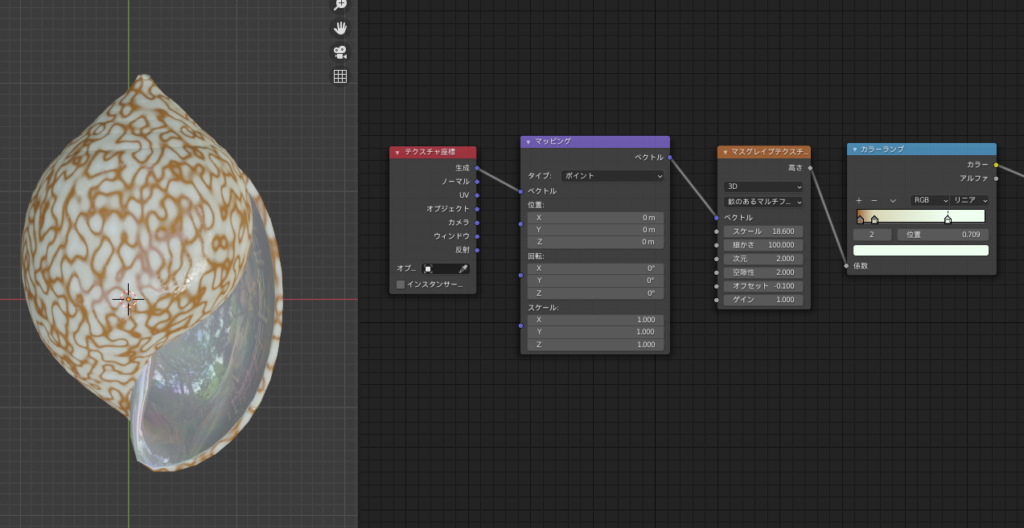
While experimenting with the Musgrave Texture, I ended up creating a fascinating camouflage pattern resembling the “Tagayasanminashi," a species of cone snail. I’ll show you how I made it.
Note: The “Tagayasanminashi" is a dangerous creature with a venomous sting (source)! It can be fatal if stung, so please avoid touching it if you ever come across it in the sea ☠!
Image of “Tagayasanminashi" (from Wikimedia Commons)

By adding the “Texture > Musgrave Texture" and connecting it to the Principled BSDF, I got a pattern like the one shown below.
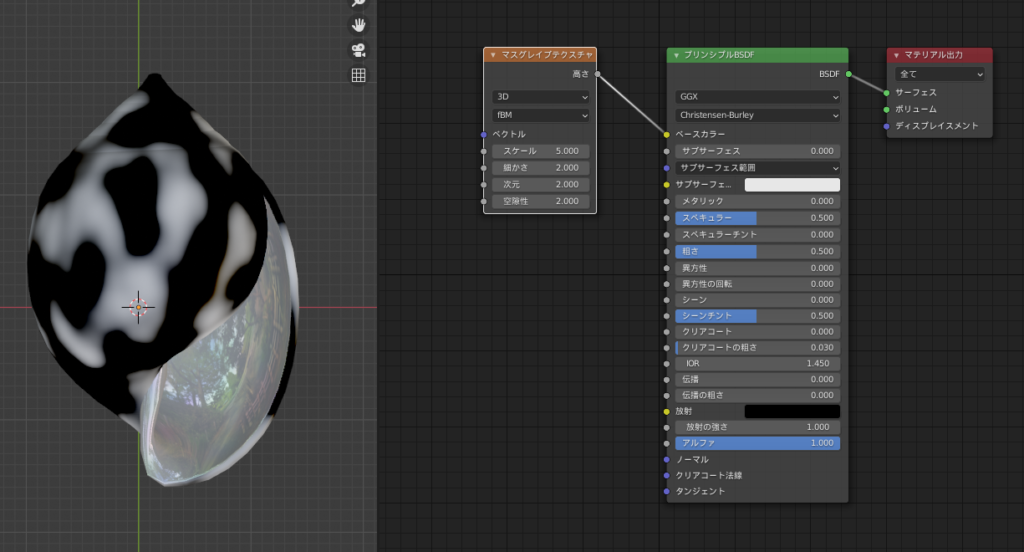
Increasing the “Scale" value made the pattern finer.
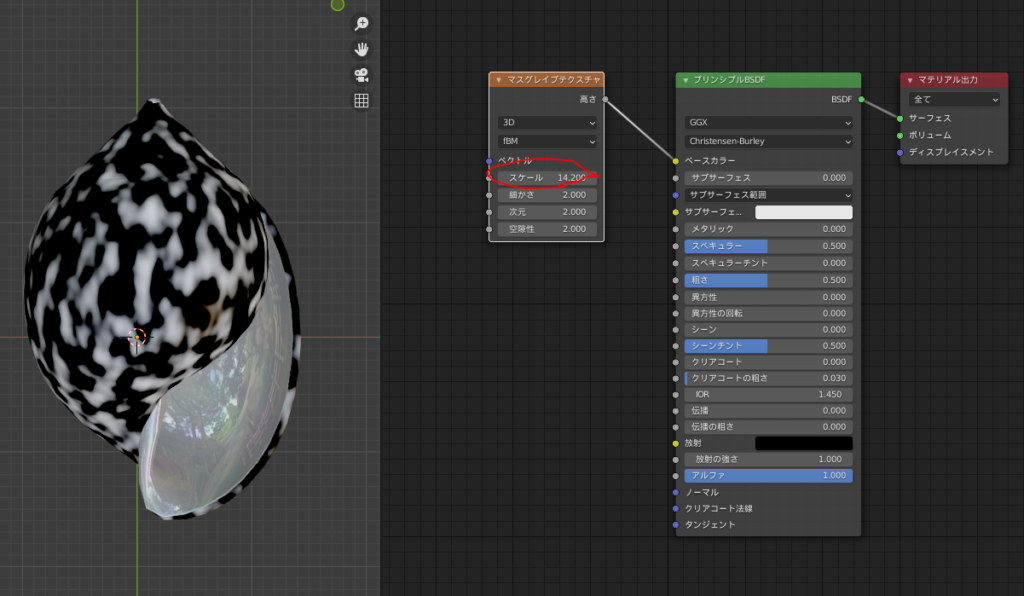
Changing the second option from “fBM" to “Multi Fractal," “Ridged Multi Fractal," “Hybrid Multi Fractal," or “Hetero Terrain" alters the pattern.
I chose the “Ridged Multi Fractal" pattern, as it looked similar to the shell texture.
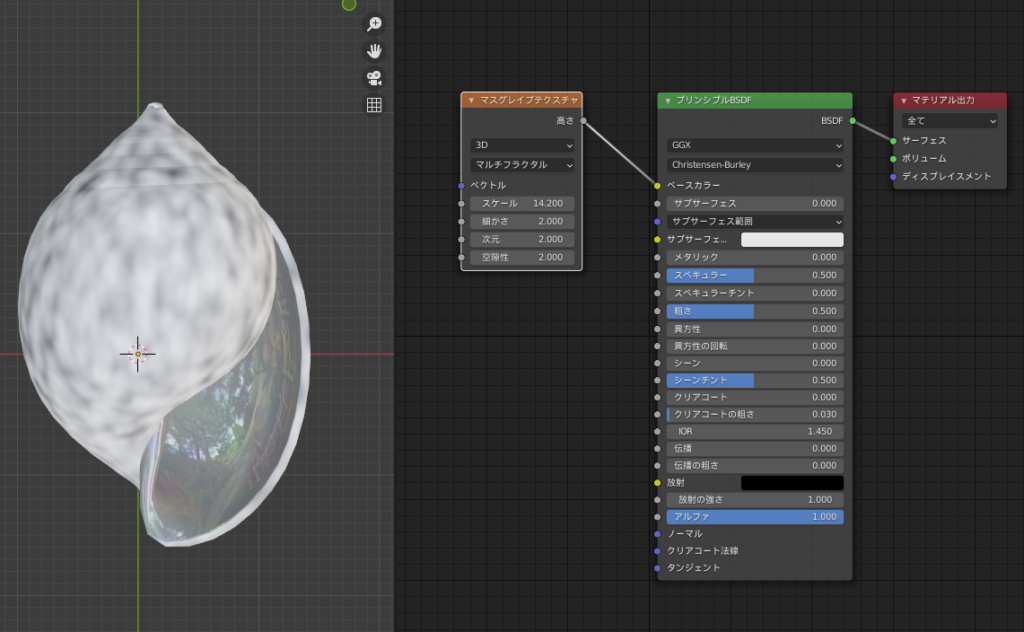
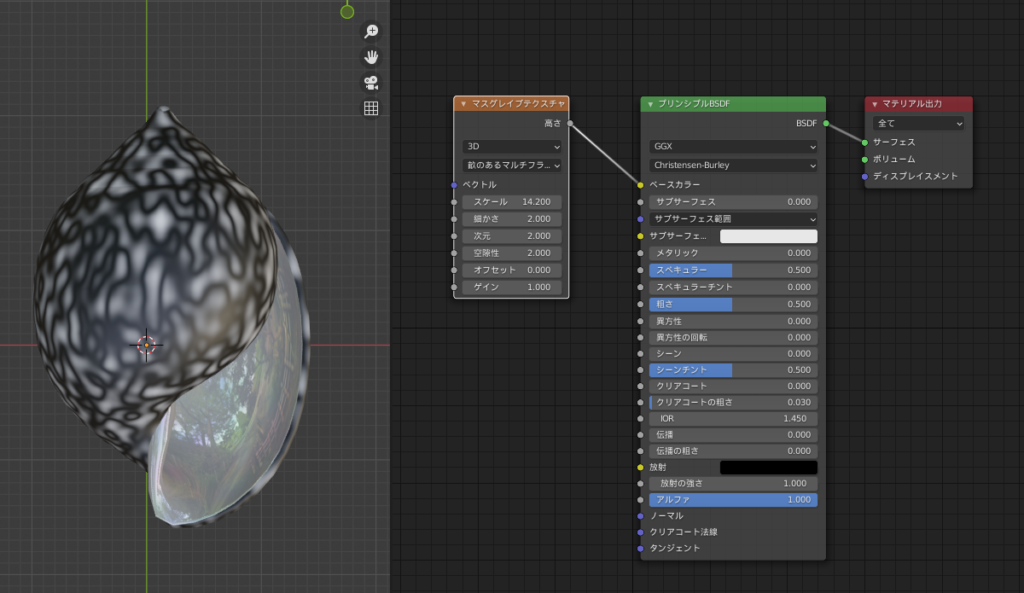
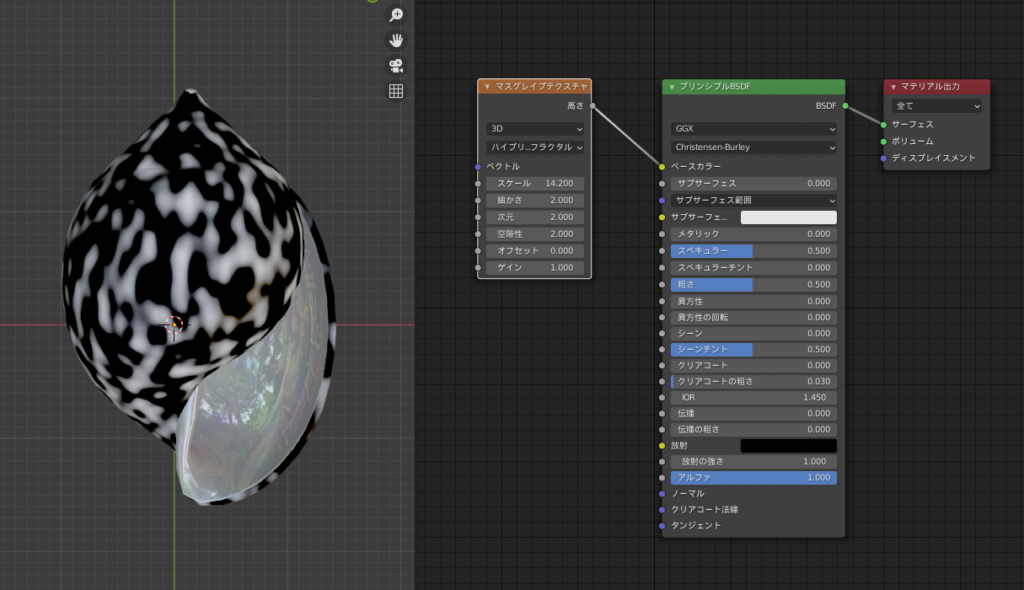
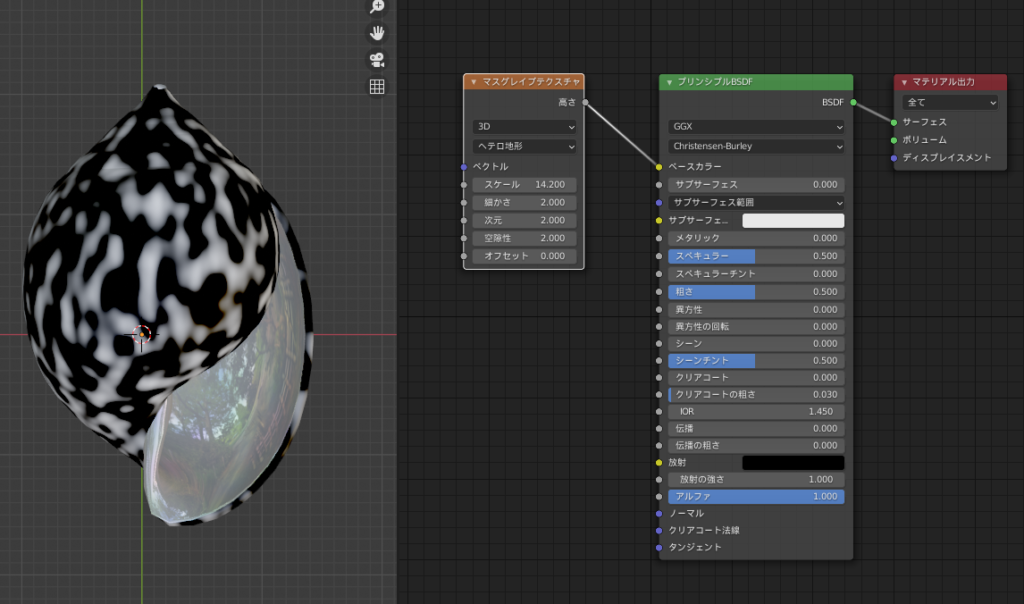
As before, I added a ColorRamp between the Musgrave Texture and the Principled BSDF and adjusted the colors and scale. This resulted in a pattern that resembled the “Tagayasanminashi."
Creating Surface Detail with Bump Mapping
The shell we created earlier using the noise texture looks good as it is, but adding some surface bumps would make it appear even more realistic.
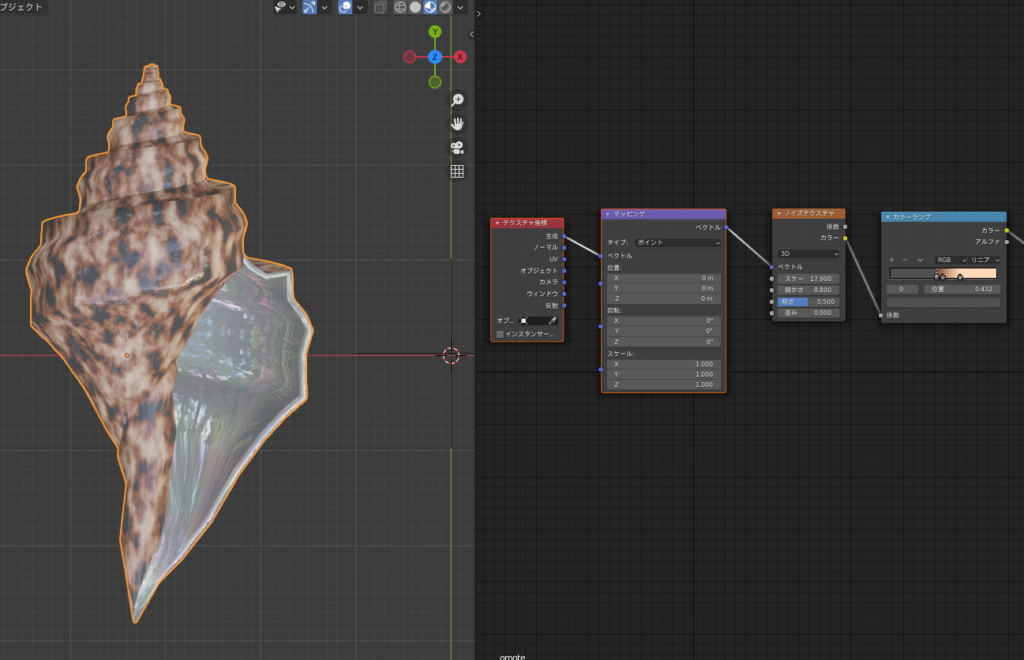
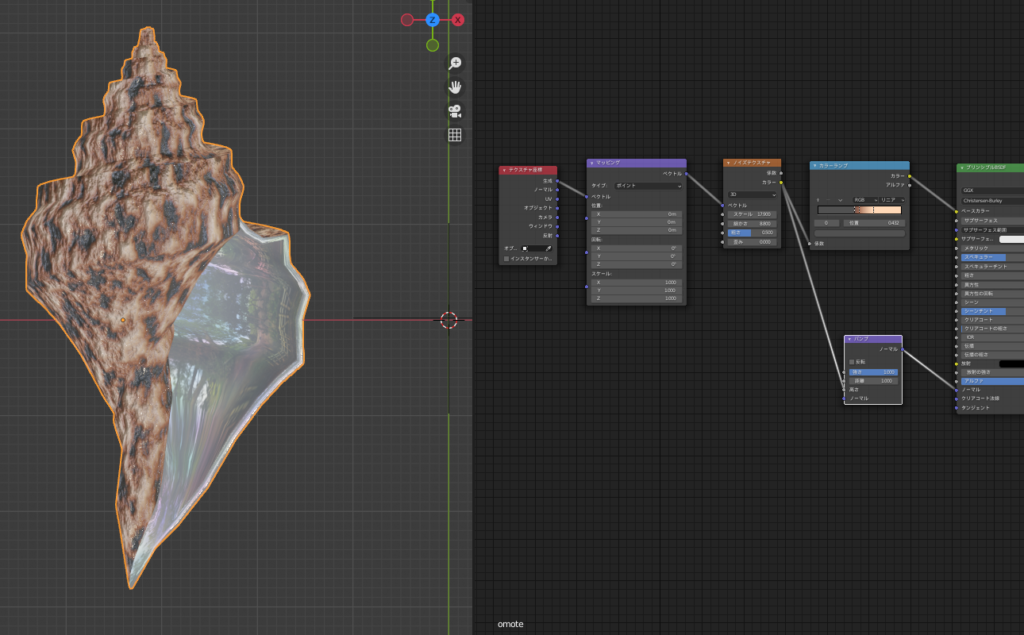
By adding a “Vector > Bump" node, we can give the surface more texture. The “Bump" node converts black and white information from a texture into surface displacement (bumps).
Here’s how I connected the “Color" from the Noise Texture to the “Height" input of the Bump node, and the “Normal" output of the Bump node to the “Normal" input of the Principled BSDF shader.
By adding the Bump node, the black spots in the pattern now appear to be recessed, as shown in the image below.
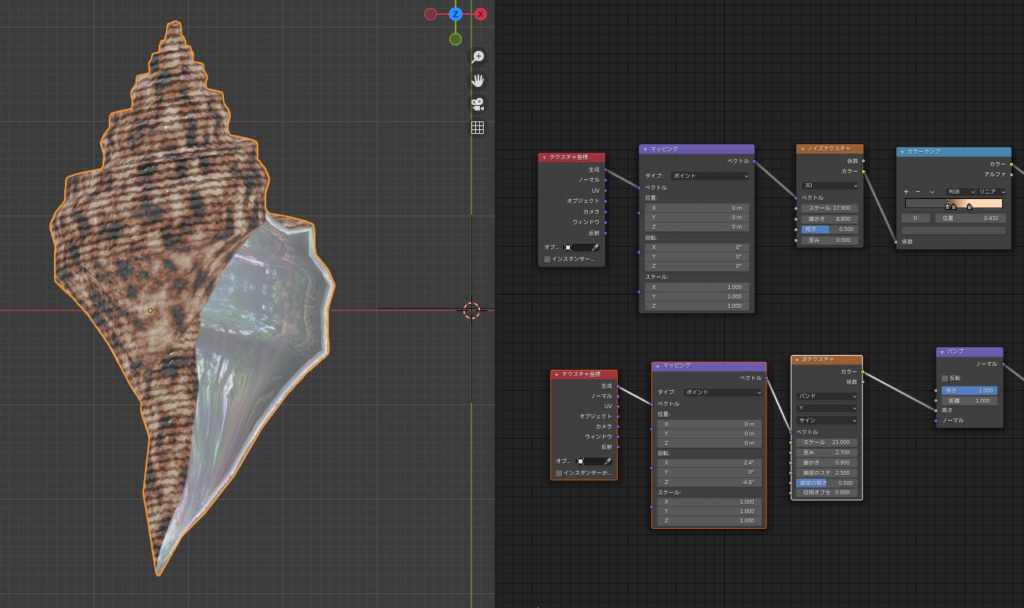
Additionally, if we replace the Noise Texture with a Wave Texture and connect it to the Bump node, we can create wave-like bumps, as seen in the example.
For further reference on how to use bump textures, I’d like to thank the following individuals for sharing useful insights:
Kemari (@actNero398) – “Kemono Kobachi"
Purupuru (@purupuru_connyu)
Texture for the Inside of the Shell
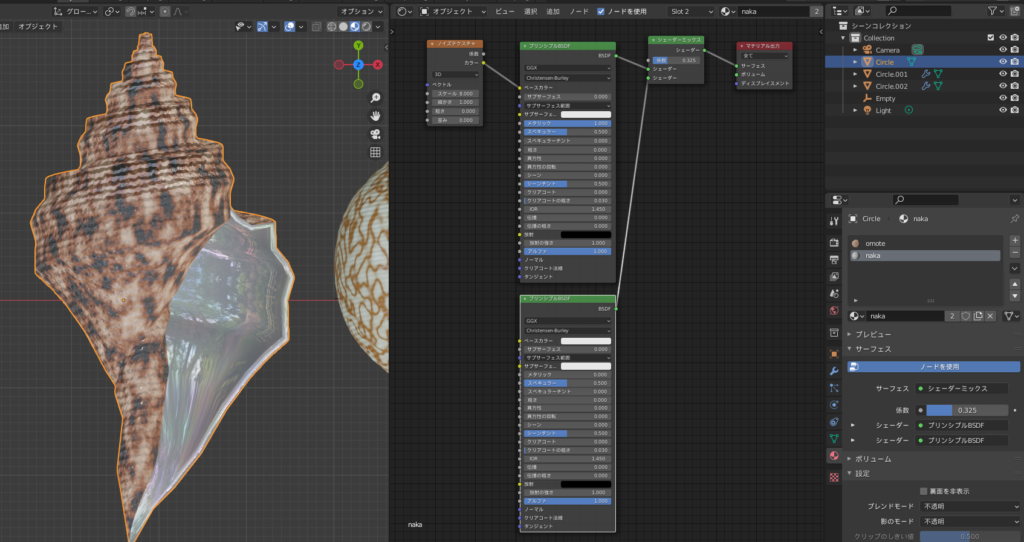
I used the “Material Assign" function in the Solidify modifier to assign a material slot for the inside of the shell. I referred to a tweet by Purupuru (@purupuru_connyu) for this process 🙇.
To give the inside of the shell a subtle rainbow-like shine, I mixed a Principled BSDF connected to a Noise Texture with another Principled BSDF set to pure white using a Shader Mix node.
Since I wanted the surface to be shiny, I set both Principled BSDF shaders’ roughness to 0. To emphasize the calcium-like appearance (the main component of a shell), I set the metallic value to 1 for the Principled BSDF connected to the Noise Texture.
AD
Conclusion
I’ve written about how to create simple patterns using material nodes. How did you find it?
By combining a few different nodes, you can create a variety of patterns, and it was so fun that I couldn’t stop tweaking the nodes 😆 lol.
I’d like to be able to express even more materials with nodes, so I plan to study nodes more seriously in the future 😊.
Reference Videos & Sites
Sasara Bch – Blender M01-072【巻貝の謎】(Mystery of Conch)🐚貝.kai,shell
Blender’s built-in free add-on NodeWrangler
Sasara Bch – Blender O01-005【NODE WRANGLER】
AD
