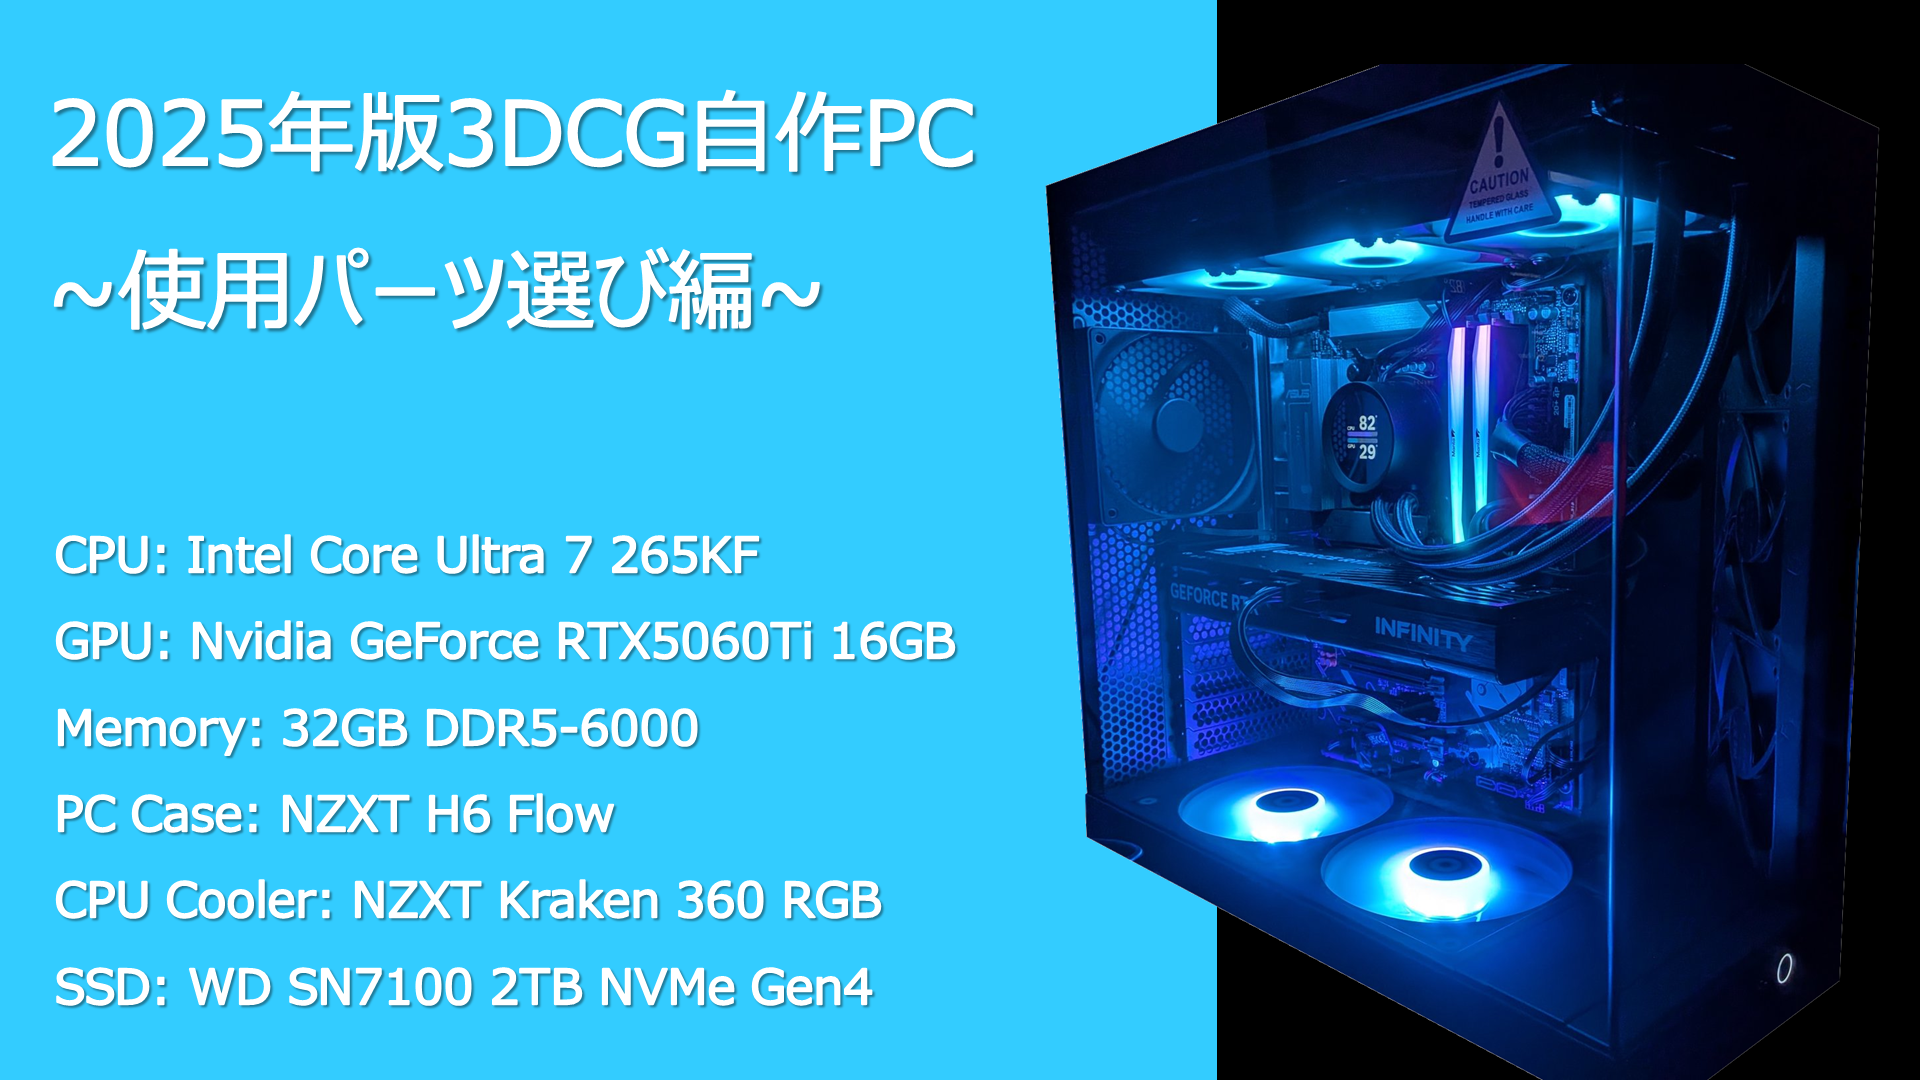
[2025 Edition 3DCG Custom PC] Choosing Components [Core Ultra 7 265KF & RTX 5060 Ti]
Hello!
The other day, I built a new custom PC for 3DCG for the first time in a while.
NZXT H6 Flow & Kraken 360 RGBで組んだ自作PCです🖥️
— クララ/Klala (@klala_lab) July 17, 2025
部屋の明かりを消すとライティングが映えますね✨ pic.twitter.com/uef8itN3Ry
When I built my previous PC in 2021, I used entry-level components aimed at 3DCG beginners. This time, however, I built it with mid-to-advanced level specifications, so I decided to write an article summarizing how I selected the parts.
If you want a PC for 3DCG—especially if you want to try video production using Blender or Unreal Engine—I hope you’ll find this helpful.
By the way, this article does not cover basic explanations of each component (for example, “What is a CPU?”) or how beginners should choose parts for a custom PC. For that kind of information, please refer to articles by others, such as “Chimolog,” for example.
If you have any comments or questions, please feel free to contact Clara on Twitter (https://twitter.com/klala_lab) (^^)/
広告/AD
Requirements Definition for the Second PC
The specifications of the PC I have mainly been using up to now are as follows:
| CPU | Intel Core i5 10400F(6C12T) |
| Graphics Card (GPU) | Nvidia GeForce RTX3050 |
| Memory | DDR4 32GB |
| SSD | 500GB(for system) 2TB(for 3DCG data) |
| HDD | 4TB |
Back in 2021 when I built this PC, I had just started learning Blender and wasn’t yet creating complex 3D models or animation projects. Because of that, my goal was simply to “use Blender comfortably,” so I built an entry-level PC in the 100,000-yen price range.
(At the time, I reused only the PC case from my old PC and replaced all internal components.)
I summarized how I selected the parts back then in another article on this blog, so I hope you’ll find it useful as a reference.
At the time I first built it, the graphics card was a GTX 1650, but in the following year, 2022, I upgraded it to an RTX 3050 for better rendering performance.
Since then, I’ve made several updates, such as replacing the PC case, adding a SSD, and changing the CPU cooler. However, the basic configuration has remained almost the same as it was in 2021.
For everyday use—like working with office software, rendering still images in Blender, or creating animations using low-poly objects—it still works perfectly fine even now, four years later.
Although the CPU is from an older generation, it still has 6 cores and 12 threads, so it handles running multiple applications at once without any issues—for example, operating Blender while writing articles.
However, while learning how to use the game engine Unreal Engine 5 (UE5), which I started using recently, the processing delays caused by insufficient specs have become more noticeable. Because of this, I increasingly wanted to build a higher-spec PC that can smoothly handle video production in UE5 as well as Blender volume rendering.
This time, with UE5 use as the top priority, I set the following requirements for the new PC build:
- Emphasis on CPU performance and core count to enable faster UE5 compilation
- Emphasis on GPU VRAM capacity, not just raw computational performance
CPU
When building a custom PC, I think many people first decide on the CPU and GPU combination based on the intended use and budget.
For example, if you are building a gaming PC, you would first decide which resolution you want to play at (Full HD? WQHD? 4K?), what games you will play (light or heavy load), and how much budget you can allocate. Based on that, you would choose a GPU, and then select a CPU that won’t bottleneck that GPU while still providing high processing speed.
For this build, my main goal was to speed up UE5 compilation, so I looked for a CPU with strong multi-core performance while keeping the budget as reasonable as possible.
The CPU market is essentially split between two major manufacturers: Intel and AMD. In terms of performance for gamers—the main target audience for custom PC builds—AMD is extremely popular, especially with game-focused CPUs equipped with 3D cache, such as the Ryzen 7800X3D and 9800X3D.
However, Intel’s 14th generation and the latest Core Ultra 200 series feature not only main performance cores (P-cores) but also efficiency cores (E-cores) optimized for background processing. Because of this, my impression is that Intel tends to perform better than AMD in multi-core workloads such as 3DCG rendering (although nowadays rendering is mostly handled by GPUs rather than CPUs).
When compiling in Unreal Engine, all CPU cores are generally used at full capacity, so I believe multi-core performance is particularly important.
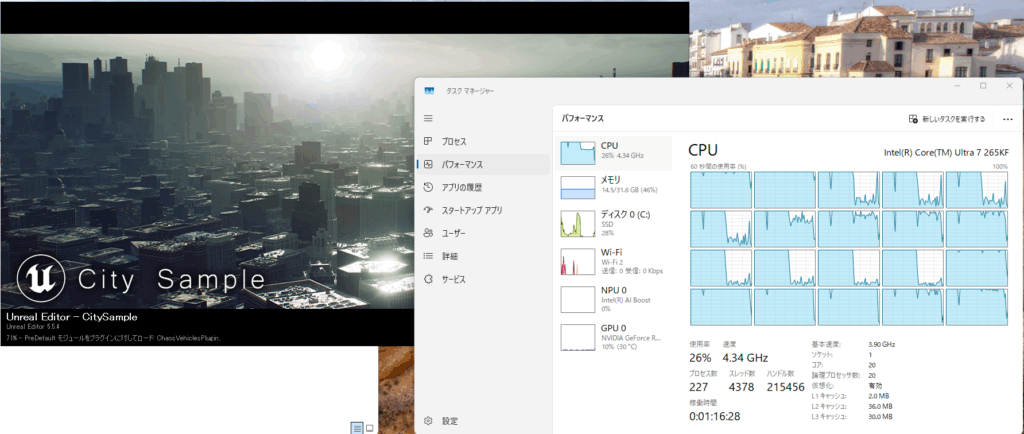
When I compared performance using CPU benchmark comparison sites, Intel showed higher multi-core performance in benchmarks such as PCMark and Cinebench.
In addition, prices for Intel K-series models such as the Core i5 14600K and Core Ultra 7 265K have recently been dropping, making them more affordable.
In my case, I initially considered upgrading my current main PC by replacing the CPU with the now older-generation Core i5 14600KF.
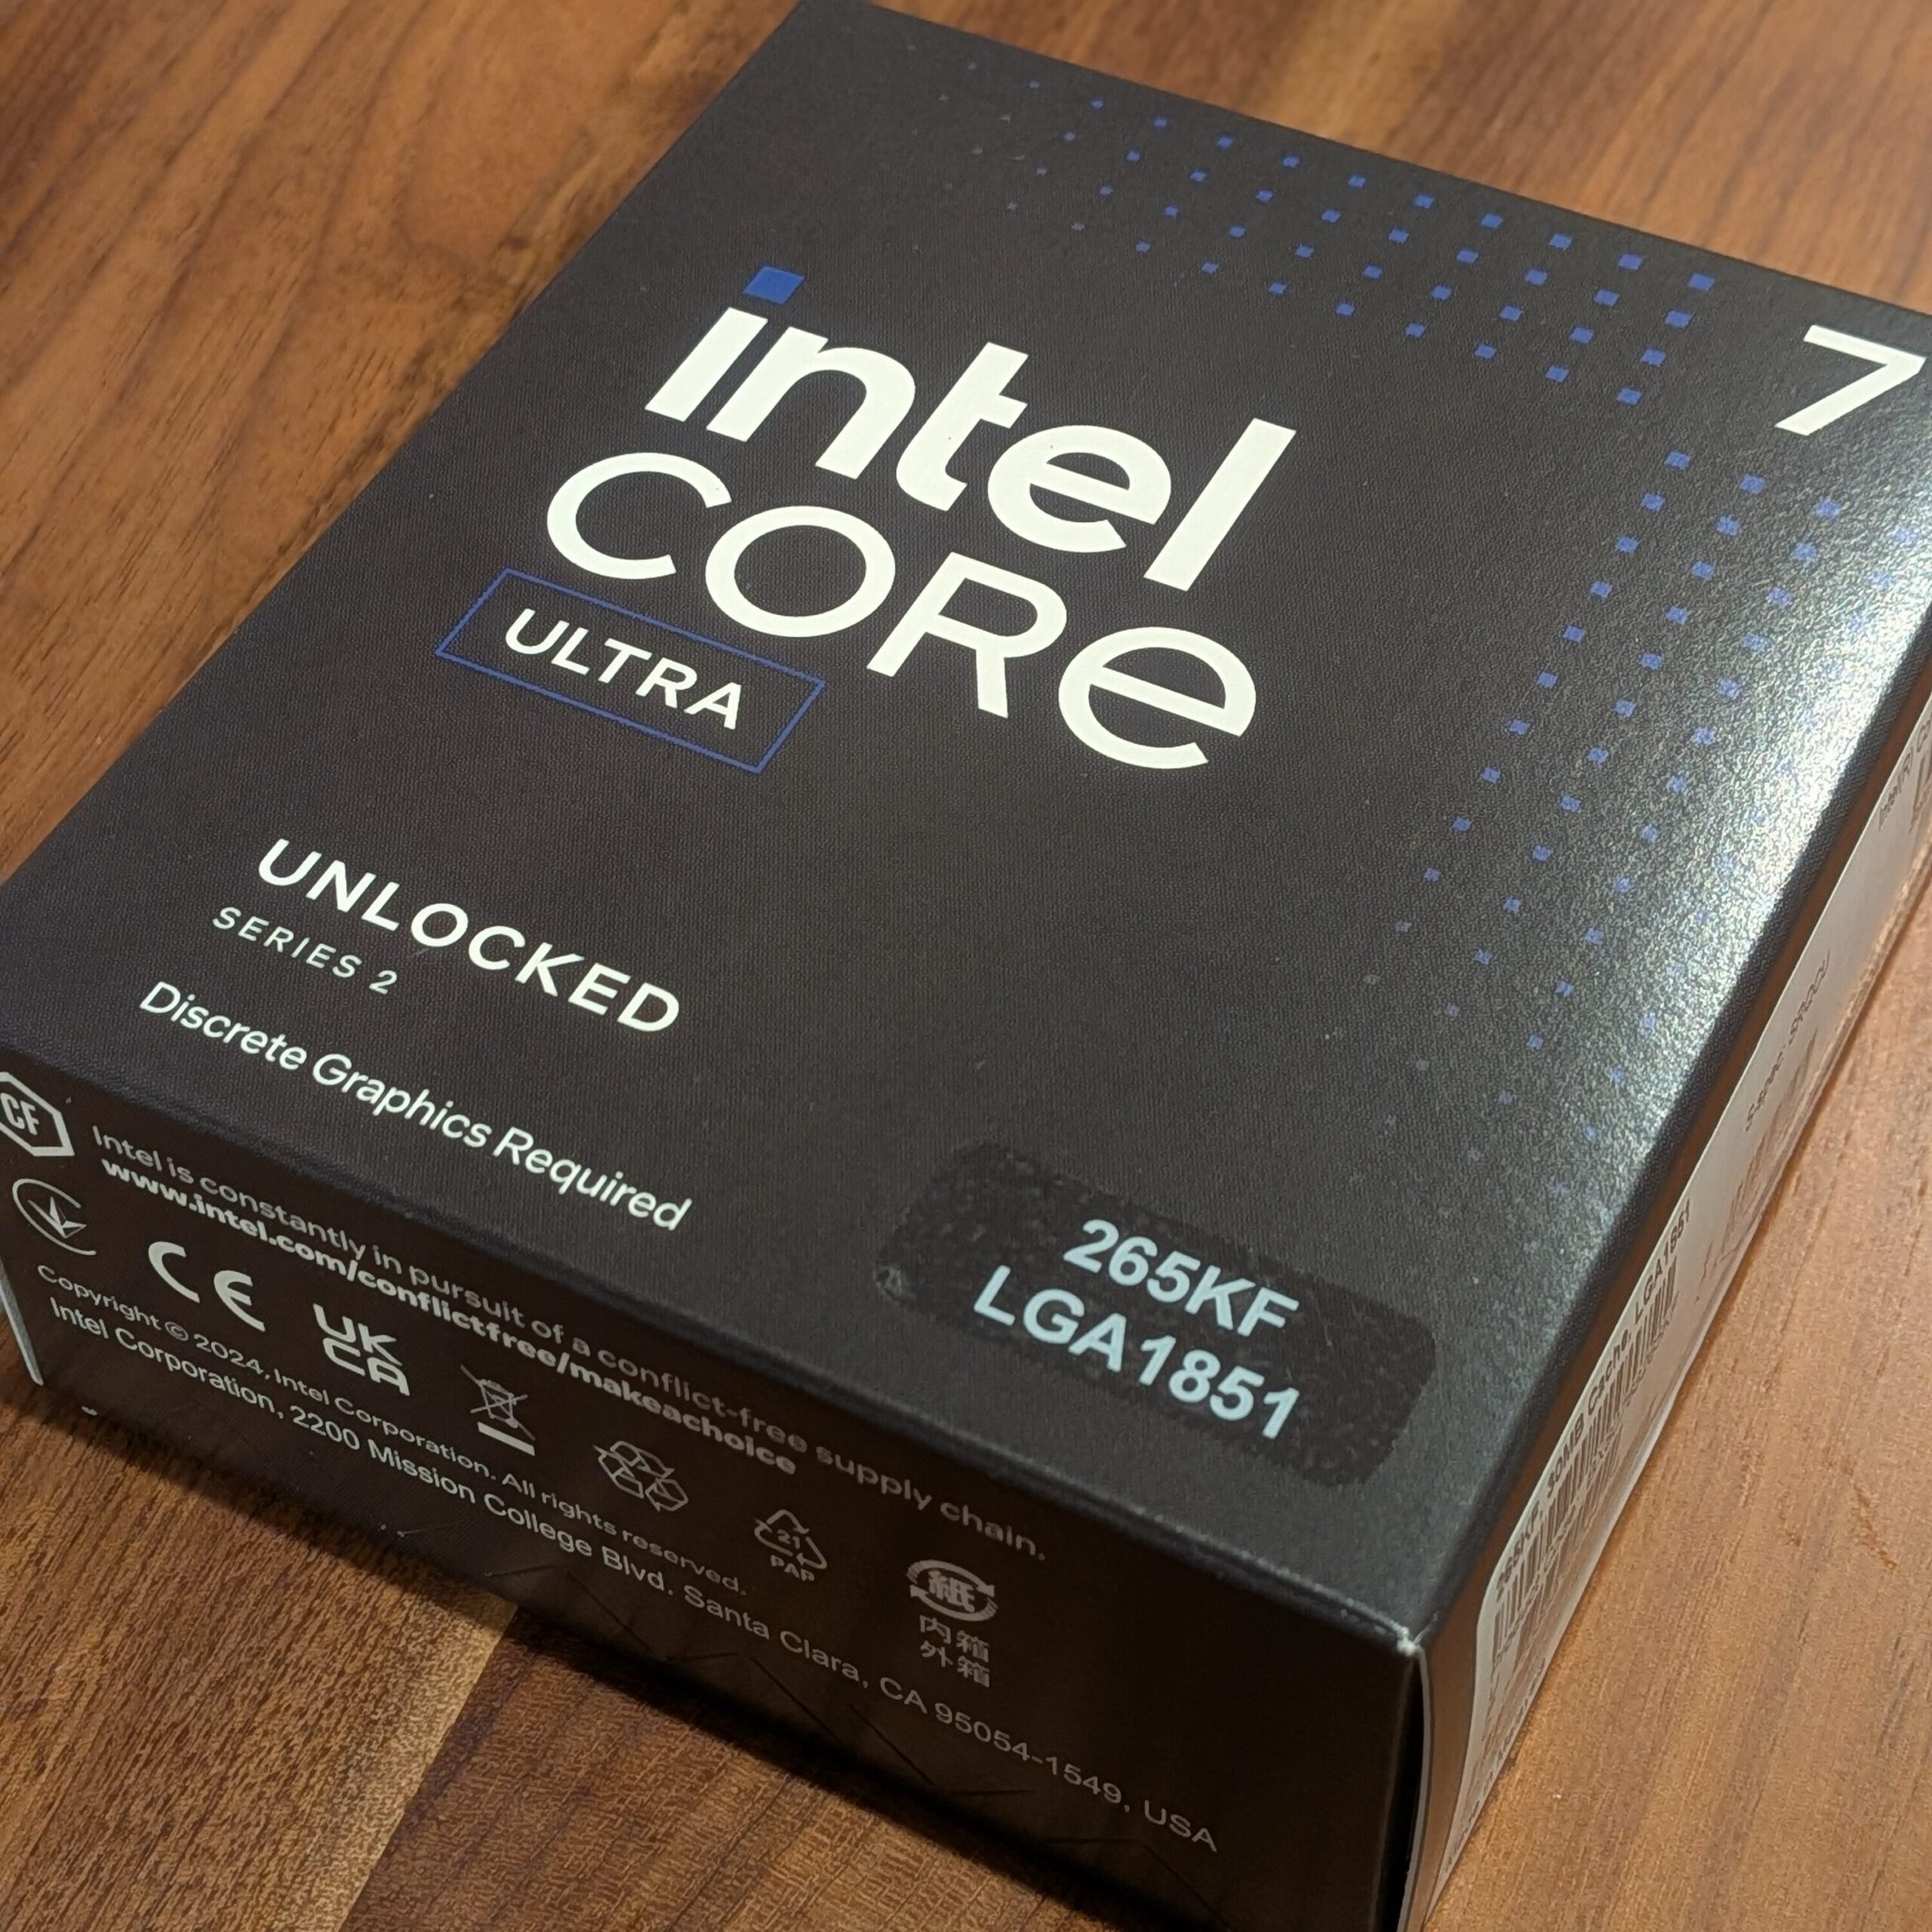
However, with the price of the Core Ultra 7 dropping, along with the fact that the Core Ultra 7 offers more than 30% higher performance compared to the i5 14600KF, and that it would not become a bottleneck even when paired with high-performance GPUs such as the RTX 5060 Ti or higher, I ultimately chose the Core Ultra 7 265KF.
I had also wanted to try using a liquid CPU cooler for some time. However, considering the risk of potential leaks (modern manufacturers are very reliable, so leaks are unlikely unless the product is extremely low quality), I decided to keep my existing PC as-is and instead build a second PC dedicated to 3DCG.
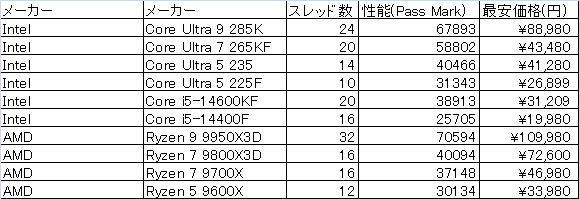
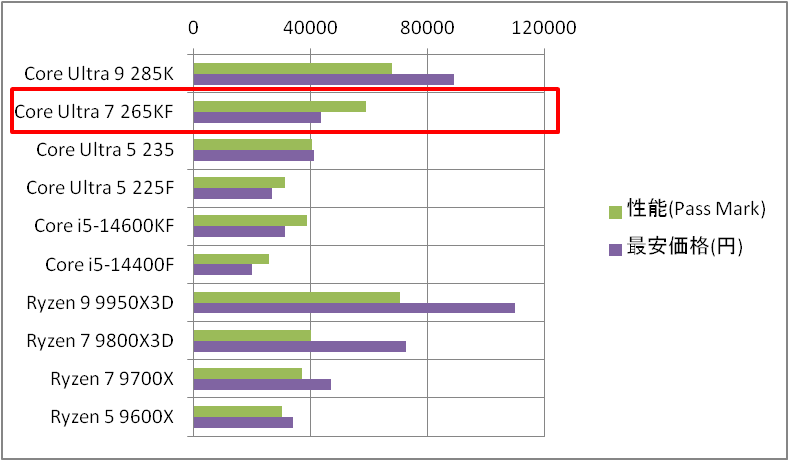
For reference, price and performance comparisons with other CPUs are shown below (as of August 2025; prices based on Kakaku.com, performance based on PC Jiyucho).
Looking at the comparison, it is clear that while the Core Ultra 7 265KF delivers multi-core performance close to the Core Ultra 9 and Ryzen 9, its price is less than half of those models, making it very cost-effective.
広告/AD
Graphics Card
As for the graphics card, products equipped with GPUs from three companies—Nvidia, AMD, and Intel—are currently available on the market. However, when it comes to rendering performance in the 3DCG software Blender, Nvidia GPUs stand out significantly.
Below is a ranking of GPU rendering speeds in Blender, and the top 10 positions are occupied by Nvidia GPUs.
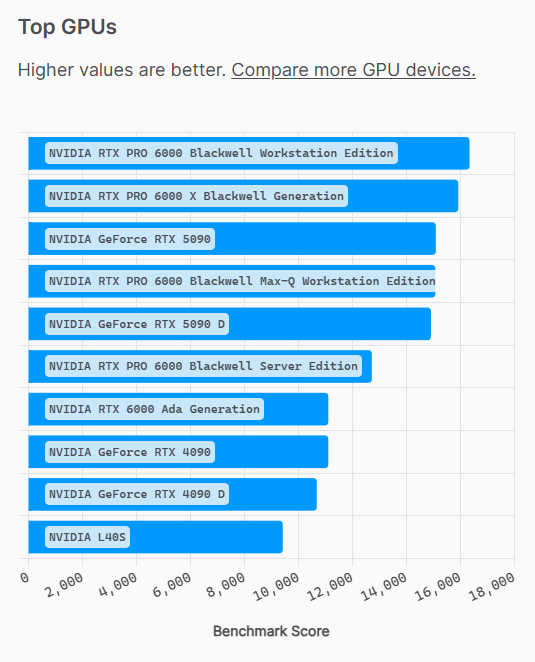
For gaming, AMD GPUs have increasingly become competitive and sometimes outperform Nvidia GPUs. However, optimization for Blender still seems to be behind.
Therefore, for this custom PC as well, I decided to choose a graphics card equipped with an Nvidia GPU, which has outstanding optimization for Blender.
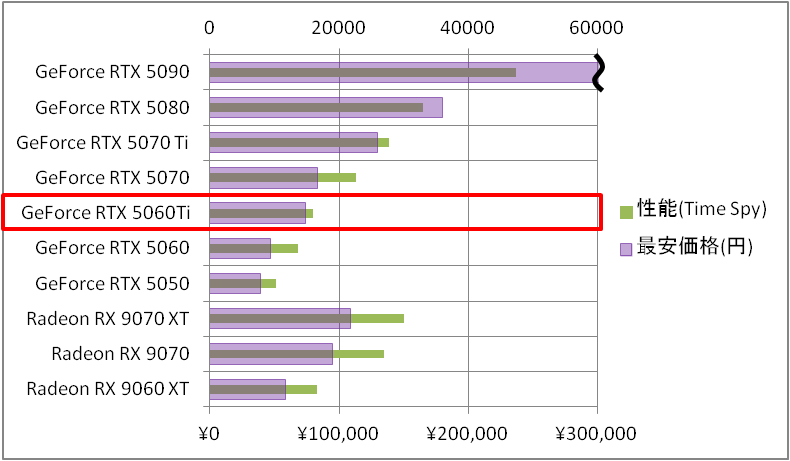
Among Nvidia GPUs, the candidates were the RTX 5070 Ti and RTX 5060 Ti, both equipped with 16GB of VRAM, and the RTX 5070, which has mid-level performance but a relatively smaller 12GB VRAM capacity. However, the 5070 Ti costs around 140,000 yen, which was beyond my budget. The RTX 5070 can be purchased for under 90,000 yen, but the 12GB VRAM capacity could become a limitation when working in UE5. Therefore, I decided to purchase the RTX 5060 Ti, which can be bought from around 75,000 yen and comes with 16GB of video memory (I may upgrade in the future).
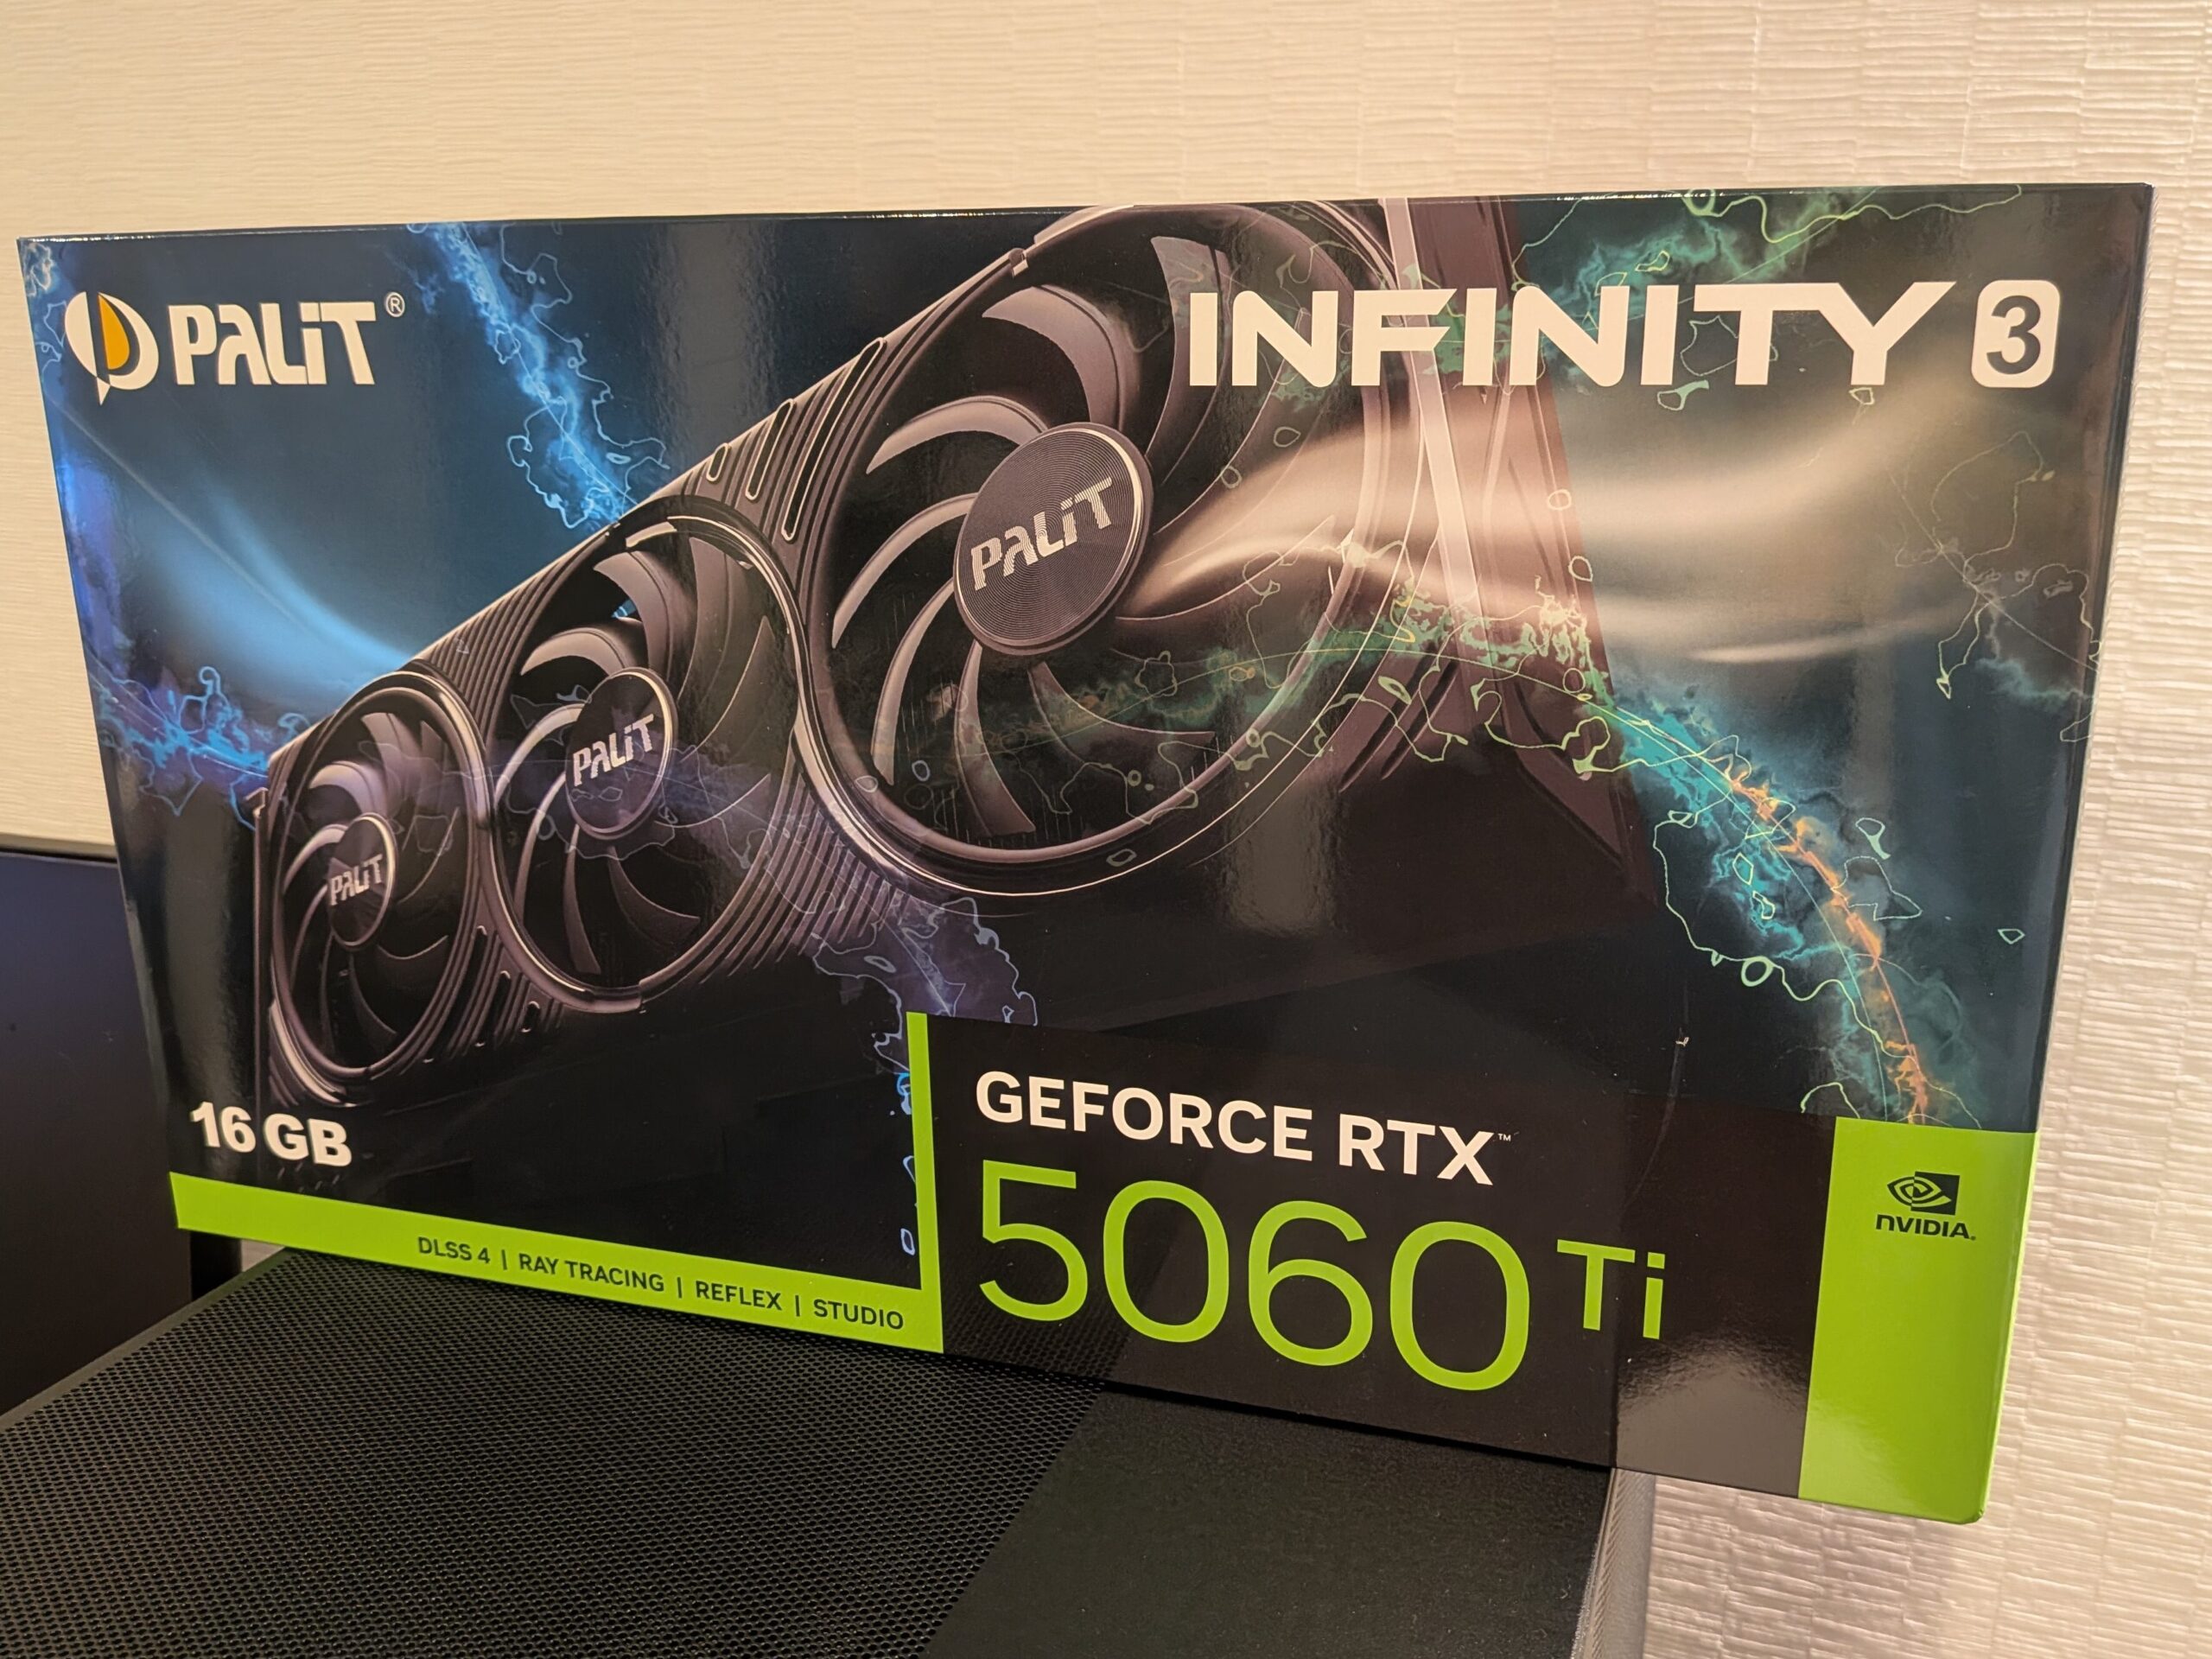
Among the RTX 5060 Ti models sold by various manufacturers, the Palit model sold exclusively by Dospara was the cheapest. Since my current RTX 3050 is also made by Palit, I chose the same brand again this time.
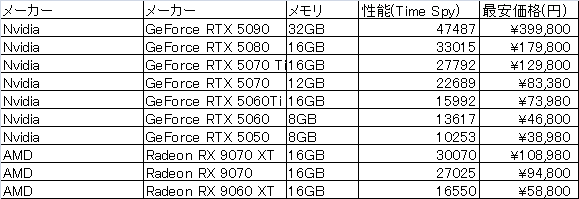
For reference, performance comparisons with other GPU candidates are shown below (as of August 2025; prices based on Kakaku.com, performance based on PC Jiyucho). If slightly less VRAM is acceptable, the RTX 5070 or RTX 5060 (also not included in the comparison below is the RTX 5060 Ti 8GB model) are options. If you do not use Blender, Radeon GPUs generally offer better cost performance.
Motherboard
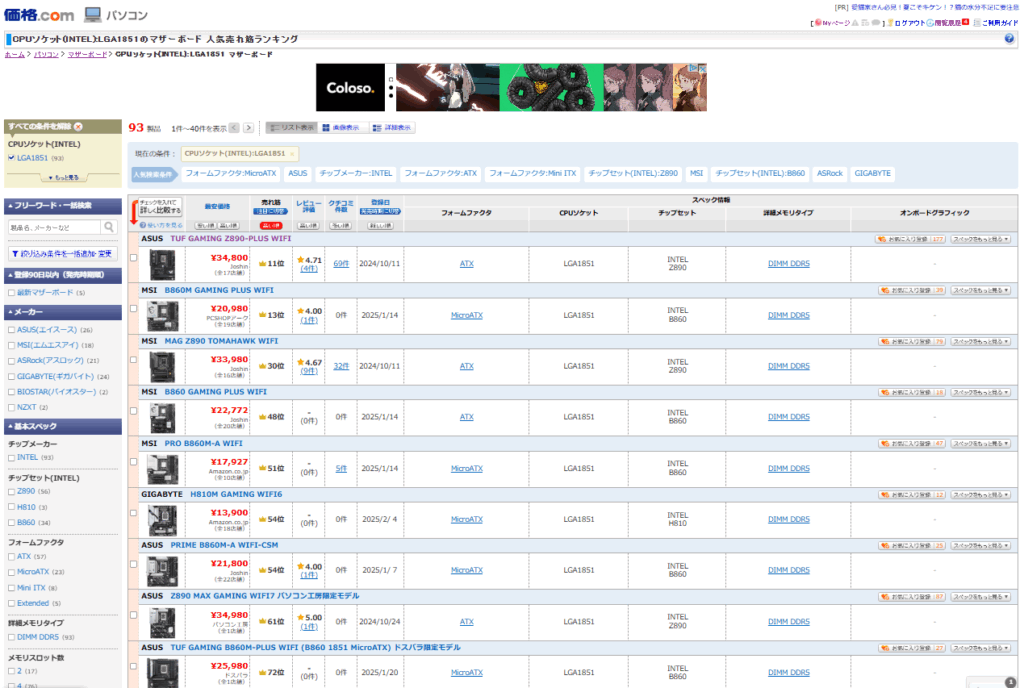
As of July 2025, possibly due to the weak yen, prices for Intel 800-series motherboards (LGA1851) for Intel Core Ultra CPUs have risen significantly.
Even budget models start in the mid-20,000 yen range, while mid-range models are priced around 30,000 to 40,000 yen.
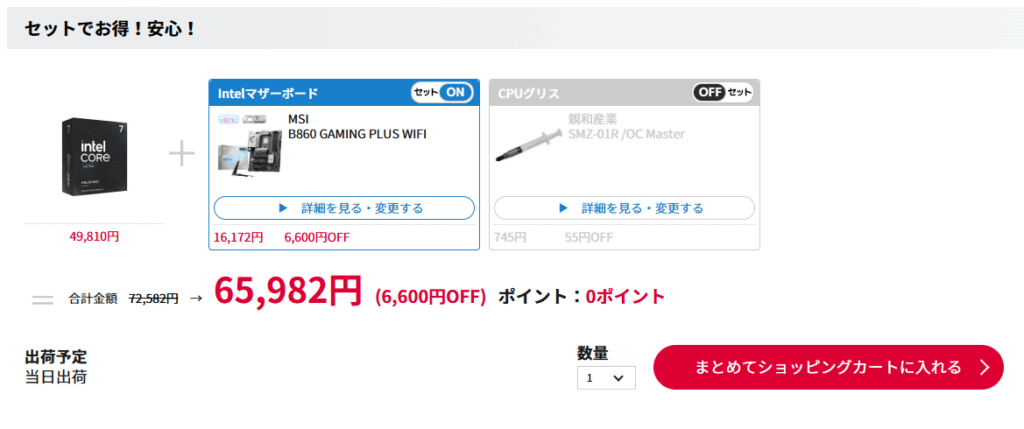
If you want to get one as cheaply as possible, I recommend purchasing the CPU and motherboard as a bundle.
For example, at PC Koubou, if you purchase a Core Ultra 7 265KF together with a motherboard, you can receive a discount of up to 11,000 yen.
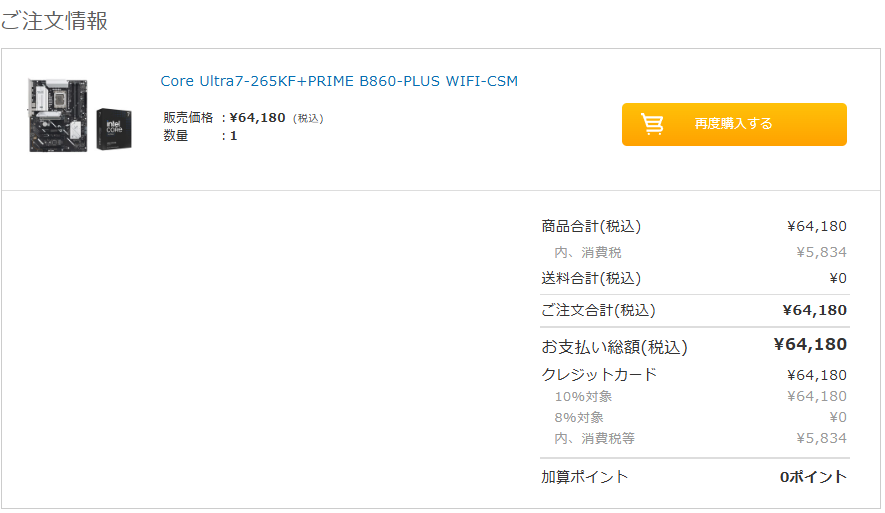
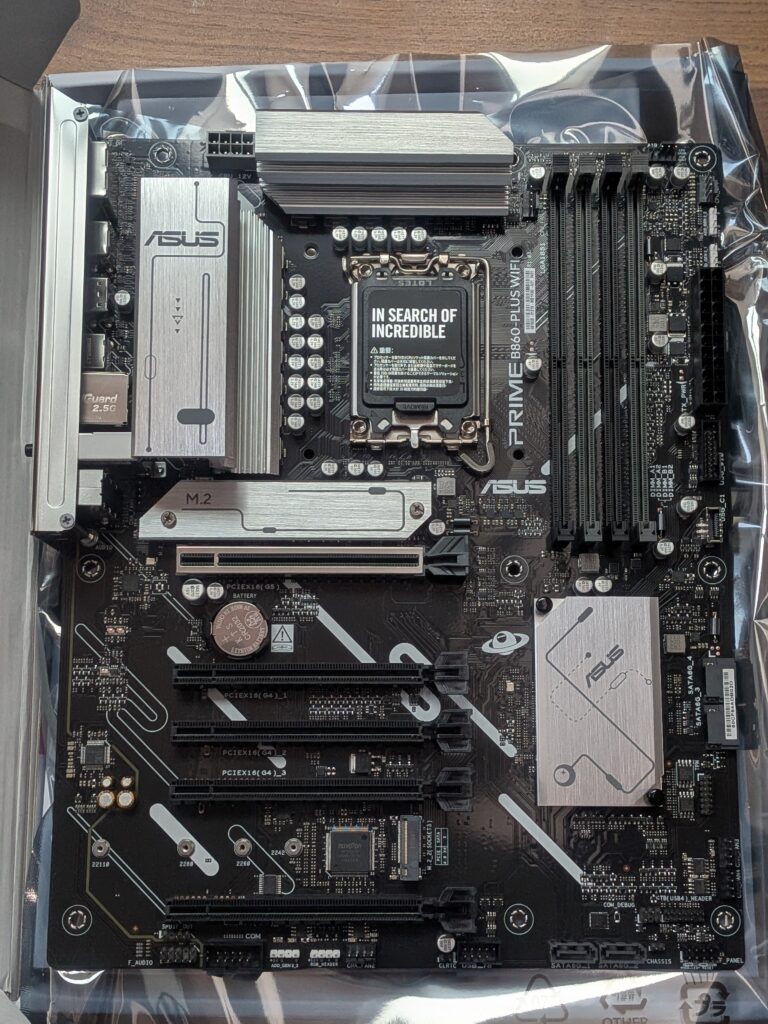
This time, I was able to purchase the Core Ultra 7 265KF together with the motherboard ASUS Prime B860 CSM-WiFi for 64,180 yen at Sofmap during a sale.
The ASUS Prime B860 CSM-WiFi is a motherboard aimed at business use. Compared to motherboards with the Z890 chipset designed for overclocking, it has somewhat more modest specifications—for example, it uses a single 8-pin CPU power connector, and the power phase design is 8+1+1+1, which is slightly lower compared to gaming-oriented motherboards.
However, as mentioned in the article below, even a single 8-pin connector can supply up to 384W of power, so it should be sufficient for normal use without overclocking.
It also has two M.2 SSD slots, allowing storage expansion by adding more M.2 SSDs in the future. In addition, it supports Wi-Fi 6E for high-speed wireless connectivity, which should be very useful when downloading and storing large UE5 projects.
Memory
Core Ultra CPUs require DDR5 memory. Although prices have dropped considerably compared to before, DDR5 is still more expensive than DDR4.
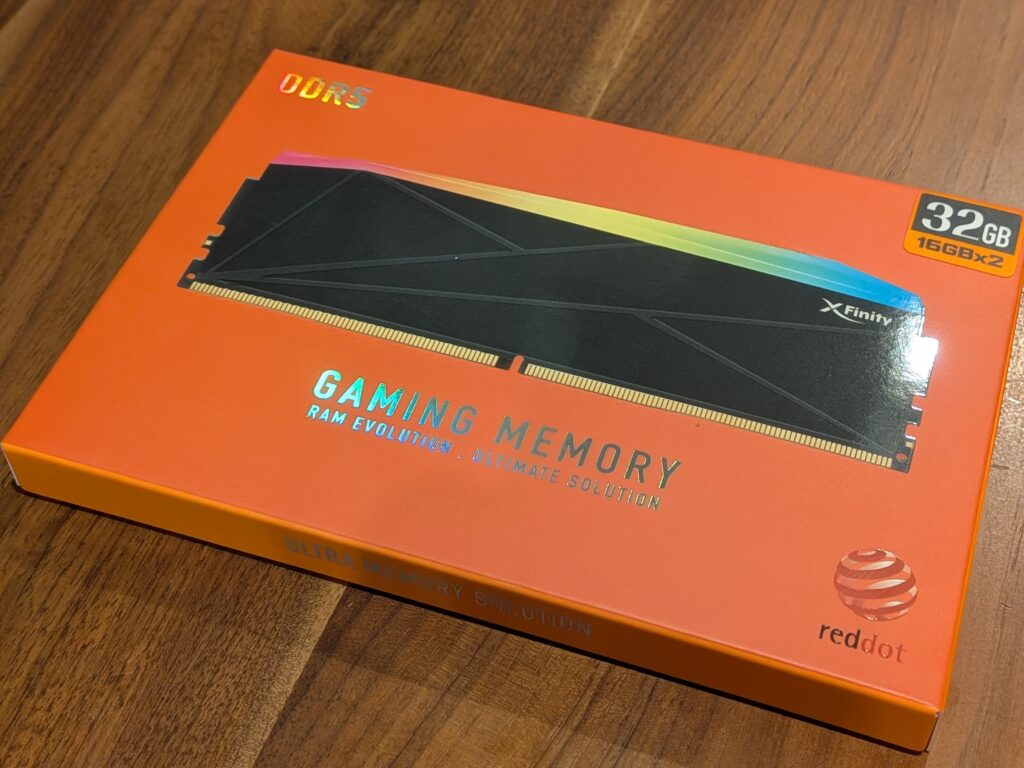
This time, I chose a 32GB memory kit with lighting from the Taiwanese manufacturer V-Color, the Manta XFinity RGB DDR5-6000 32GB (16GB × 2).
I was able to purchase it for 12,980 yen during a sale at PC Shop Ark.
As I’ll introduce later, I chose a pillarless PC case with good internal visibility this time, so I’m looking forward to seeing how the lighting will look.
広告/AD
SSD
For storage, I chose the following SSD:

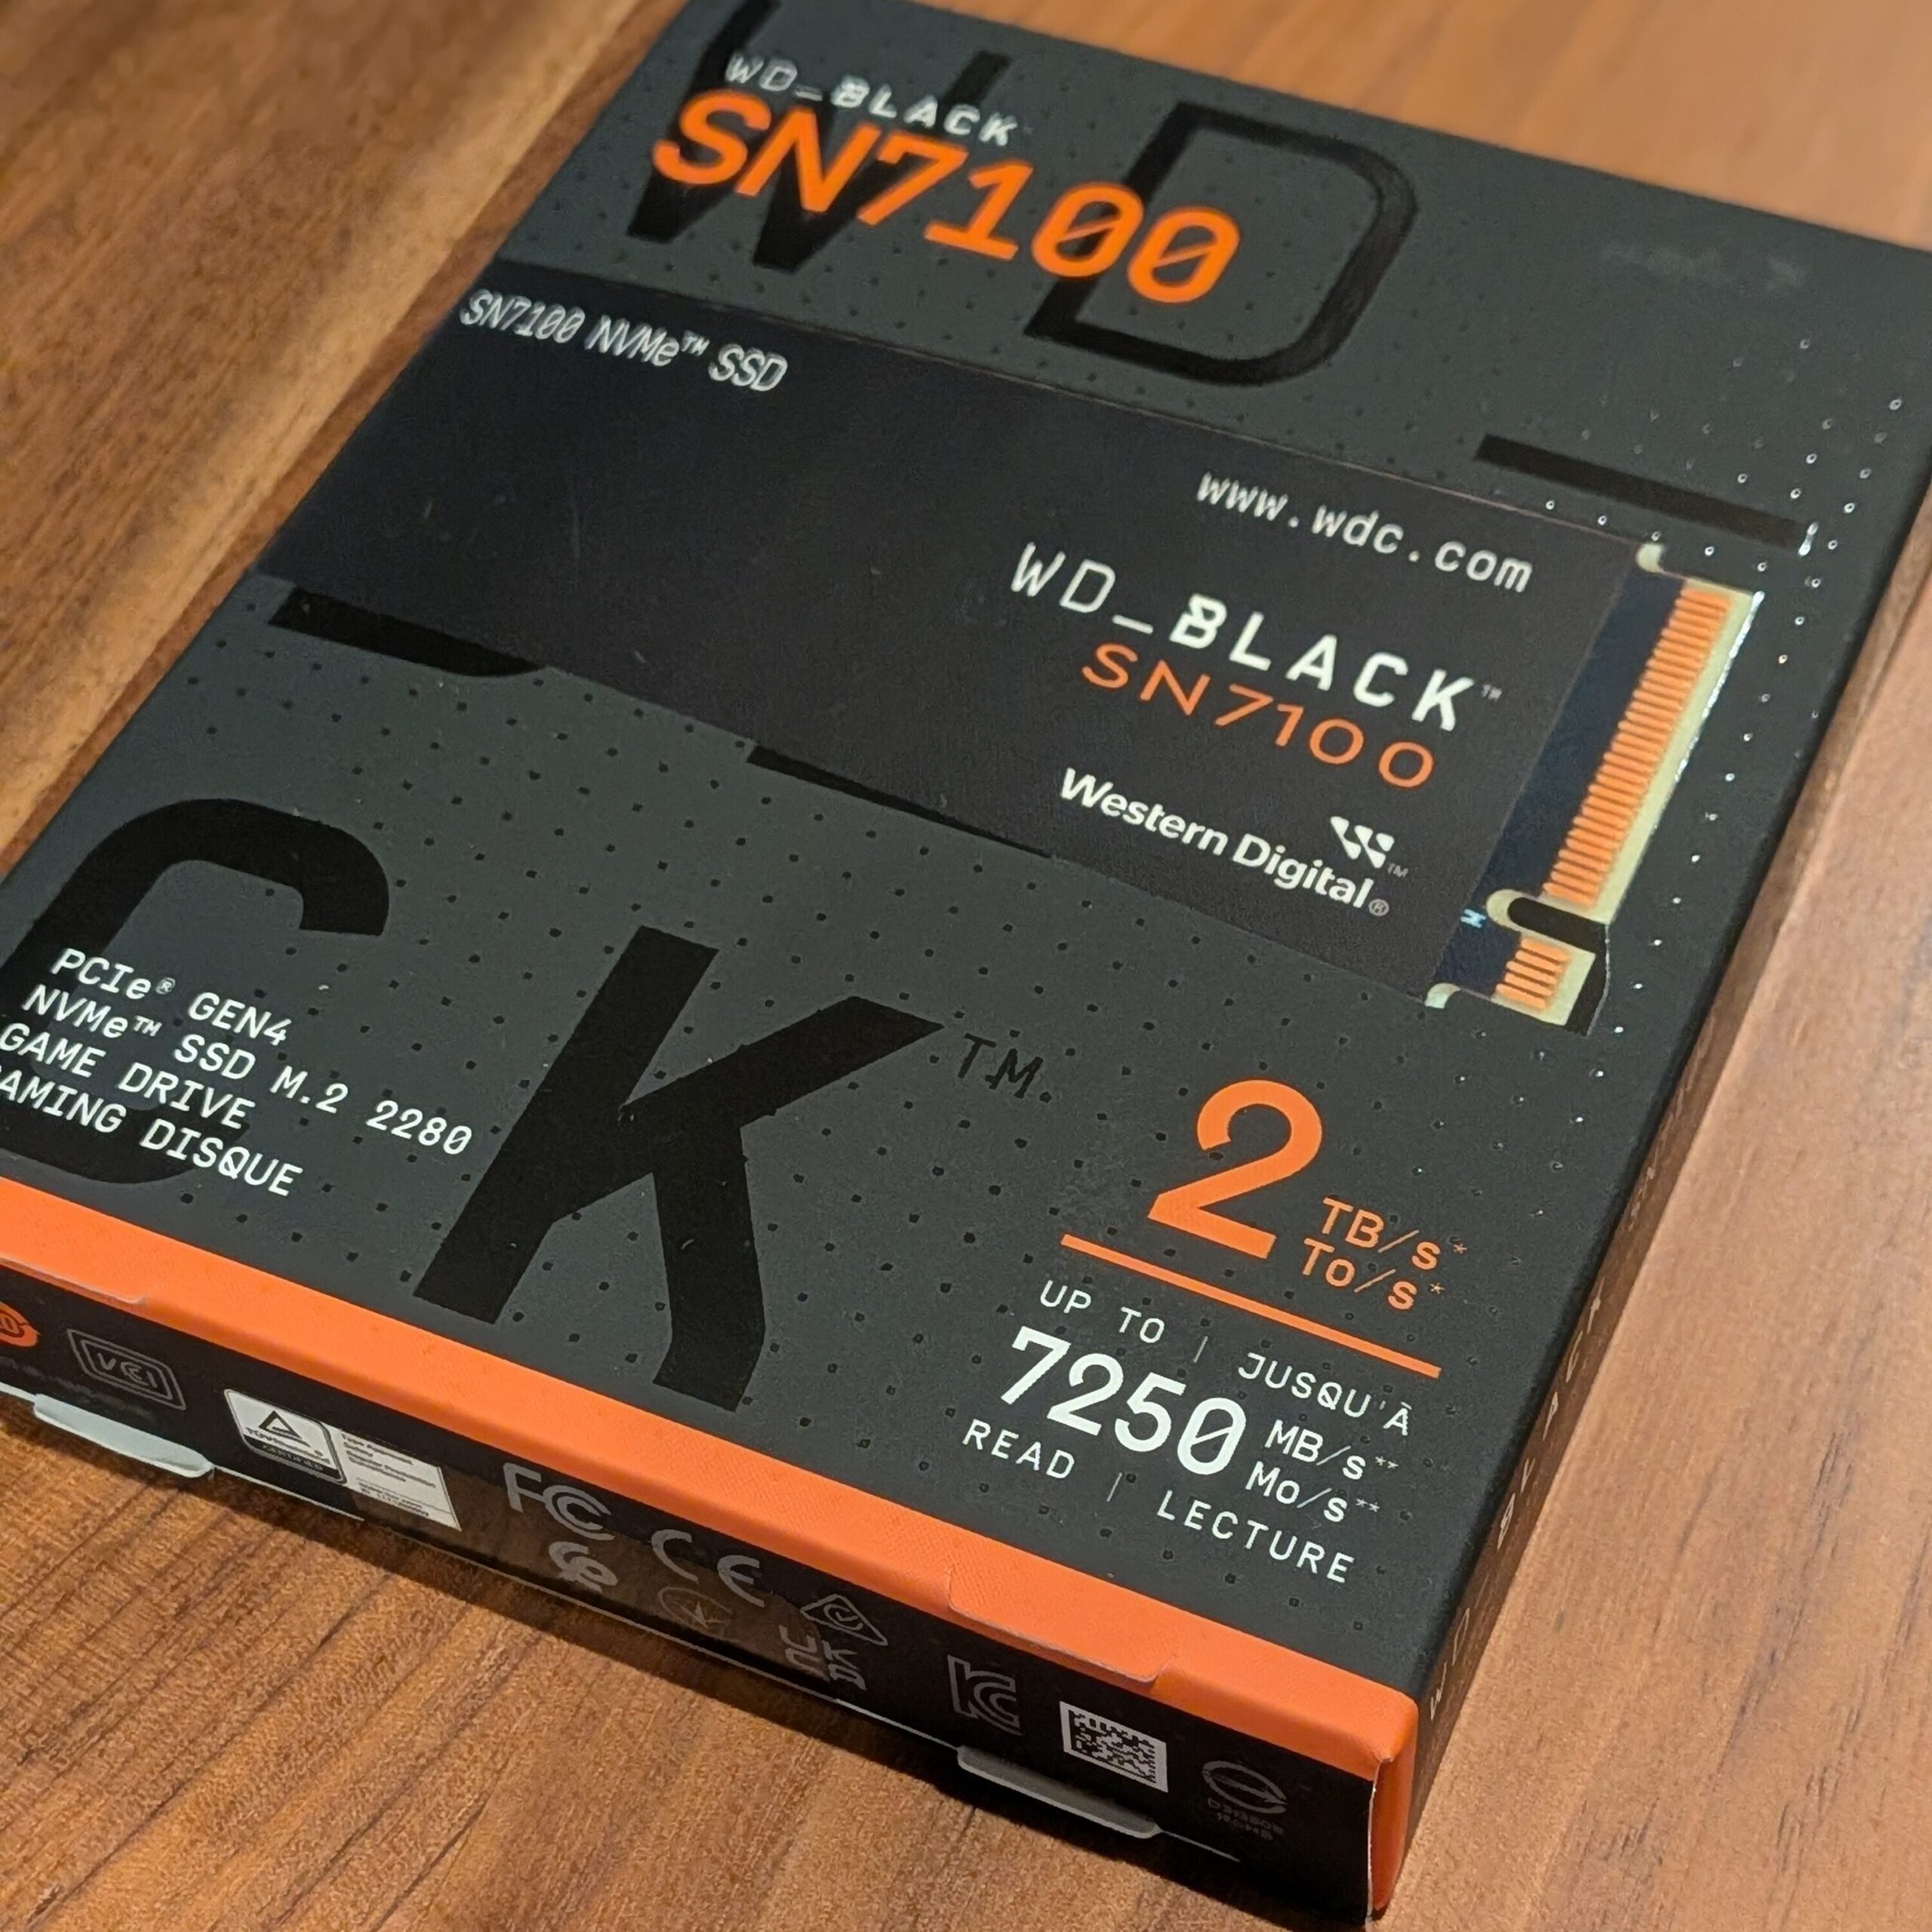
Western Digital SSD 2TB WD Black SN7100 (Max Read 7,250MB/sec) M.2-2280 NVMe WDS200T4X0E-EC (Official Domestic Distributor Product)
I selected the Western Digital Gen4 SSD “WD Black SN7100 2TB.”
The WD_BLACK SN7100 2TB PCIe Gen4 NVMe M.2 SSD is a 2TB M.2 SSD, the same capacity as the KIOXIA EXCERIA G2 I purchased previously. However, it features much faster sequential speeds of around 7,100MB/s while still being relatively affordable at around the 20,000-yen range.
Even large UE5 project files—often ranging from several GB to over 100GB—should be stored without any issues.
For reference, I also used an article by Chimolog as a guide when choosing this SSD:
Power Supply
The graphics card I selected this time is the RTX 5060 Ti, which uses an 8-pin connector and has a relatively modest power consumption of around 180W. Because of this, I believe a 650W power supply is sufficient.
I purchased the Kuroutoshikou “KRPW-BK650W/85+” because it was on sale at PC Koubou for 6,980 yen.
It is said that power supplies are most efficient when operating at around 50% of their rated capacity. Therefore, if you plan to run the CPU and GPU at 100% load constantly, choosing a 750W power supply may provide better power efficiency (see reference article below).
If I upgrade the graphics card to an RTX 5070 Ti in the future, power consumption will increase by more than 100W, and it will also require a 16-pin connector compatible with ATX 3.1. In that case, I plan to upgrade to a power supply rated at 800W or higher.
CPU Cooler
I spent a lot of time deciding on the CPU cooler and PC case.
This time, I wanted to get the maximum performance out of a high-performance CPU, and since I had only used air coolers before, I also wanted to try an all-in-one (AIO) liquid CPU cooler. Because of that, I decided to purchase a liquid cooling solution.
At first, I planned to prioritize cooling performance and use the ANTEC “FLUX” or “AX85” case, and pair it with an AIO cooler from ANTEC’s “VORTEX” series.

ANTEC ARGB LED Fan Equipped AIO Liquid CPU Cooler – Vortex Lum 360 ARGB
However, there were other options available for liquid coolers as well, such as ASUS “Prime” and Corsair “Nautilus.”

ASUS CPU Cooler 360mm All-in-One AIO Liquid Cooler – ASUS PRIME LC 360 ARGB (Official Domestic Distributor Product)

CORSAIR NAUTILUS 360 Radiator Liquid CPU Cooler with RS Case Fans – Black CW-9060089-WW
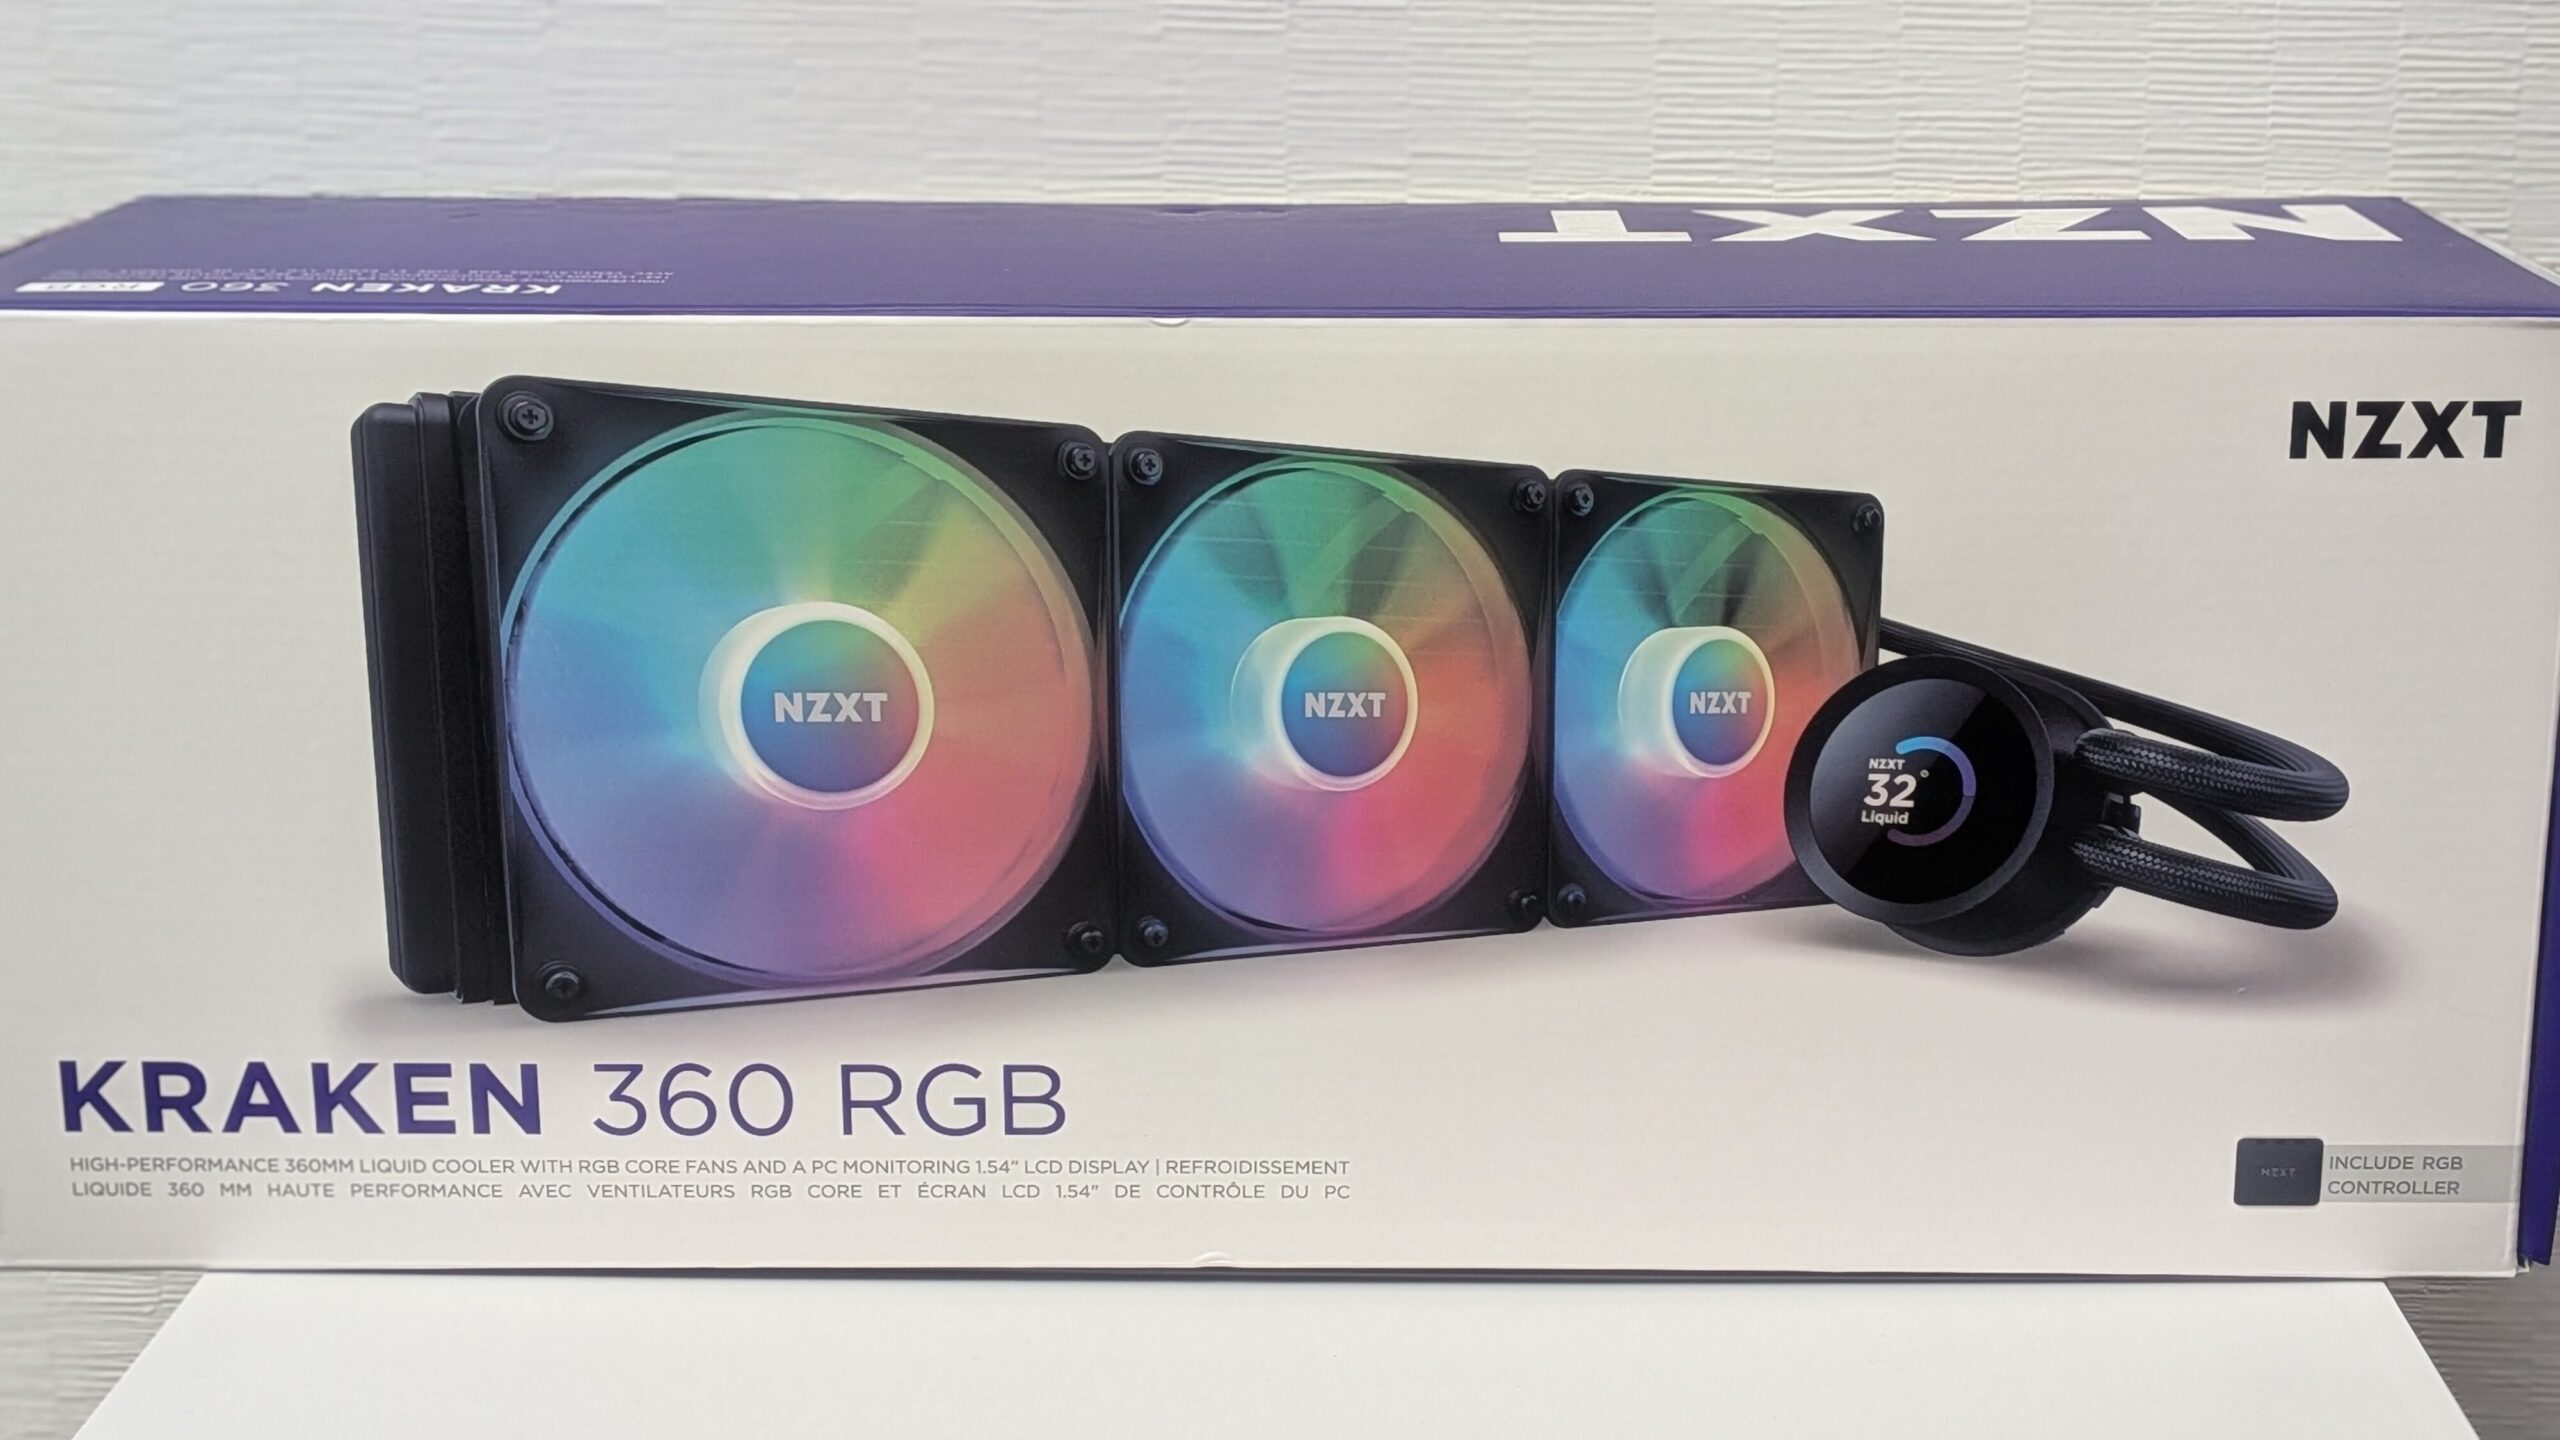
However, during an in-store sale at PC Koubou, the NZXT “KRAKEN 360 RGB” was being sold for 12,980 yen—less than half of its usual price—so I ended up choosing that.
NZXT liquid coolers use liquid cooling units manufactured by ASETEK, come with a 6-year warranty (longer than many other manufacturers), and are known for their strong design features, such as LCD-equipped pump heads.
The KRAKEN 360 RGB I purchased is an older model, but after checking the manufacturer’s website, I confirmed that it supports the Intel LGA1851 socket, so compatibility is not an issue.

NZXT KRAKEN RGB 360 Black AIO Liquid CPU Cooler RL-KR360-B1 FN1875
PC Case
I went through quite a bit of trial and error when deciding on the PC case.
At first, I was considering shallow-depth PC cases that wouldn’t take up much space when placed under my desk. Candidates included the ANTEC “AX85” and the Cougar “MX220.”

Antec AX85 ARGB ATX Mid-Tower PC Case (Includes 4 ARGB Fans)
However, considering future upgrades, I decided it would be better to choose a case that can support a 360mm AIO cooler mounted on the top and also accommodate large graphics cards. With that in mind, I also considered options such as the Corsair “3500X,” ANTEC “FLUX,” and Lian Li “Lancool 215.”

CORSAIR 3500X ARGB Tempered Glass Mid-Tower PC Case Black CC-9011278-WW
I was close to choosing the FLUX because of its strong cooling performance and included six fans. However, I happened to get the NZXT KRAKEN 360 RGB during a sale, so I decided that if I was going to use an NZXT cooler, I might as well consider an NZXT case as well.
Among NZXT cases that support a 360mm radiator on the top panel—H6 Flow, H7 Flow, and H9 Flow—I chose the most compact model, the H6 Flow.

NZXT H6 Flow Black Mid-Tower Case CC-H61FB-01 CS8789
Since the H6 is a pillarless case, I wanted to install LED lighting fans, so I considered adding NZXT ARGB fans.
One important note about NZXT ARGB fans is that they use proprietary connectors, so they must be connected to an NZXT RGB controller.
The KRAKEN 360 RGB I purchased includes a 3-way RGB controller, but both the AIO pump head and the RGB controller need to be connected to the motherboard’s USB 2.0 headers.
Because of this, if you add more NZXT RGB fans, you may run out of USB 2.0 headers. In that case, you would need to purchase an NZXT USB 2.0 hub or fan controller.
By standardizing lighting with NZXT products, you can achieve unified lighting control using the NZXT CAM software. However, this increases total cost due to the need for additional hubs or controllers.
Also, as of July 2025, NZXT does not sell reverse fans, so if you install bottom intake fans, you would need to mount them upside down, which exposes the fan guard.
After comparing options including other manufacturers, I decided to go with the Thermaltake “CT140 Reverse ARGB.”

Thermaltake CT140 Reverse ARGB Sync (2-Pack) Black PC Case Fan CL-F174-PL14SW-A FN2398
広告/AD
Summary
When building this new custom PC for 3DCG, I wrote down my thoughts on how I selected each component.
The intended use, budget, preferred design, and favorite manufacturers all differ from person to person when it comes to custom PCs. As long as you meet the required specifications for components such as the CPU, memory, and graphics card, I believe the choice of specific products is ultimately up to the individual (being able to build it exactly the way you want is one of the best things about custom PCs).
…That said, the large number of options can make choosing parts quite difficult, so I hope this article will be helpful as a reference.
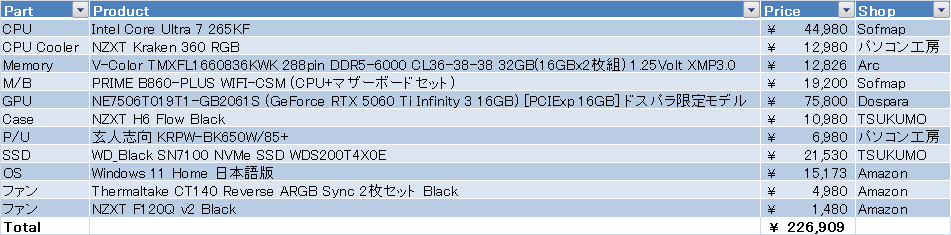
A list of the parts I selected and their purchase prices is shown below.
I plan to cover the assembly process and benchmark results in a separate article at a later date.
Reference Site
Chimolog https://chimolog.co
This is a great website recommended for beginners building their own custom PCs.

広告/AD