【Blender 2.9】Modeling “Poké Ball etc. (Pokémon)”
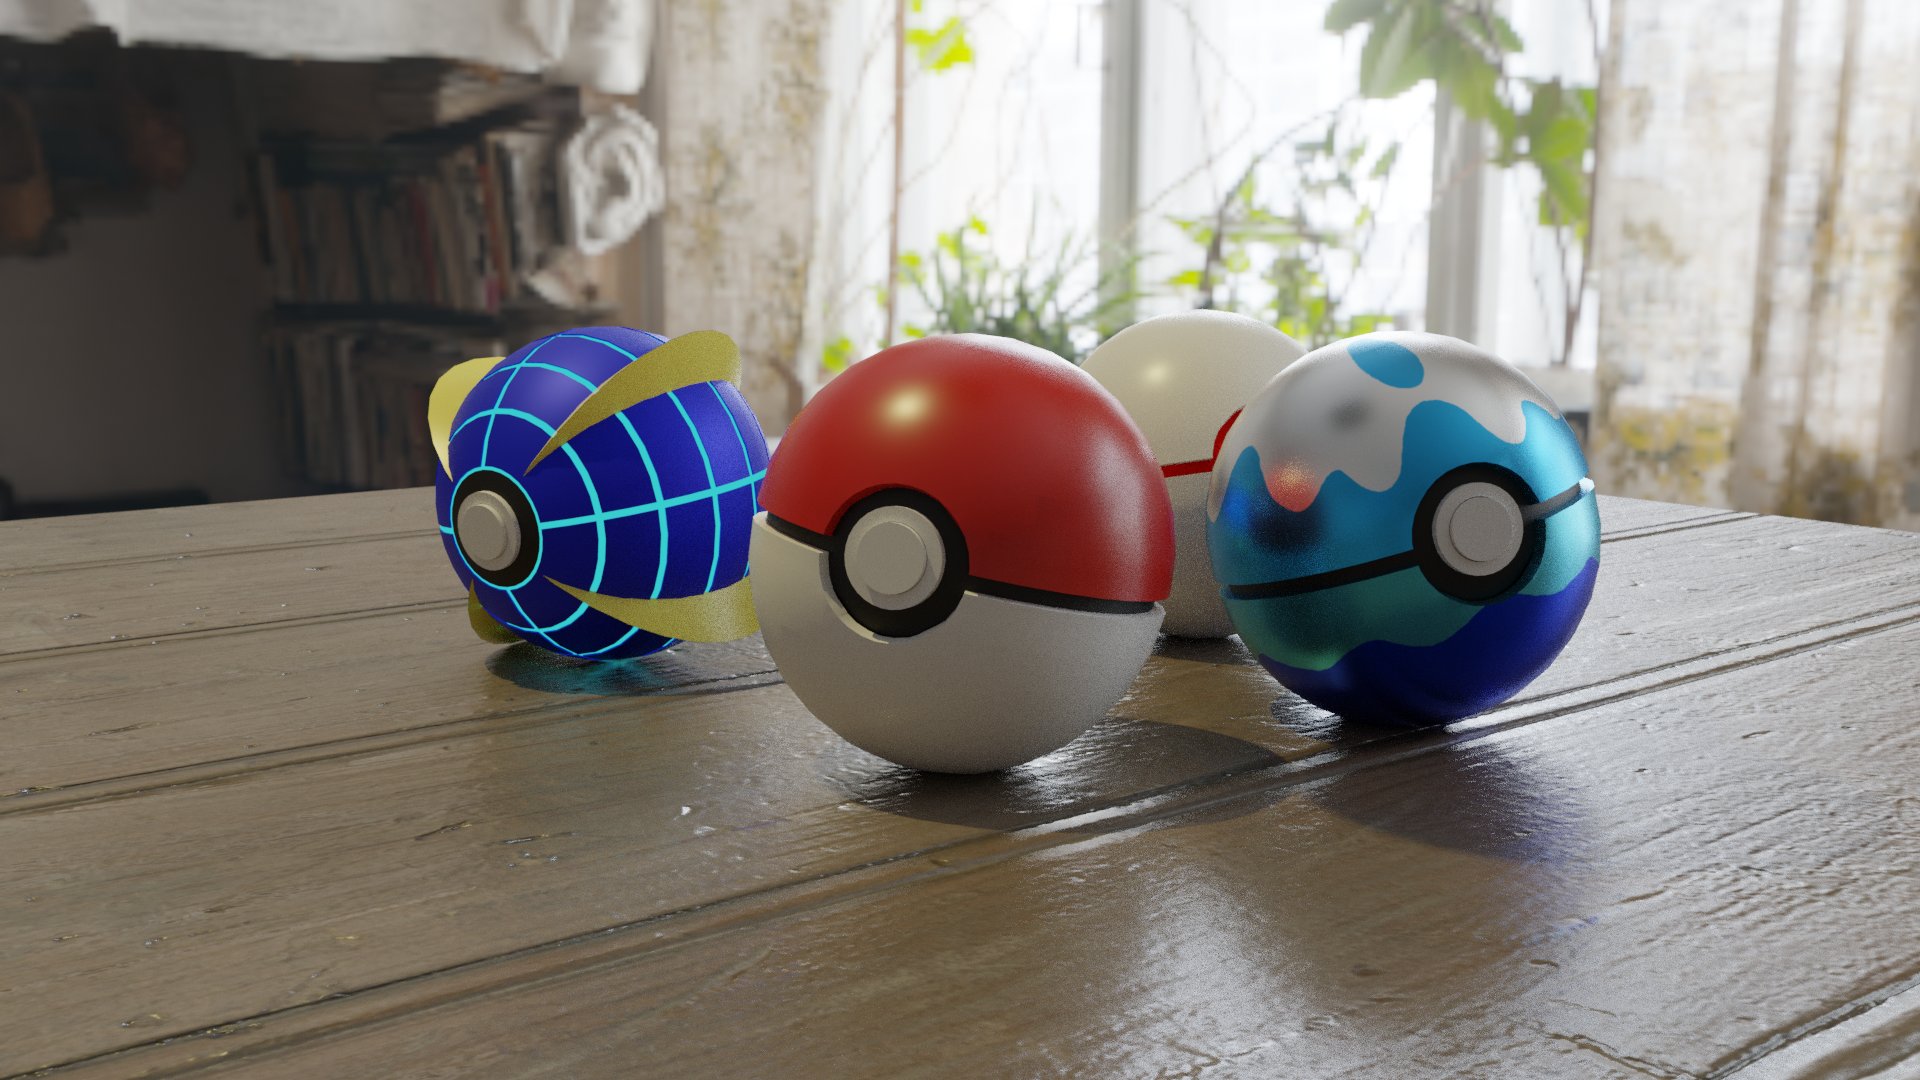
I decided to create this piece after watching Vary’s tutorial video—it looked really interesting! 😊✨
During the process, I was able to learn fundamental modeling techniques such as extrusion and inset. 👍️✨
Below, I’ve summarized the concept behind the work, the challenges faced, and other key points.
Feel free to share your thoughts or ask questions via Klala’s Twitter: https://twitter.com/klala_lab (^^)/
AD
Concept Behind the Work
I wanted to practice modeling in Blender, and around that time, news about the new Pokémon game (commonly known as the “Diamond and Pearl Remakes") was announced. Inspired by this, I decided to create something Pokémon-related.
As a Pokémon fan (not Pokémon GO, but the mainline games), I’ve always been fascinated by the variety of Poké Balls featured in the games—there are actually over 30 different types! These Poké Balls differ not just in design but also in battle animations, capture rates, and even the level of friendliness they provide after catching a Pokémon.
From these, I chose to model four types of Poké Balls that hold personal significance to me:
- Poké Ball (Red/White): The classic ball and the first one the protagonist typically obtains. It’s affordable but has a relatively low capture rate.
- Premier Ball (White): A stylish, minimalist ball you receive as a bonus when purchasing 10 Poké Balls.
- Beast Ball (Blue with glowing web patterns): Introduced in Generation VII for catching Ultra Beasts. It has a low capture rate for other Pokémon but features a cool animation.
- Dive Ball (Glossy white with blue wave patterns): Effective for catching Pokémon encountered on water or through fishing. Its effects are visually stunning!
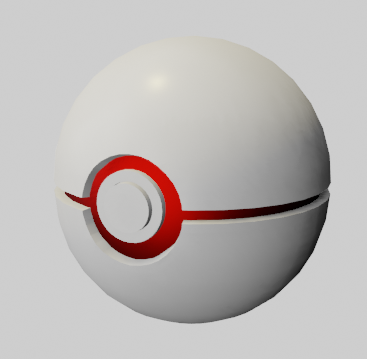
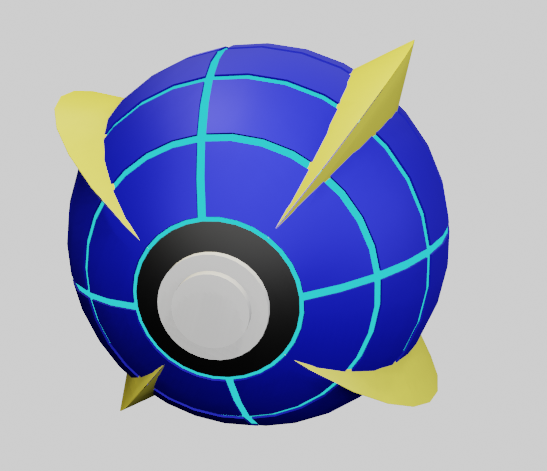
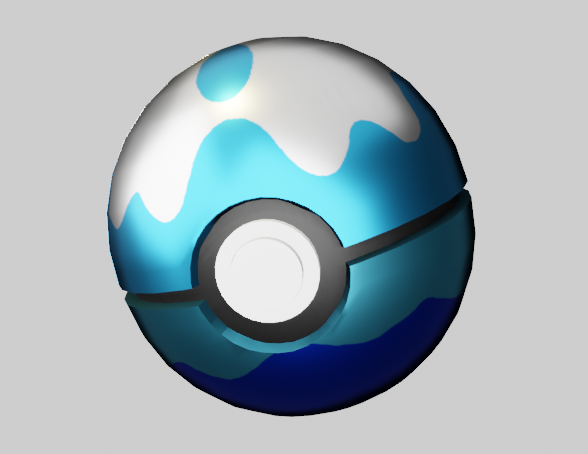
A Little Side Note
I’ve had two major phases in my life where I was deeply into Pokémon.
- The first phase was during my elementary and middle school years, starting with the first generation (Red/Green) and continuing through the second generation (Gold/Silver) on the Game Boy Color.
- The second phase came in recent years with the seventh generation (Sun/Moon & Ultra Sun/Ultra Moon) on the 3DS.
During the second phase, I became engrossed in the added features like shiny hunting, hidden abilities, and online battles. Outside of work, I was pretty much playing Pokémon non-stop. 😅
I never thought I’d get so hooked on a game as an adult. Looking back, I can’t help but feel I spent a lot of time on it that could have been used more productively… 😭
Techniques Used
- Extrude (E)
- Inset (I)
- Knife Project
- Solidify Modifier
Steps to Create
Poké Ball
The Poké Ball was created by following VARY GRAPHICS’ tutorial video.
For detailed steps, please refer to Vary’s original video.
(As of August 12, 2021, it seems the original video has been set to private. 😅)
Overview and Key Points for Creation
- Create a UV Sphere and keep only the top half (for the shell).
- Duplicate and rotate the first half to create the other half.
- Use a Circle Object and Knife Project to carve out the button area.
- Create the button using Extrude (E) and Inset (I).
- Make the black center part using a UV Sphere.
- Add thickness to the shell with a Solidify Modifier.
- Assign materials and colors to each component.
Important Note
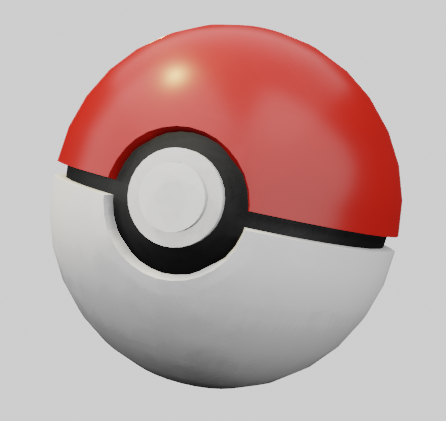
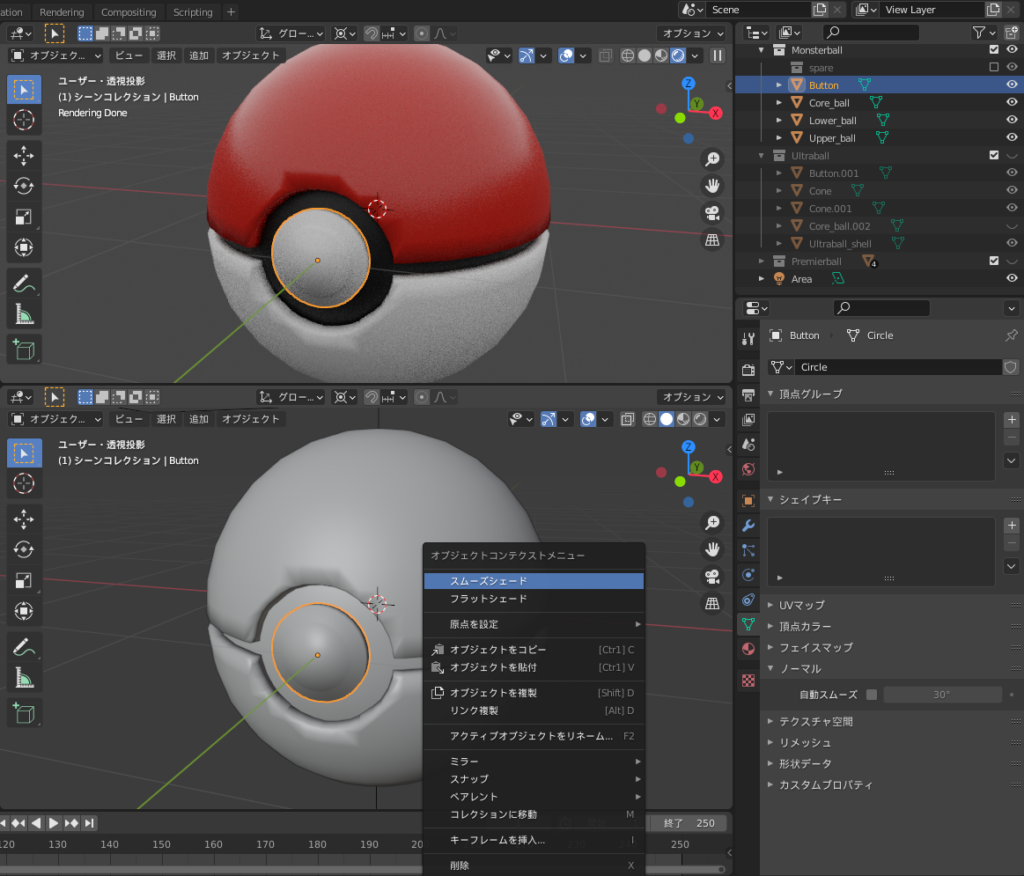
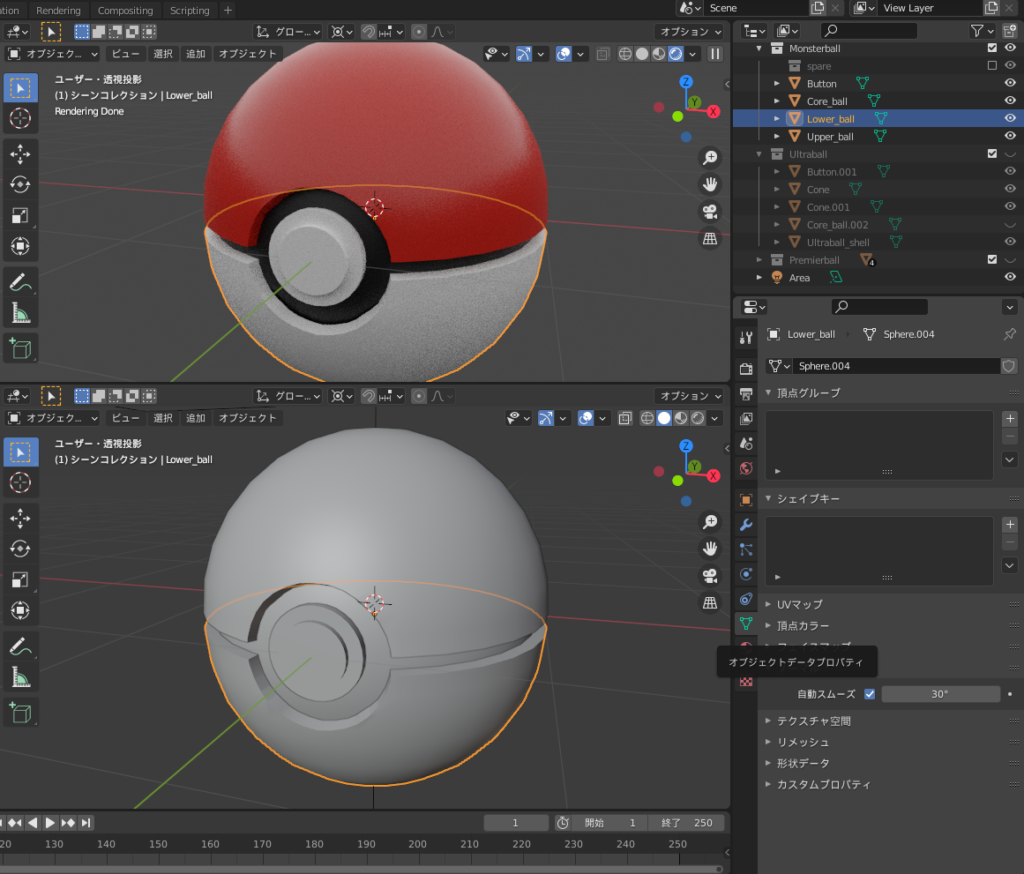
When following the video and applying Right-Click → Shade Smooth to the button and shell, you may encounter unnatural bumps around the edges, as shown below.
This occurs because Auto Smooth is being applied to the edges.
Solution
To fix this issue, go to the Object Data Properties (green triangle icon) on the right panel, and check Normals → Auto Smooth. This will disable Auto Smooth for edges where the angle between adjacent faces is 30° or more, making them appear sharp and clean.
(This tip was inspired by Vary’s advice in the comments section on YouTube. Thank you, Vary, for your clear and helpful explanation!)
Premier Ball
The modeling method is exactly the same as that of the Poké Ball. You can create it simply by changing the colors as follows:
- Change the shell color from red to white.
- Change the center color from black to red.
AD
Beast Ball
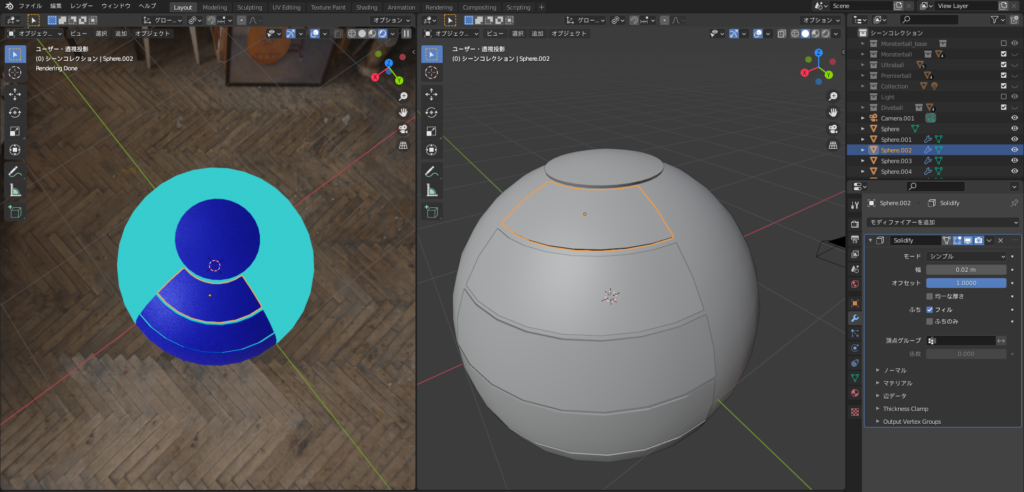
The shape is slightly unique, but the creation process isn’t overly complicated. Below are the steps to create it. Compared to the Poké Ball, this method requires a few additional steps.
-
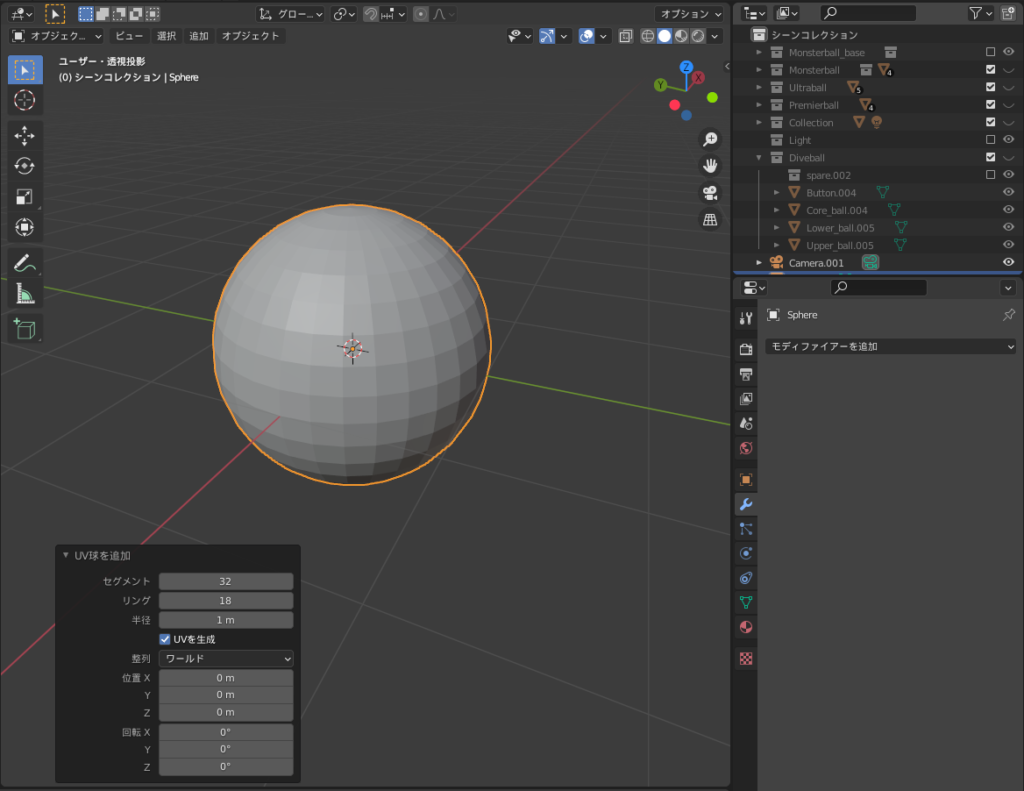
Create a UV Sphere
- Set the number of rings to 18.
-
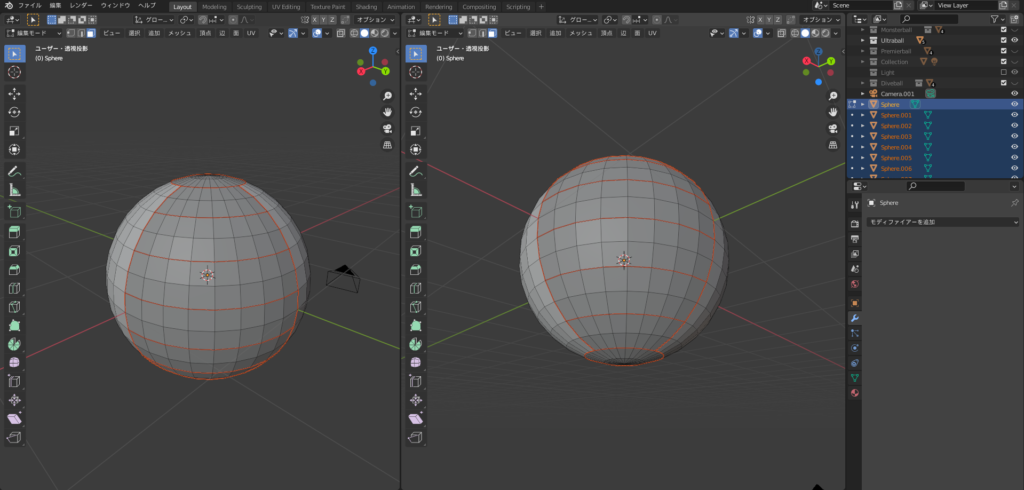
Switch to Edit Mode → Face Select Mode
- Select the top and bottom two rows of faces, and one-quarter of the middle section, two rows at a time, as shown in the diagram.
-
Separate the Selected Faces
- Duplicate the selected faces with Shift + D, then separate them into a new object using P. Repeat this process for all sections.
-
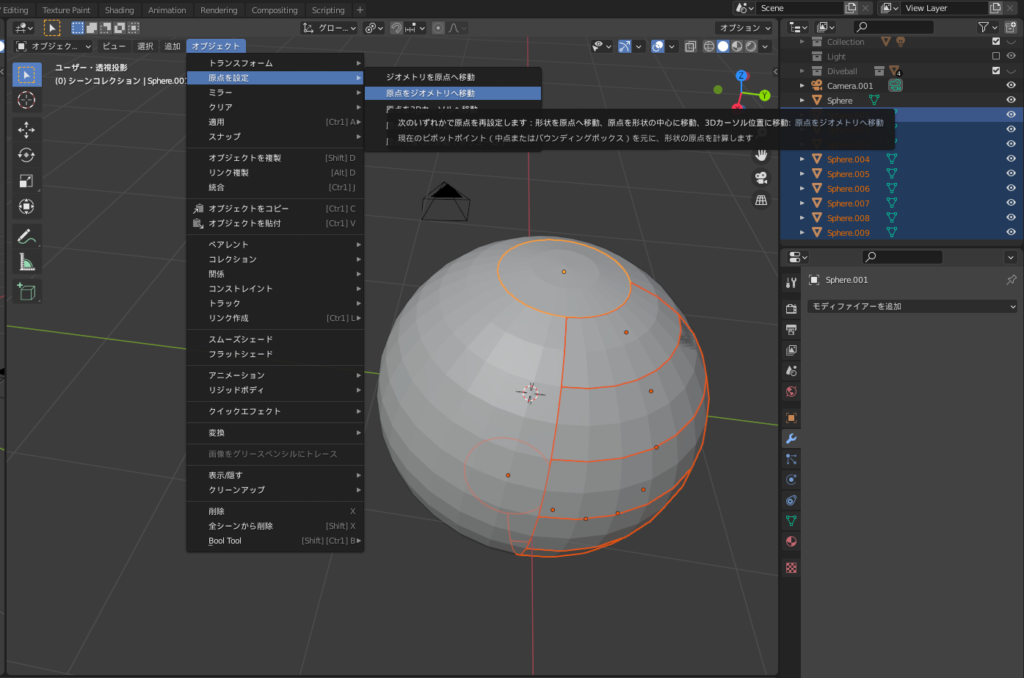
Set Object Origins
- In Object Mode, select each separated face section (referred to as “shells" below) and reset their origins using Set Origin → Origin to Geometry.
-
Adjust Pivot Points
- Press . (Period) to set the Pivot Point to Individual Origins.
-
Resize Each Shell
- Use S to scale down each shell. Adjust the scaling factor to around 0.90–0.95 to your preference.
-
Add Thickness
- Apply a Solidify Modifier to each shell to give them thickness. Set the Offset to 1.
-
Apply Materials
- Set the shells’ material color to blue.
-
Make the Ball Glow
- For the ball body, use an Emission Shader to give it a glowing light blue effect.
-
Adjust Pivot for Replication
- Change the Pivot Point back to 3D Cursor by pressing . (Period).
- Move the 3D cursor to the world origin with Shift + S.
-
Copy and Rotate Shells
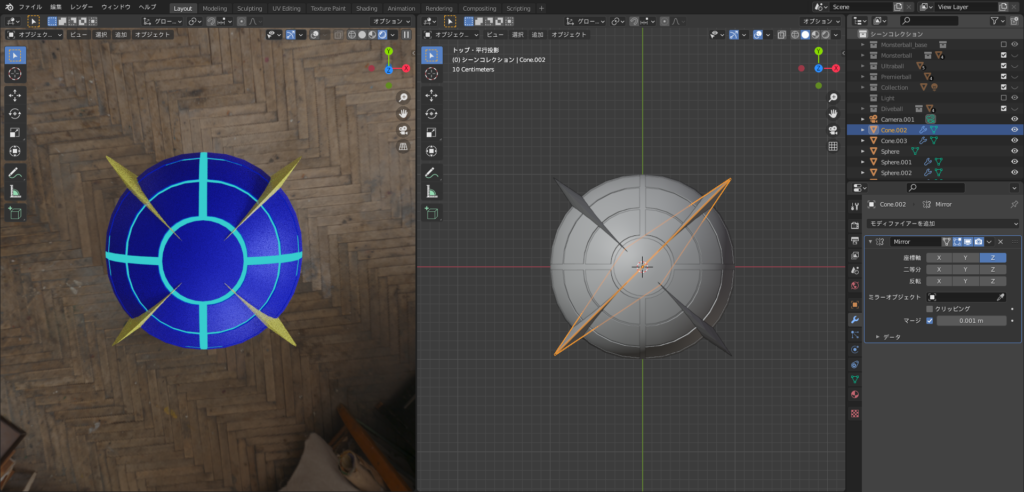
- Use Shift + D to duplicate the shells, then rotate them by R, Z, 90. Use Shift + R to repeat the process.
-
Add the Yellow Discs
- Add a cone object and adjust its size using scaling, then apply a Mirror Modifier to create the yellow disc-like parts.
-
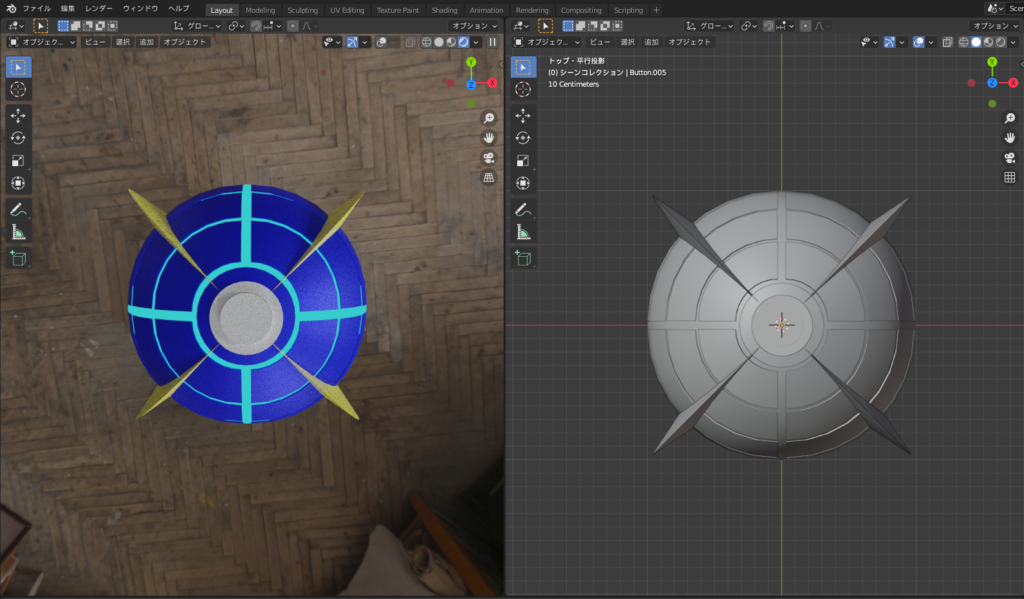
Add the Button
- Create the button as per the steps for the Poké Ball.
Dive Ball
The basic shape is the same as the Poké Ball, but to replicate the distinctive wave pattern on the shell, I used Texture Painting.
For instructions on how to paint textures on the ball, Vary has provided a tutorial video that you can refer to.
(As of August 12, 2021, the original video seems to be set to private. 😅)
Steps for Texture Painting
Following the tutorial video above, I created a UV image with texture painting and applied it to the ball as shown below:
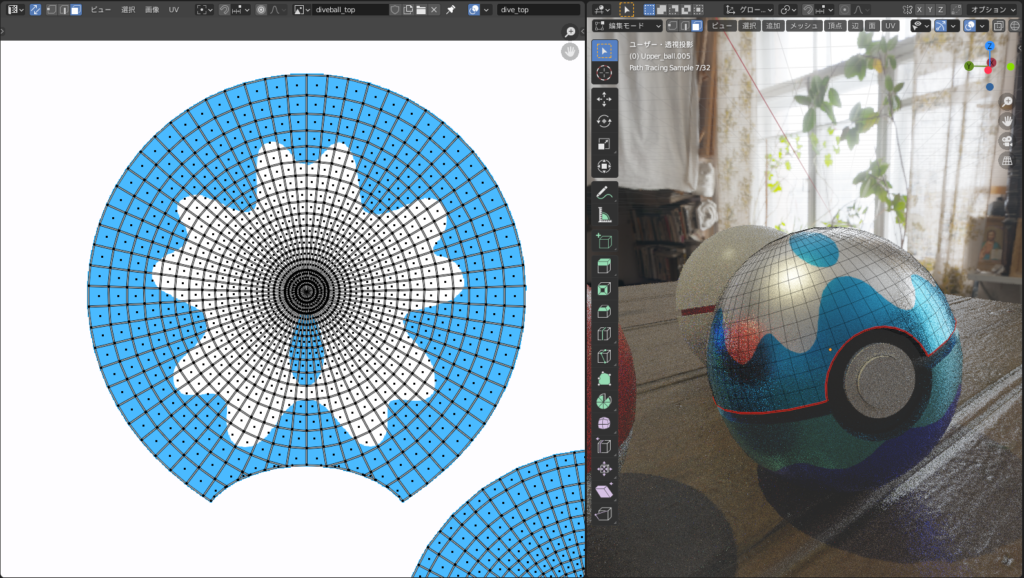
(Texture applied to the top part of the ball)
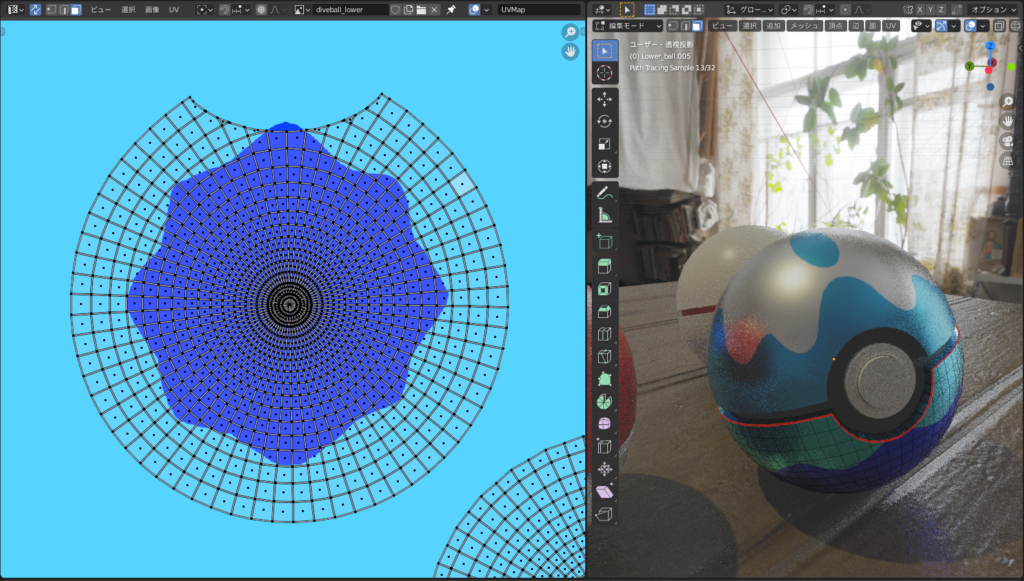
(Texture applied to the bottom part of the ball)
Challenges and Reflections
When I created this piece, I had just started seriously practicing modeling, so I struggled quite a bit with the basic operations of Blender. I think it took a full day just to complete the Ultra Ball 😅.
Additionally, this was my first time using Texture Painting, and I had quite a hard time with it. I didn’t know how to use Bezier Curves, so in the end, I had to repeatedly redraw the wave-like patterns freehand to get them right.
AD
Conclusion
As a beginner in modeling, I struggled, but I’m satisfied with how I was able to represent the Pokémon world in a somewhat realistic way 😊.
Vary’s tutorials are detailed and easy to follow, making them highly recommended for beginners who want to learn modeling techniques in Blender!
Reference Tutorials
VARY GRAPHICS: [Beginner Tutorial] Creating a Poké Ball in Blender [Blender 2.81]
(As of August 12, 2021, the original video appears to be set to private. 😅)
VARY GRAPHICS: [Blender Tutorial] Learning UV Unwrapping and Texture Painting [Beginner-Friendly]
(As of August 12, 2021, the original video appears to be set to private. 😅)
AD
