【Blender 2.93】Simple “Cumulus Cloud / Towering Cumulus” Modeling Method [Memo]
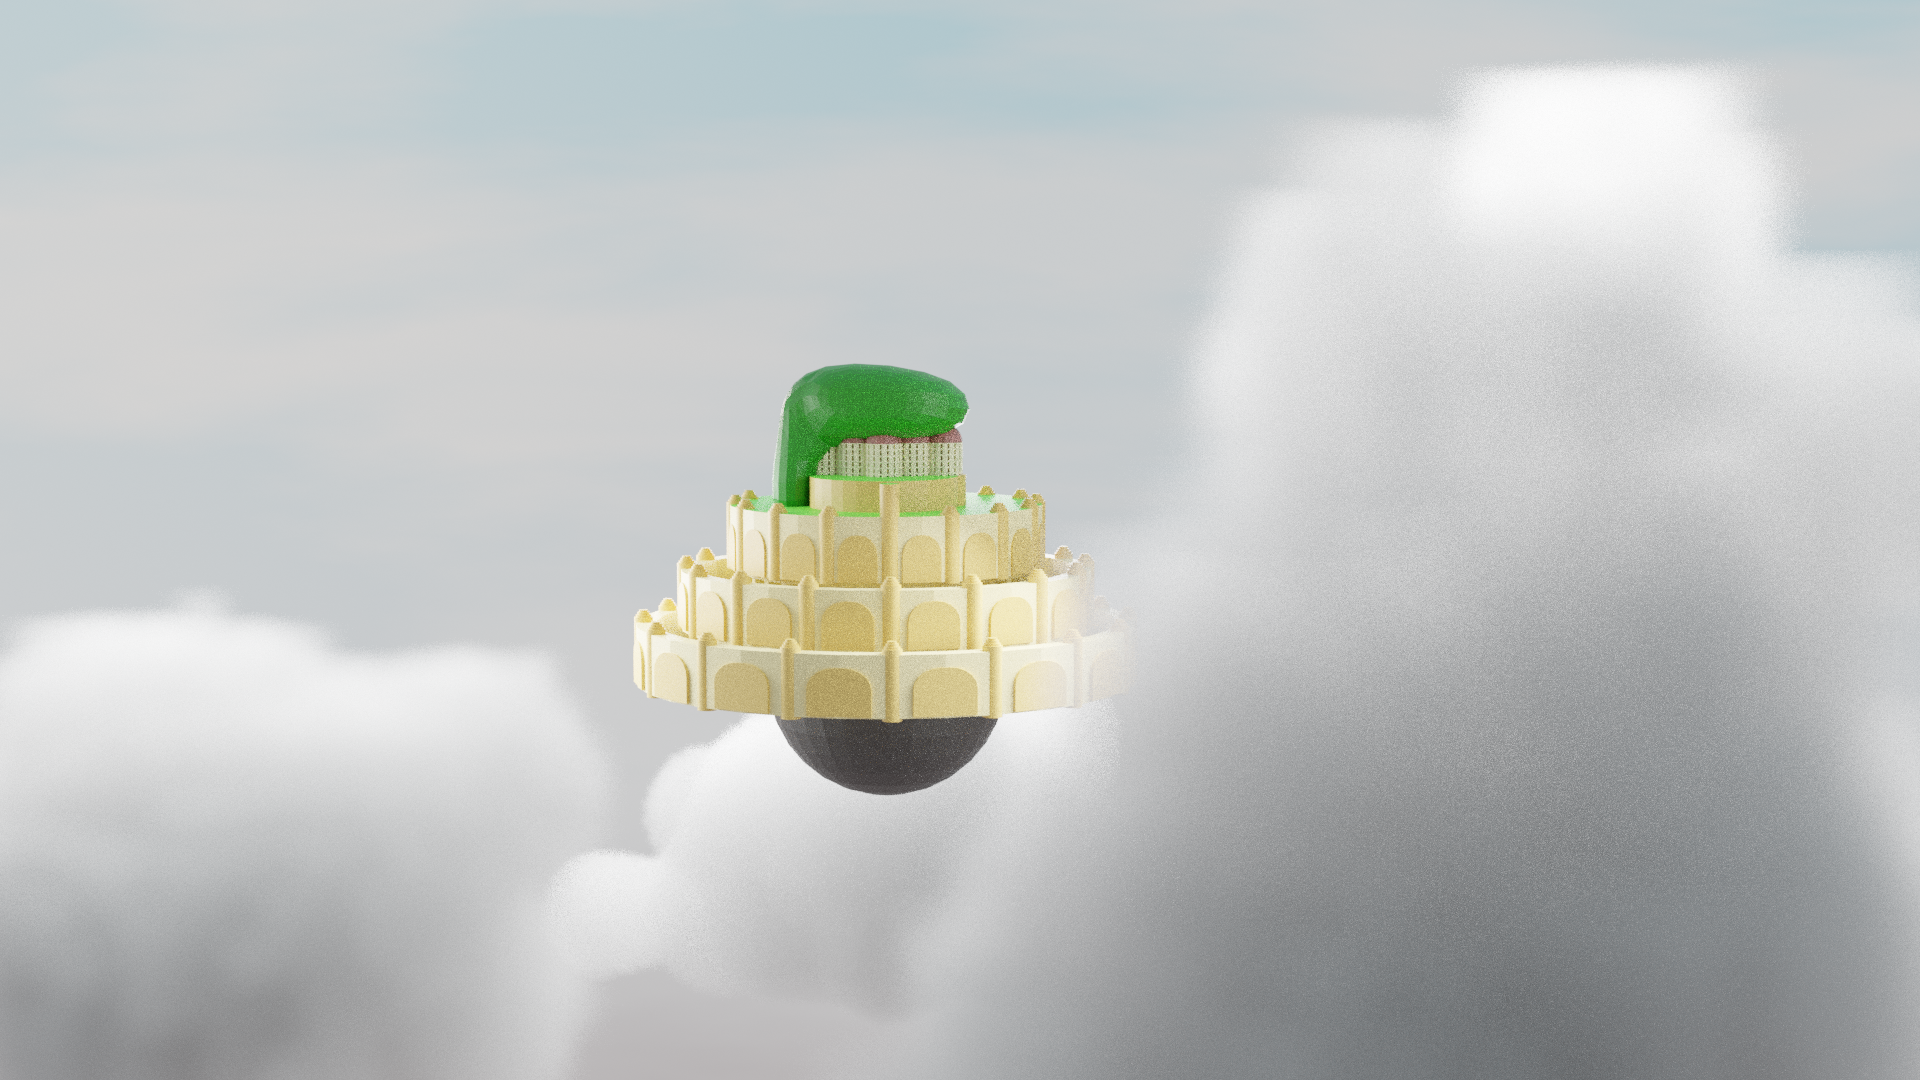
I researched how to create “Cumulus Clouds / Towering Cumulus" in Blender and summarized the process.
This method is for those who want to create three-dimensional cumulus clouds for still images without too much effort. Since it doesn’t use complex fluid simulations, it’s recommended for beginners as well 👍
Feel free to share your feedback or ask questions on my Twitter (https://twitter.com/klala_lab)😊
Here’s what the final result looks like.

AD
Creation Steps
Here are the steps to create the cloud. I’ll explain them from top to bottom.
- Creating the Cloud Mesh
- Adding Volume / Mesh to Volume Modifier
- Material and Lighting Settings
Creating the Cloud Mesh
Start by opening a new Blender file and deleting the default cube and light.
Use the shortcut key “Shift + A” to add a “Metaball" → “Ball".
We’ll use Metaballs to create the cloud mesh.
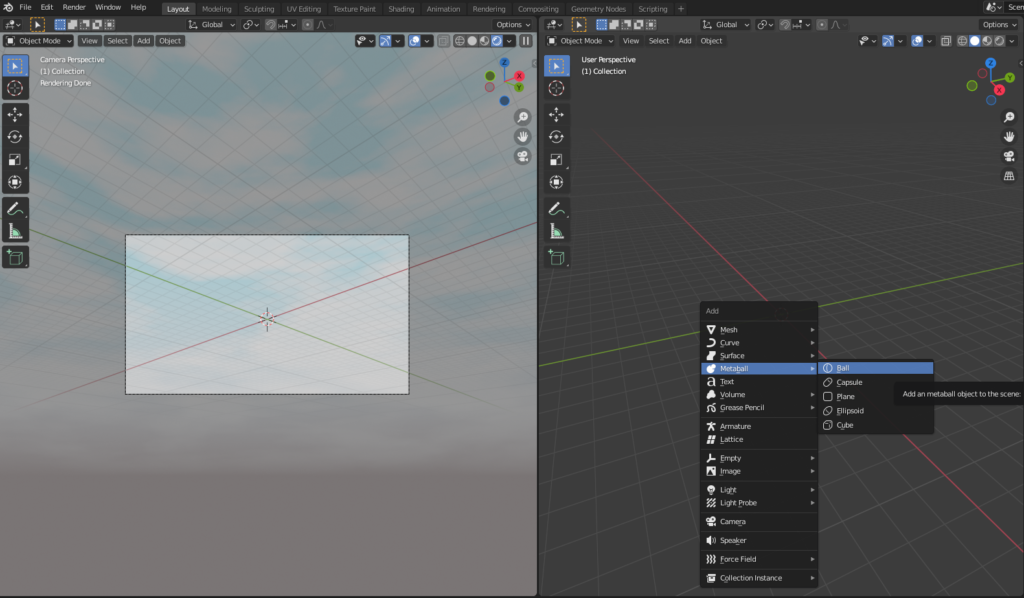
By the way, the background used in this example was created with Blender’s built-in addon “Dynamic Sky.”
The setup for this was explained in a previous article, “Modeling the Desert (Sand Dunes” so please refer to that for more details 😊
Now, let’s start with the bottom layer of the cloud.
Press “7" on the numpad to switch to the top view and add about 10 Metaballs by pressing “Shift + A." Arrange them randomly.
The Metaballs will connect as shown in the following diagram.
Use “S” to scale and add randomness to the shape.
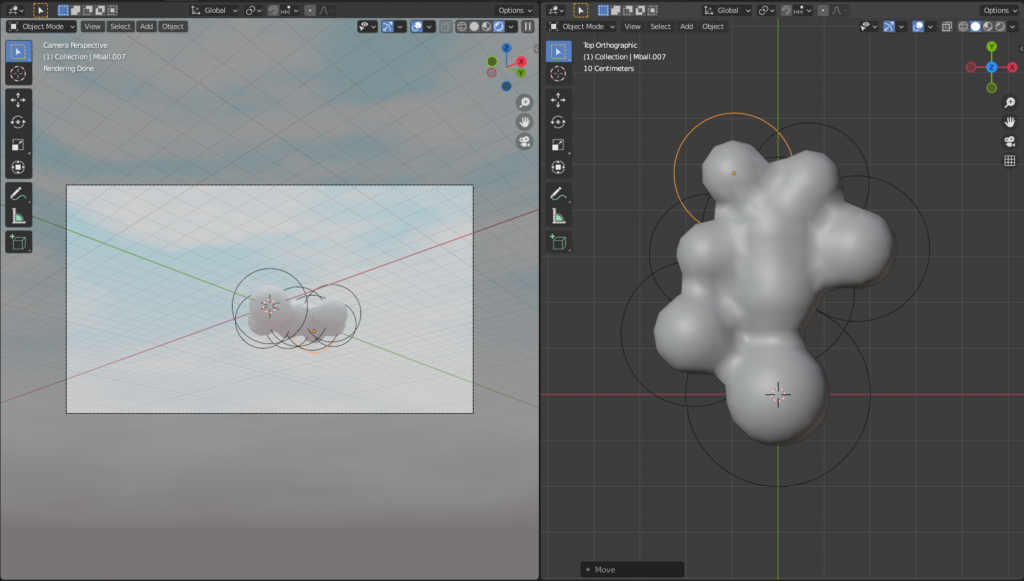
Next, we will stack the cloud upwards.
Select multiple Metaballs, switch to the side view with “1" on the numpad, and press “Shift + D" to duplicate and move them. After duplicating, you can rotate them by pressing “R → Z."
Repeat the duplication of Metaballs until you have a shape that resembles “towering cumulus clouds," like the one shown below 😊
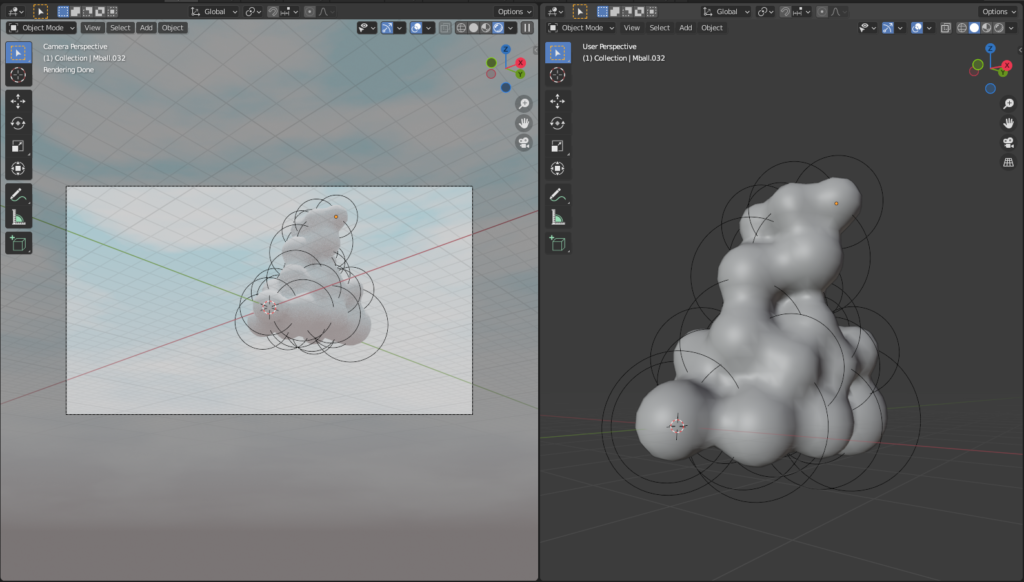
Once you’ve shaped the cloud, convert the Metaballs to a mesh.
Right-click on the Metaballs and select “Convert to" → “Mesh."
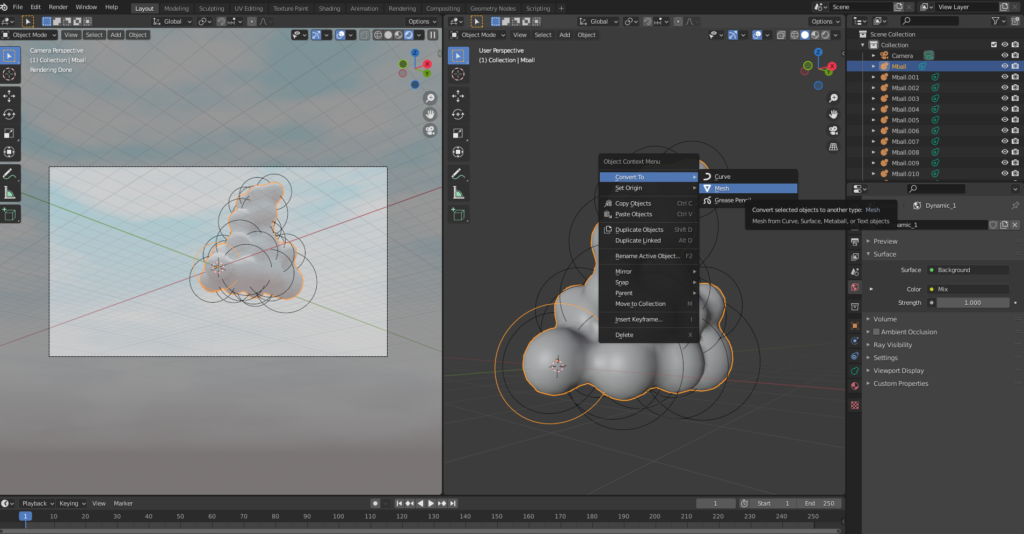
This will convert them into a mesh object as shown below. Now, the cloud mesh is complete 😊
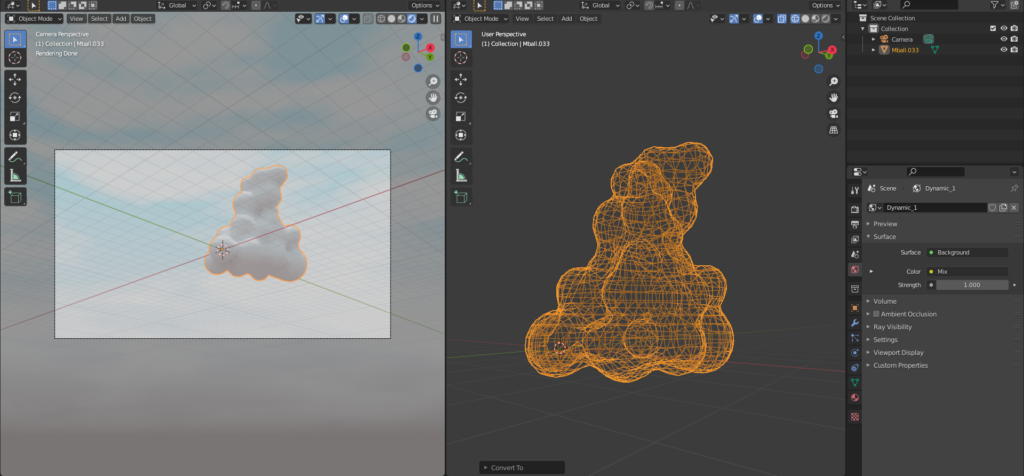
Adding Volume / Mesh to Volume Modifier
Next, we’ll create the “cloud volume" based on the mesh.
By using “Volume," internal light scattering that can’t be represented by a mesh will be displayed, giving the cloud a more “cloud-like" appearance.
Press “Shift + D" and add “Volume" → “Empty."
At this point, nothing will appear in the viewport, but the volume will be selected.
From the Modifier Properties in the bottom-right panel, select “Mesh to Volume."
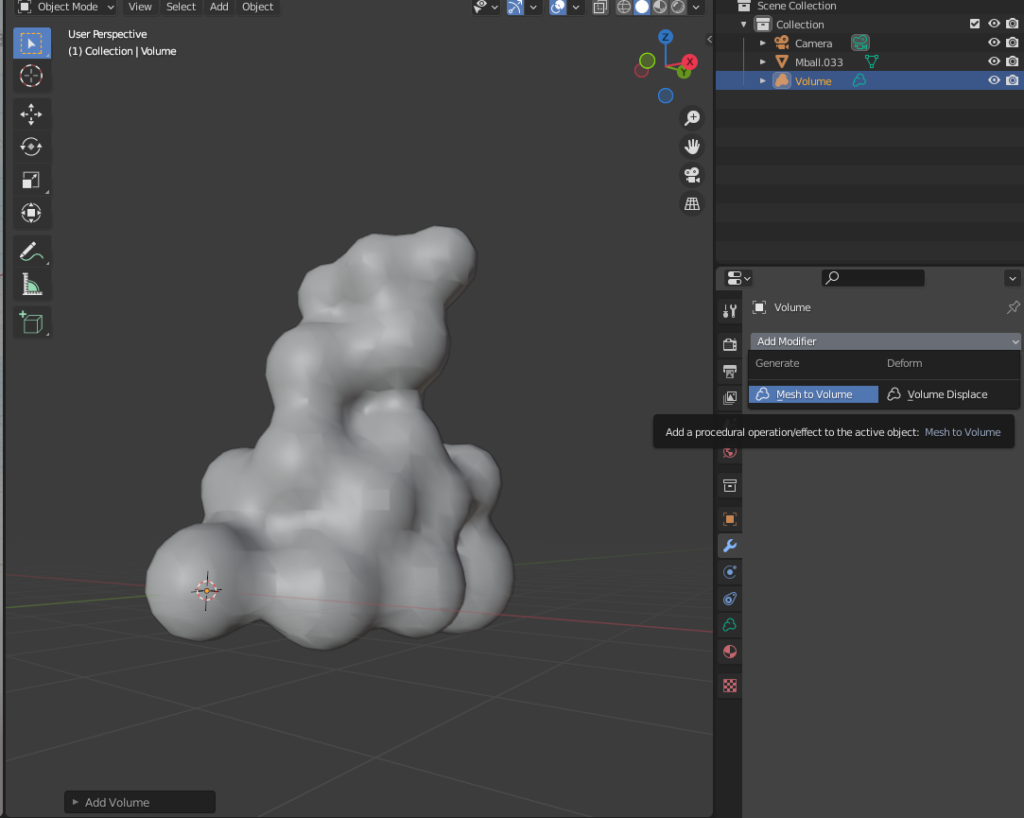
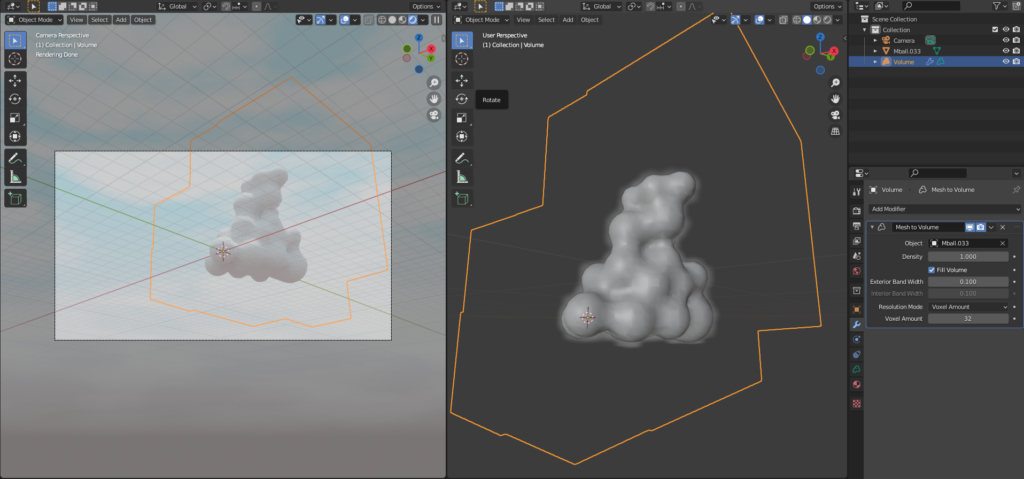
Now, you’ll see an orange outline in the viewport along with a misty effect around the mesh. This is the volume created from the cloud mesh.
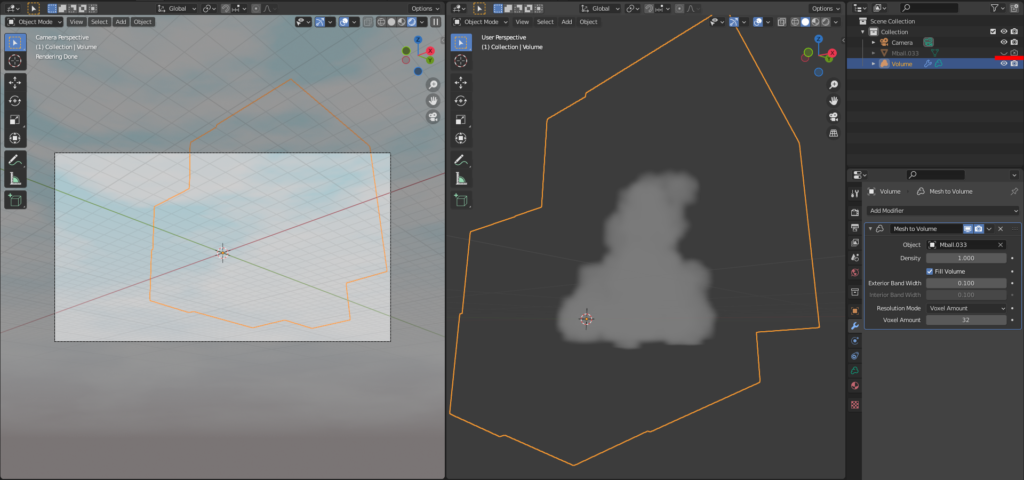
To hide the cloud mesh, click the “👁" and “📷" icons next to the mesh in the scene properties on the top-right.
At this point, the cloud outline will be visible in the viewport, but since we haven’t set the material yet, nothing will appear in the render preview.
AD
Material and Lighting Settings
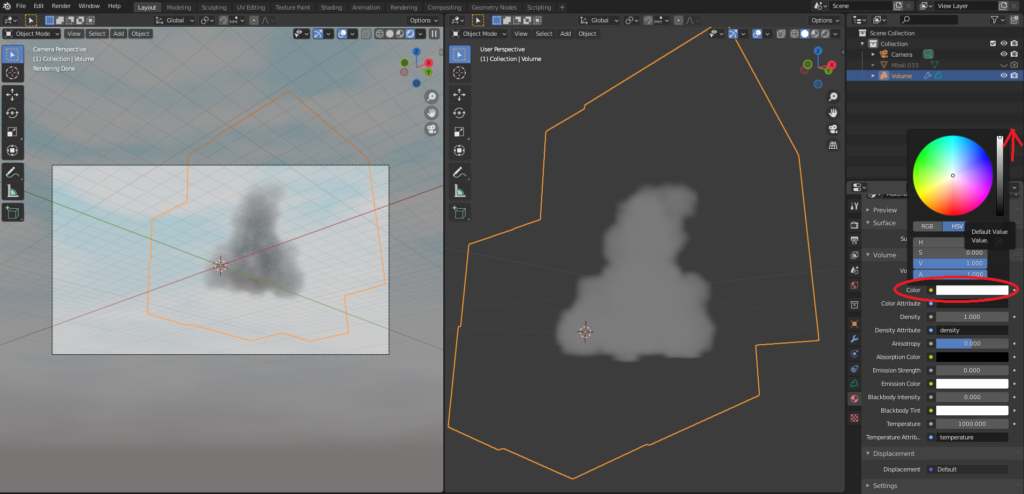
With the volume selected, click “New" in the Material Properties to create a new material.
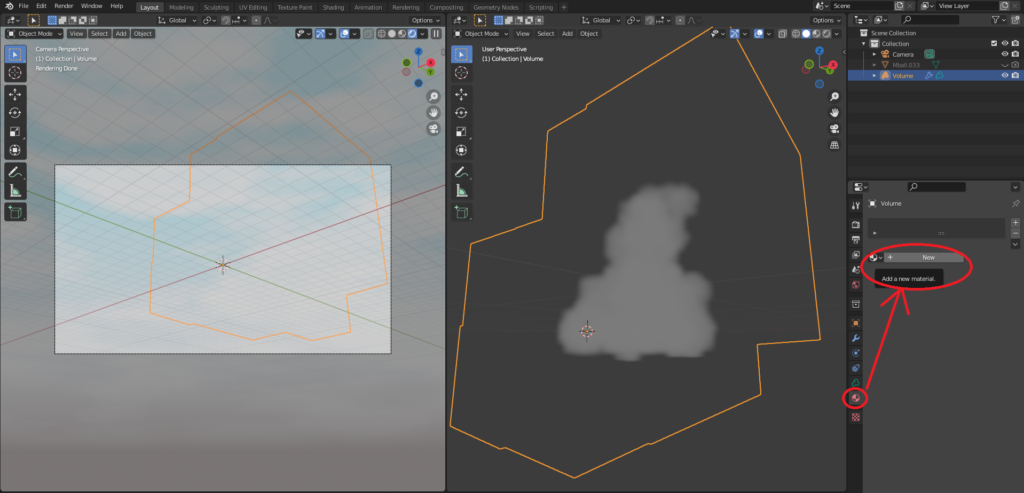
This will apply the “Principle Volume" material by default.
Set the color to white, as shown in the following screen.
The default density is low, so increase the “Density" value from 1 to around 2 (you can adjust it to your preference).
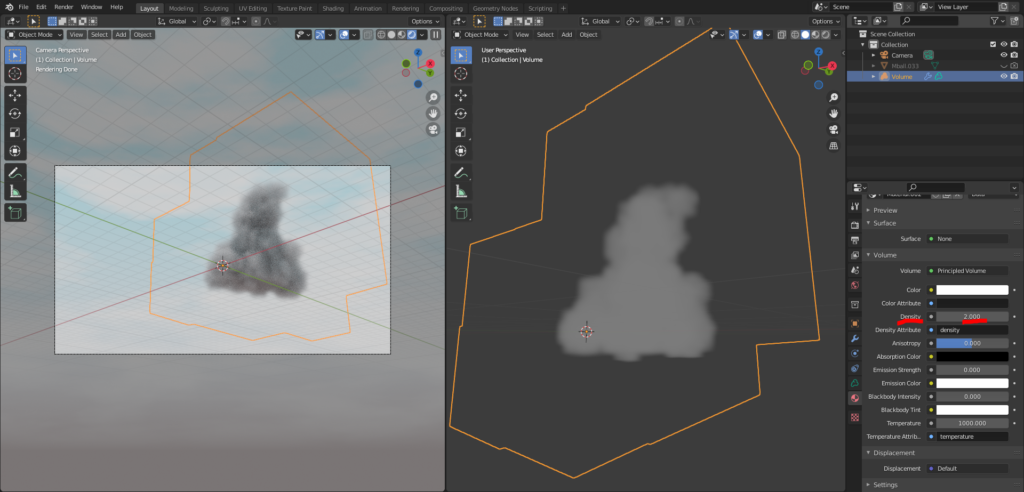
Even though the cloud is set to white, it appears black due to the weak light being blocked. So, we’ll need to add a light source.
Press “Shift + A" → “Light" to add an area light, scale it up with “S," and move it above the cloud using “G → Z."
From the bottom-right “💡" icon, set the light’s strength to around 500–1000W (or higher).
To add depth to the cloud, adjust the light angle to illuminate it from the sides.
For easier adjustment, press the “." (period) key to set the pivot point to the 3D cursor.
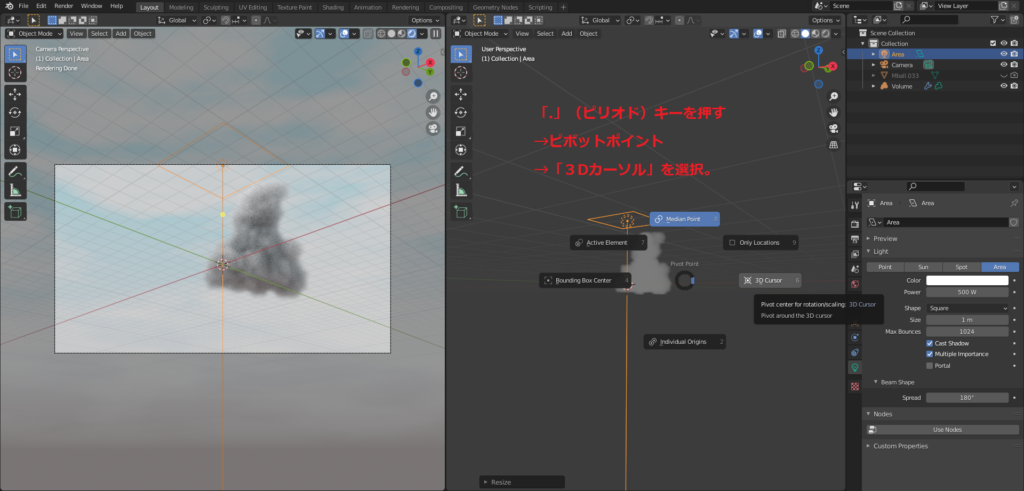
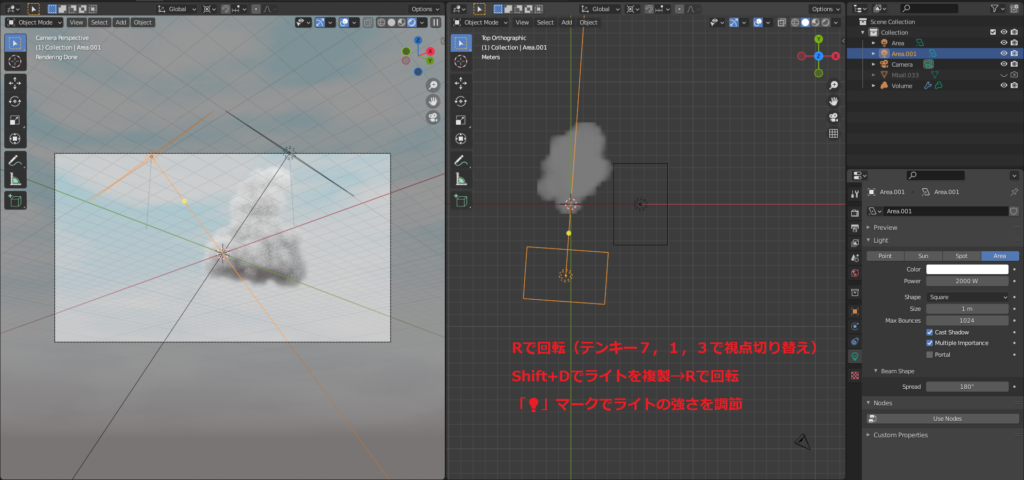
Once you’ve set the light to shine from the cloud’s diagonal right side, duplicate it with “Shift + D" and adjust it to illuminate from the left side.
Check the cloud’s appearance and adjust the light intensity. (You can also tweak the “Anisotropy" value in the Material Properties 👍).
To adjust the camera angle, press “0" on the numpad to switch to the camera view and check the “Camera to View" option.
Finally, select the Cycles render engine and press “F12" to render the scene.
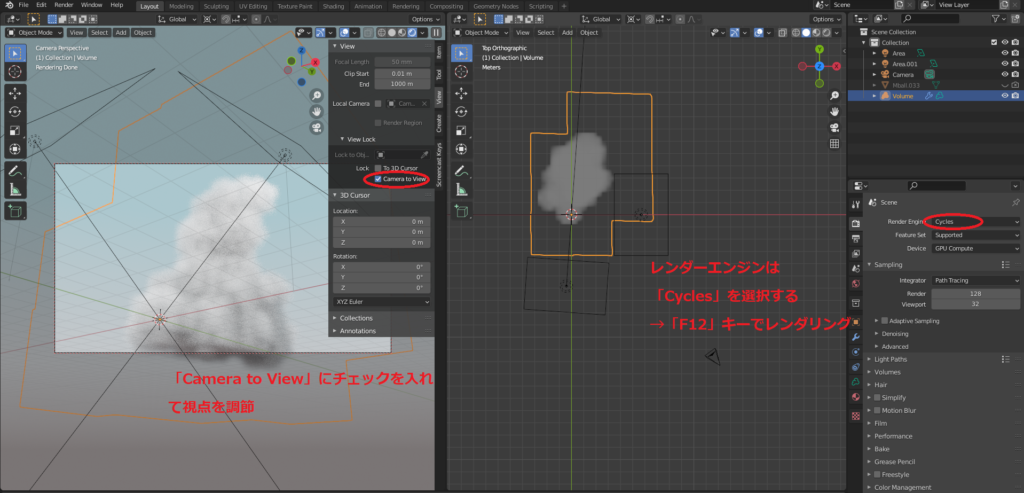
Select the Cycles render engine and press “F12" to render the scene.
AD
Conclusion
And that’s it! You’ve now created your very own cumulus clouds/thunderheads! Thank you so much for reading through the process! 🙇
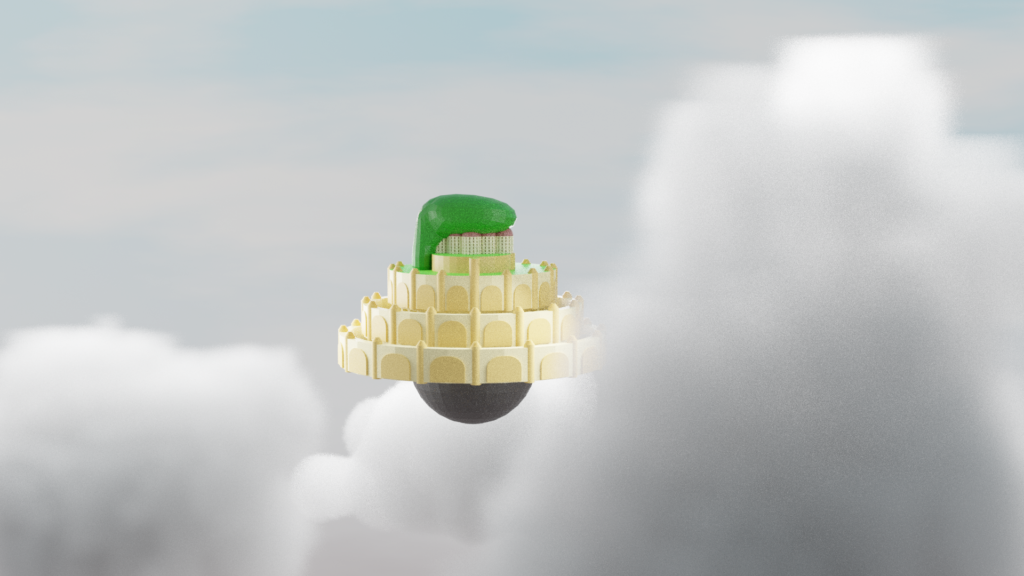
By the way, here’s an example of how the clouds can be used (the background for Laputa created in the “60-minute midnight modeling challenge", search with hashtag “#深夜のモデリング60分1本勝負").
Reference Tutorials/Sites
The method for creating the cloud mesh was inspired by ML/Ch’s YouTube video 🙇
ML/Ch – How to Create a Blue Sky and Clouds in Blender 2.8 – Realistic Clouds Part 1
Information about the “Mesh to Volume Modifier" was learned from the following site 🙇
Vasa Entertainment Inc. Blog – Creating Clouds in CG with Blender – Part 2
Horohorori.com – Blender 2.9: Mesh to Volume Modifier
The following articles on this blog show how to creating clouds.
AD


