[Blender 5.0] Creating a Horse Animation (Loop Animation)
Every year, I’ve created a 3D model of that year’s zodiac animal for New Year’s greetings.
This year, I modeled the 2026 zodiac animal, the Horse (Uma).
In this article, I’ll briefly explain key points for making a running horse look realistic, as well as how to create a loop animation where the background rotates at varying speeds to enhance the sense of motion.
If you have any comments or questions, feel free to reach out to Klara on Twitter: https://twitter.com/klala_lab.
広告/AD
Production Process
The overall workflow for this project is outlined below:
- Sculpting
- Retopology
- Material Creation
- Rigging & Running Animation
- Background Creation
- Loop Animation Setup
- Rendering
In the following sections, I will go over the key points for each step.
Sculpting
As with my previous projects, I created the shape while referencing horse photos found online.
I’ve summarized the detailed sculpting workflow in a past article, so if you’re interested, please take a look:
First, I adjusted the overall proportions of the neck, torso, and limbs. After that, I refined the details.
I think emphasizing the chest and thigh muscles, as well as slightly enlarging the ankle joints, helps increase realism.
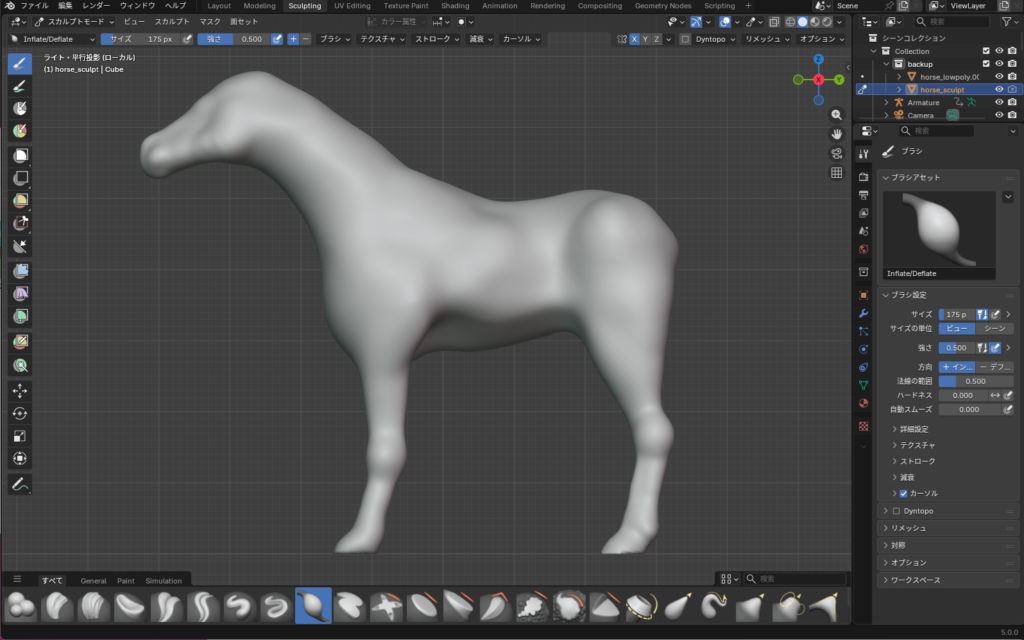
By the way, since the horse in this project is shown entirely from the side, I adjusted the shape with a focus on how realistic it looks from that angle.
When viewed from the front, the sculpted model looks quite stout and chunky like this, but it’s perfectly fine to simplify areas that won’t appear in the final result.

Retopology
Based on the sculpted shape, I proceeded with mesh modeling.
I used a Mirror Modifier, and with snapping enabled, I extruded the mesh directly along the surface of the sculpted model.
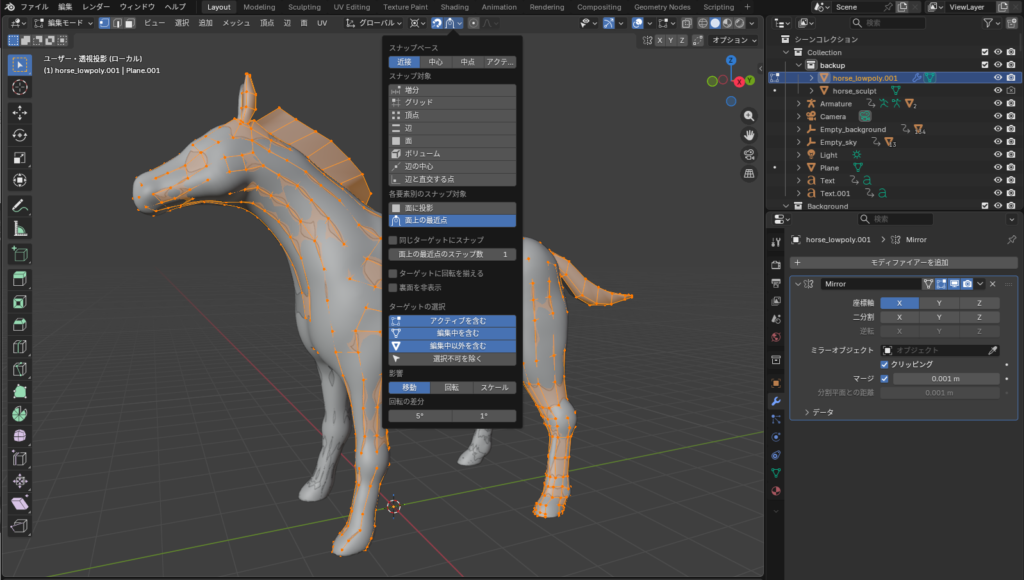
For the ears, mane, and tail, I turned snapping off and created them by extruding the mesh manually.
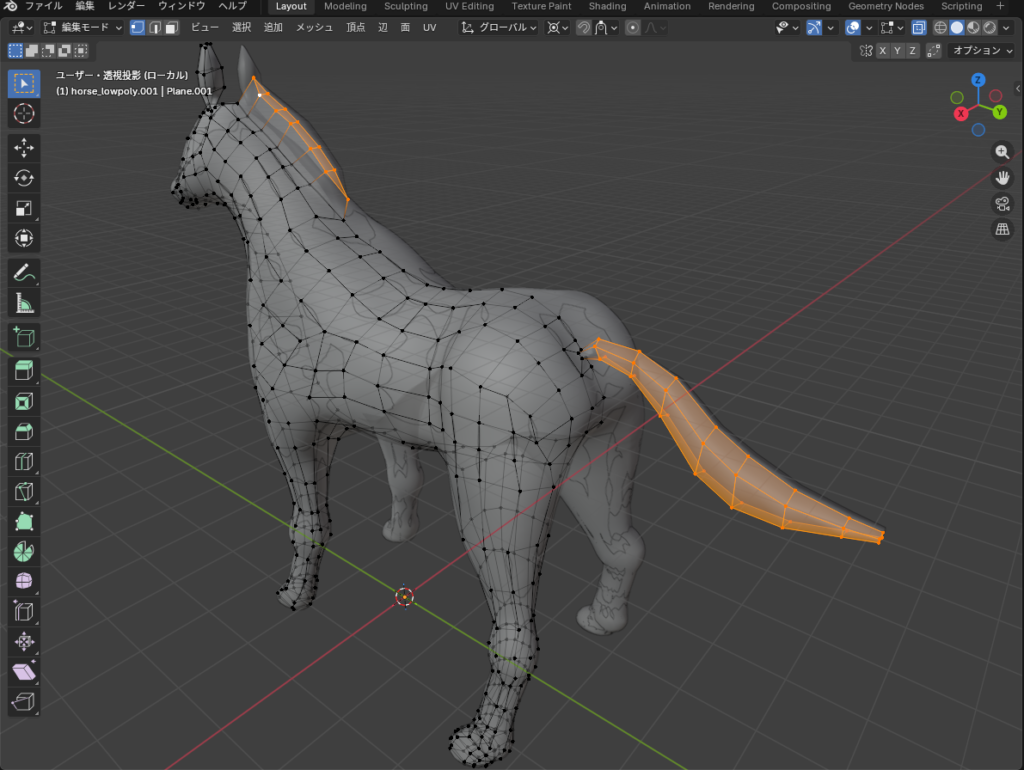
After that, I marked seams and unwrapped the UVs to complete the process.
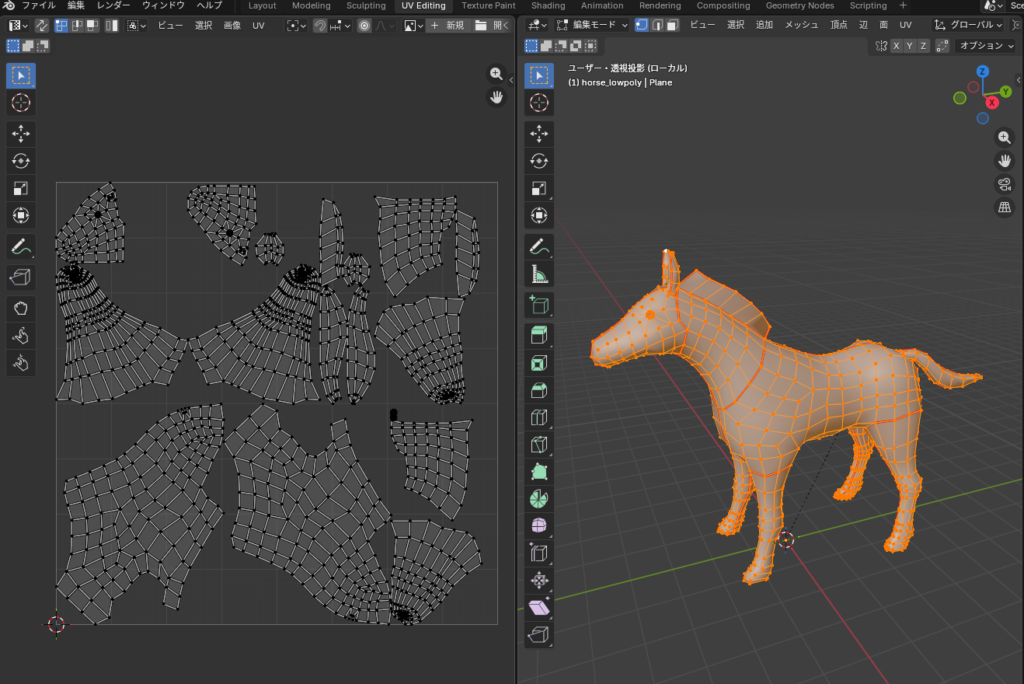
The UV unwrapping method is the same as described in the following previous articles, so please feel free to refer to them as well:
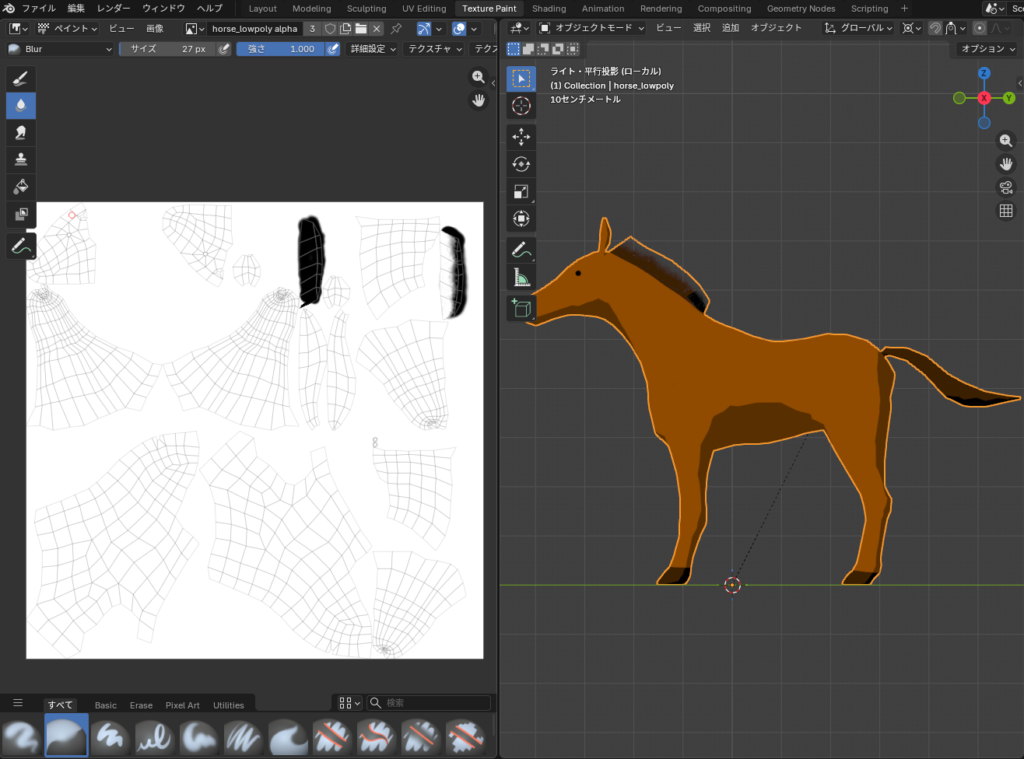
Material Creation
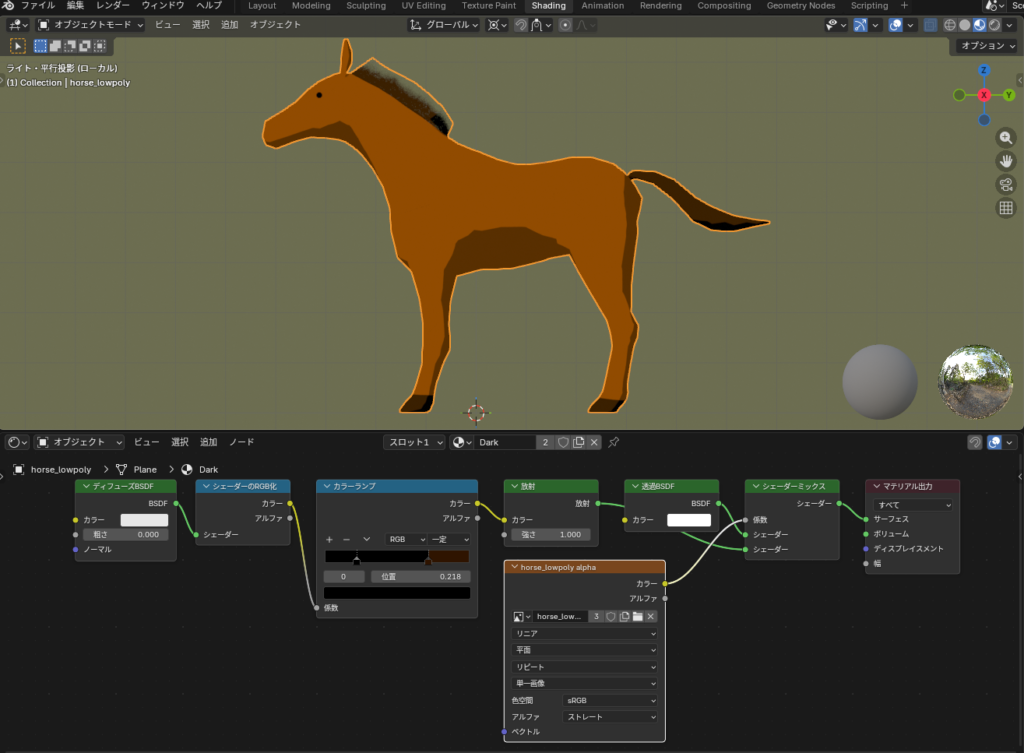
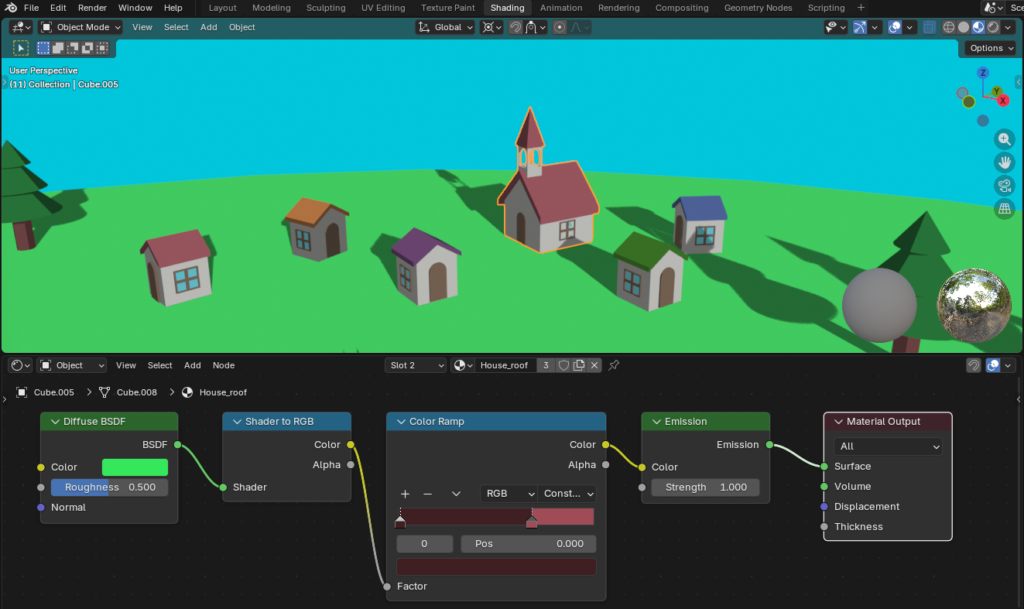
Since I wanted the final piece to have an anime-style look, I created a cel-shaded material like the one shown below.
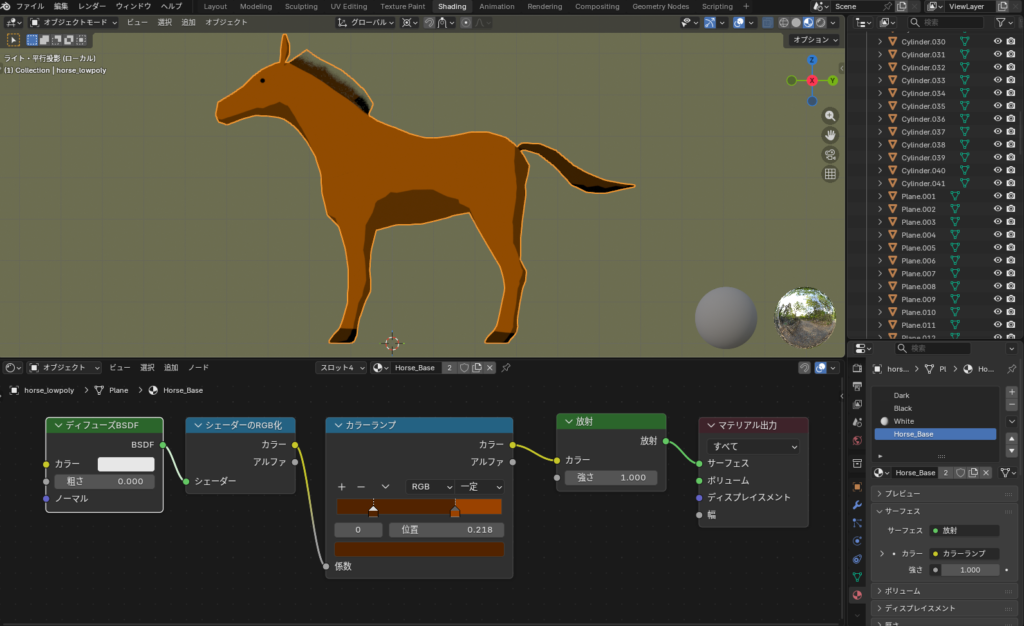
For the horse’s mane, I used alpha transparency to make the hair look as natural as possible.
広告/AD
Rigging & Running Animation
In this project, the main focus is the horse’s movement as it runs.
To make the running motion look realistic, I studied reference videos of running horses and set keyframes based on their gait.
I animated the motion so that the horse pushes off the ground with its hind legs first, followed by the front legs.
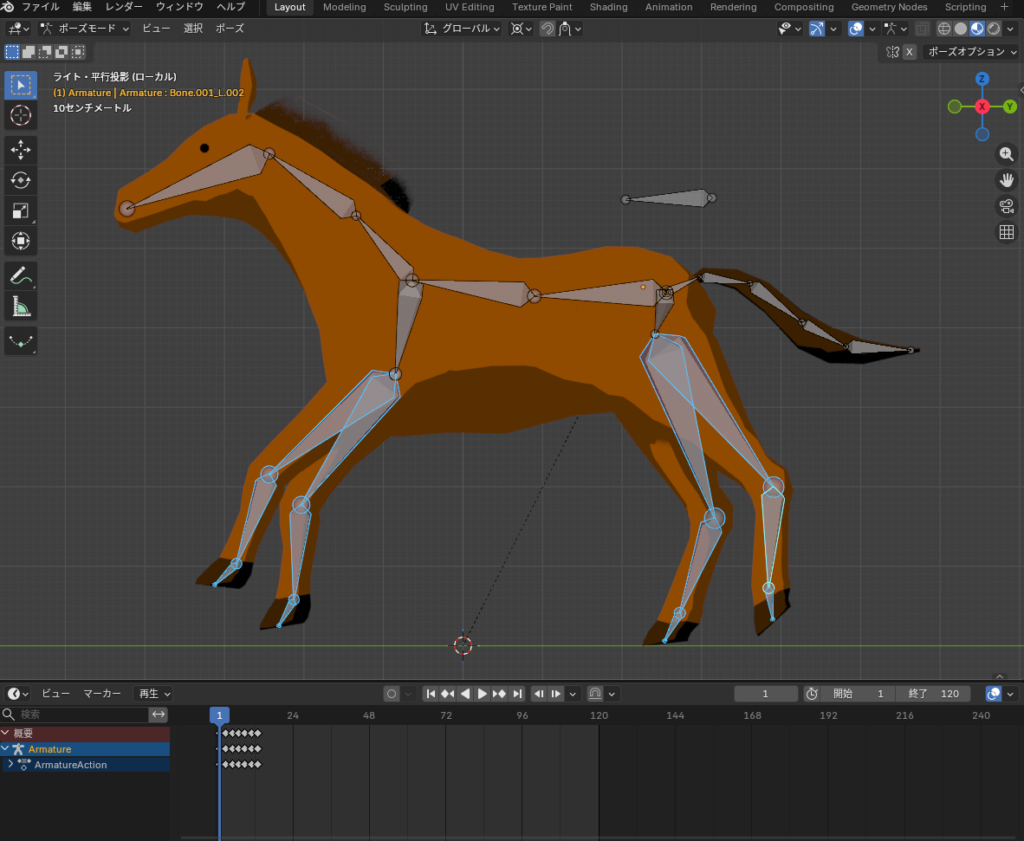
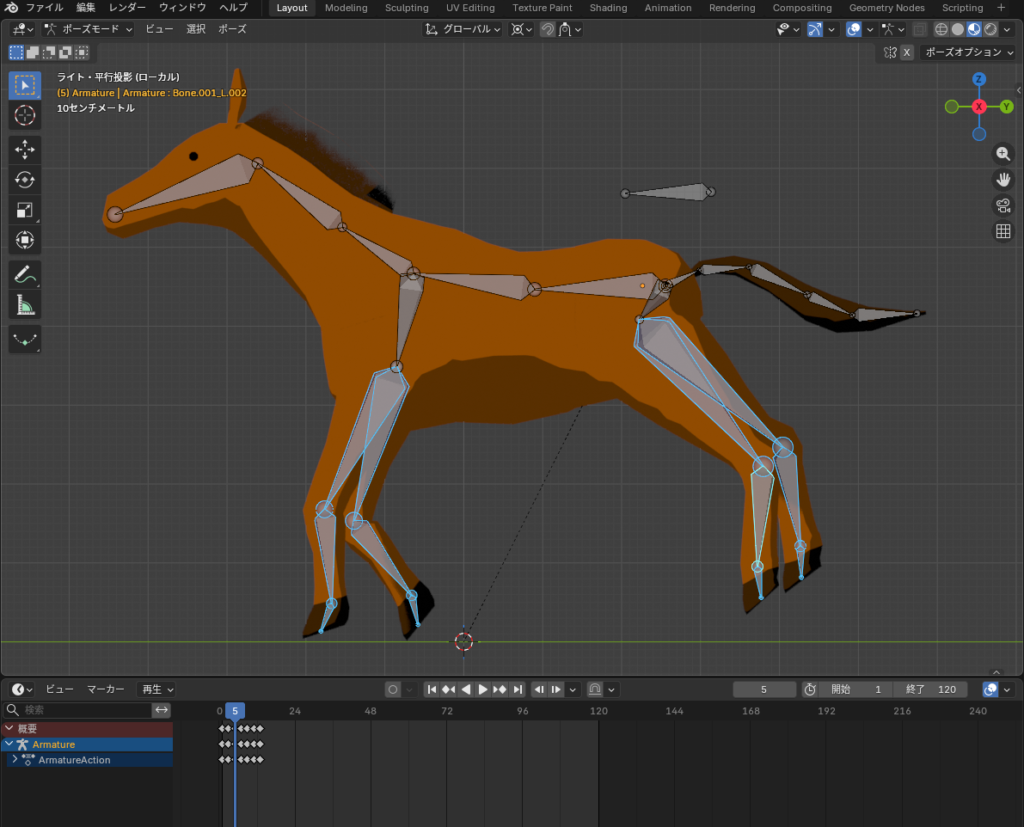

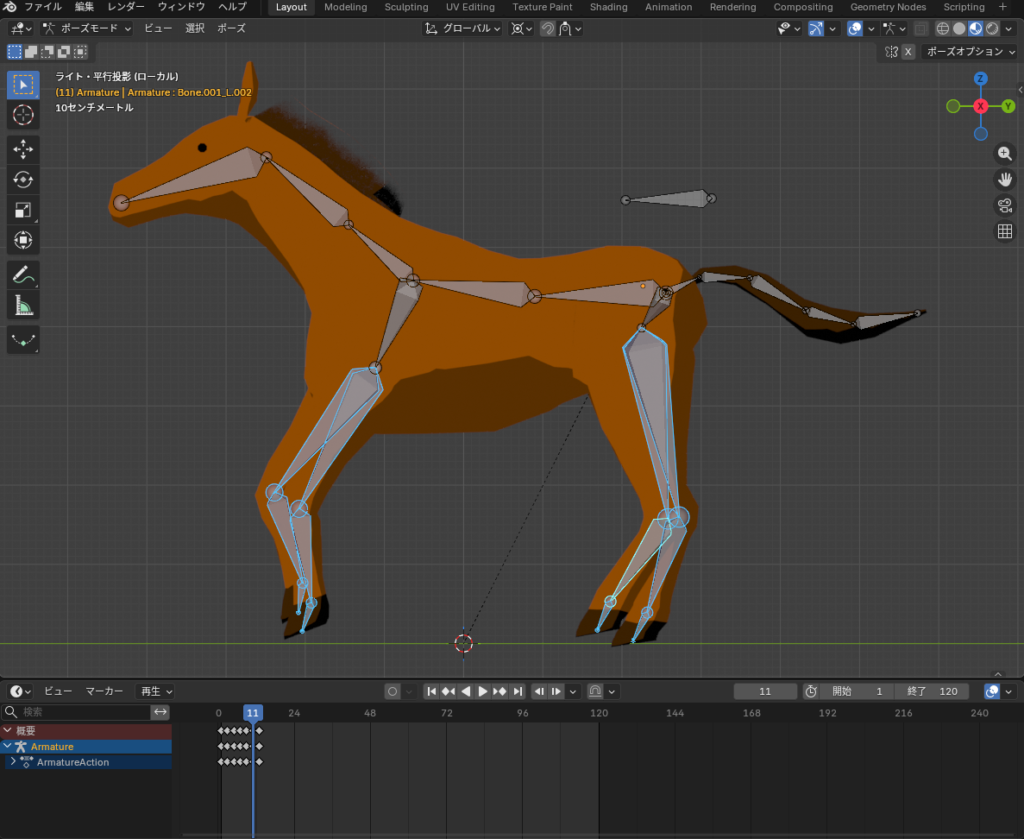
I also added keyframes to the bones of the hips, neck, and tail, giving them subtle up-and-down motion to enhance the sense of dynamism and energy.
Background Creation
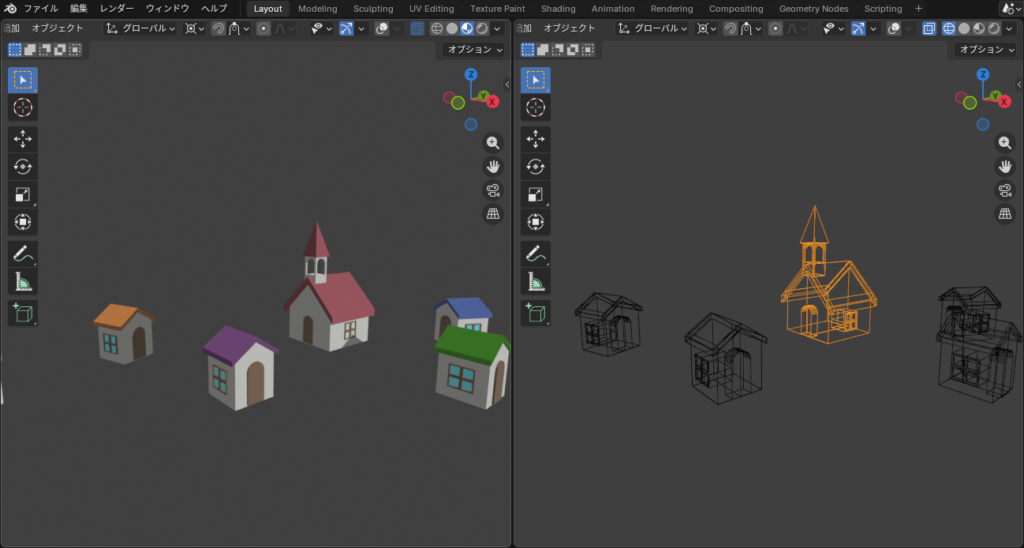
I created the houses, trees, and grass using basic polygon modeling techniques.
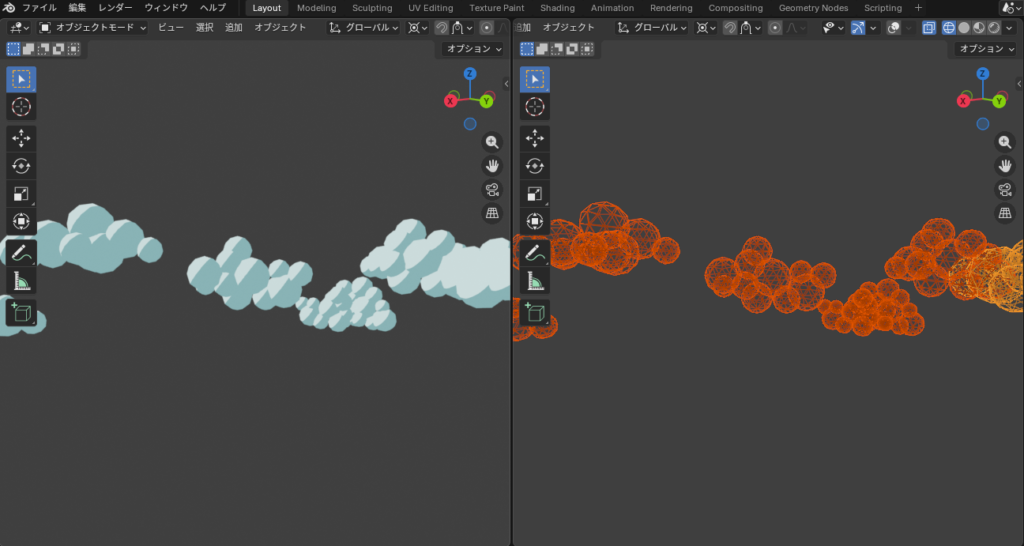
The distant clouds were made by duplicating an Icosphere.
For the cel-shaded materials, I reused the same material setup as the horse and simply adjusted the colors.
広告/AD
Creating the Loop Animation
In this project, instead of placing the horse on a rotating merry-go-round, I kept the horse at the center and rotated the surrounding scenery to make it look like the horse is running.
To create a sense of depth, I rotated nearby objects (such as trees and houses) faster, and distant objects (such as clouds and mountains) more slowly.
The specific setup is as follows:
Foreground (Nearby Scenery)
1. Add an Empty object.
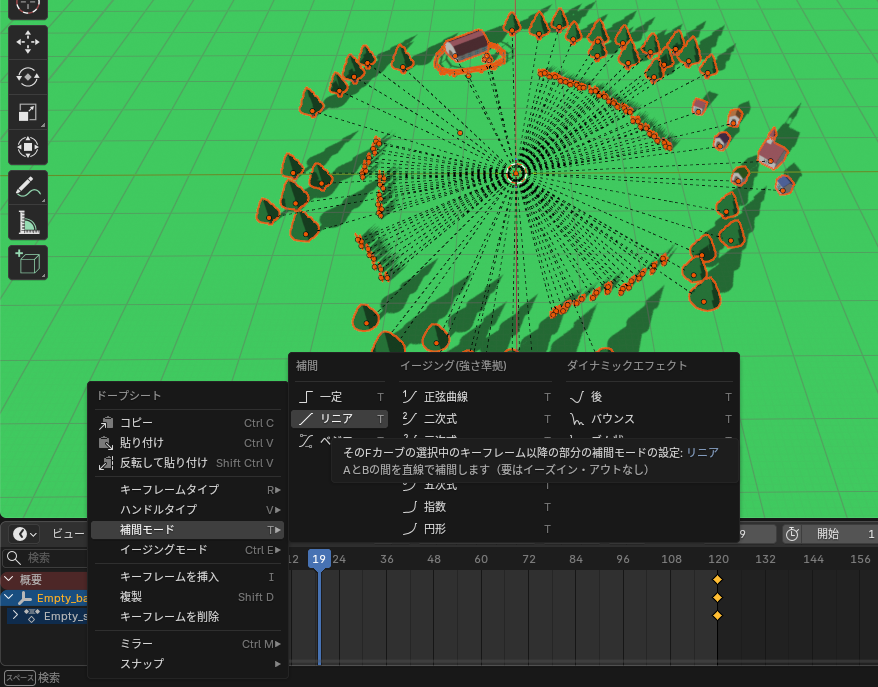
2. Set keyframes so that it rotates 360° over 120 frames.
3. Change the interpolation mode to Linear to keep the motion constant.
4. Select the nearby objects (trees, grass, etc.), then select the Empty object and press Ctrl + P to parent them.
When you play the animation, the objects complete one full rotation in 120 frames.
Background (Distant Scenery)
1. Add a second Empty object.
2. Set it to rotate 360° over 600 frames (five times slower than the first Empty).
3. Parent the distant clouds and mountains to this second Empty.
4. To make the animation appear seamless as a loop, rotate the clouds visible in the camera view by 72° at frame 1, and position them so that they appear in the same place again at frame 121.
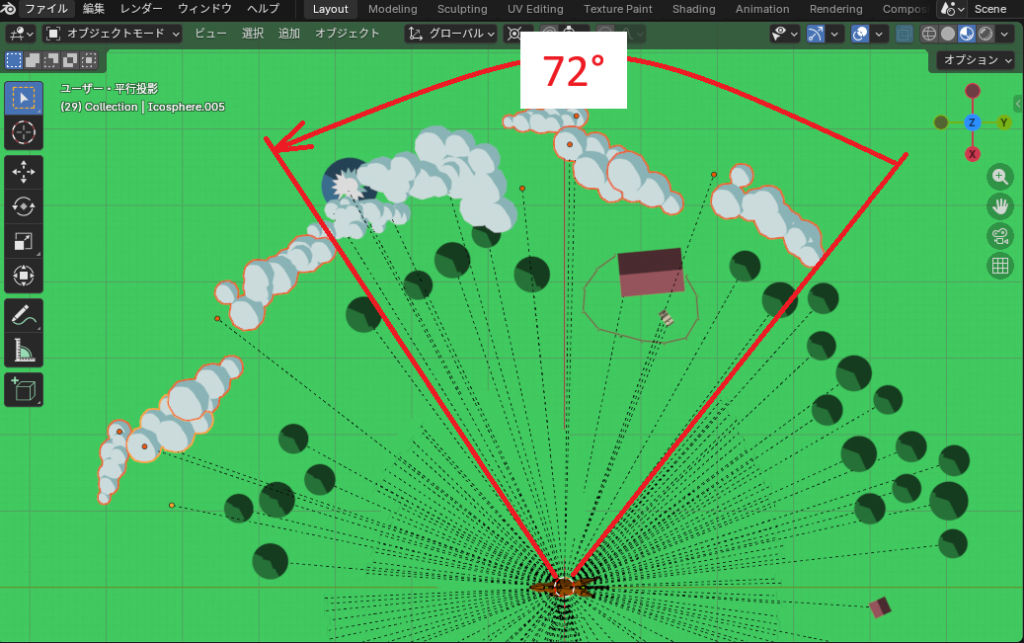
When you play the animation, the distant scenery rotates 1/5 of a full turn over 120 frames, creating a parallax effect and a smooth looping animation.
Rendering
To enhance the sense of speed, I enabled motion blur in the render settings.
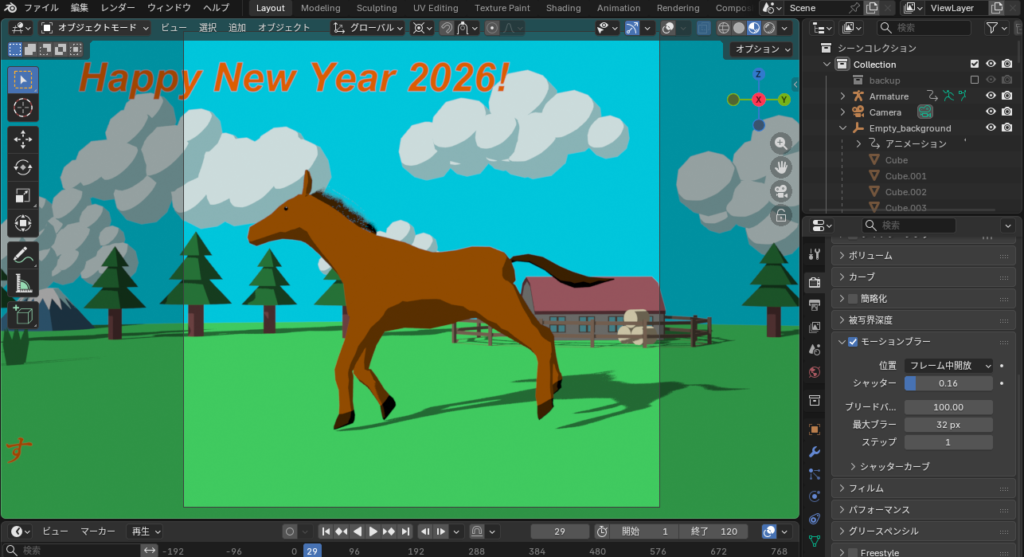
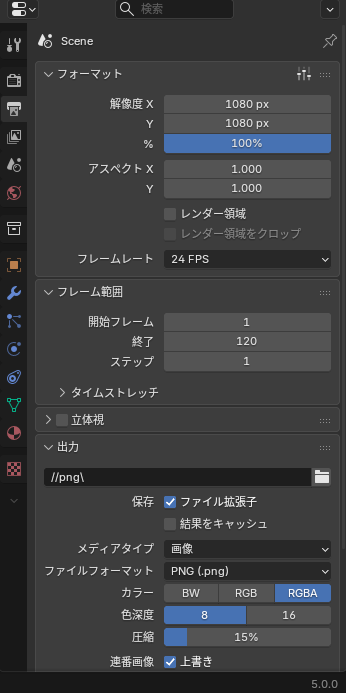
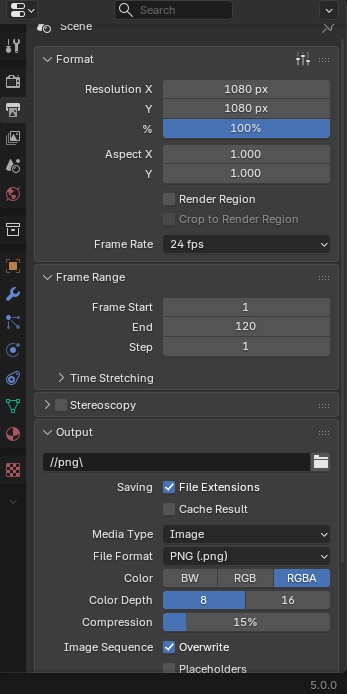
The animation rendering settings are as follows.
Conclusion
I’ve briefly summarized the process of creating the Horse (Uma) animation.
I hope this guide will be helpful for your own creative projects.
広告/AD
関連記事
竜のアニメーション作成についての記事です。
モデリングやアニメーションレンダリングの方法についてはこちらの記事により詳細に書いてあるので参考にしてください。
うさぎのモデリングについての記事です。
Part 1~7までありますが、以下の記事ではスカルプトとリトポロジーについて詳しく紹介しています。