Building a Custom PC for 3DCG: Upgrading with a 2TB SSD [KIOXIA EXCERIA G2]
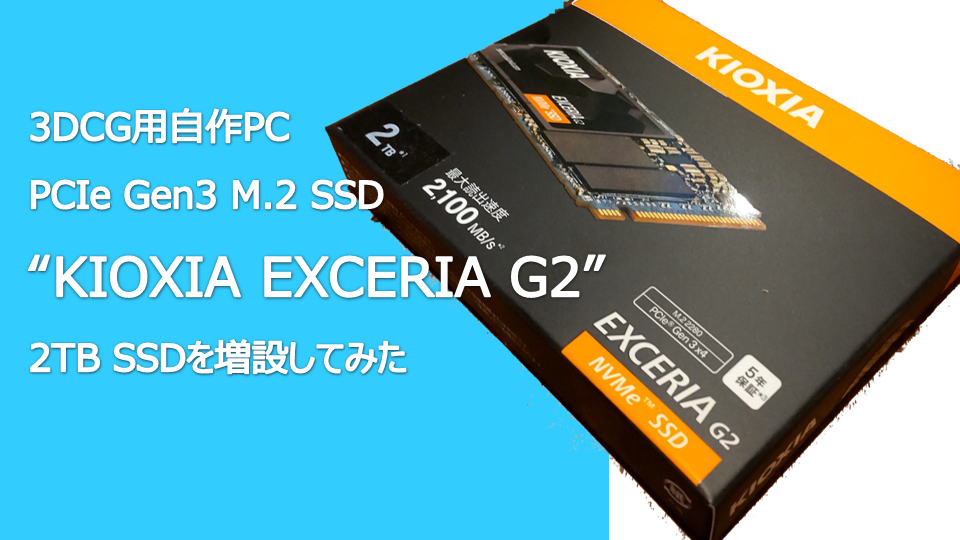
In 2021, I built a custom PC (Core i5-10400F/DDR4 32GB/RTX 3050/500GB SSD) primarily for 3DCG creation using Blender. However, the 500GB SSD that doubles as the system drive has started to feel insufficient. To address this, I added a 2TB M.2 SSD dedicated to storing 3DCG project files.
In this article, I’ll briefly summarize the key points for choosing an M.2 SSD and the steps involved in installation and configuration.
If you have any feedback or questions, feel free to reach out to me on Clara’s Twitter (https://twitter.com/klala_lab) 😊
AD
About the Installed SSD: KIOXIA EXCERIA G2
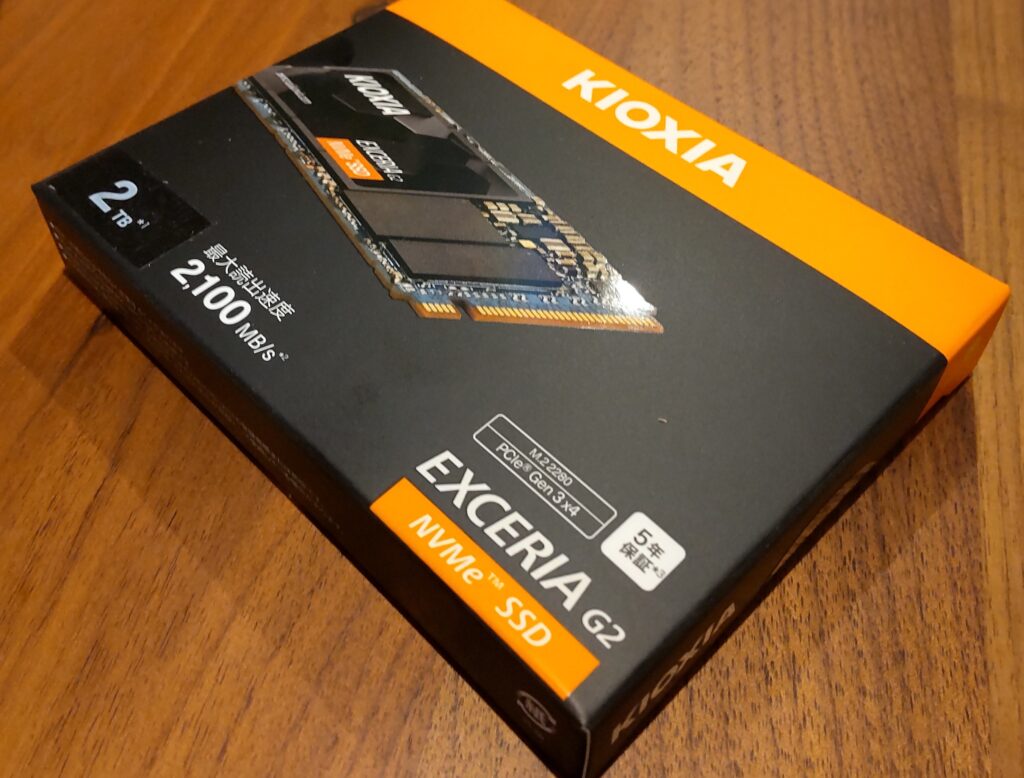
Amazon Link:https://amzn.to/3Rbvrb8
When deciding on an SSD to expand my storage, I ultimately chose the “KIOXIA EXCERIA G2" based on the following criteria:
- Sufficient capacity (2TB)
- Stable performance
- From an original NAND manufacturer
- Reasonably priced
I prioritized the third criterion, “from an original NAND manufacturer,” because it ensures higher reliability (as noted in an article by Chimolog).
The SSD I previously purchased in 2021, the “Western Digital WD Black SN750," is also an SSD from Western Digital, a reputable manufacturer.

Initially, I considered other options from Western Digital, such as the WD Black SN770 or WD Blue SN580. However, the prices, which were once under ¥20,000, have now risen to around ¥22,000–¥23,000 due to the yen’s depreciation against the dollar (source: “Kakaku.com").


In contrast, SSDs from KIOXIA, formerly Toshiba’s memory division, have remained relatively affordable. While prices have increased slightly compared to last year’s lowest point, the KIOXIA EXCERIA G2 was priced at ¥16,980 when I purchased it on May 16 (as of June 2, the price has risen to the ¥19,000 range).

KIOXIA EXCERIA G2 may have a modest read speed of 2,100MB/s, but its inclusion of a DRAM cache (a memory chip within the SSD) helps maintain stable performance even when handling large files.
For a detailed review of the KIOXIA EXCERIA G2, including its pros, cons, and benchmark results, I recommend reading Chimolog’s article, which was instrumental in my decision to purchase this SSD.
What You Need to Install an Additional SSD
Here’s a summary of the items you’ll need to install an SSD.
Phillips Screwdriver (+1 Size)
This is used for tightening and loosening screws that secure the graphics card to the PC case slots.
I recommend a +1 size screwdriver with an easy-to-grip handle, such as the one below:
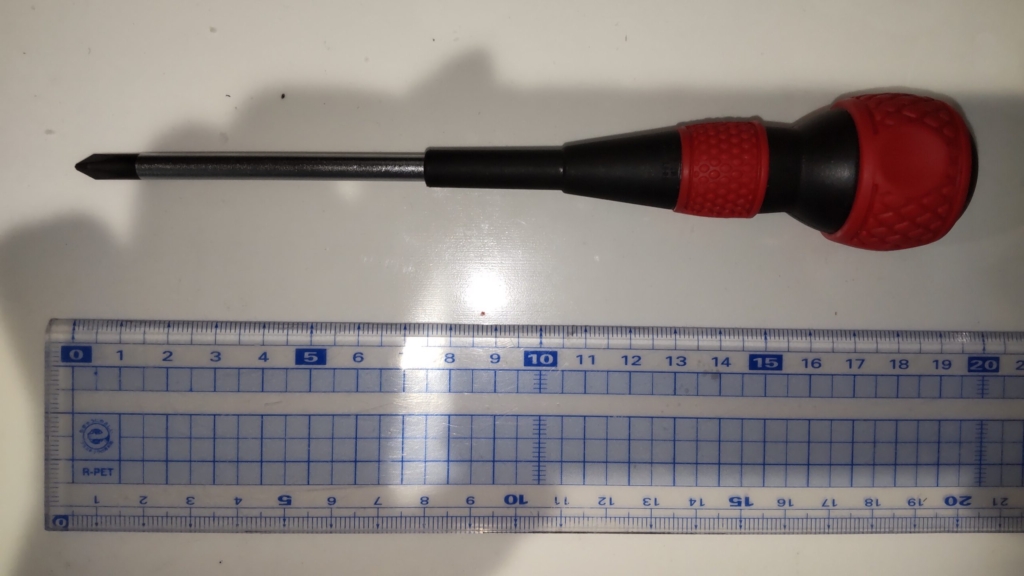
Amazonリンク:https://amzn.to/3Kti95S
Anti-Static Gloves
Since SSDs are precision components, they are vulnerable to static electricity.
Static electricity is especially prevalent in winter, so I strongly recommend using these anti-static gloves:
Time and Mental Preparation
Installing an SSD often involves attaching small spacers or screws, which can be tricky, especially if you’re not used to it.
Make sure to schedule the installation when you have plenty of time and can work calmly without rushing. Taking your time ensures a smoother and safer process.
AD
SSD Installation Procedure
Here’s a step-by-step guide to installing an SSD:
Prepare Your Tools
Ensure you have anti-static gloves and a suitable screwdriver ready.
Unplug the Power Cord
Disconnect your computer from its power source to avoid any electrical hazards.
Open the PC Case
Place the computer on the floor and remove the side panel of the PC case.
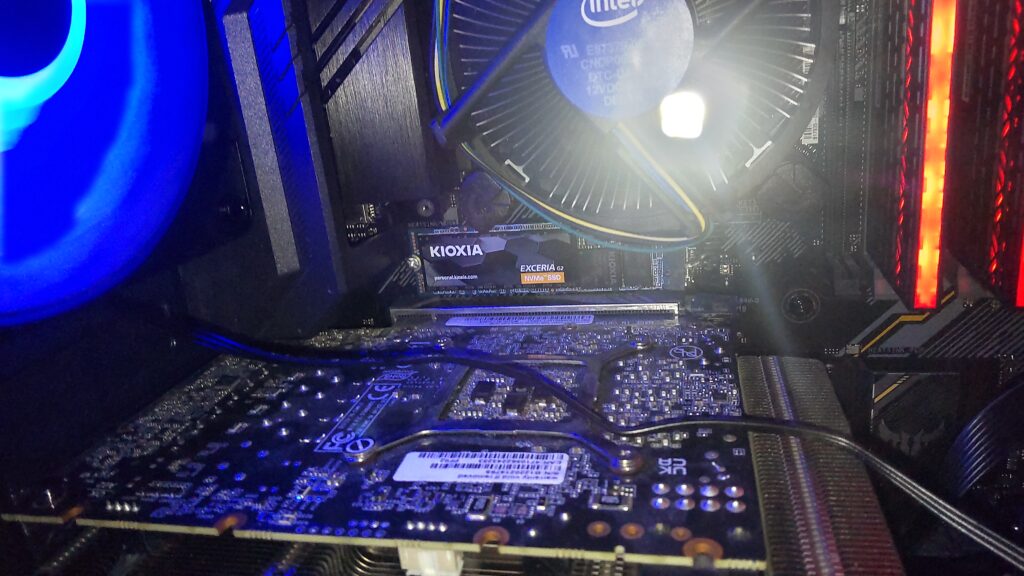
(Note: The photos provided are from an older PC, so they may not match the current setup exactly—apologies for the discrepancy.)
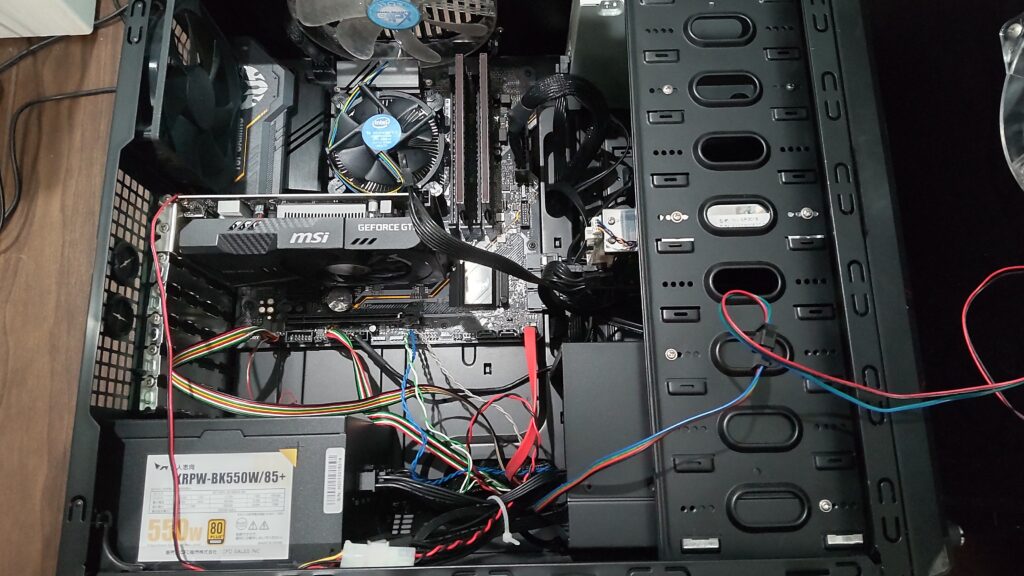
Locate the M.2 Slot
For this installation, the M.2 slot is situated between the CPU cooler and the GPU.
Gather Necessary Parts
Refer to your motherboard’s user manual to locate the spacers and screws that come with it. Keep them handy.
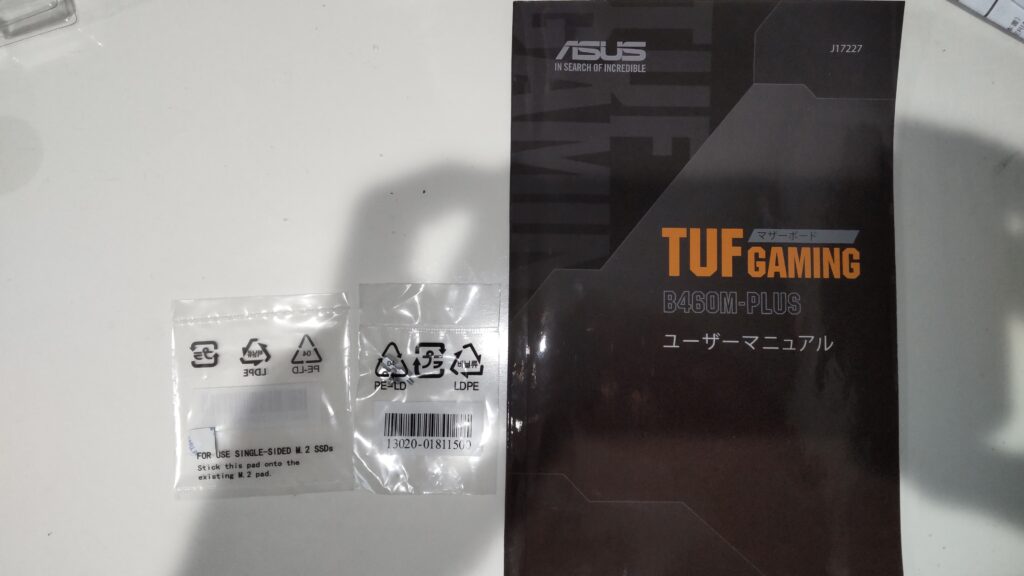
Attach the Spacer
Following the instructions in the user manual, attach the spacer to the motherboard.
Be patient—handling such a small part can be challenging, and you may need to tighten it manually.

Insert the SSD
Align the SSD with the M.2 slot and carefully insert it.
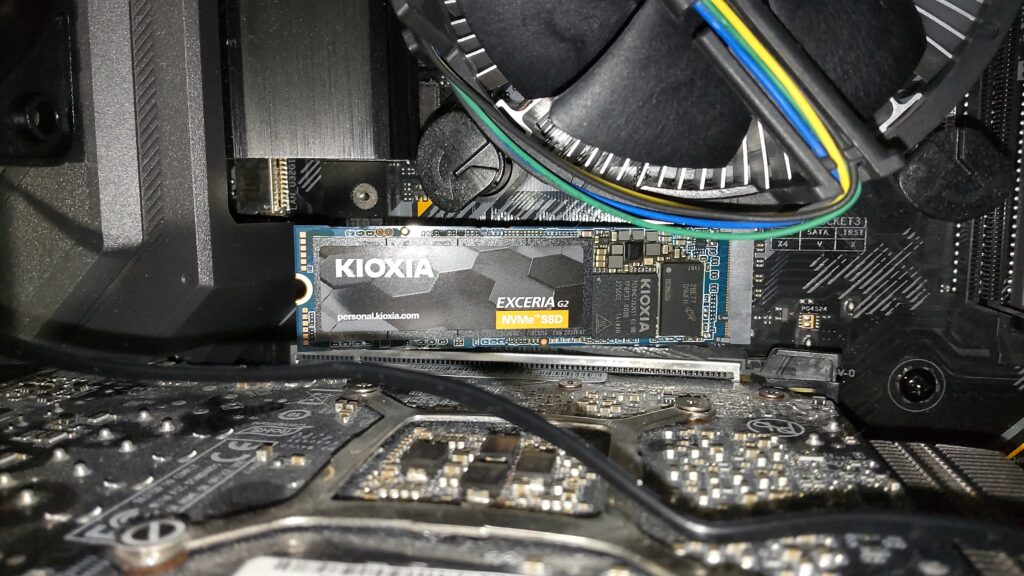
Secure the SSD
Use a screw to fasten the SSD’s semicircular notch to the spacer.
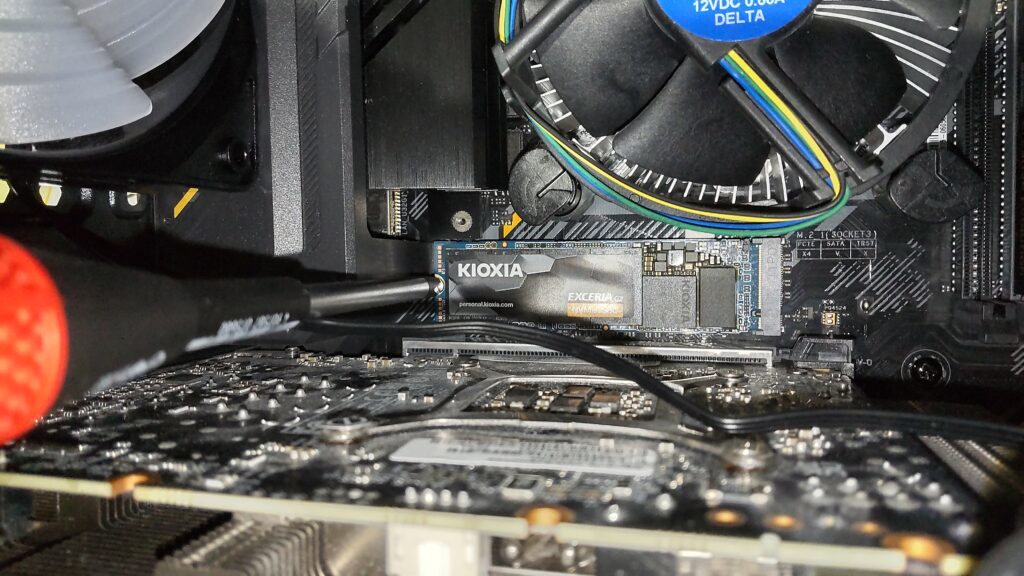
Test Before Closing
Before closing the PC case, reconnect the power and boot up the system to ensure the SSD is recognized.
Open the “Device Manager" and verify that the “KIOXIA EXCERIA G2 SSD" is listed.
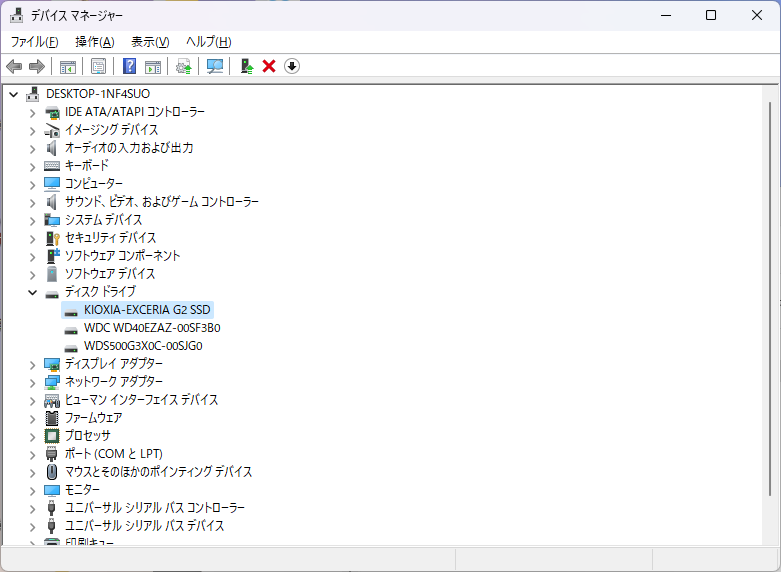
Once confirmed, you’ve successfully completed the hardware installation of your SSD!
Configuring the Installed SSD
After installing the SSD, it will not be recognized as a usable drive until it is formatted (initialized). Below are the steps for configuring the SSD on Windows 11:
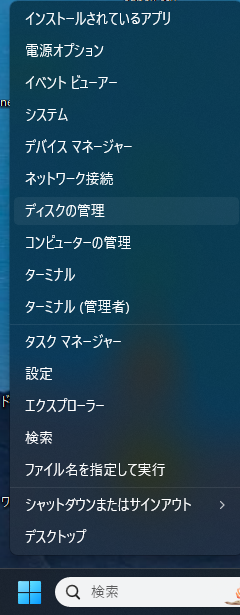
Open Disk Management
Right-click the window icon at the bottom of your screen and select Disk Management from the context menu.
Initialize the Disk
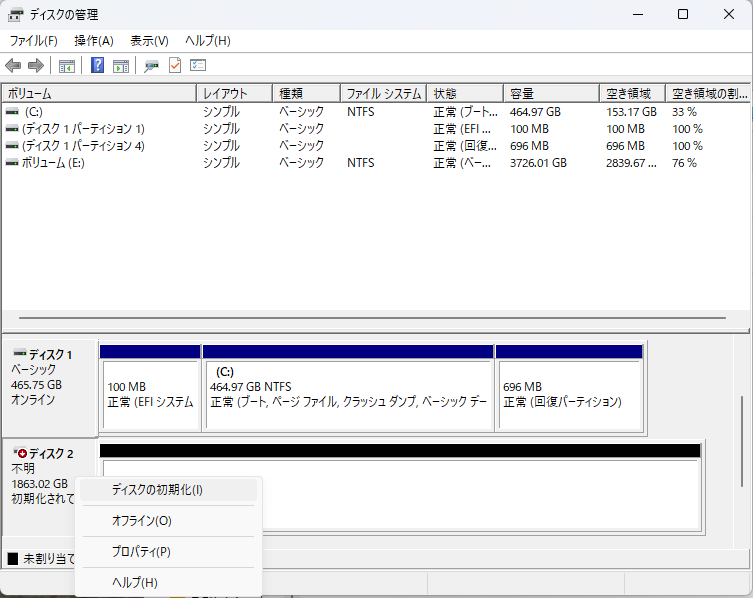
In the Disk Management window, locate the new disk, typically labeled as Disk 2 – Unknown.
Right-click on it and select Initialize Disk.
Format the Disk
When prompted, format the disk using the NTFS file system.
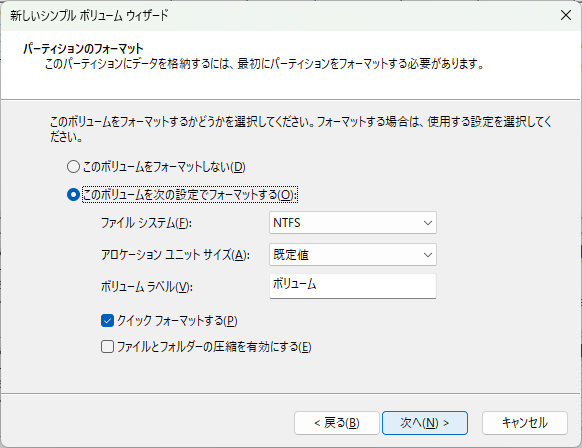
Verify the Configuration
Once formatted, the SSD will be recognized as a usable drive. In this case, it was identified as a 1.81TB drive.
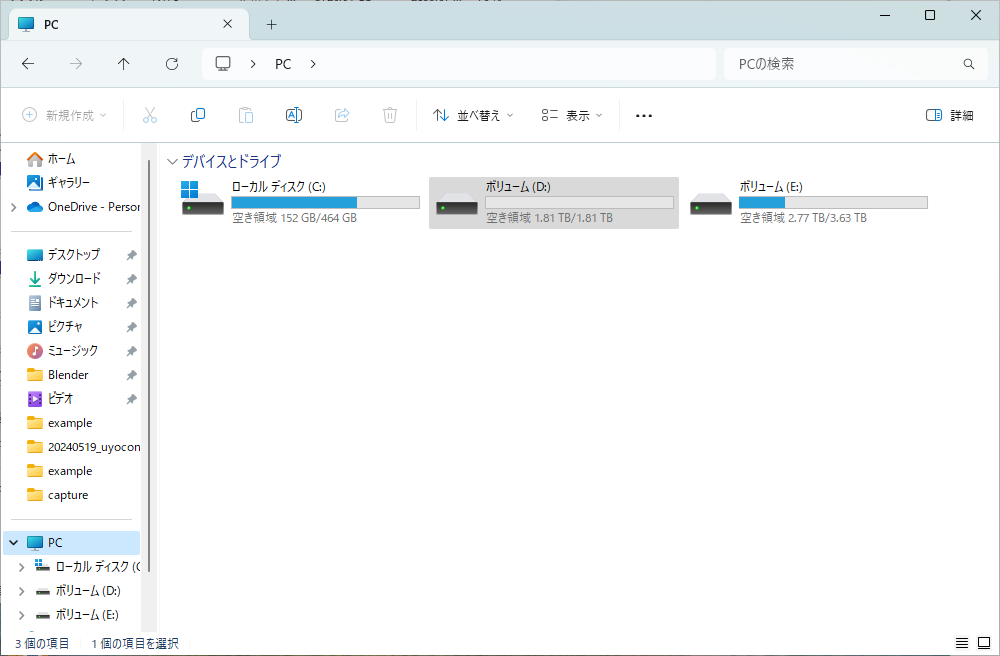
For more detailed guidance, I referred to the following articles:
https://www.century.co.jp/support/faq/windows11-format.html
By following these steps, your new SSD should be ready for use!
Benchmark Results
To ensure the SSD delivers performance as advertised, I ran the benchmark software CrystalDiskMark, a go-to tool for testing SSD performance. You can download it from the link below:
https://forest.watch.impress.co.jp/library/software/crystaldisk
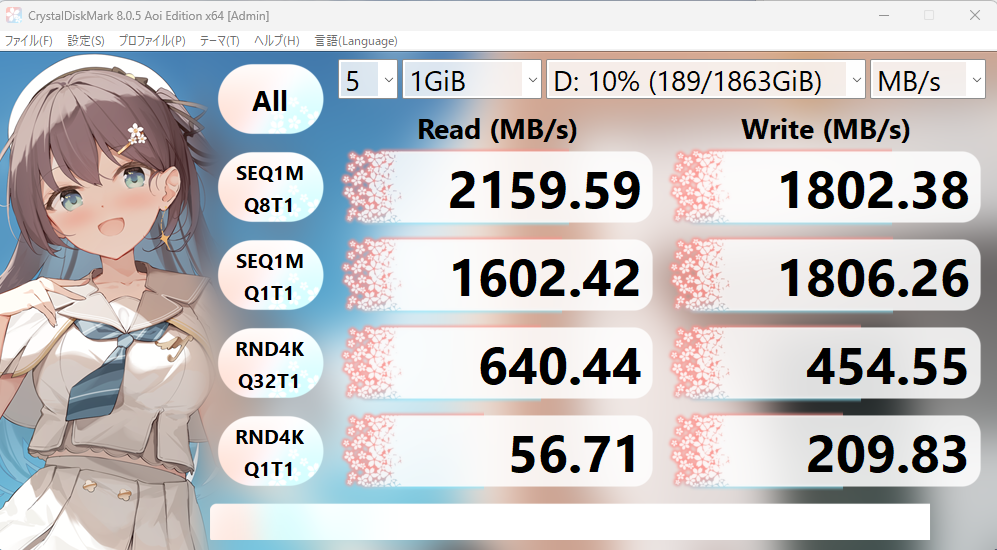
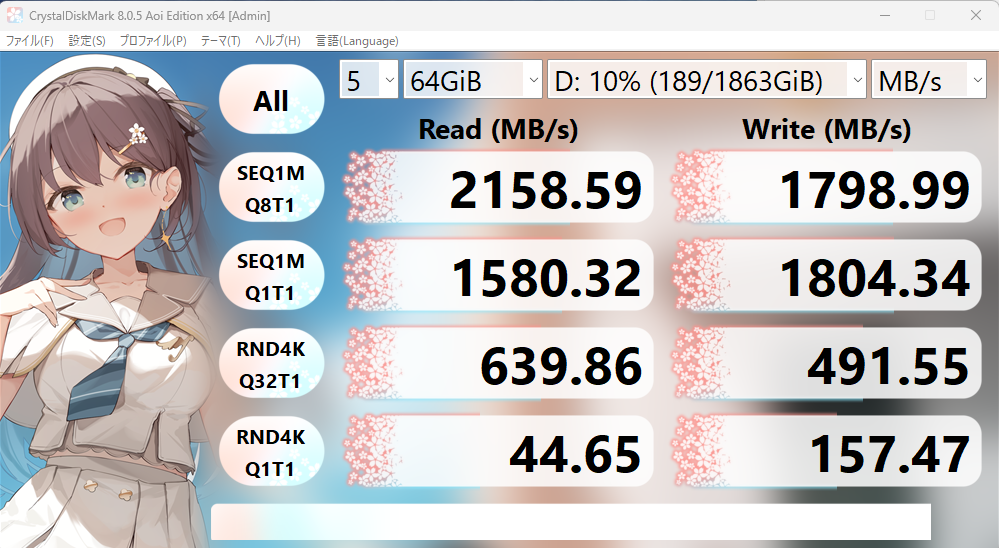
Here are the results for the KIOXIA EXCERIA G2 2TB M.2 SSD (note: these results were obtained with data already stored on the drive, so it wasn’t tested at 100% empty capacity—please excuse the slight variance).
KIOXIA EXCERIA G2 Benchmark Results:
Random read/write speeds were slightly slower compared to results reported on “Chimolog."
However, the sequential read speed reached the advertised 2100MB/s, showing no major concerns regarding its performance.
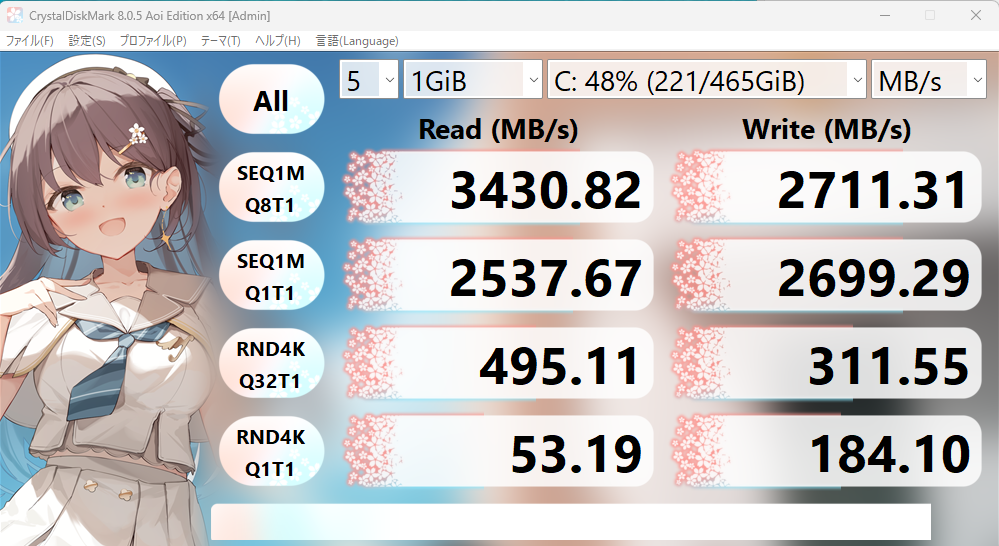
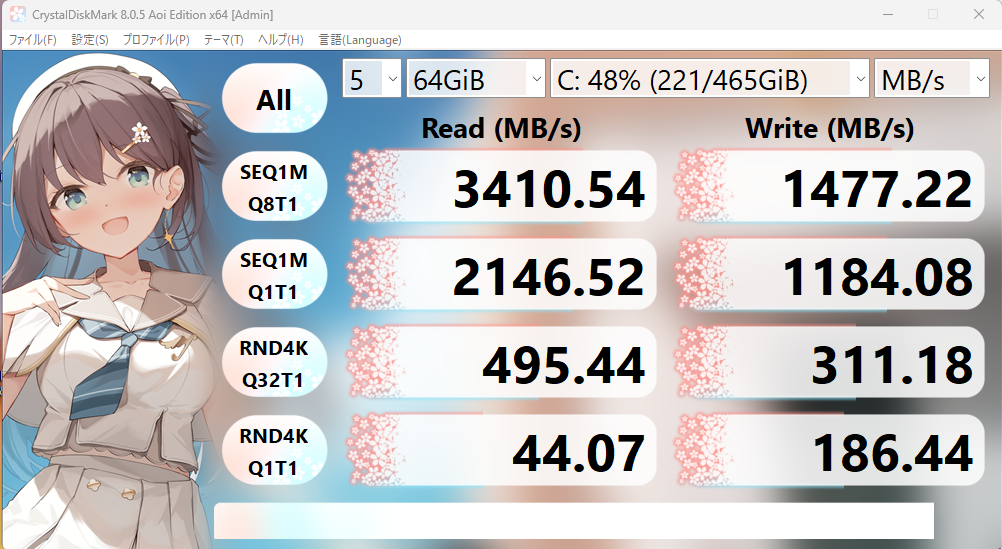
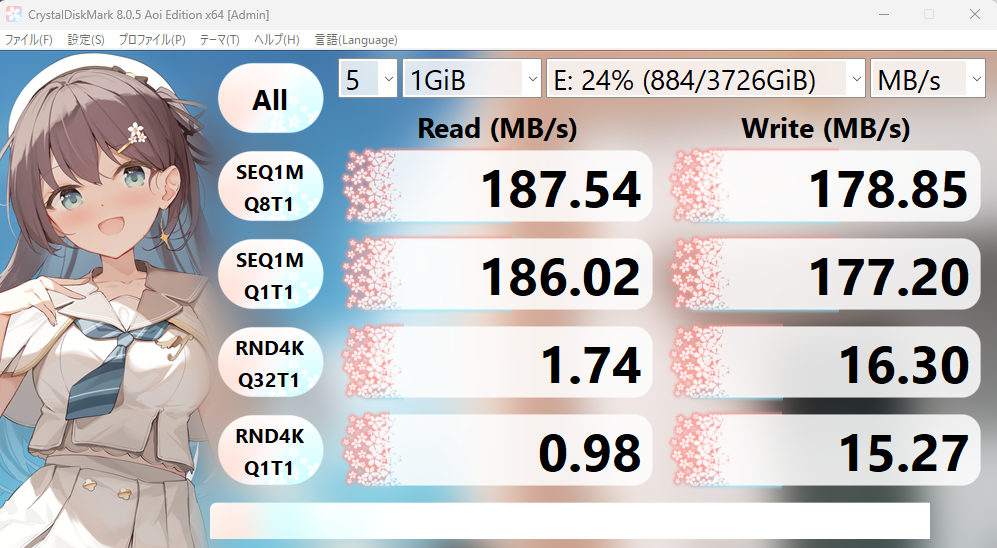
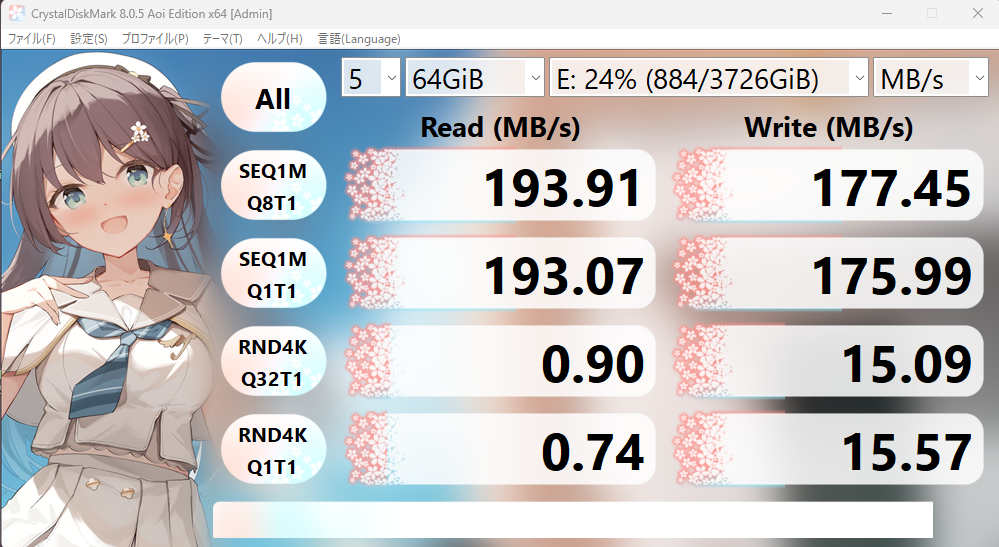
Out of curiosity, I also benchmarked my other storage drives:
- WD Black SN750 500GB M.2 SSD
- WD40EZAZ 4TB HDD
Comparison Results:
WD Black SN750 500GB M.2 SSD: Sequential read speed reached 3400MB/s, which significantly outpaces the KIOXIA EXCERIA G2.
WD40EZAZ 4TB HDD: Sequential read speed was around 190MB/s, highlighting the stark performance gap between NVMe SSDs and SATA HDDs.
AD
Conclusion
In this article, I summarized the steps for adding an SSD to your PC.
Whether you use Blender, video editing software like After Effects, or game engines like Unreal Engine, having a large SSD for storing your production files becomes essential for creative work.
I hope this guide helps you when you decide to upgrade your PC with an SSD.
By the way, I’ve already started using the newly added SSD to store Unreal Engine 5’s sample files, which are over 100GB in size. I plan to write a separate article detailing my experience and thoughts on that soon.
Reference Articles:
For building a custom PC, check out this guide:
For replacing parts, refer to these articles:
AD


