【Blender 2.92】Modeling “Police Badge (Cherry Blossom Emblem) & Koban”
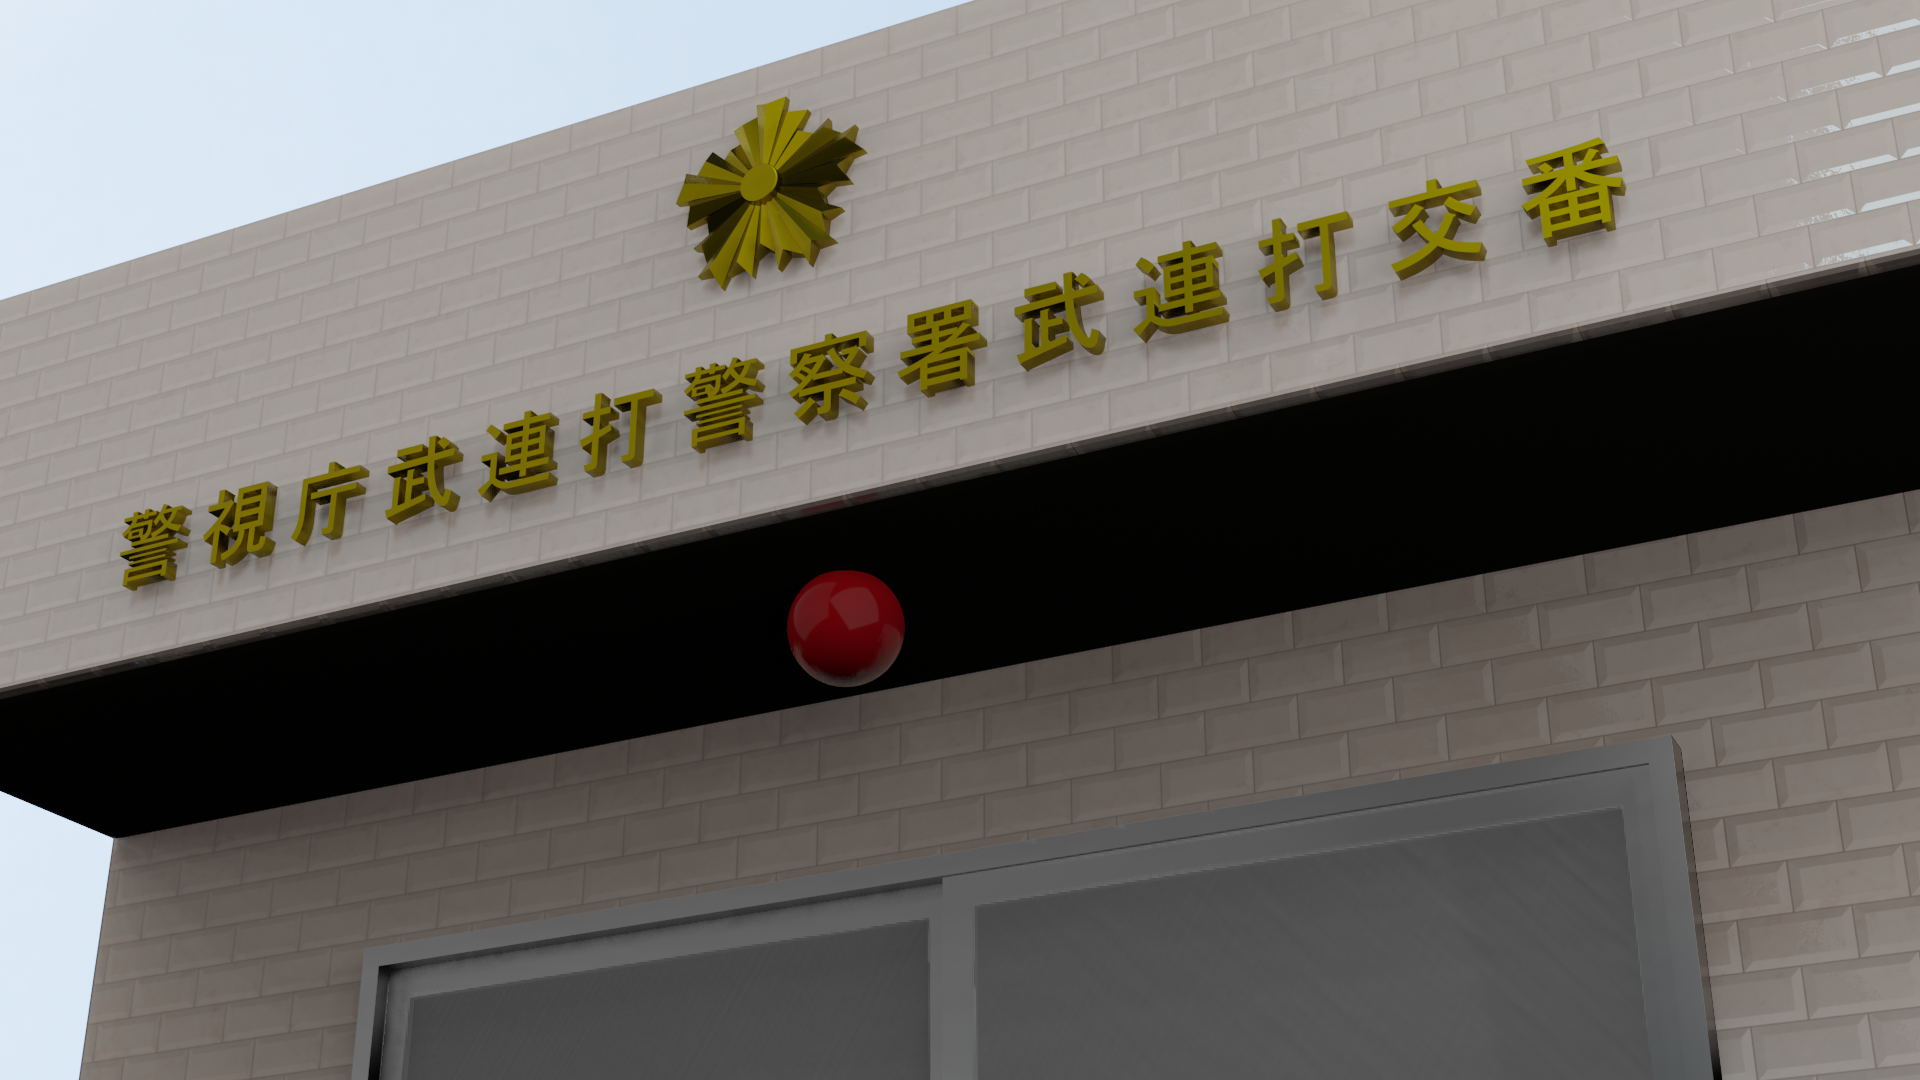
Explanation of modeling of “Police Badge (Cherry Blossom Emblem) & Koban" (Police office)👮
This post summarizes the concept behind the work, the challenges faced during its creation, and other key points.
Feel free to share your thoughts or ask questions via Klala’s Twitter: https://twitter.com/klala_lab (^^)/
AD
Concept Behind the Work
I was inspired to create this piece after watching a tutorial video by Sasara Bch, where the police badge design was showcased—it looked so cool that I decided to give it a try! ☆彡
To complement the police badge, I also modeled a koban (police box) to highlight its design.
Techniques Used
- Node Wrangler (Addon)
- Use of Japanese text with the Text Object
Steps to Create the Work
Police Badge
For detailed steps, please refer to Sasara Bch’s tutorial video. Here, I’ll highlight the key points:
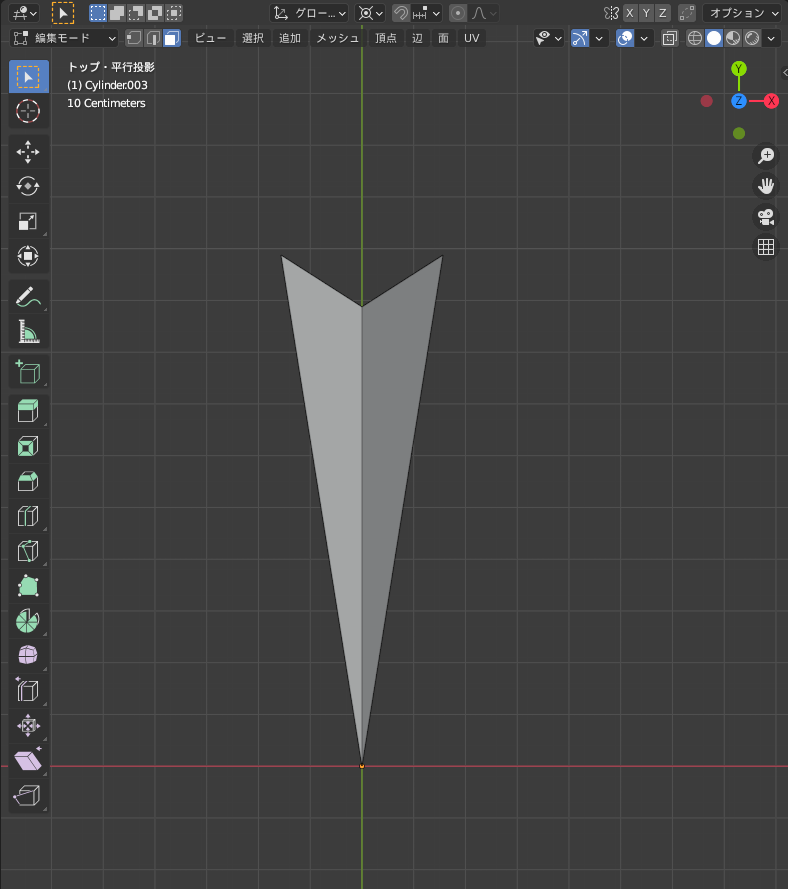
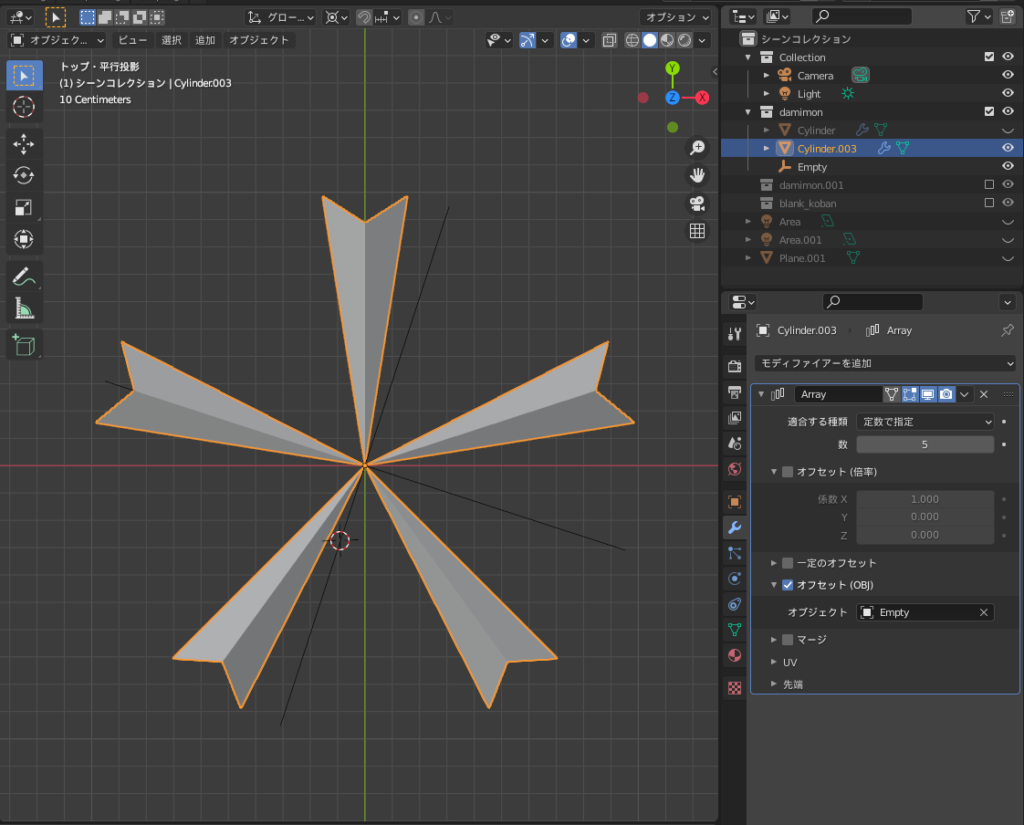
- Start with a cylinder and create a triangular base shape.
- Add an Empty object.
- Apply an Array Modifier to the triangular base, selecting the Empty object as the target.
- Rotate the Empty object by 72°.
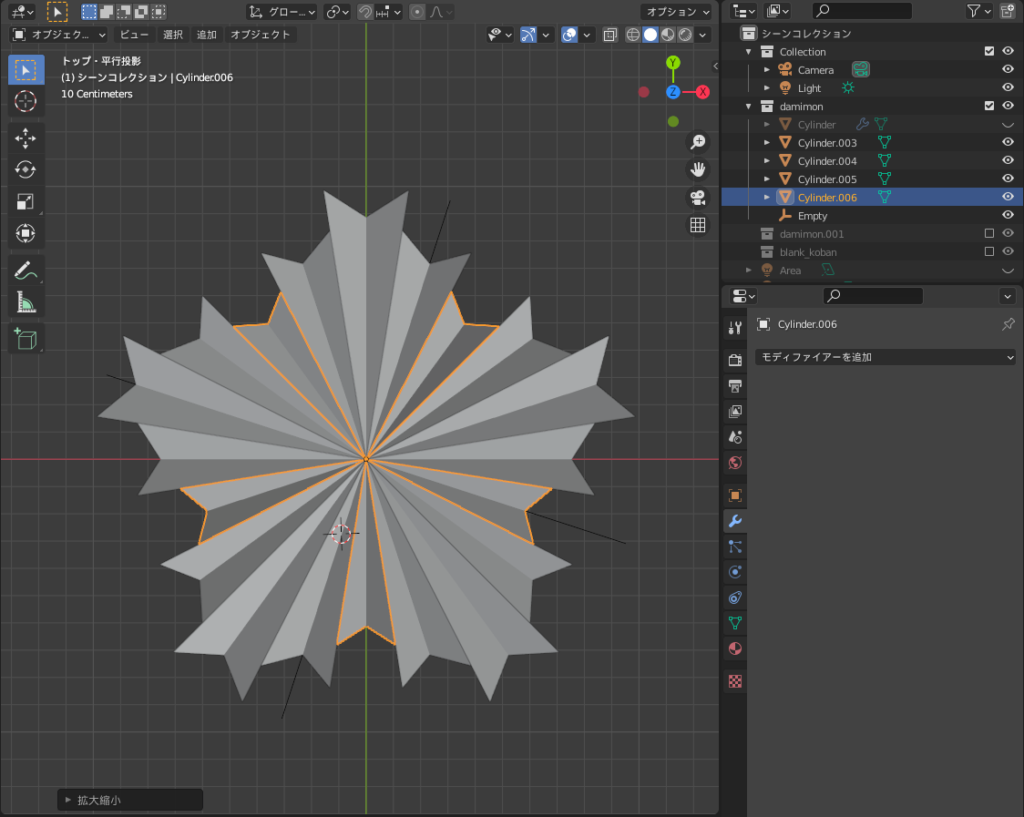
- After applying the array, duplicate, rotate, and scale the shapes to form a star.
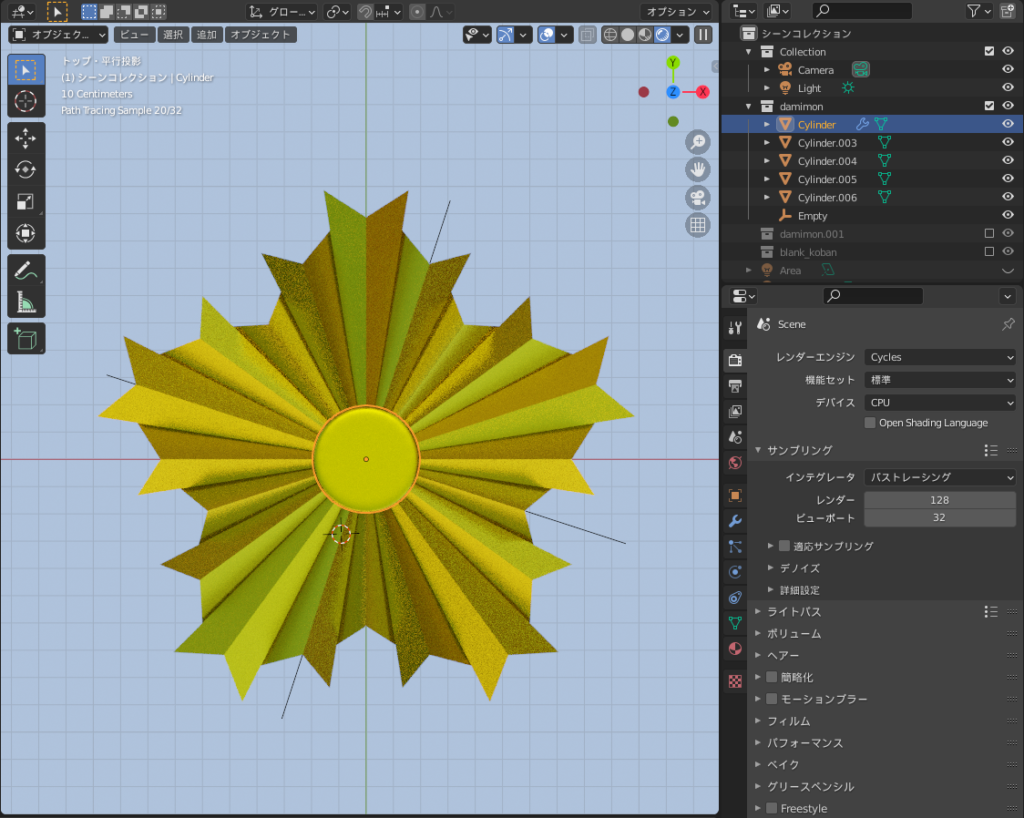
- Add a cylinder object to create the center part.
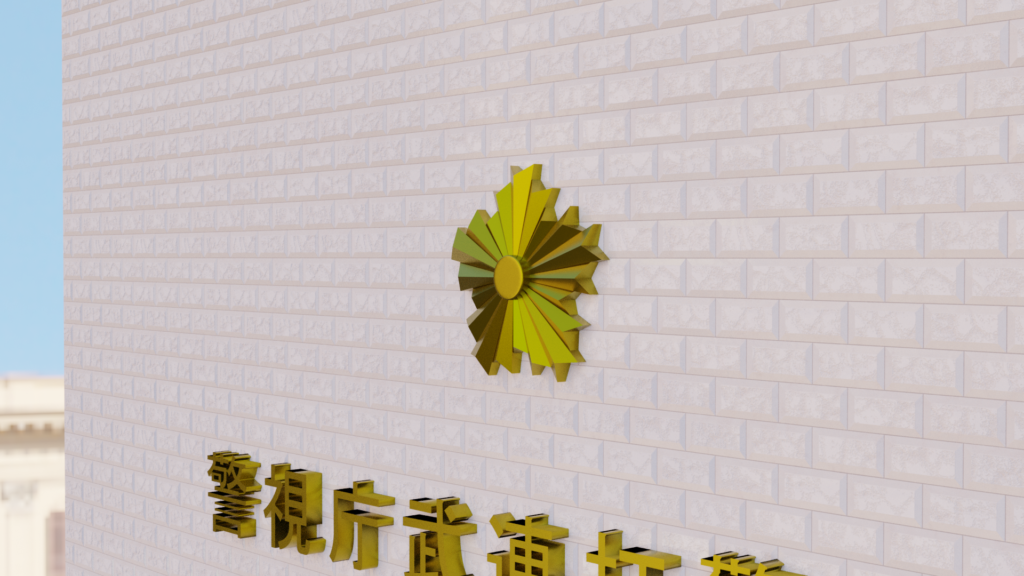
Following these steps, the police badge came together as shown below 😊
AD
Koban
Although the process involved some trial and error, the following steps summarize how the koban was created:
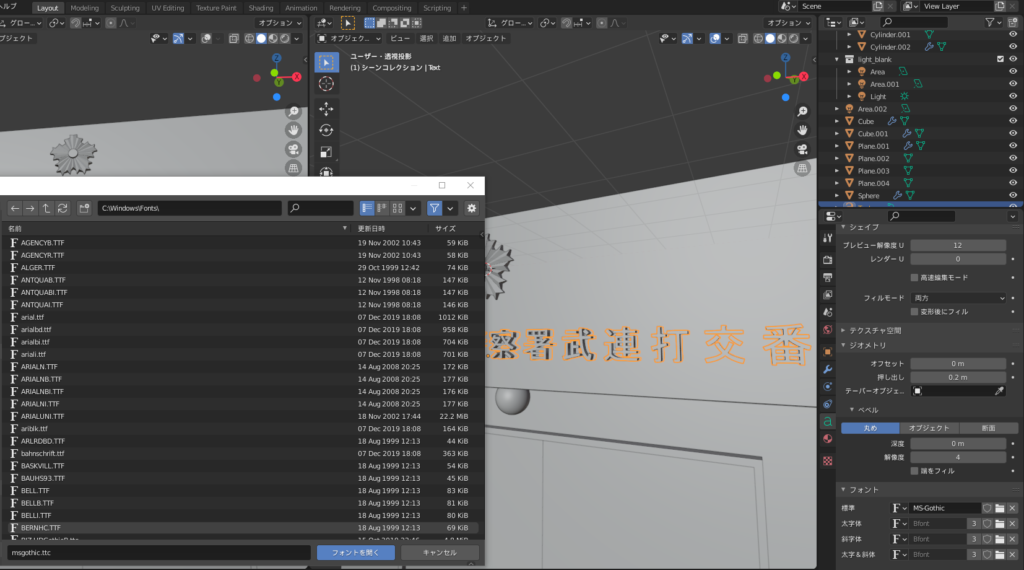
- Signboard Creation: Use a Text Object and set it with a Japanese font.
- Building Structure: Start with a cube object and apply a Solidify Modifier and a Bevel Modifier.
- Exterior Wall Material: Set up the material using the Node Wrangler addon.
- Sliding Door Creation: Design and model the sliding door.
Signboard Creation
Added a Text Object and changed the font to MS Gothic, a Japanese-compatible font.
Set the extrusion value to 0.2.
Applied a gold material to create a unified look with the police badge.
Building Structure Creation
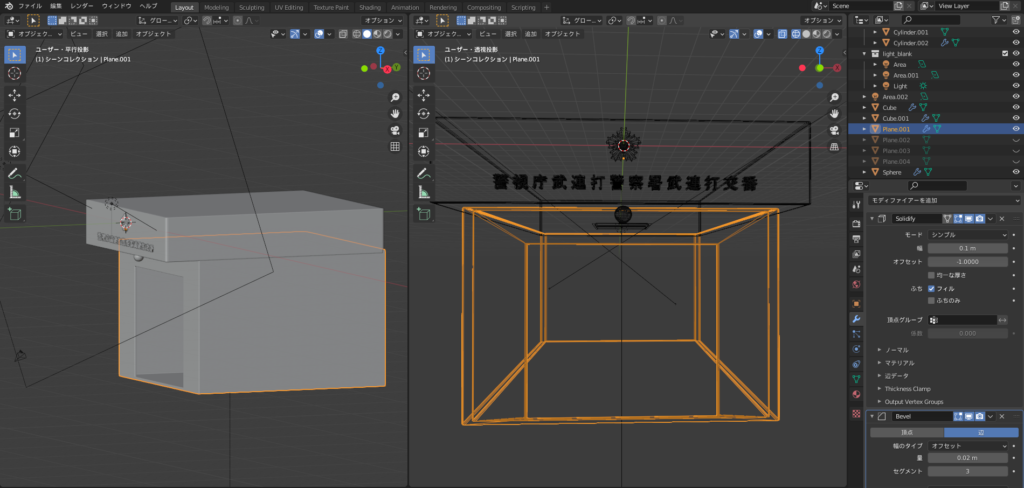
Using reference images from the internet, created the roof and main structure starting from cube objects.
For the main structure:
- Cut out the door area using Inset (i) followed by deleting only the face.
- Added a Solidify Modifier to give thickness to the exterior walls.
Finished by applying a Bevel Modifier to smooth the edges.
Setting Exterior Wall Material
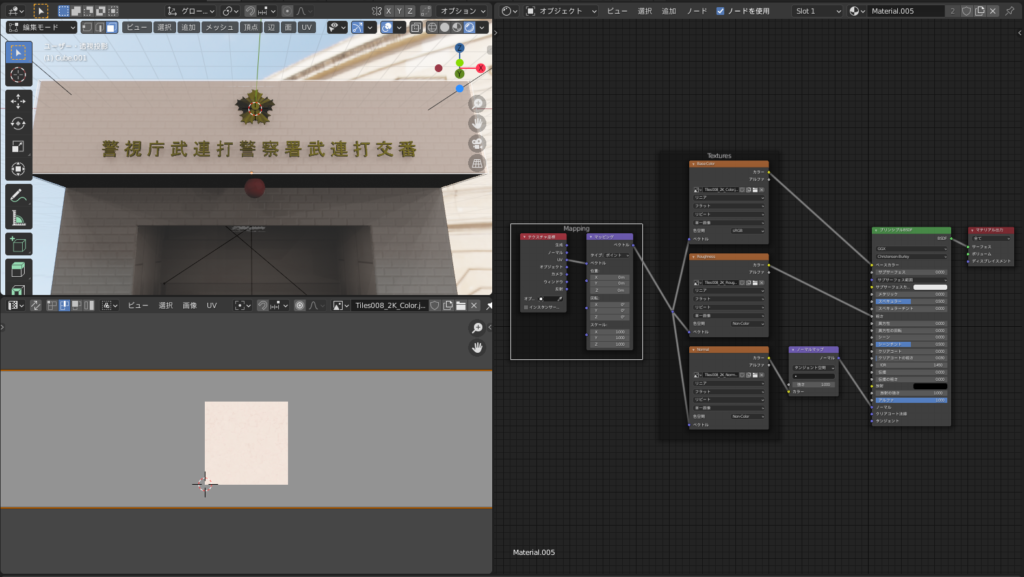
Used an image texture downloaded from the following site:
- CC0textures.com: https://cc0textures.com/view?id=Tiles008
Opened the Shader Editor and used the shortcut Shift + Ctrl + T to set up the Color, Roughness, and Normal maps all at once.
(Ensure the Node Wrangler addon is enabled in “Edit → Preferences" beforehand.)
Adjusted the tile size in the UV Editor (as shown in the bottom-left image).
Sliding Door Creation
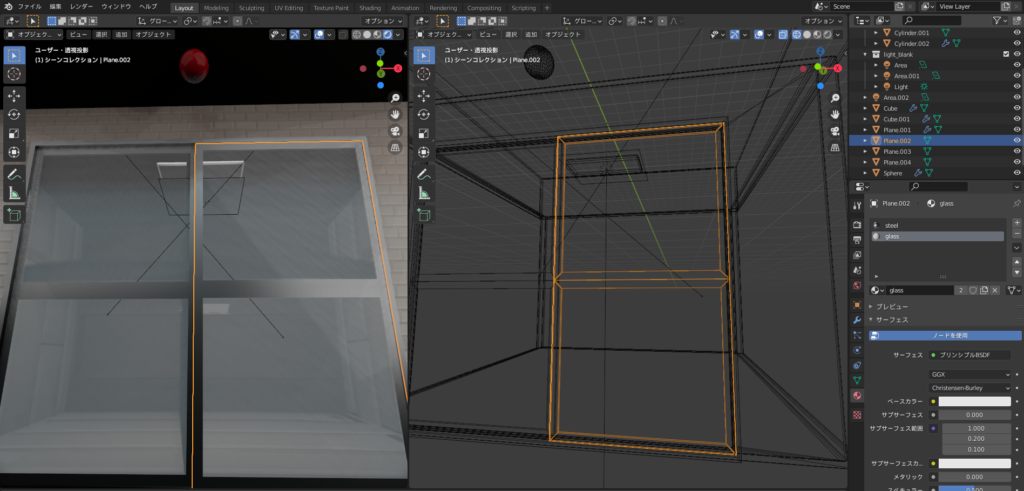
Created the sliding door using a Plane Object, along with Loop Cuts, Inset, and Extrude tools.
Since koban doors are often glass, the door material was set to be transparent.
(If rendering in Eevee, make sure to:)
Set the Blend Mode to Alpha Blend in the Material Properties.
Enable Screen Space Refraction/Reflection in the Render Properties.
Challenges and Reflections
Finalizing the Koban Design:
It took a lot of time to create because I struggled to settle on the koban’s overall shape. I relied on image searches to solidify the concept while modeling, which slowed down the process. 💦
UV Editor Difficulty:
I’m still not fully accustomed to using the UV Editor, so adjusting the tile sizes for the textures was quite challenging. 😅
AD
Conclusion
Although creating the koban took longer than expected, I think the final result turned out quite well.
I was able to make good use of the police badge design! 👍 (laugh)
Reference Tutorial
Sasara Bch – Blender M01-066 [Cherry Blossom Emblem]
Sasara Bch – Blender O01-005 [NODE WRANGLER]
AD


