[For 3DCG PC] Replacing and Reviewing the Cost-Effective CPU Cooler “ZALMAN CNPS4X Black”
Hello, this is Klala.
The custom-built PC I use for 3DCG production is equipped with an Intel Core i5-10400F CPU, paired with the stock cooler.
Although the stock cooler barely manages to keep temperatures in check due to the CPU’s relatively low heat output, working with UE5 puts significant stress on the CPU, causing the fan to spin loudly. 😅
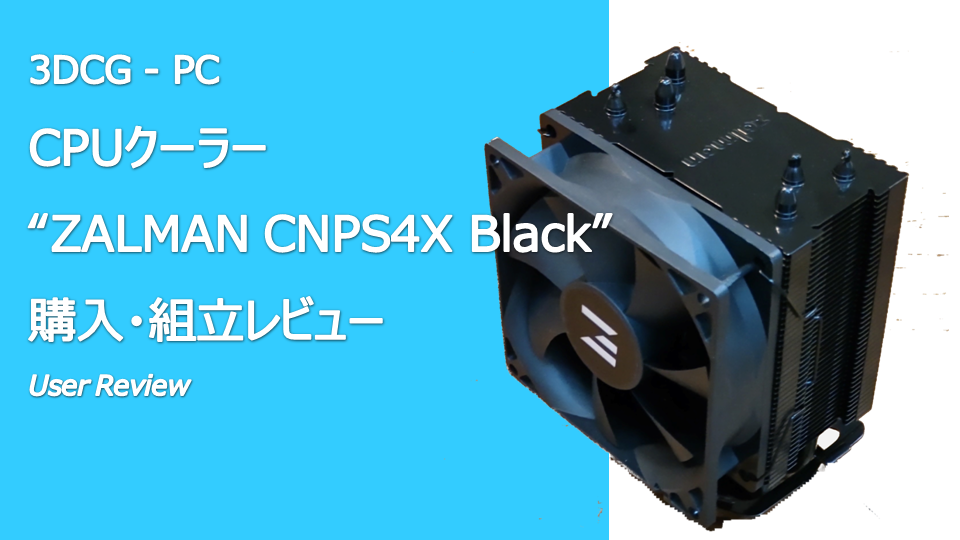
To address this noise issue, I took advantage of some downtime and replaced the stock cooler with ZALMAN’s CPU cooler, CNPS4X Black.
This entry-level CPU cooler, available for just over 2,000 yen, delivered a significant improvement in both cooling performance and noise reduction compared to the stock cooler after the swap.
In this article, I’ll provide a review with photos, covering its specifications, assembly process, and key points to note.
Additionally, since the CNPS4X maintains sufficient cooling performance even at lower fan speeds, I’ll also share BIOS settings to further enhance its quiet operation.
If you have any comments or questions, feel free to reach out to me on Twitter (https://twitter.com/klala_lab) 😊
Intel Core i5-10400Fの純正クーラーを使っているのですが、UE5で作業するとかなりファンが回ってうるさいです😅
— クララ/Klala (@klala_lab) July 27, 2024
静音化のために #Zalman のCPUクーラー 「CNPS4X Black」に交換することにしました🔧
格安ですが、黒く塗装されてて思っていたより格好いいです😊✨ pic.twitter.com/DpoR9rUlsz
AD
What is a CPU Cooler?
A computer is equipped with a CPU (Central Processing Unit), which acts as the “brain" by performing calculations.
When the CPU processes data, part of the electrical energy is converted into heat energy, causing the CPU to heat up. To ensure safe operation, a component known as a CPU cooler is used to dissipate this heat from the CPU.
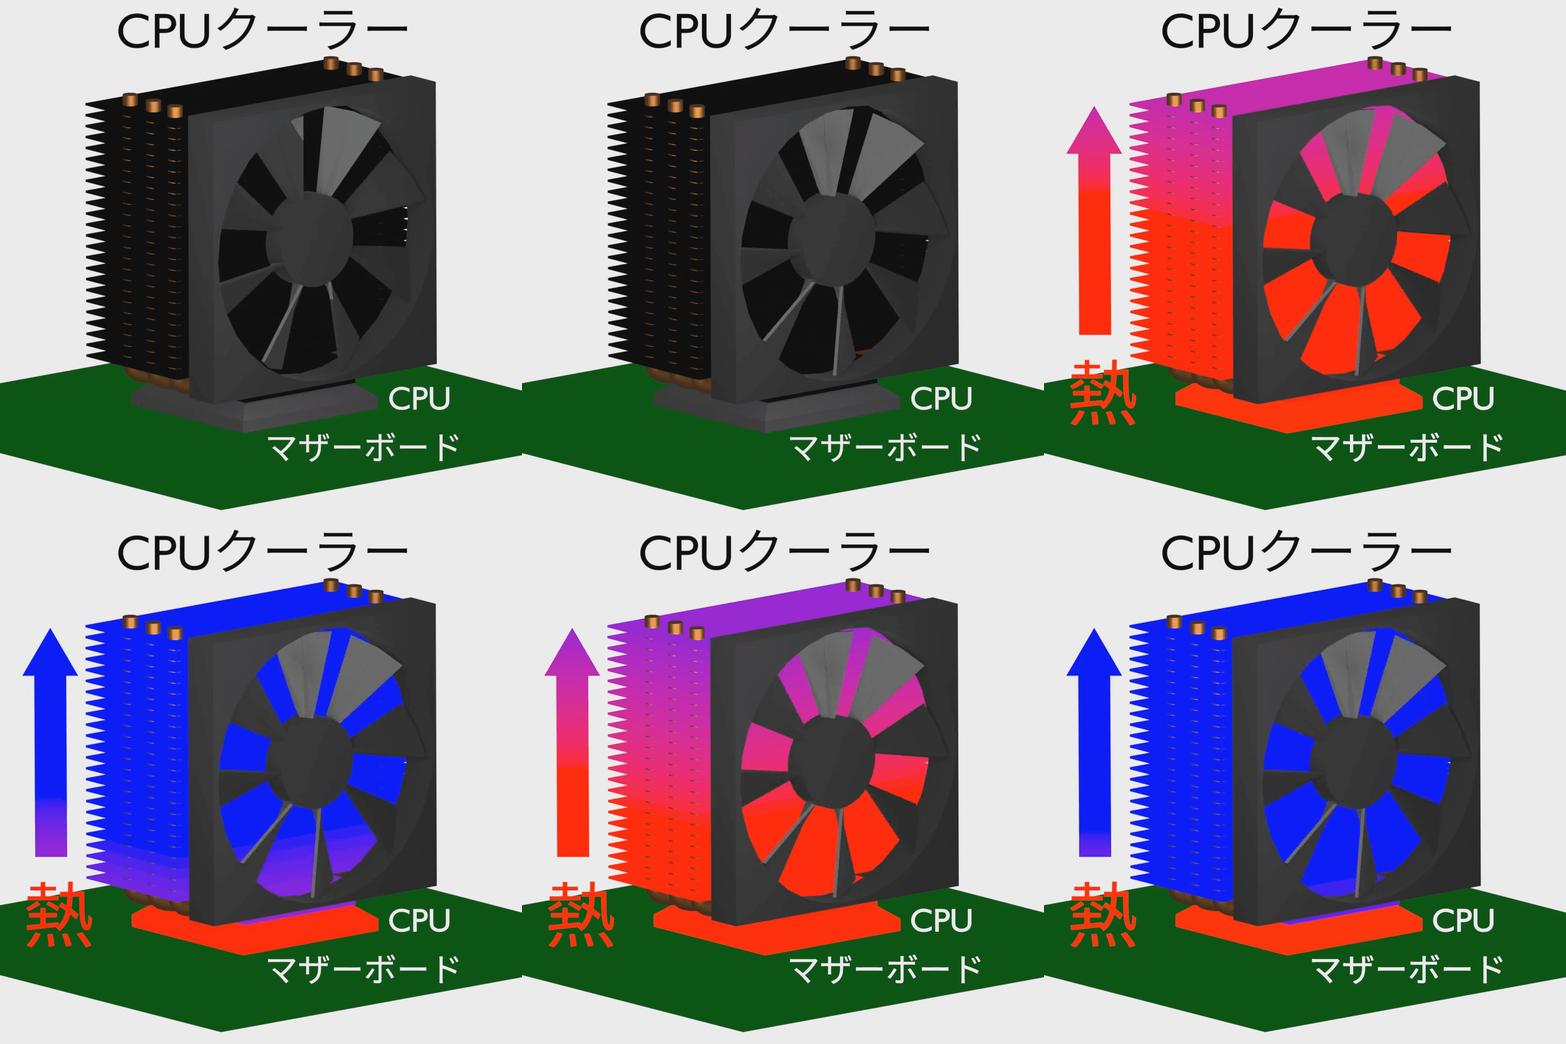
CPU coolers come in the following types:
- Air Cooling
- Top-Flow Air Cooling
- Side-Flow Air Cooling
- Water Cooling
- All-in-One (AIO) Liquid Cooling
- Custom Liquid Cooling
For detailed explanations or examples of specific products, I recommend checking other websites such as “kakaku.com." Here’s a summary of the characteristics, advantages, and disadvantages of each type:
| Top-Flow Air Cooling | Side-Flow Air Cooling | All-in-One Liquid Cooling | Custom Liquid Cooling | |
| Characteristics | Directs airflow from above onto the heatsink. | Directs airflow horizontally through the heatsink. | Circulates liquid within a closed-loop to cool the CPU. | Circulates liquid using pumps and pipes installed in the PC. |
| Advantages | Affordable Low profile, fits in compact cases. Good quietness with large-diameter fans. Cools surrounding components like the motherboard and SSD. | Affordable Higher cooling performance than top-flow coolers. Often quieter. | Superior cooling performance compared to air cooling. | High cooling performance, cooling other components like the GPU. |
| Disadvantages | Lower cooling performance compared to other types. | Taller design may conflict with smaller PC cases. Lower cooling performance than water cooling. | More expensive than air cooling. Sources of noise. Risk of liquid leakage. Heat buildup near the motherboard. | Very expensive, appealing mainly to enthusiasts. Complex assembly with multiple components. Risk of liquid leakage. |
About ZALMAN CNPS4X Black
In this section, let’s take a closer look at the features of the CPU cooler used in this project, ZALMAN CNPS4X Black.
Features
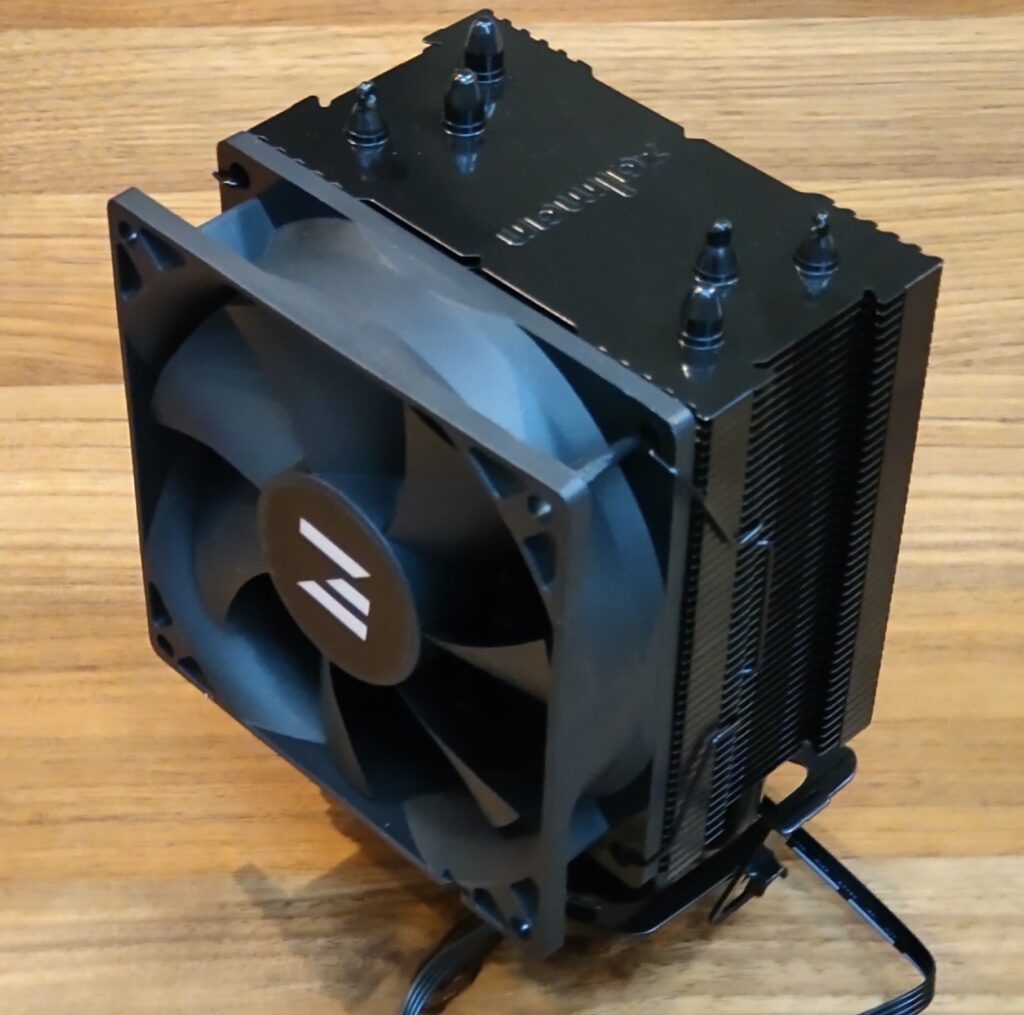
CNPS4X Black I purchased this time is an entry-level side-flow air-cooled CPU cooler released in 2023 by ZALMAN, a long-established PC parts manufacturer from South Korea.
It comes in a single black color variant.
Amazon link: https://amzn.to/3LHFGRg
Here is a quick summary of ZALMAN CNPS4X Black’s features:
- Compact size at 135mm height, fitting most PC cases.
- Affordable price, available for just over 2,000 yen.
- Heat sink and fan are uniformly black.
- Noise level of 29.0dB (±10%), making it very quiet.
- Unique mounting method, potentially difficult to install on AMD CPUs.
The strongest point of this CPU cooler is its low price.
The price of CPU coolers varies widely. High-performance coolers, such as all-in-one liquid coolers, can cost tens of thousands of yen. Generally, the more expensive a CPU cooler, the better its cooling performance, which is necessary for cooling high-spec CPUs.
However, for CPUs like Core i5 or Ryzen 5 with a TDP of 65W, I believe a cooler in the 2,000–3,000 yen range is sufficient.
If you are currently struggling to choose a CPU cooler, why not opt for a cost-effective model like this one? You could use the savings to upgrade other components or invest in software.
Back to ZALMAN CNPS4X Black, as of July 30, 2024, its lowest price on kakaku.com is 2,106 yen. This makes it one of the most affordable CPU coolers currently available.

The size is 95x75x135mm, making it exceptionally compact for a side-flow air-cooled CPU cooler. As such, it easily fits into smaller PC cases, like my Zalman T3 Plus (which supports CPU cooler heights up to 150mm), with room to spare.
Additionally, the heat sink, cooling fan, and wiring are all black, giving it a clean and sleek appearance.
Furthermore, the noise level is a quiet 29dB±10%. According to an article by Bic Camera, noise levels in the range of 20–30dB are generally not noticeable.
A noteworthy point about CNPS4X Black is its unique installation method, which may cause difficulties.
For Intel CPUs, the process involves attaching plastic brackets and then hooking the heat sink’s metal clips, as detailed in the installation instructions later in this article.
For AMD CPUs, the metal clips hook onto the plastic brackets already installed on the motherboard. However, this requires significant force and may not always fit properly due to interference issues.
While I didn’t face significant challenges installing it on an Intel CPU, if you’re considering this cooler for an AMD CPU, be aware of the potential risks and installation difficulties before purchasing.
AD
Unboxing the CNPS4X Black
This section introduces the state of the CNPS4X Black upon unboxing.
Package and Appearance
I purchased the product using points on BicCamera.com.
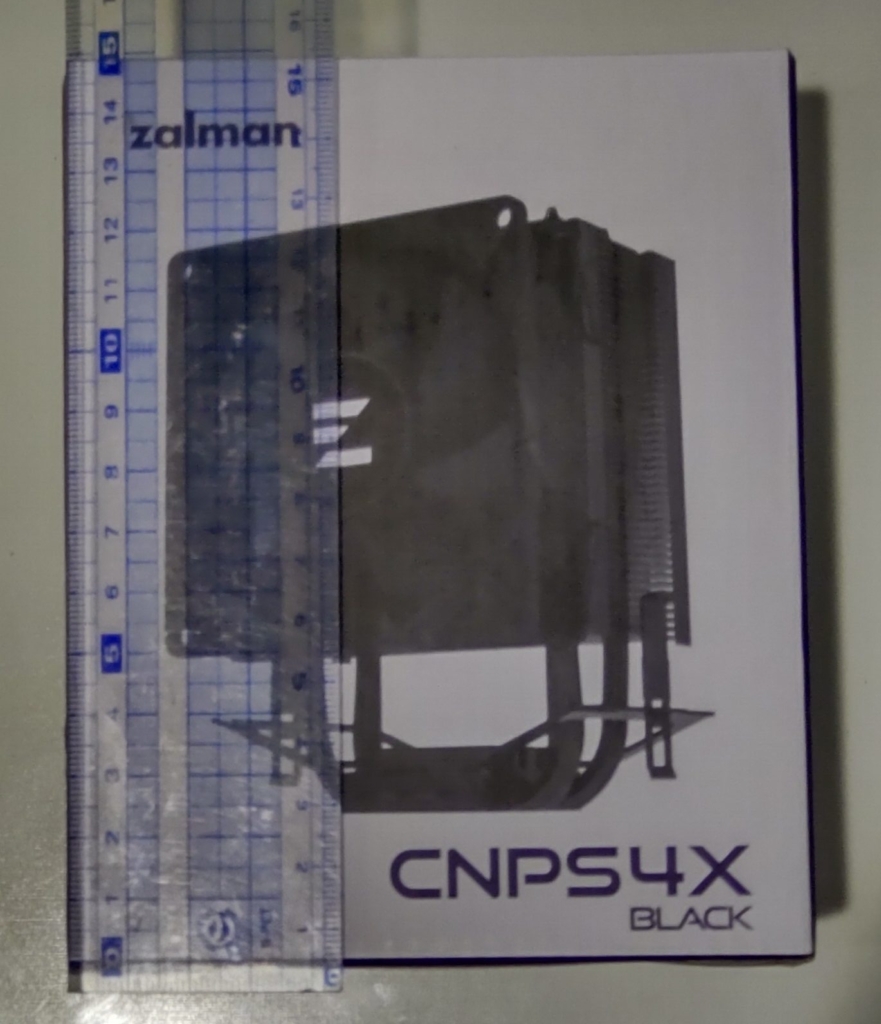
The package is a small cardboard box measuring around 15 cm (shown with a 30 cm ruler).
Contents of the Box
Inside the box, cushioning materials are placed at the bottom and on both sides of the heatsink, providing adequate protection.
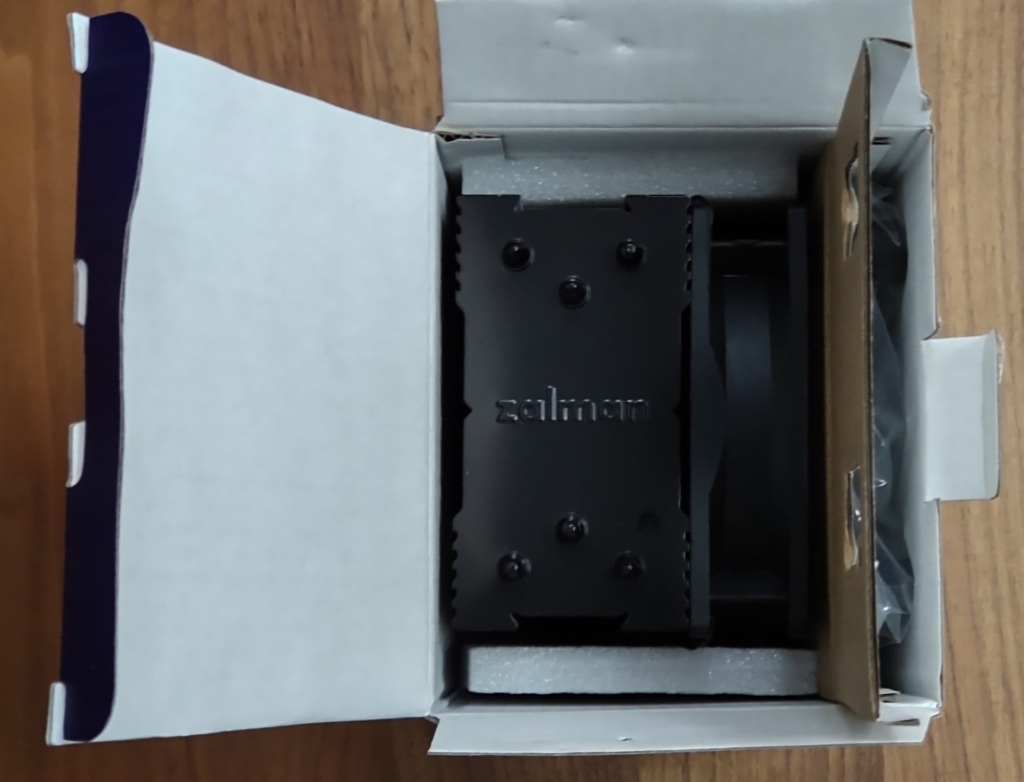
Removing the CNPS4X from the box:
The cooling fan comes pre-attached to the heatsink.
Other included items are an Intel bracket, pins for attaching to the motherboard, CPU grease, and a manual.
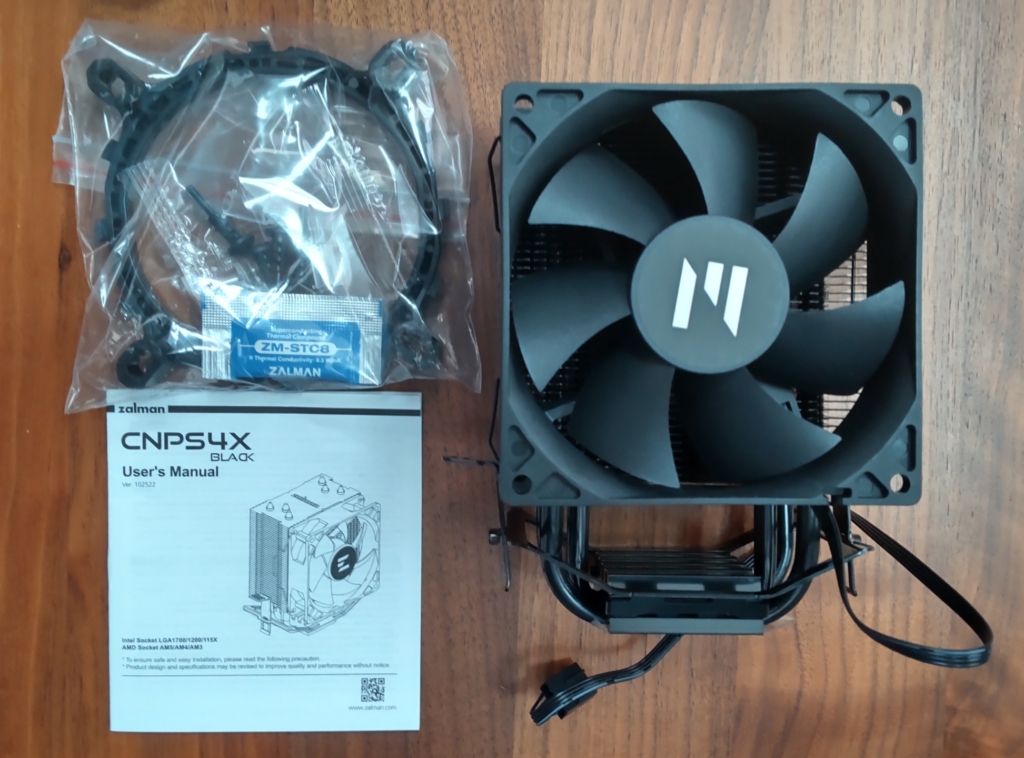
Here’s a closer look at the CNPS4X from various angles:
The heatsink and heat pipes are fully painted in black, giving a sleek and tidy appearance.
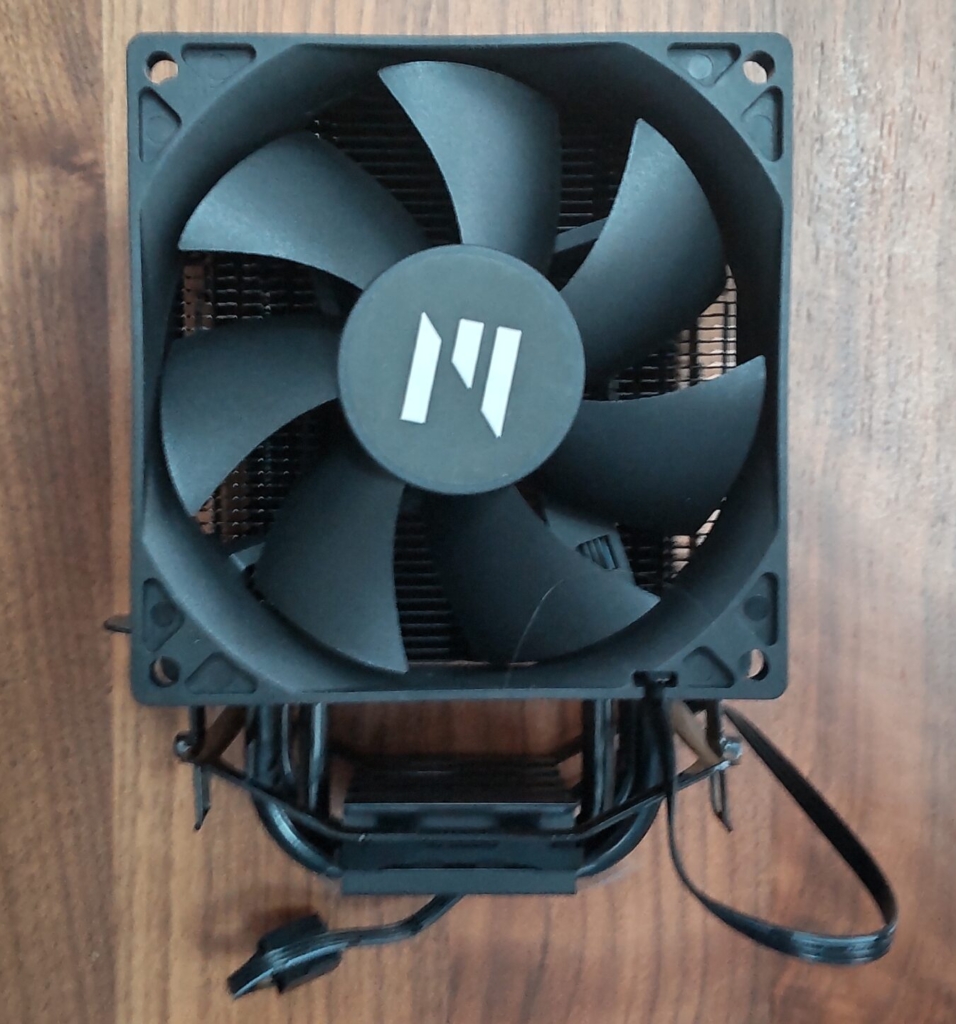
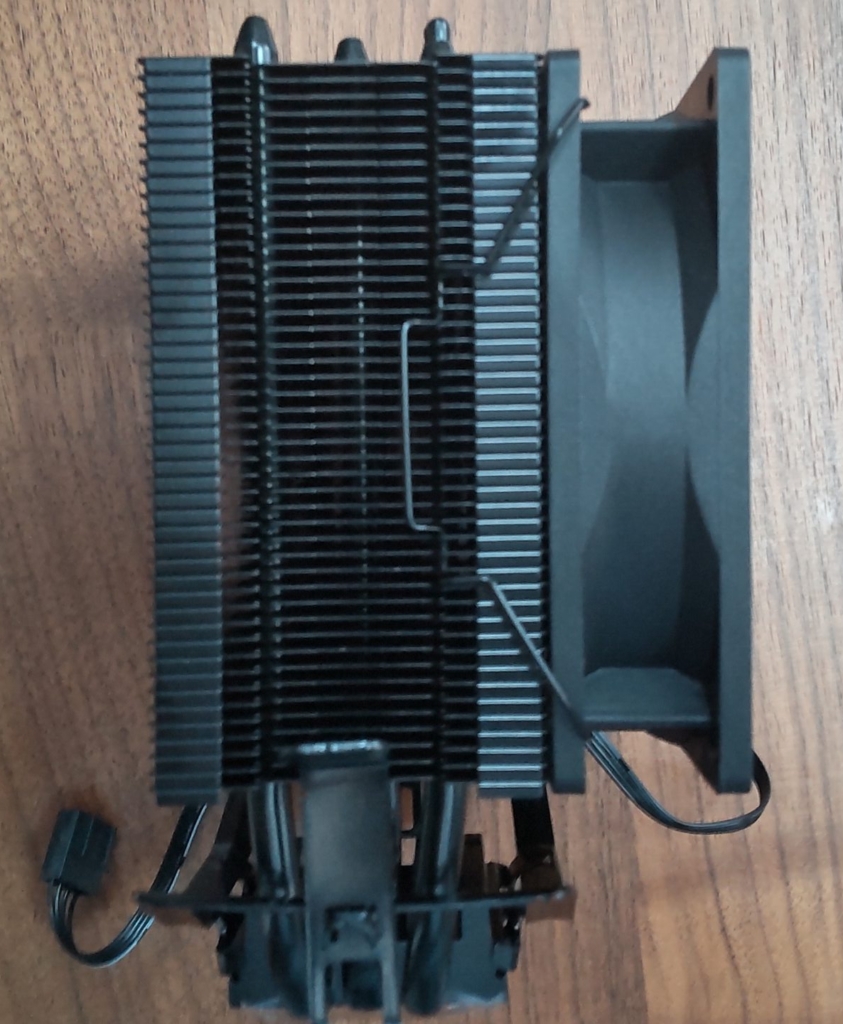
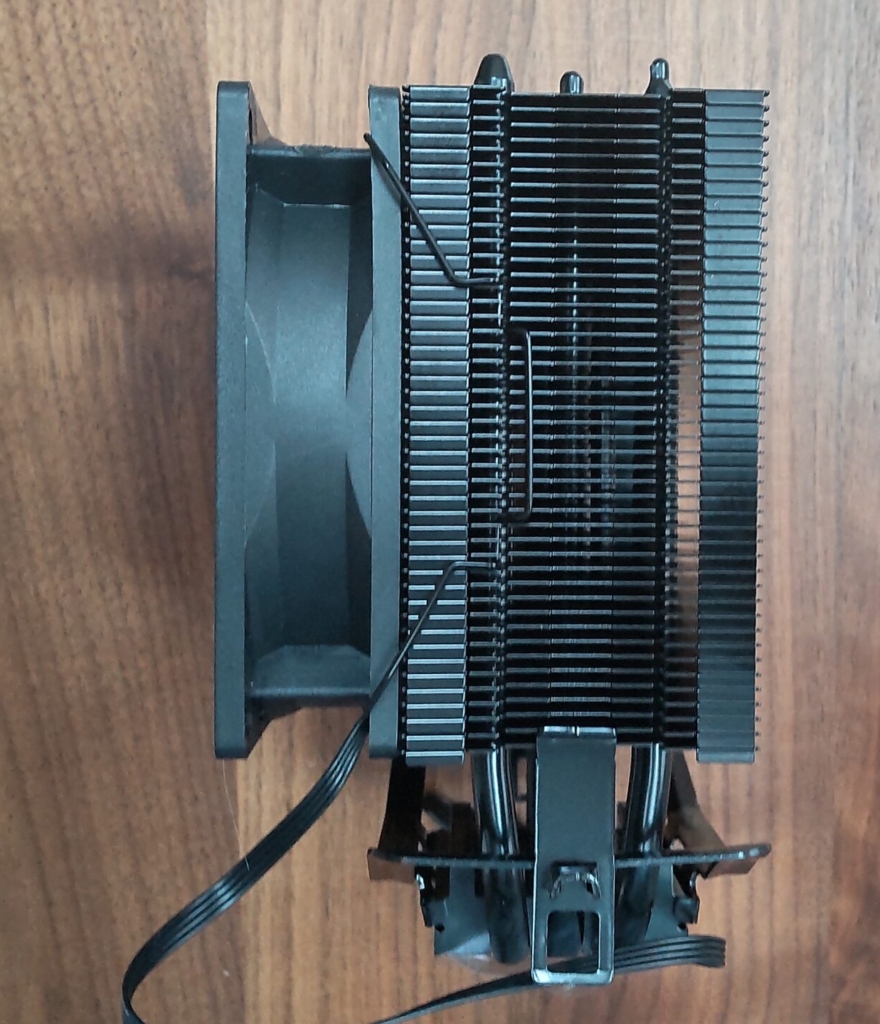
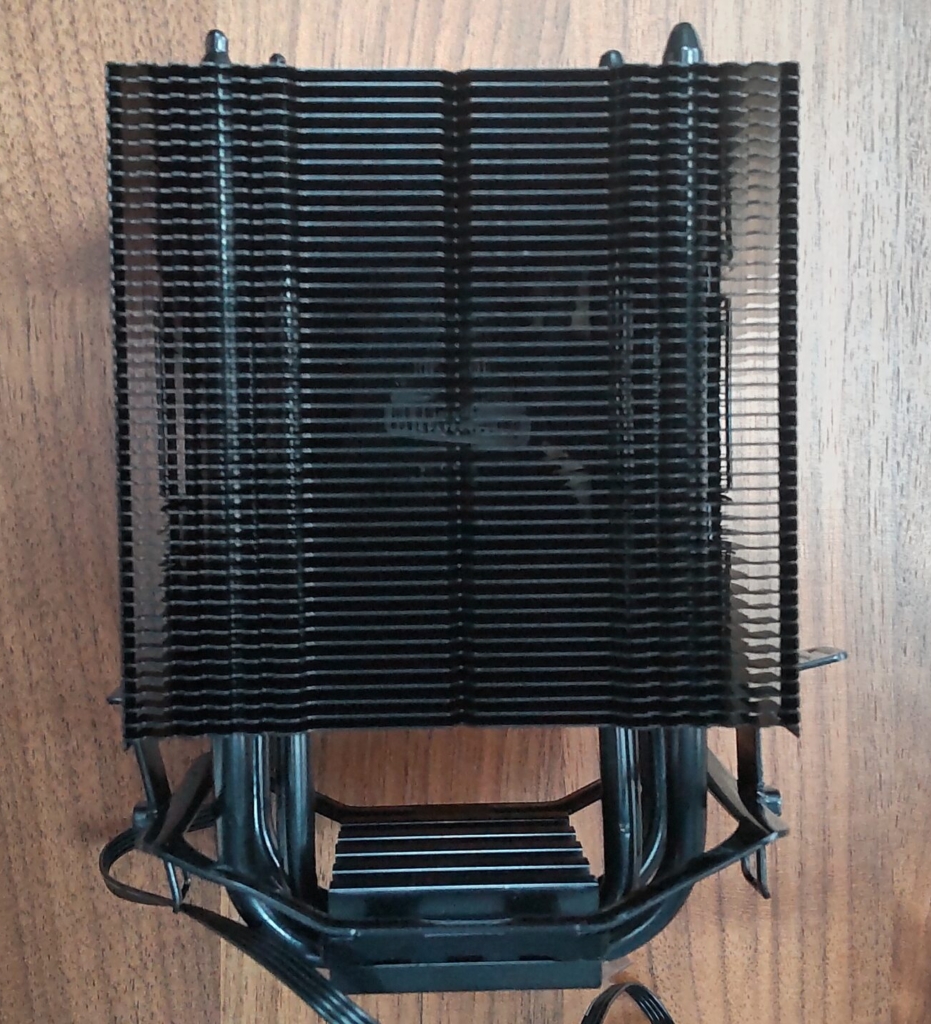
The top of the heatsink features the “Zalman" logo.
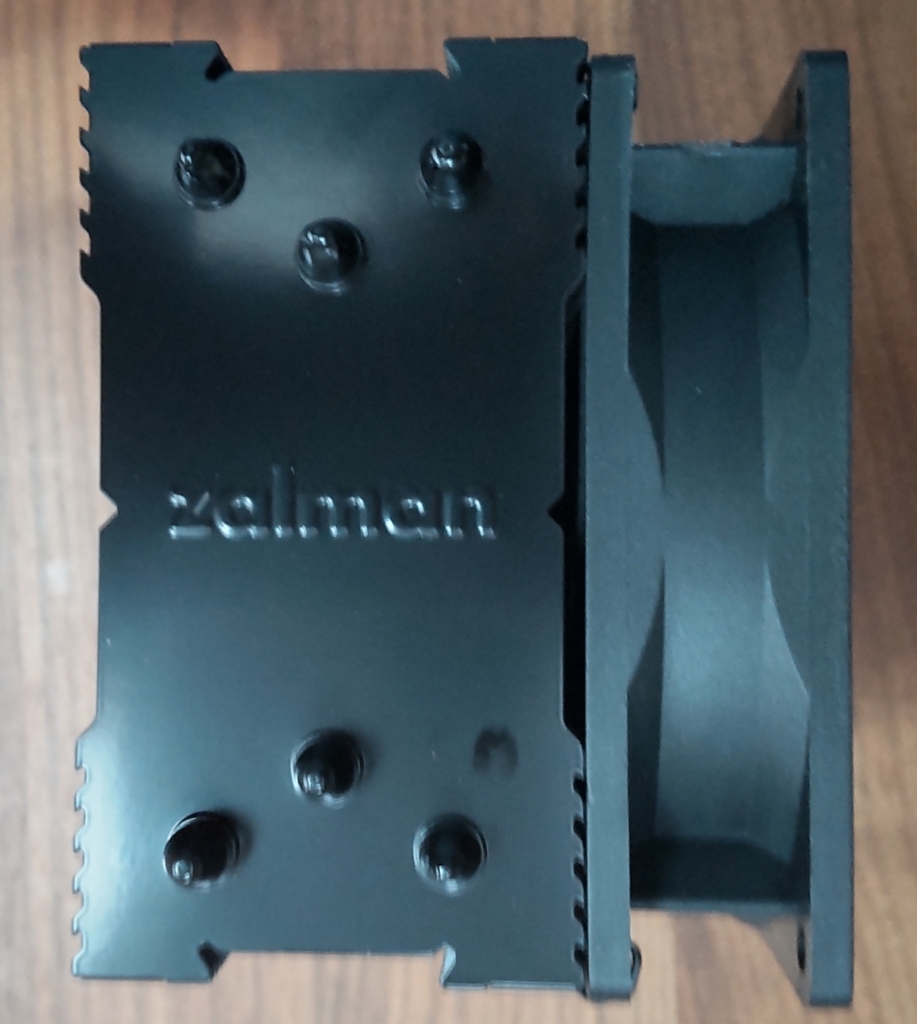
The bottom surface of the heatsink is protected with a layer of film.
The cooler uses the “heat pipe direct touch" method, where the heat pipes make direct contact with the CPU—common in budget CPU coolers.
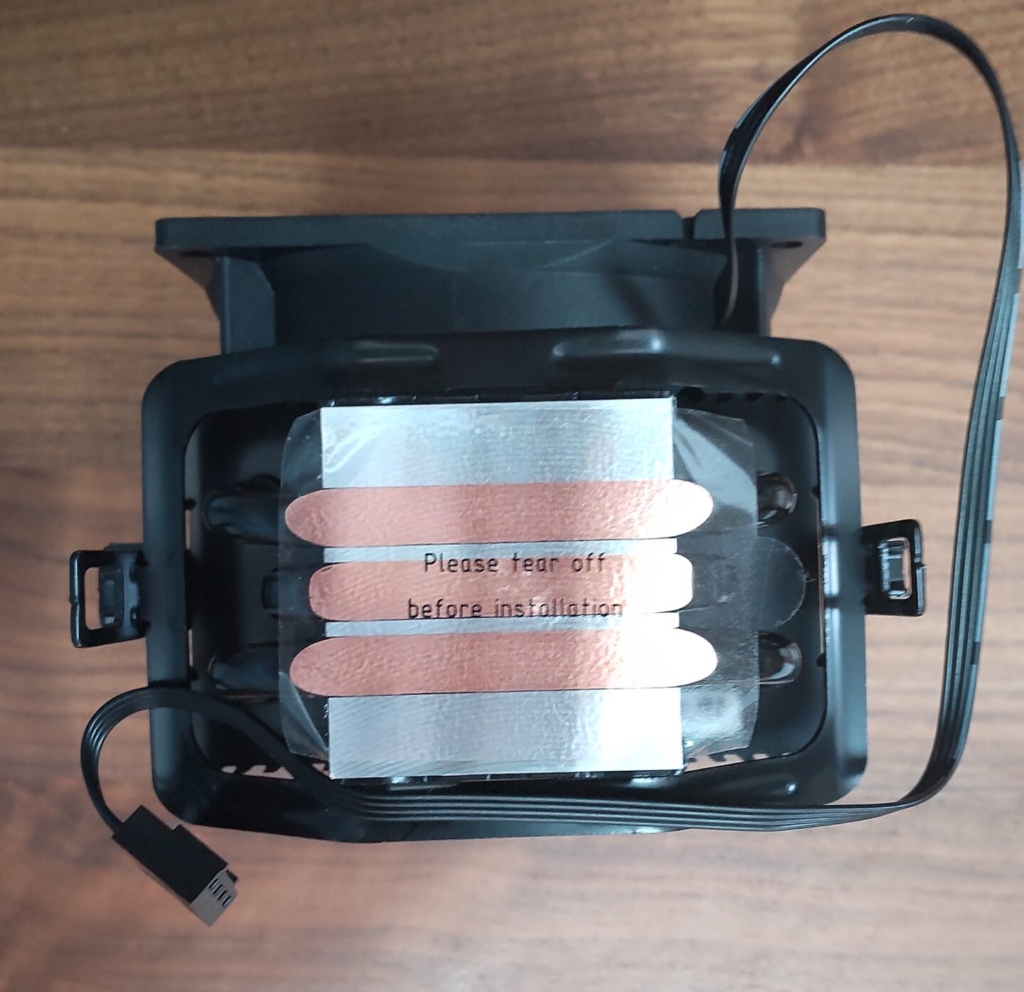
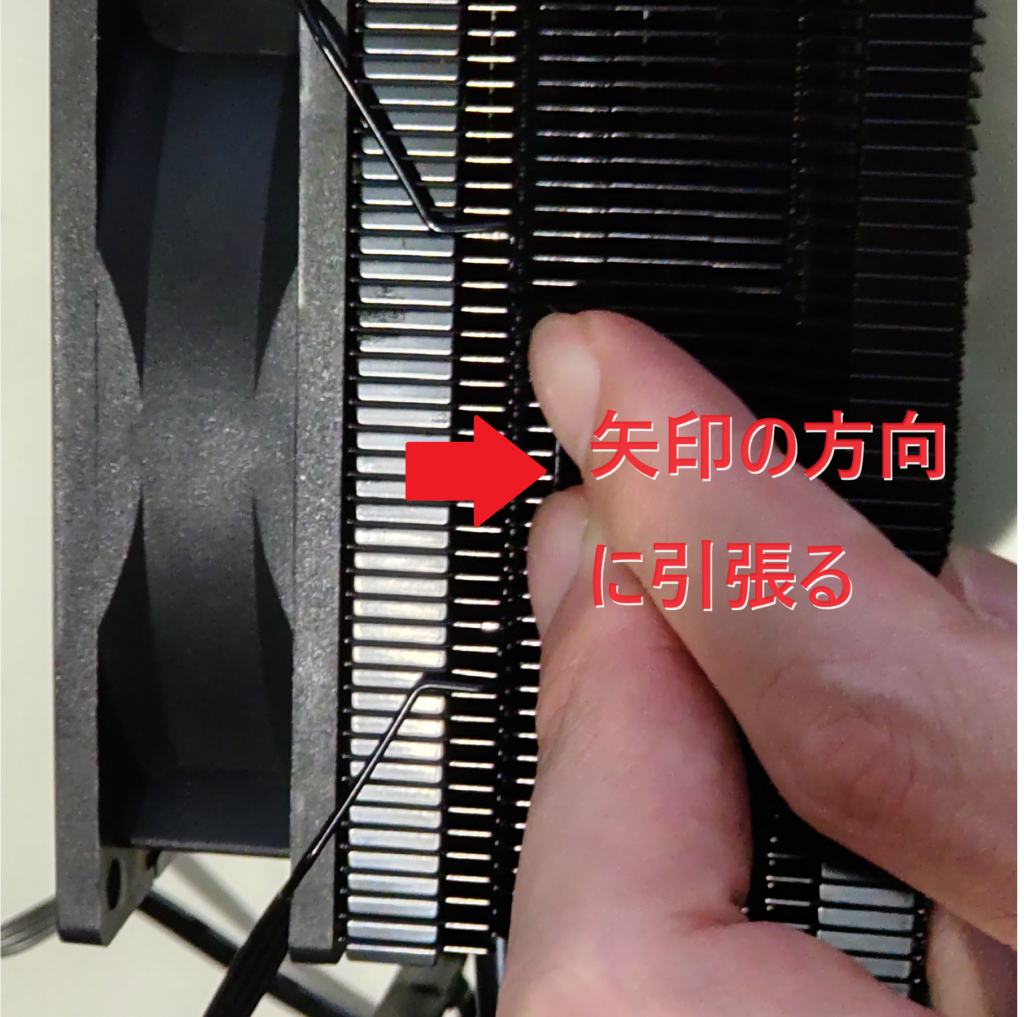
The fan clip is attached to the grooves of the heatsink. You can easily detach it by pulling it with your fingers, as shown below.
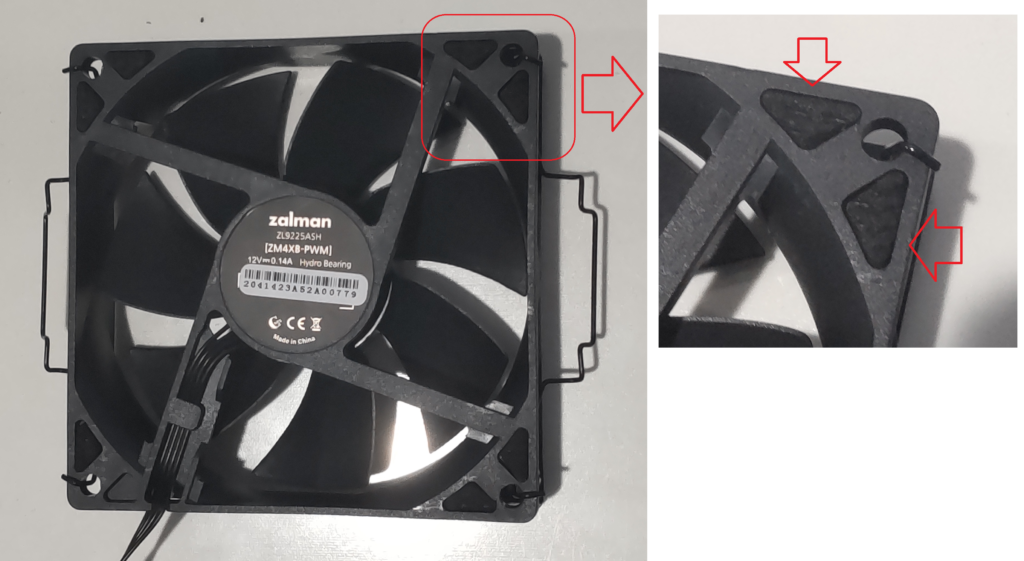
On the back of the fan, there’s a felt-like material for vibration reduction.
AD
Replacing the CPU Cooler
This section summarizes the steps for replacing the Intel retail cooler with the CNPS4X Black.
By the way, if you’re looking for guidance on assembling or disassembling a custom-built PC, you might find my previous article helpful, so feel free to check it out as well.
Additionally, I’ve written an article detailing the steps for replacing a graphics card (GPU). If you’re interested, I recommend taking a look at that article too.
Necessary Items
Before starting the process, make sure to prepare the following items:
- Anti-static gloves
- Anti-static brush or air spray
- Tissues or a dry cloth
- Phillips screwdriver
PC components are precision parts and are highly susceptible to static electricity.
Especially during winter, when static electricity tends to occur more often, I strongly recommend using anti-static gloves.
Sanwa Supply Anti-static Gloves (with Non-slip Grip) TK-SE12M
Anti-static Brush or Air Spray
Dust tends to accumulate inside a PC case after extended use.
When swapping cases or parts, it’s a good idea to have an anti-static brush or air spray handy for cleaning accumulated dust on the components.
ELECOM Air Duster, Usable Upside Down, 350ml ECO (CFC-free) AD-ECOMT (Pack of 3)
Tissues or a Dry Cloth
You’ll need these to wipe off the old thermal paste.
Phillips Screwdriver
A Phillips screwdriver is required for tasks like removing the graphics card.
Time and Patience
Replacing a CPU cooler can be challenging for first-timers.
If you try to rush or force parts into place, you might end up damaging the CPU cooler or motherboard.
Make sure to choose a time when you can work without haste or stress to complete the process carefully.
Removing the Old CPU Cooler
Next, we will remove the Intel retail cooler from the motherboard.
The procedure follows this flow: remove the GPU (graphics card) → remove the CPU cooler.
Before starting the task, first use an air spray or a brush to remove any dust.
When replacing the CPU cooler, the GPU can get in the way, so disconnect the power cables and use a Phillips screwdriver to remove the screws before taking out the graphics card.
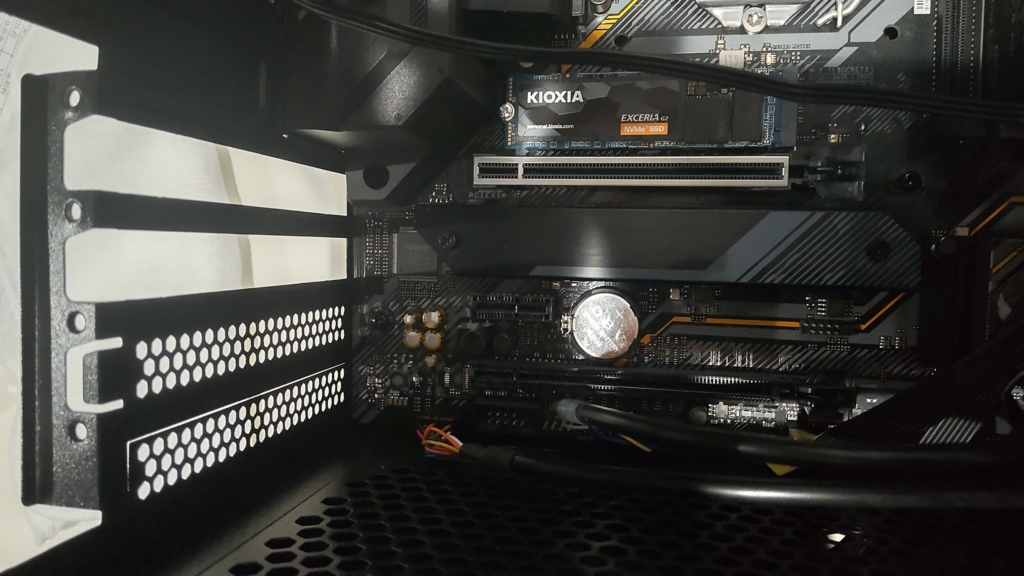
For detailed instructions on how to do this, please refer to the article linked here for more information.
https://klala-lab.net/20220206_gpu_replace
Once the graphics card is removed, proceed with taking out the CPU cooler.
First, disconnect the CPU cooler cable that is plugged into the motherboard’s “CPU_FAN" terminal.
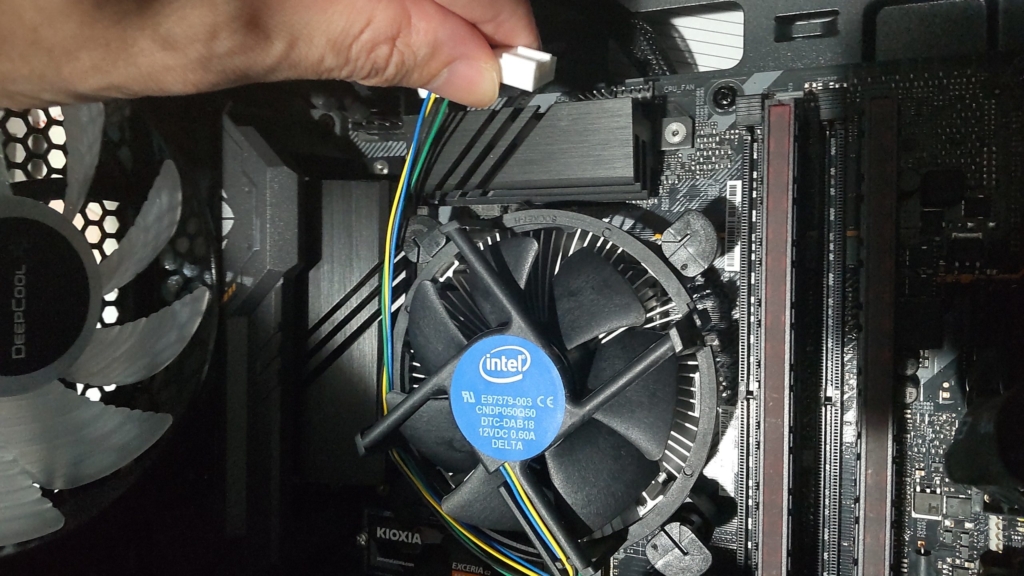
Next, rotate the four pins on the corners of the Intel retail cooler 90° in the direction of the arrows.
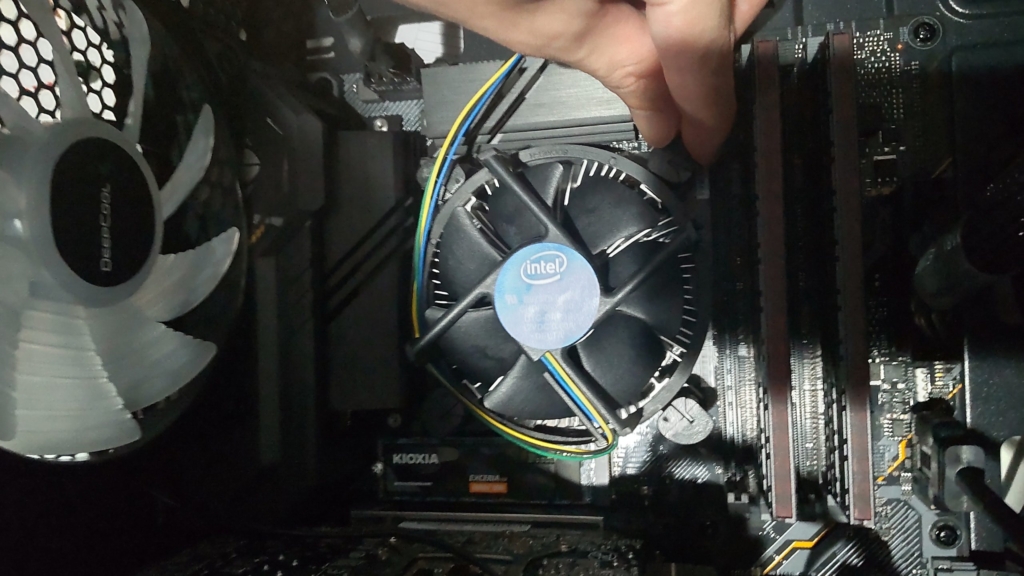
Once the pins are rotated, pull them straight up to detach the pins from the motherboard.
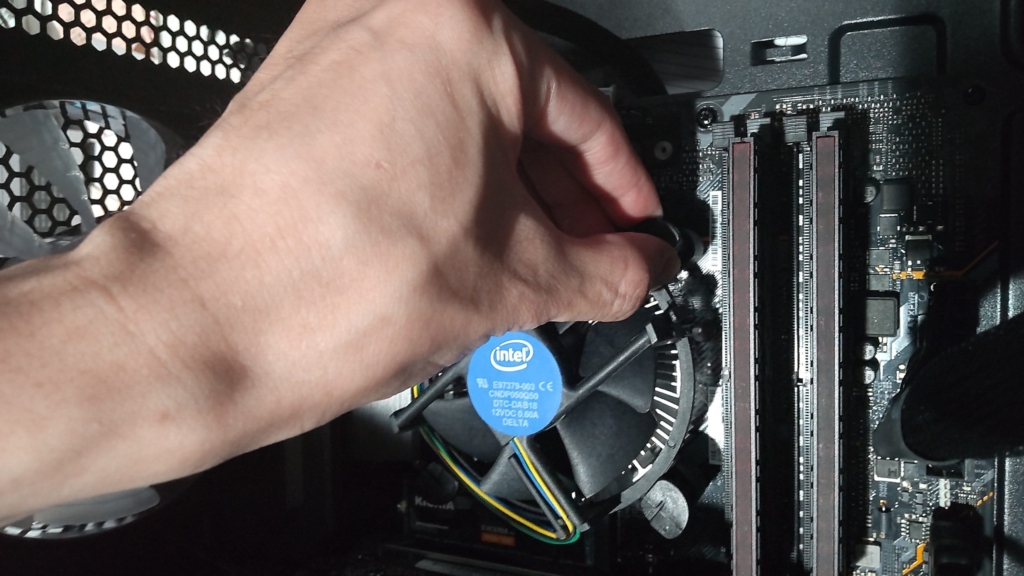
After the four push-pins are removed, lift the CPU cooler to detach it.
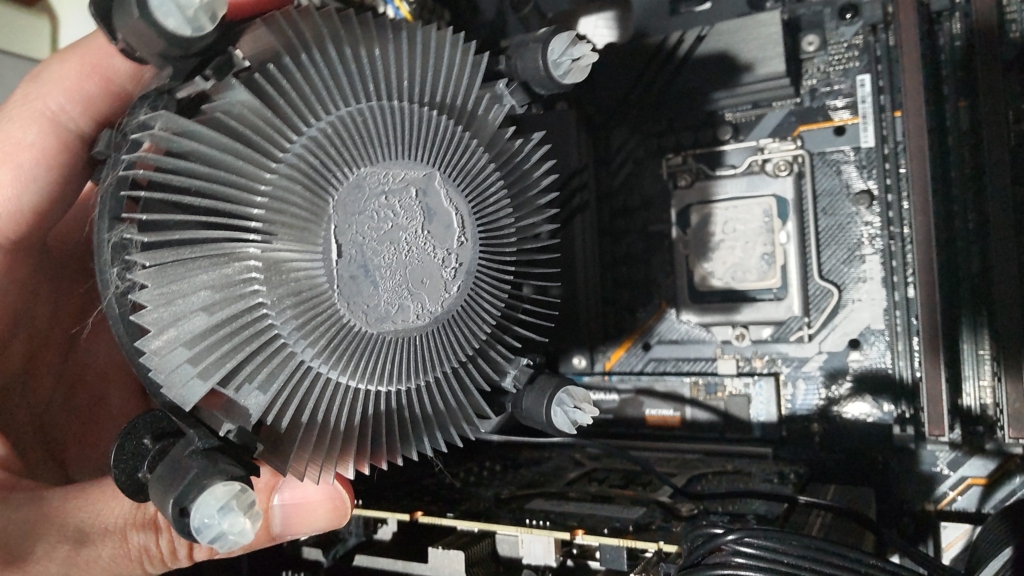
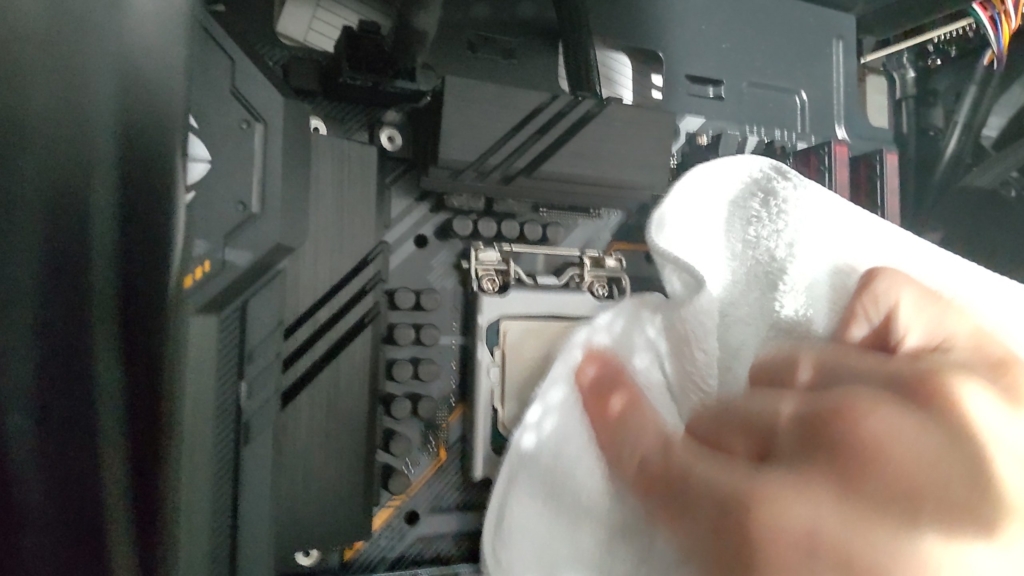
Be sure to wipe off any old thermal paste on the CPU with a dry cloth or tis
Installing the CNPS4X
Here, I will walk you through the installation process of the CNPS4X with accompanying photos.
The procedure follows this flow: apply thermal paste → attach the bracket (for Intel CPUs) → install the CPU cooler.
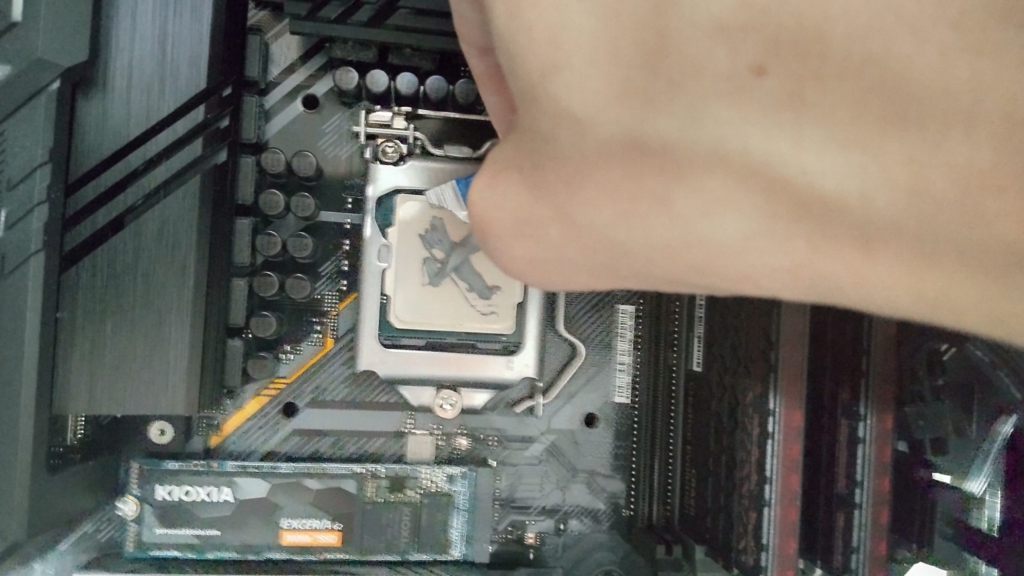
First, apply the thermal paste that comes with the CPU cooler to the CPU.
You can spread it thinly with a spatula or something similar, but personally, I find it easier to apply it in an “X” pattern, as shown below (this will cool it properly).
The hooks and bracket insertion positions may vary depending on the CPU generation, so be sure to check the instructions carefully.
For this setup, the target CPU is the Core i5 10400F, so I’ll be installing it on the “LGA1200” marked hook.
Therefore, install the bracket in such a way that the hooks face the top and bottom of the motherboard.
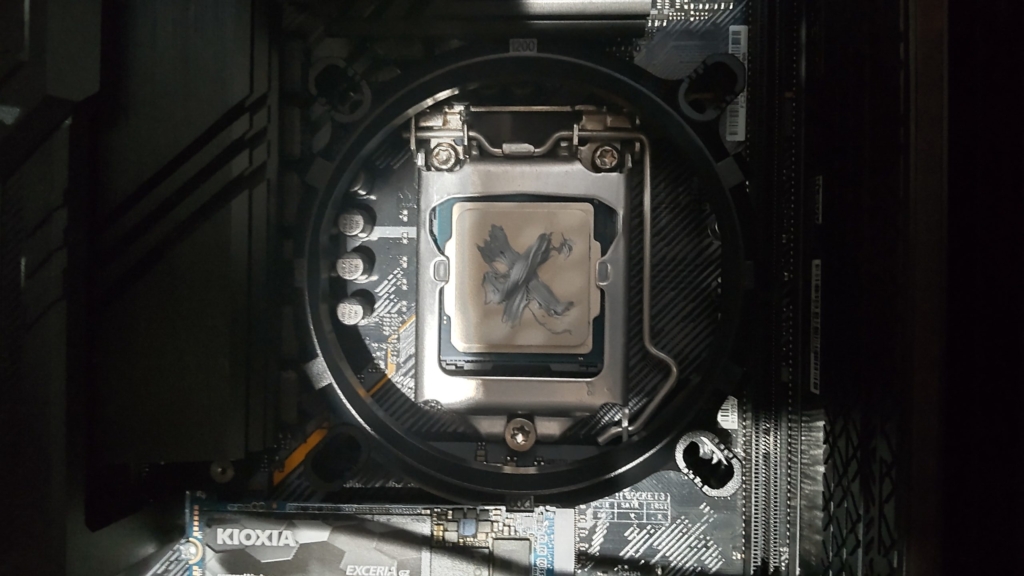
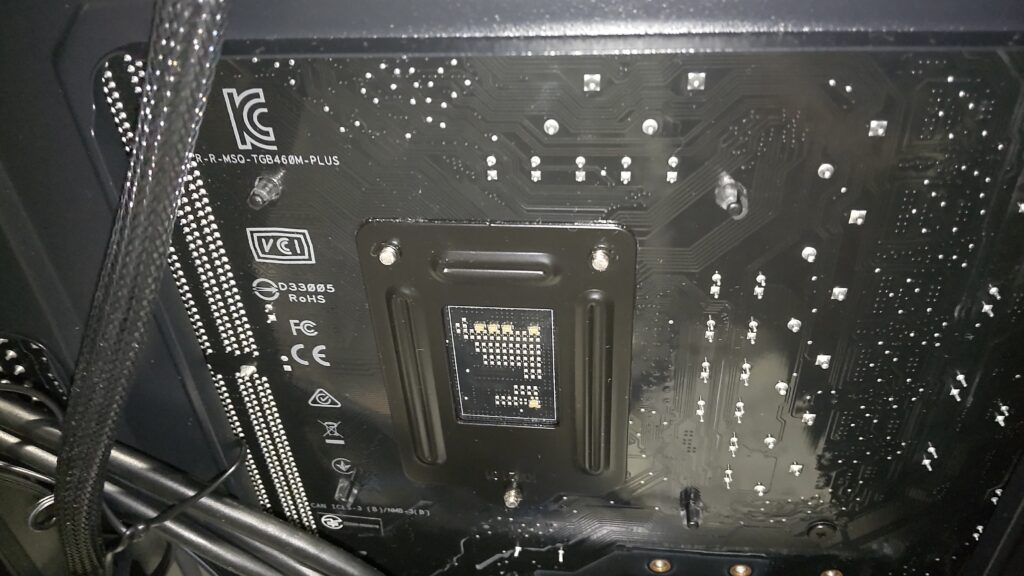
Using the two types of pins included with the CPU cooler, attach the bracket to the motherboard.
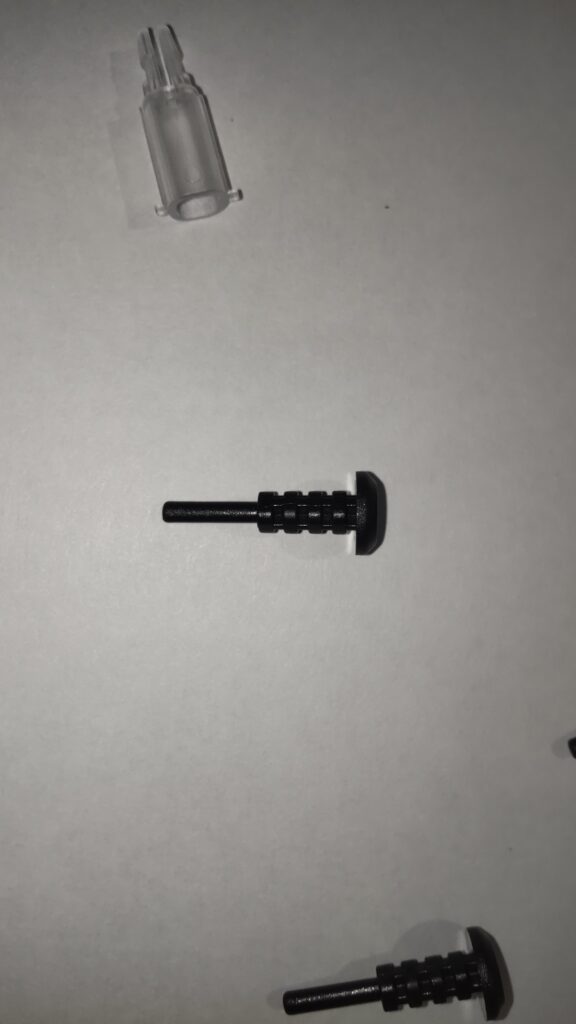
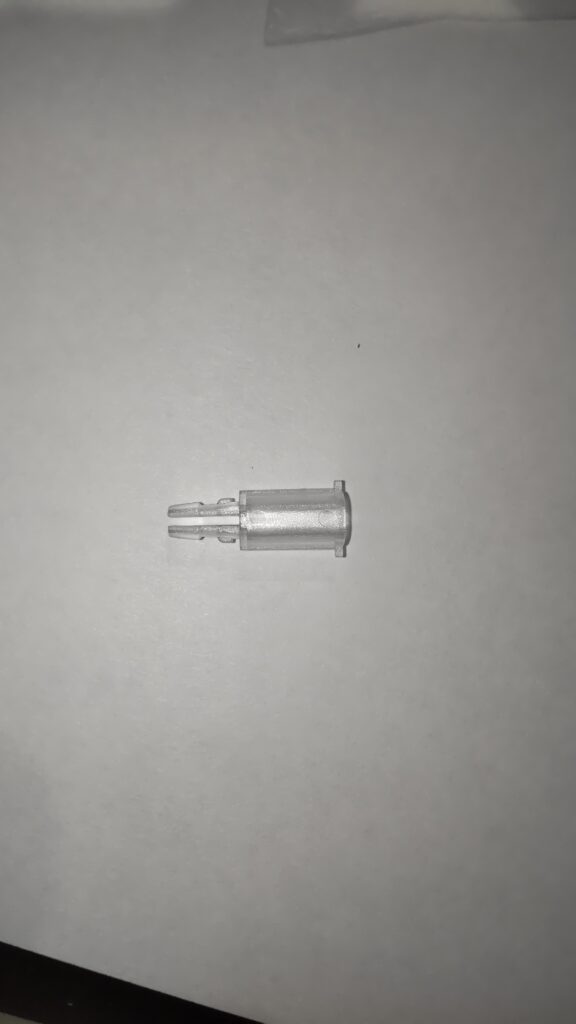
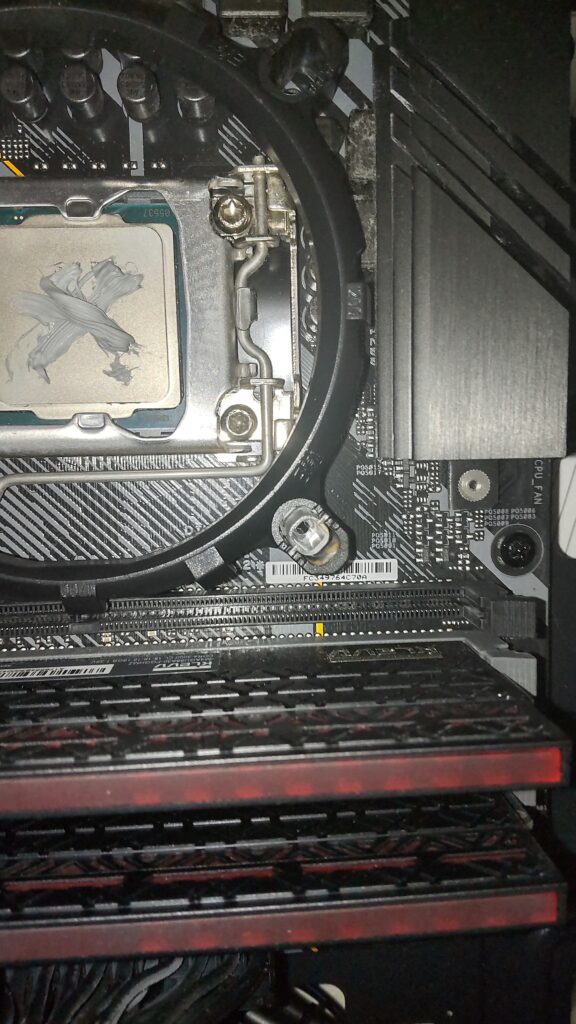
Insert the transparent pin first, followed by the black pin. This mechanism ensures the pins’ tips hook onto the back side of the motherboard and won’t come out.
Important: Do not forget to remove the protective film from the CPU cooler before installing it!
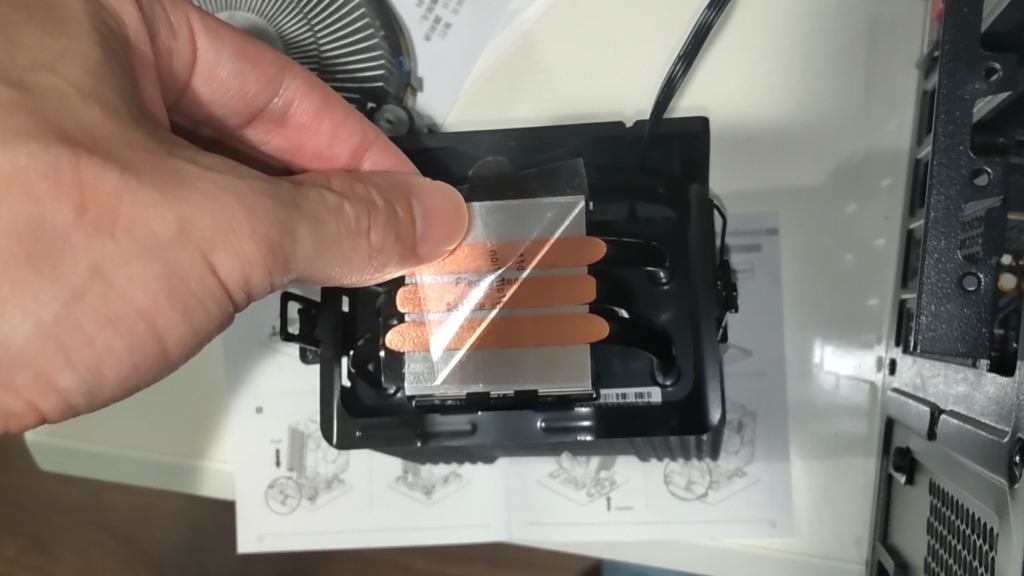
While tilting the CPU cooler, hook the right-side clip from the cooler onto the bracket hook at the top of the motherboard.
This part can be difficult to see as it’s hidden behind the motherboard’s heatsink.
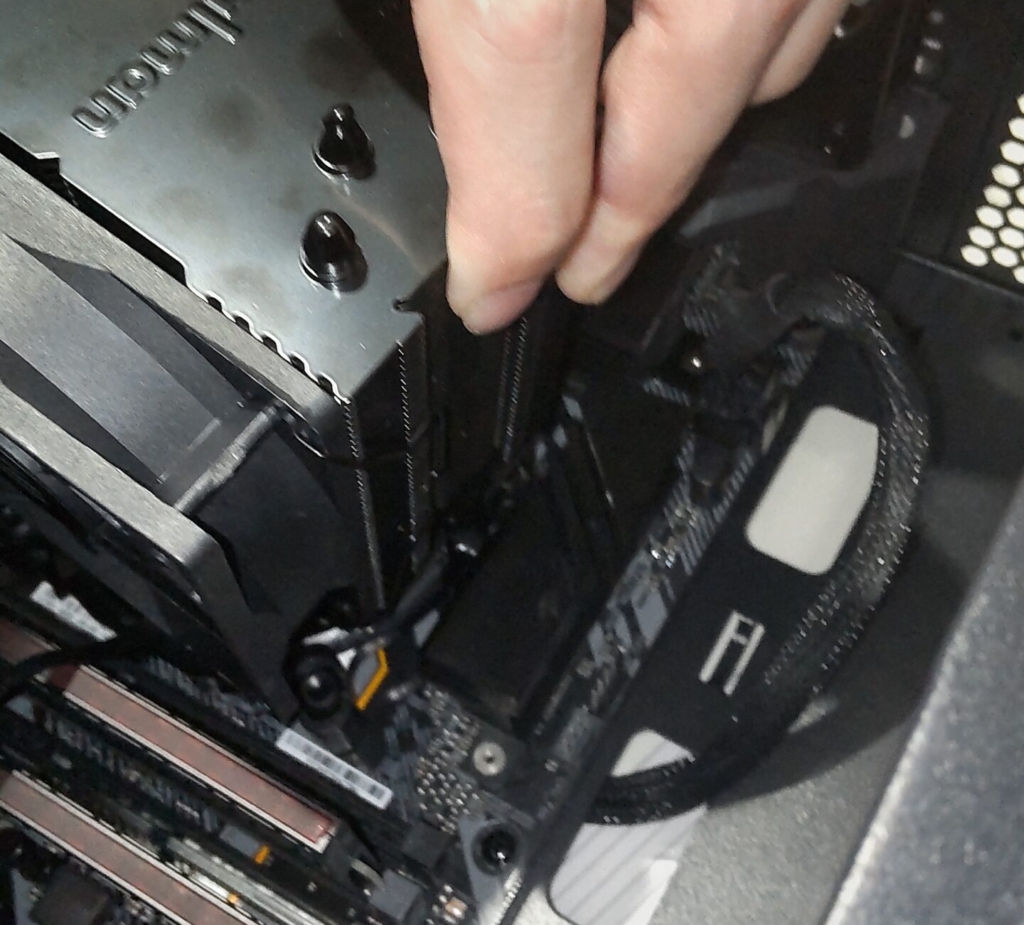
Press the CPU cooler down from the top and hook the other clip onto the bracket.
Looking at reviews on sites like Kakaku.com, it seems this step requires a good amount of force, but I didn’t have much trouble with the installation.
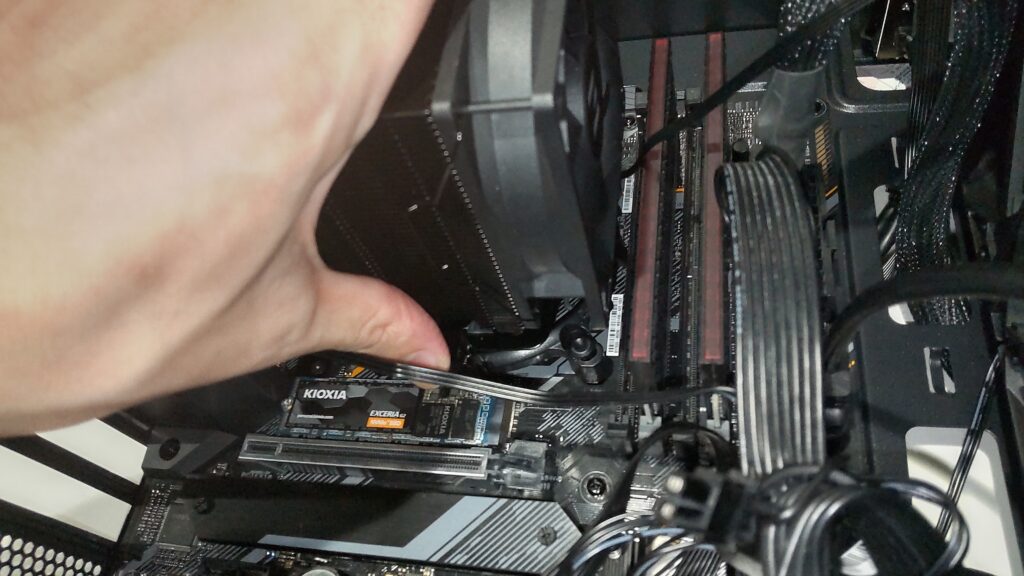
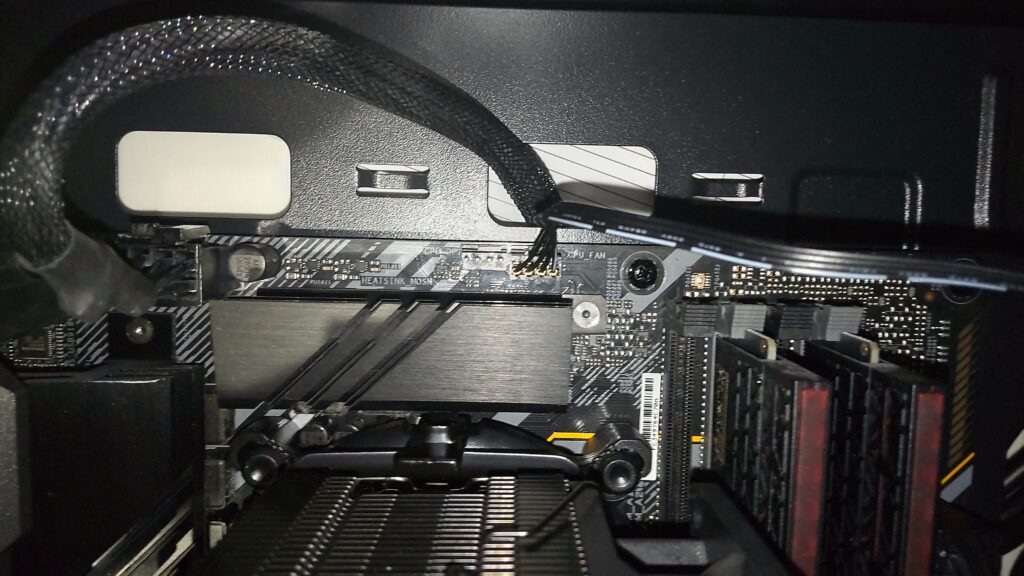
Next, connect the CPU cooler’s cable to the “CPU_FAN” connector on the motherboard.
Reinstall the graphics card as it was.
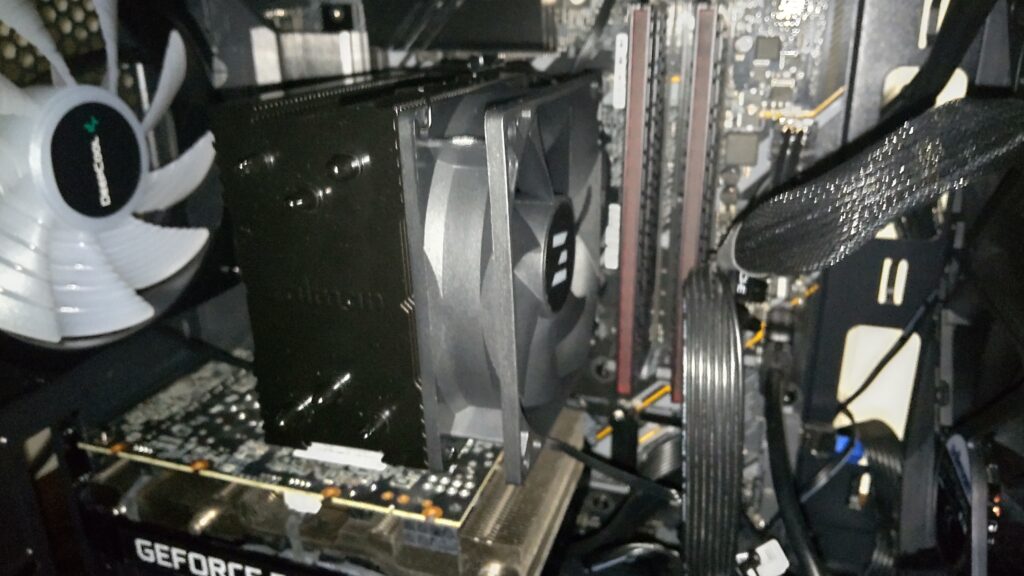
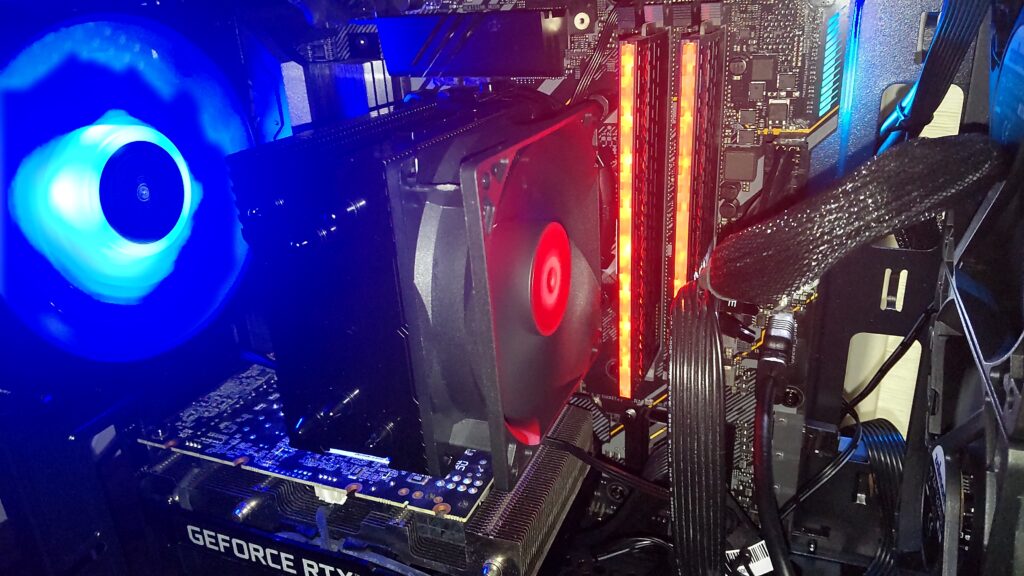
Before closing the case, do a quick functionality check.
Switch on the power and confirm that the fan is spinning—if so, everything is good to go.
AD
Actual Usage Test
In this section, I’ll share the results of comparing the temperature and noise levels of the ZALMAN CNPS4X Plus with the Intel retail cooler.
Additionally, I’ll explain how I revisited the BIOS settings to reduce overall PC noise and how to apply these settings.
I’ll also summarize the pros and cons of using this cooler after actually installing it.
Temperature and Noise with Default Settings
First, I compared the CPU temperatures of the Intel retail cooler and the CNPS4X under default settings.
The PC case used was the T3 Plus, and the room temperature was set to 25°C.
I ran the CPU benchmark software “Cinebench R23” three times to compare CPU temperatures. The retail cooler reached nearly 90°C, while the CNPS4X kept temperatures in the 60°C range.

(left group; idle, right group; Cinebench, RT 25 degC)
In addition to the CNPS4X’s inherent performance, the side-flow design of the cooler, which uses airflow from the front and rear case fans, helped lower the temperature.
Next, I compared the noise levels.
When using the Intel retail cooler, the fan speed reached around 3000 rpm under heavy CPU load, making a loud “grr" noise.
After switching to the CNPS4X Black, the noise during Cinebench (100% CPU load) was as follows:
While there was some noise, it was not unpleasant because the fan speed was kept to a maximum of around 1400 rpm due to the lower temperature.
I placed a smartphone on top of the PC case and measured the noise using an app. Here are the results:
- With the retail cooler: 42.3dB at idle and 46.8dB at 100% CPU usage.
- With the CNPS4X: 41.8dB at idle and 43.3dB at 100% CPU usage.
The CNPS4X is noticeably quieter.

(left group; idle, right group; Cinebench, back ground noise: 37dB)
Temperature and Noise with Fan Speed Adjustments
Using the ASUS motherboard control software “Armoury Crate," I adjusted the CPU fan speed and compared the temperature and noise.
The software offers four modes for fan speed: “Silent,” “Standard,” “Turbo,” and “Full Speed.”
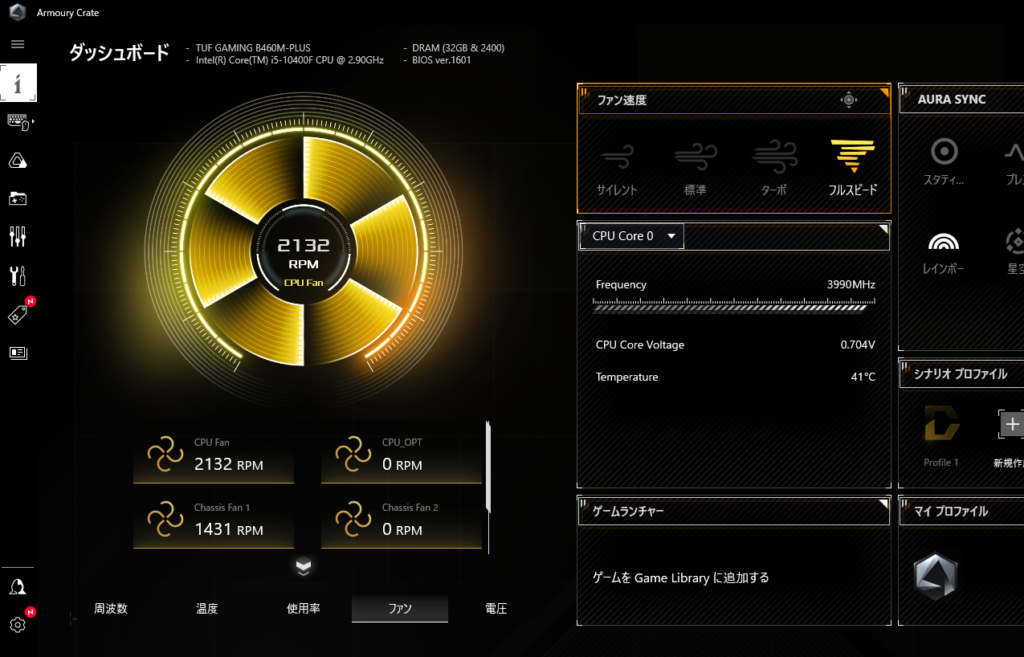
Here’s the comparison of temperatures and noise for the “Standard,” “Full Speed,” and “Silent” modes:

(left group; idle, right group; Cinebench, room temperature: 25 degC)

(left group; idle, right group; Cinebench, back ground noise: 37dB)
When switched to “Full Speed,” the temperature dropped by about 3°C, but a somewhat annoying “hum” noise was generated.
On the other hand, in “Silent” mode, the fan speed was kept under 1000 rpm, and the highest temperature was still 73°C, which is sufficient for cooling. This shows that reducing the fan speed is effective for achieving a quieter PC.
BIOS Tuning Method and Temperature/Noise Results
Since adjusting the fan speed through software every time the PC starts up can be tedious, I adjusted the fan speed directly in the BIOS.
When the PC boots up (before Windows loads), press the “Delete” key to enter the BIOS (UEFI).
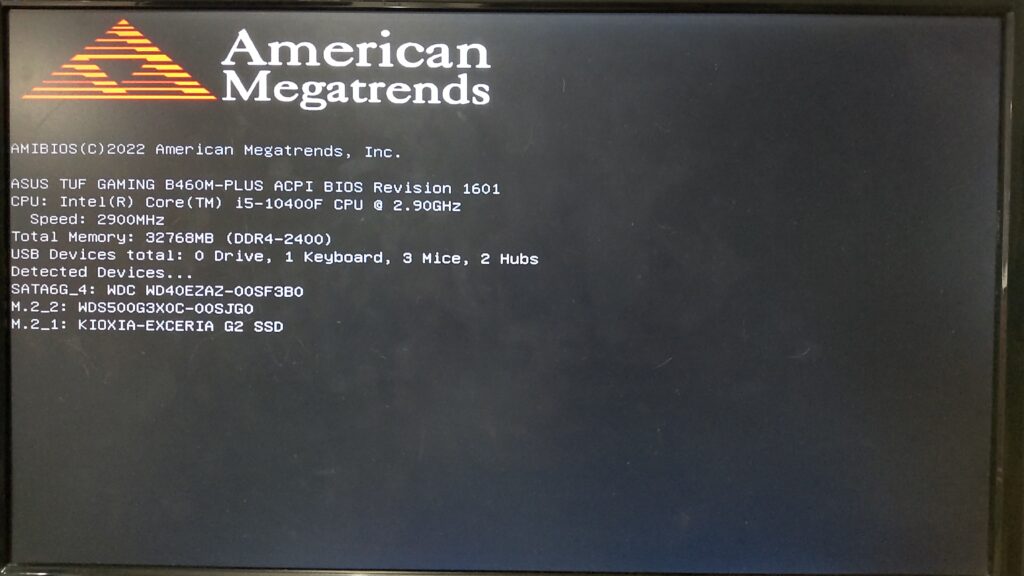
In the BIOS menu, select “Fan Profile” → “Manual Adjustment.”
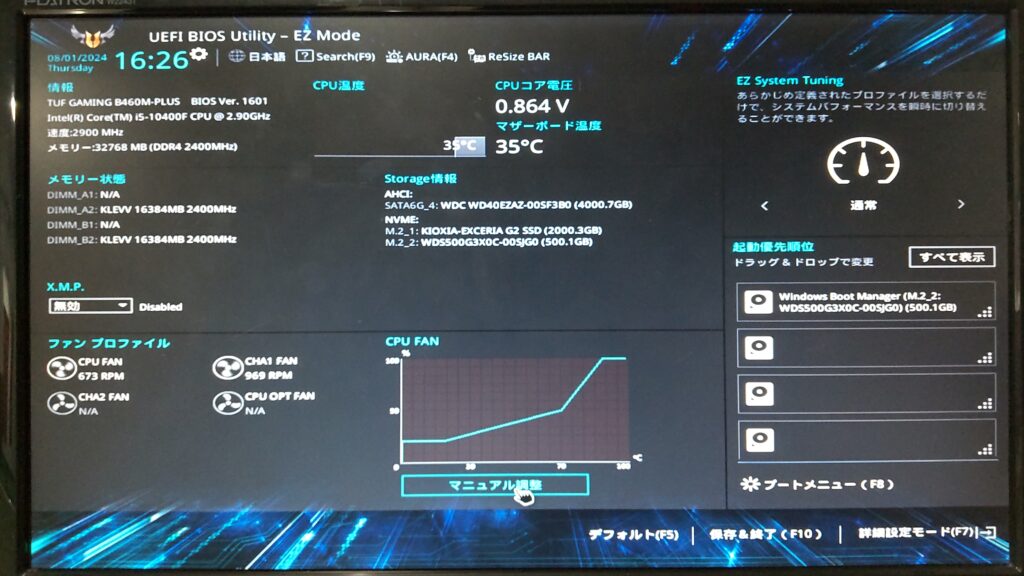
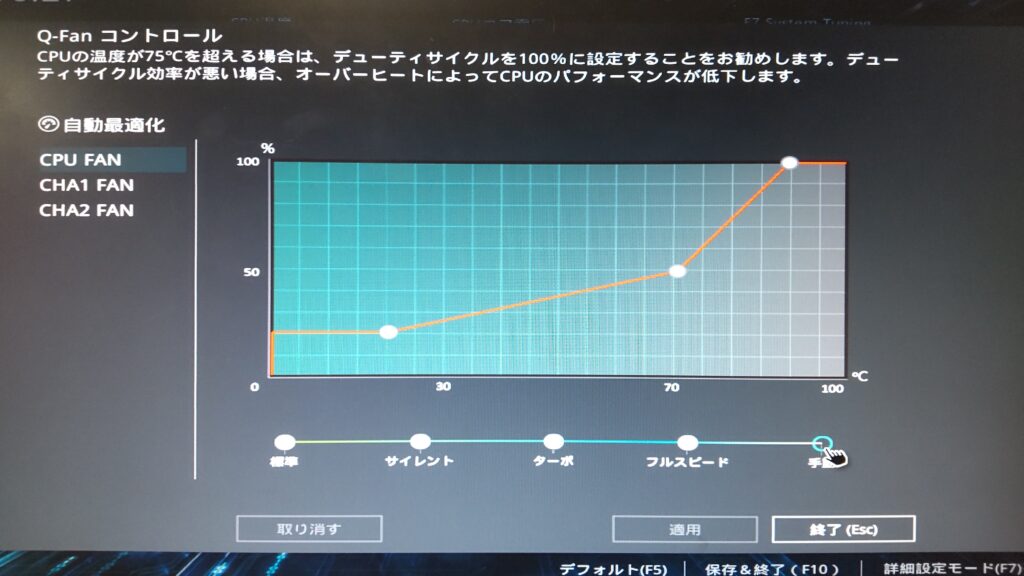
Under “CPU FAN” → “Manual,” I adjusted the fan speed to keep it below 50% when the temperature is below 70°C.
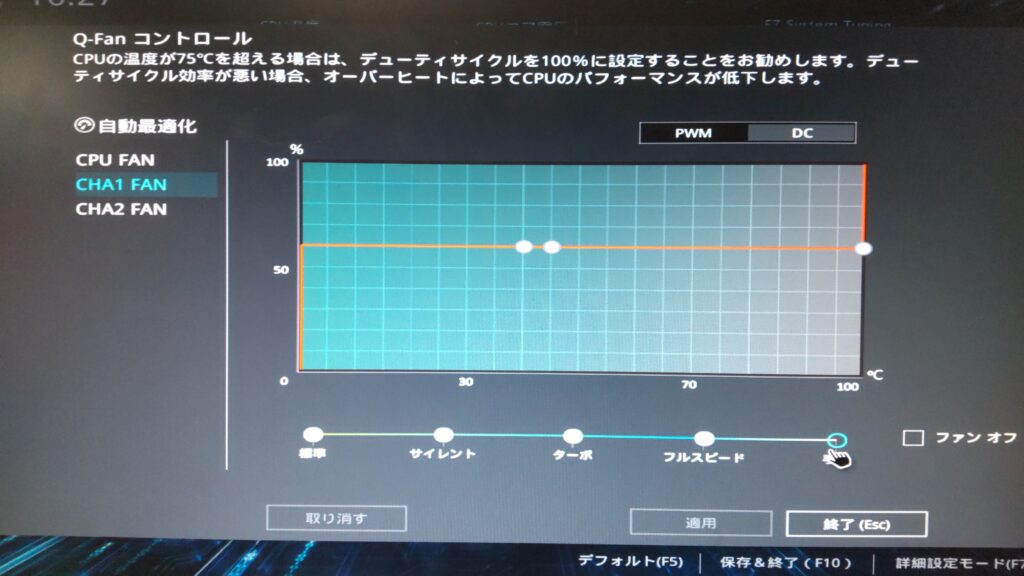
Additionally, I wanted to make the case fans quieter, so I lowered their maximum speed to 60%.
After making these changes in the BIOS, the temperature and noise were as follows:

(left group; idle, right group; Cinebench, room temperature: 25 degC)

(left group; idle, right group; Cinebench, back ground noise: 37dB)
Lowering the case fan speed further quieted the system.
By the way, when using UE5, the graphics card fan will spin, causing the noise level to increase to around 43.9 dB. However, it’s still much quieter and more comfortable compared to before I replaced the CPU cooler.
Pros and Cons
Finally, let’s summarize the pros and cons of CNPS4X.
Pros
- Affordable, available for just around 2000 yen
- Compact with a height of 135mm, making it compatible with small cases
- A sleek all-black design
- Better cooling performance than the retail cooler, with the ability to operate at lower fan speeds
- Quieter than the retail cooler, even at maximum fan speed
Cons
- Installation can be tricky, and it’s difficult to install on AMD CPU
- sIt becomes noisy when the fan speed reaches 2000 rpm
- Performance is inferior compared to 120mm fan-based CPU coolers
Conclusion
I reviewed the installation steps and performance of the ZALMAN CNPS4X Black, a CPU cooler available for just around 2000 yen.
As mentioned in the article, it’s highly recommended for users who want to quietly cool an Intel entry-level CPU on a budget.
Personally, for CPUs like the Core i5 10400F, which don’t generate excessive heat, I suggest keeping the fan speed low via BIOS settings, as it provides sufficient cooling.
If you’re building your first PC, why not try using this cooler based on the tips in this article?
AD


