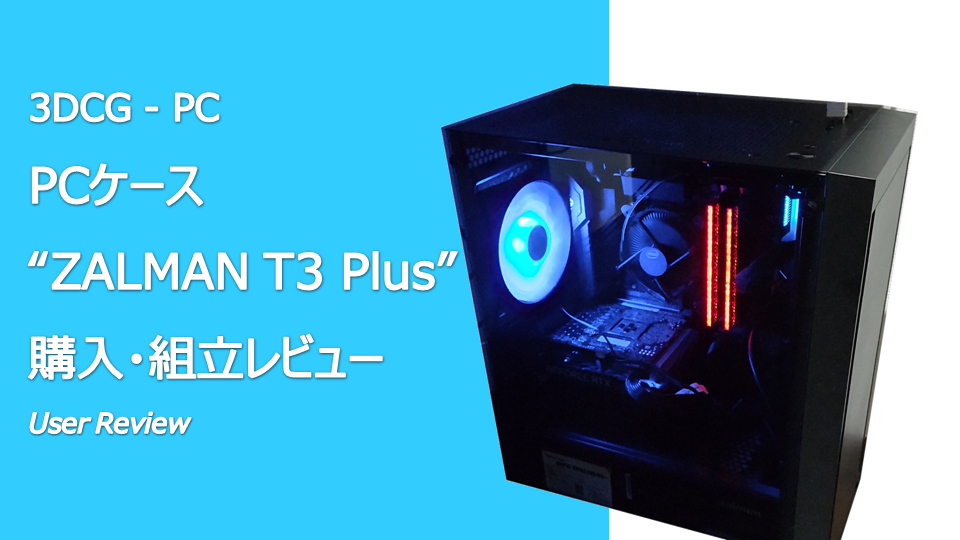
【3DCG PC】Best Value Micro ATX PC Case: Switching to and Reviewing the ZALMAN T3 Plus
Hello, it’s been a while! This is Klala.
I’ve been a bit lax in updating Klara’s Lab recently, but I used the Golden Week holidays to swap out the PC case for my custom-built 3DCG workstation.
The PC case I chose this time is the ZALMAN T3 Plus, an affordable Micro ATX case available for around the mid-3000 yen range.
Despite its budget-friendly price, it comes equipped with two pre-installed fans, tempered glass side panels, and three front USB ports, offering plenty of features. In this article, I’ll be sharing my review, complete with photos, on how it feels to use this case.
I’ll also cover some points to keep in mind when assembling components in a compact case like this.
Feel free to share your thoughts or ask questions on my Twitter account, Klala (https://twitter.com/klala_lab) 😊
AD
ZALMAN T3 Plus
Let’s take a look at the features of the PC case I used this time, ZALMAN T3 Plus, as well as some alternative options I considered.
Features
The T3 Plus I purchased is an entry-level PC case released in 2023 by ZALMAN, a veteran PC components manufacturer from South Korea.
It is available in a single color: black.
The key features of the ZALMAN T3 Plus can be summarized as follows:
- Compact case compatible with Micro ATX motherboards
- Affordable, starting at around 3000 yen
- Side panel made of tempered glass
- Equipped with three USB ports on the front
- Includes two cooling fans, with support for up to six fans
- No soundproofing features
- Limited expandability
The biggest selling point of this PC case is its affordable price.
The cost of PC cases varies widely, with some high-end models priced in the tens of thousands of yen.
Premium cases often feature sleek designs, superior soundproofing and cooling performance, adjustable fan speeds, and built-in dust filters to improve usability and convenience.
For instance, the “Torrent" by Sweden’s Fractal Design is priced at around 30,000 yen. It comes equipped with five PWM-controlled cooling fans and includes dust filters for the front and bottom panels.
However, unless you’re using a high-performance CPU or GPU that requires exceptional cooling, I personally believe there’s little advantage to spending heavily on a PC case.
For example, with components like an Intel Core i5 CPU (excluding the K-series) or an RTX 4060 GPU, heat generation is relatively low. An entry-level PC case like the T3 Plus should provide sufficient cooling.
If you’re currently struggling to decide on a PC case, consider choosing a cost-effective option. You can then use the money saved to upgrade other components or invest in software.
Returning to the ZALMAN T3 Plus, as of May 3, 2024, the lowest price listed on kakaku.com is 3,570 yen, making it one of the most affordable PC cases currently available.
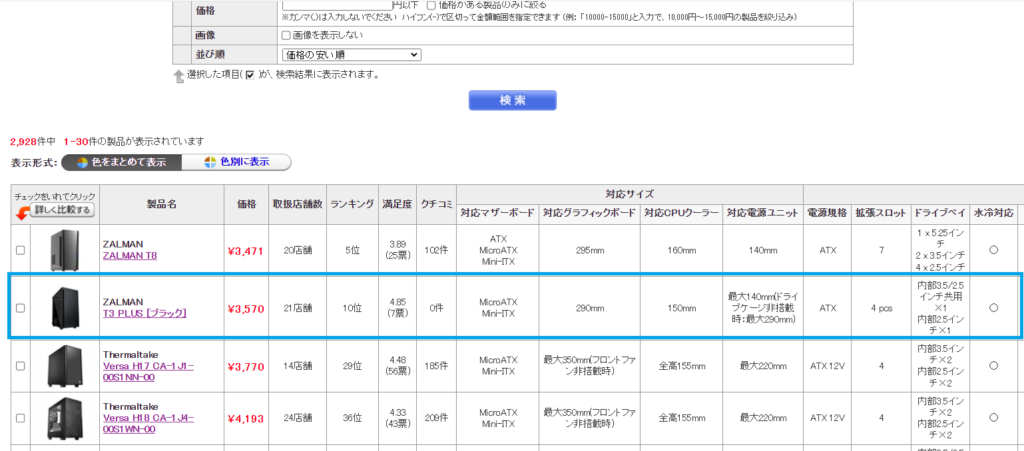
The dimensions of the case are 206 x 422 x 355mm, making it very compact for a tower PC case.
It supports motherboards up to the Micro ATX form factor and does not accommodate taller ATX motherboards.
Additionally, as has become a standard feature in modern PC cases, the side panel is made of tempered glass, allowing a clear view of the internal components.
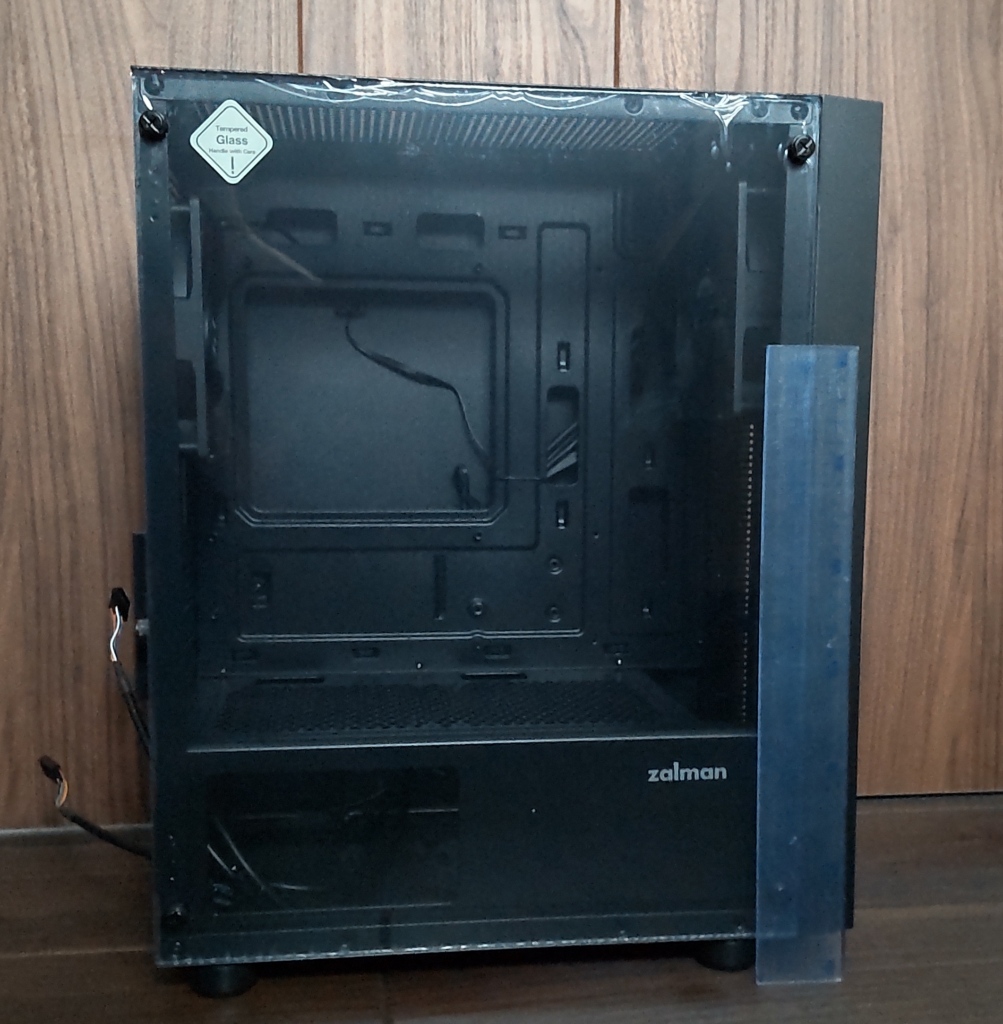
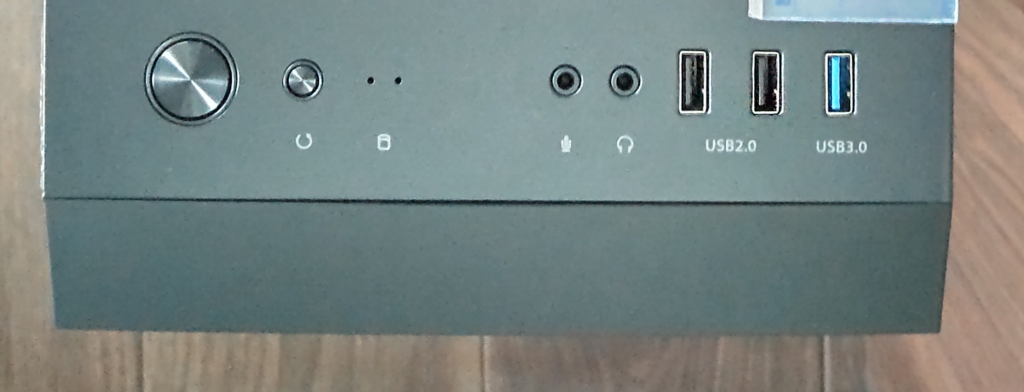
Additionally, the front panel features three USB ports (though it doesn’t include a USB-C port, which isn’t an issue for me as I don’t use it).
I use a wired USB keyboard, and during remote work, I often switch the connection between my company PC and my personal PC (which is placed on the floor). Having easily accessible USB ports on the front is incredibly convenient for this kind of setup.
Another advantage is that, despite the low price, this case comes with two cooling fans pre-installed.
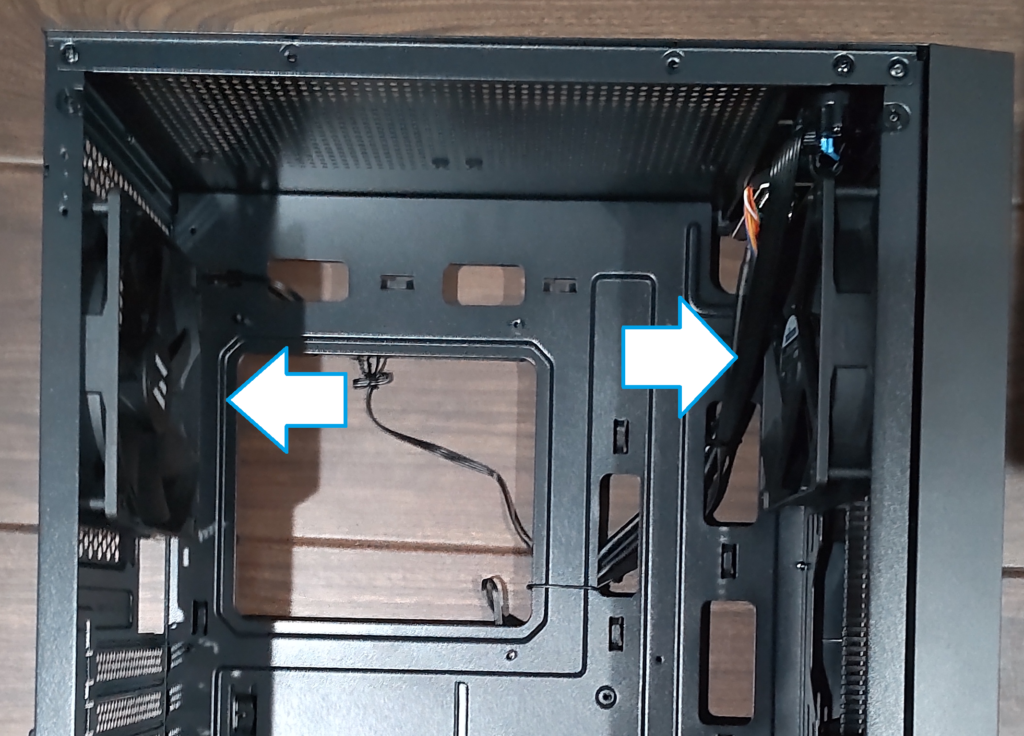
Furthermore, by fully utilizing the fan mounts, you can add up to six more fans, bringing the total to eight fans for enhanced cooling.

The downsides of the T3 Plus are its lack of soundproofing and expandability.
As an affordable PC case, the steel used is quite thin. When lightly tapped, it produces sound like this, which can be a bit noisy.
In addition to the thin steel, the top panel has ventilation holes for cooling, which means that when the CPU temperature rises, the noise from the CPU fan becomes more noticeable.
Additionally, the CPU cooler height is limited to 150mm according to the specifications, so popular models like the Deepcool AK400 (155mm) and Mugen 6 (154mm) won’t fit.
Moreover, even with a liquid cooler, only radiators up to 120mm in size can be installed. This makes it difficult to use high-performance CPU coolers with mid-range or higher CPUs that require more advanced cooling in the T3 Plus.
Other Options
Here are a few Micro ATX PC cases that can be purchased for around 5,000 yen, which could serve as alternatives to the T3 Plus.
ZALMAN Z1 Iceberg
The ZALMAN Z1 Iceberg, released in 2022, is essentially an upgraded version of the T3 Plus.
With dimensions of 221 x 426 x 409mm, it’s slightly larger than the T3 Plus (206 x 422 x 355mm) and is priced in the 5,000 yen range, making it a bit more expensive.
However, it supports CPU coolers up to 160mm in height and radiators up to 280mm, offering more expandability for future upgrades. If you’re looking for a case with more room for growth, I would recommend this option.
It comes in two color options: white and black.
Additionally, it includes three cooling fans by default.
I was torn between choosing the T3 Plus and the Z1 Iceberg until the end, but given my PC specs, I decided that the T3 Plus was sufficient for my needs.
ANTEC NX200M
The NX200M, released in 2022 by the renowned American PC component manufacturer ANTEC, is notable for being even smaller than the T3 Plus, with dimensions of 200 x 390 x 351mm.
It also comes in two color options: white and black.
The included cooling fan is just one, but you can install up to five fans in total. It also supports a 240mm radiator on the front panel for additional cooling.
While the NX200M is an attractive option, I decided against it because it wasn’t available at the Dospara PC shop I frequent.
Thermaltake Versa H17/18
The Thermaltake H17 and H18 are classic PC cases from the long-established Taiwanese PC component manufacturer Thermaltake.
The H17 features a steel side panel, while the H18 has an acrylic panel.
- H17 dimensions: 205 x 400 x 423mm
- H18 dimensions: 206 x 398 x 438.7mm
Both cases are slightly shorter in height (by about 2 cm) and have a longer depth (about 7-8 cm) than the T3 Plus. The longer depth allows for the installation of high-end graphics cards up to 350mm in length.
With a price around 4,000 yen, they are quite affordable.
The H17/H18 cases also have great reviews on price.com, making them an appealing option. However, since these models were released in 2018, I decided to opt for a newer PC case this time.
DEEPCOOL MACUBE110
The Deepcool case, released in 2020 by the rapidly growing Chinese PC parts manufacturer, is another option worth considering.
With dimensions of 225 x 431 x 400mm, this case is slightly larger than the T3 Plus. It offers good expandability, supporting 165mm CPU coolers and 320mm graphics cards.
The price is in the 5,000 yen range, which is a bit higher than the T3 Plus.
In terms of color options, it offers a wide variety, including black and white, as well as pink, green, pastel pink (exclusive to Dospara), blue (exclusive to Dospara), pastel blue (exclusive to Dospara), and purple (exclusive to Dospara), making a total of eight colors.
AD
Unboxing the ZALMAN T3 Plus
Let me walk you through the unboxing of the ZALMAN T3 Plus.
Packaging
The case arrived in a cardboard box like this one.
Here’s the size of the box, with a 30 cm ruler placed next to it for reference.
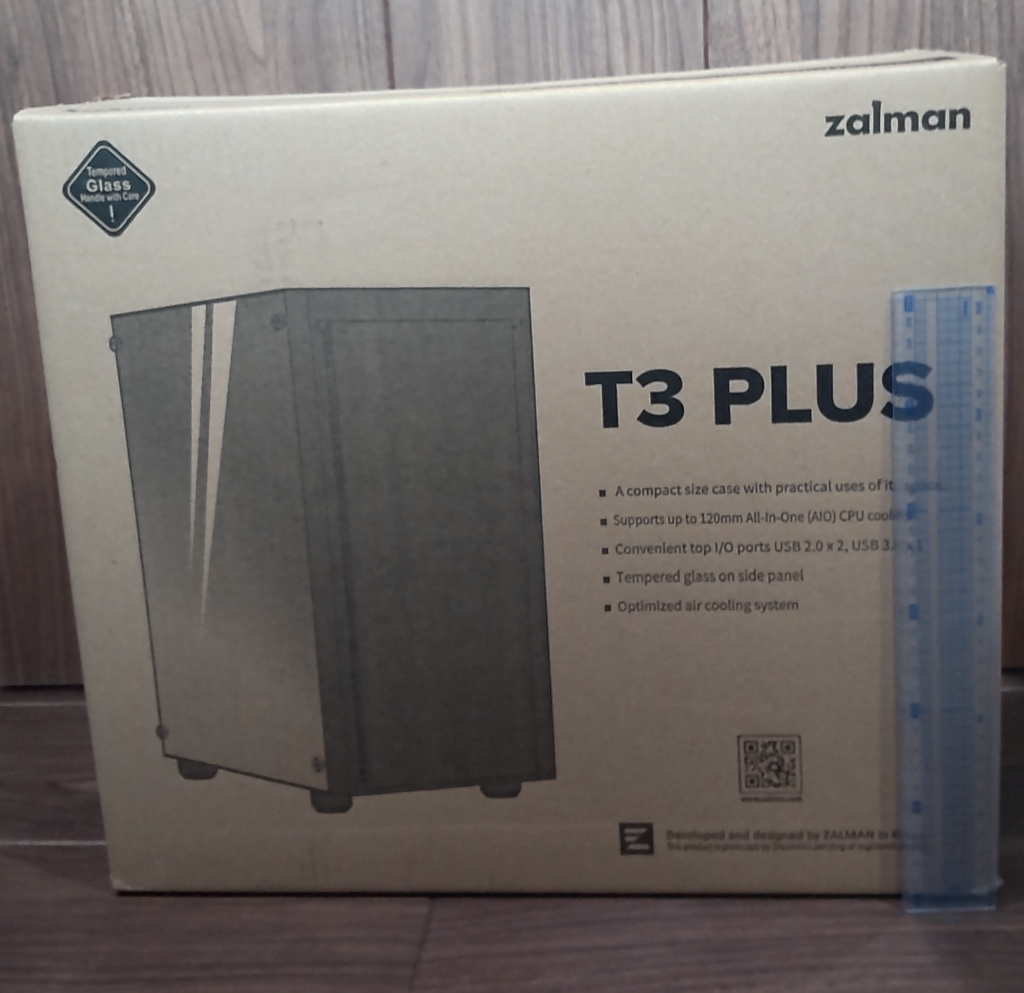
Here’s what’s inside the box. The case is sandwiched between styrofoam, providing adequate protection during shipping.

Exterior
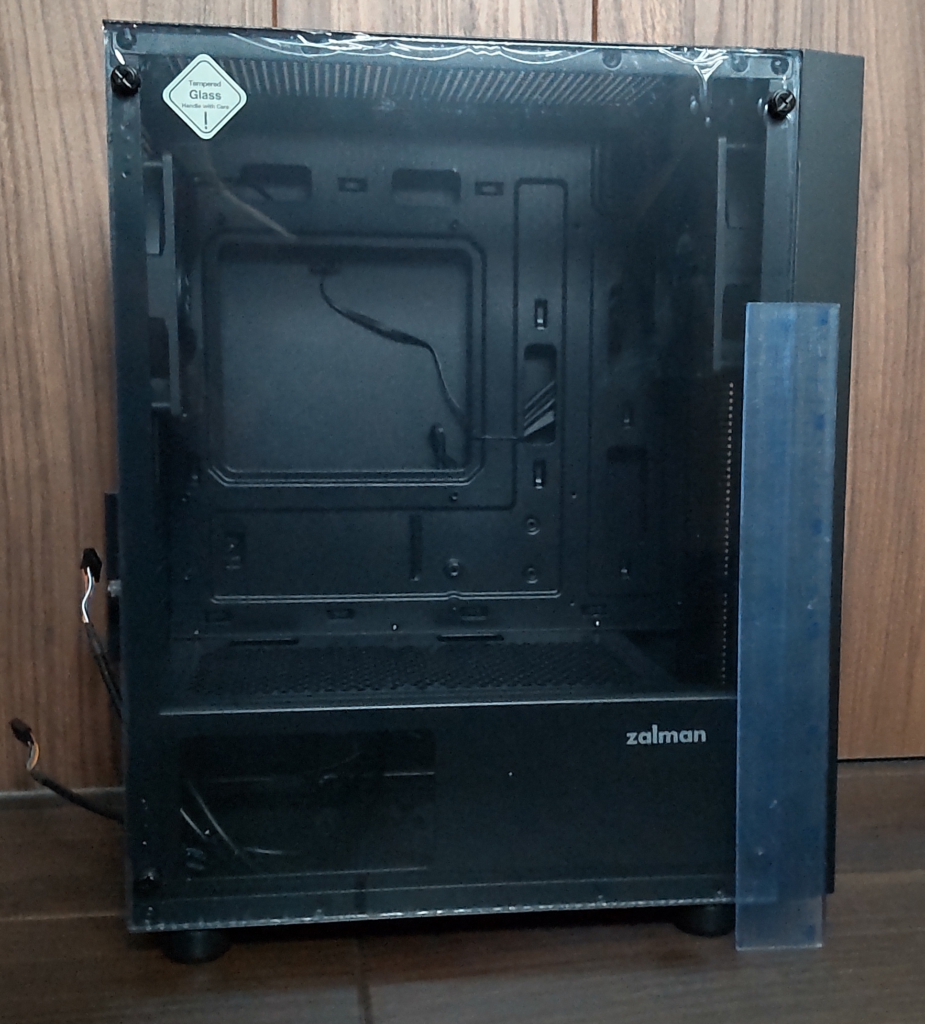
After taking the T3 Plus out of the box, here’s a look at the case from the side.
As you can see, there is protective vinyl film on both sides of the glass panel to prevent scratches during shipping.
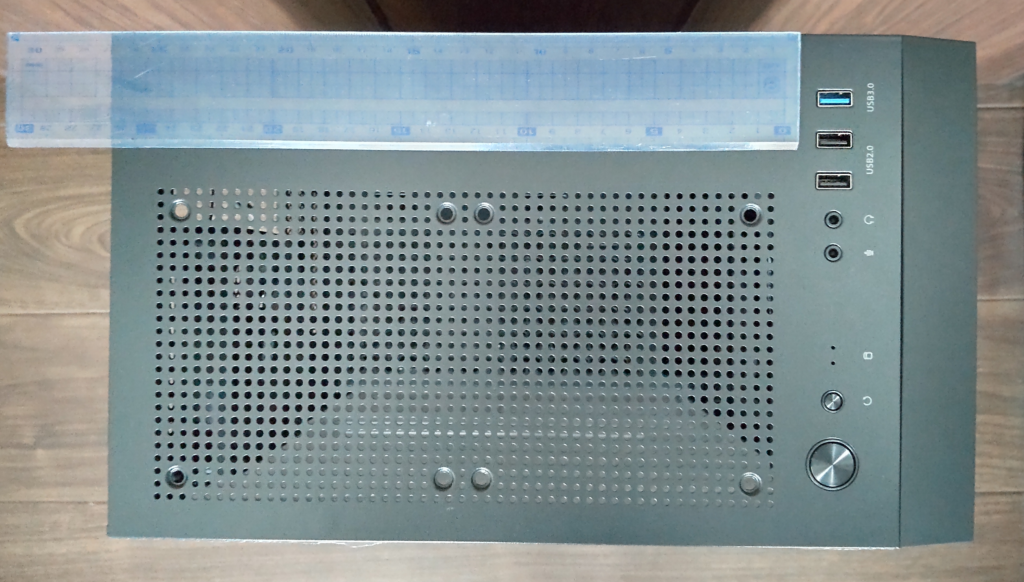
Top Panel
The power and reset switches have a brushed metal finish, which gives them a surprisingly premium feel.
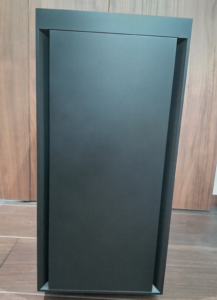
Front View
Although it is made of plastic, the texture is decent.
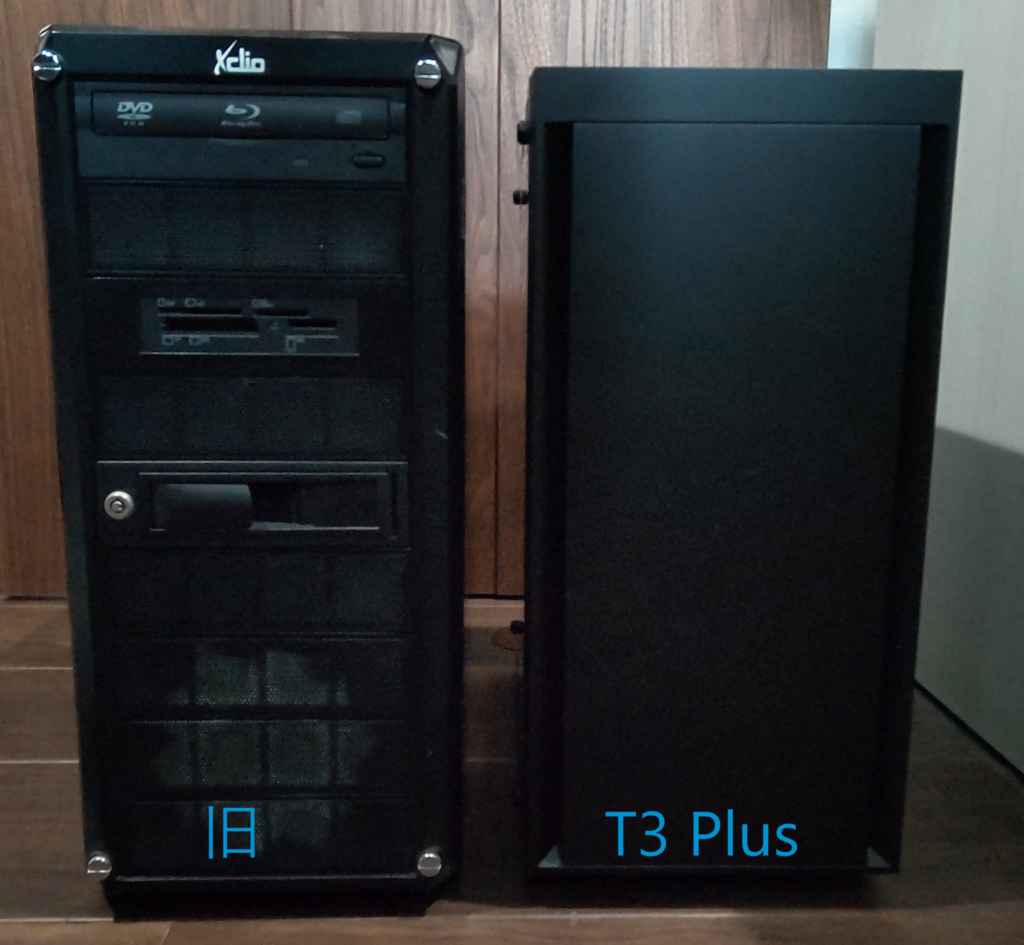
Comparison with the Old PC Case
The height and width are almost the same, but the depth has been shortened.
Interior View
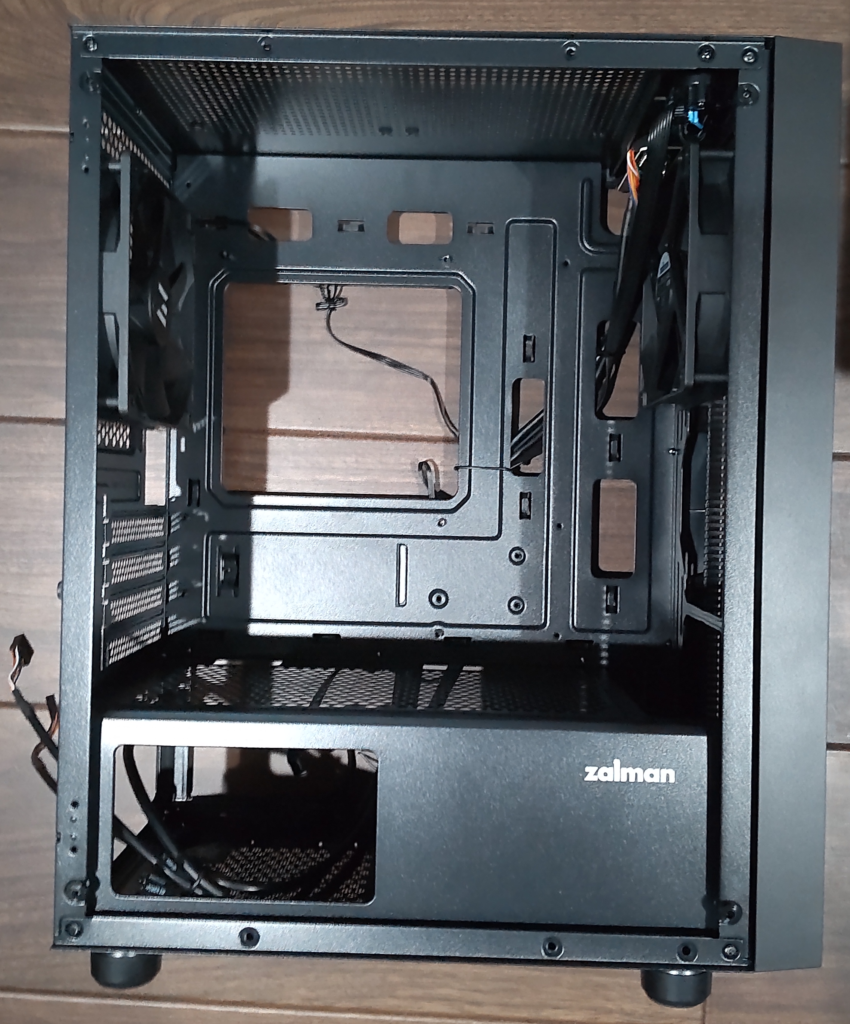
I removed the side panel and took a look inside.
The two case fans are pre-installed and connected to a 3-way splitter cable.
Included Accessories
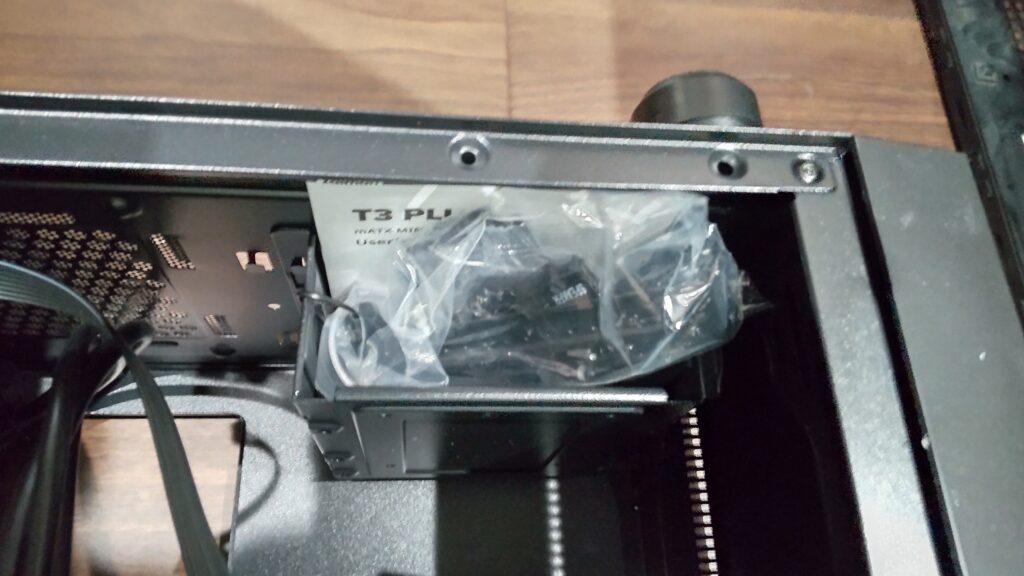
The accessories were stored inside the HDD/SSD mounting tray.
I use this tray to store leftover screws and other small accessories after assembling the PC.
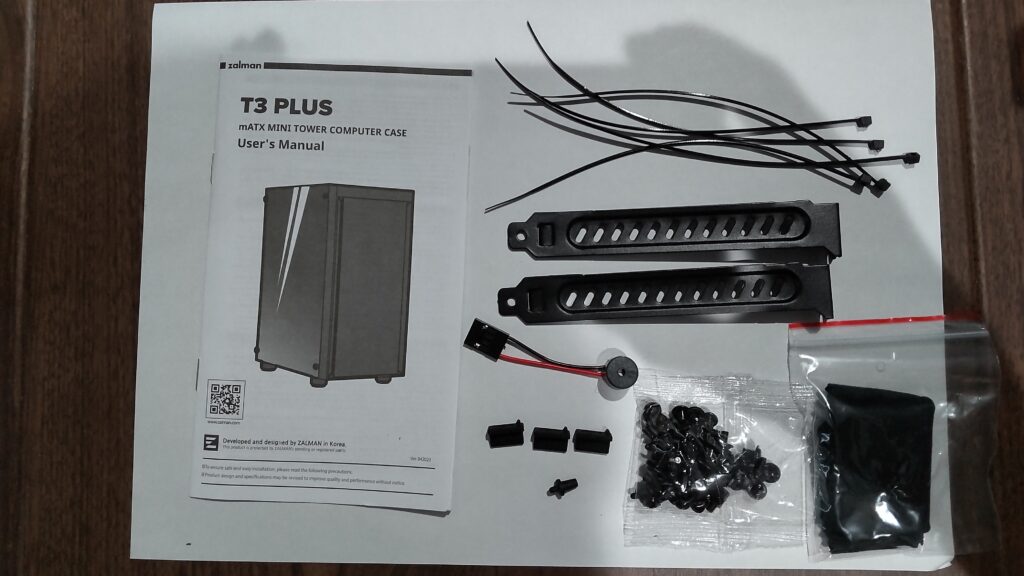
Contents of the Accessories
The accessories include a manual, screws, a speaker, PCI slot covers, and more. For the price, it’s quite well-equipped. Additionally, it comes with caps for the USB and audio ports to prevent dust from entering.
AD
PC Case Replacement
In this section, I’ll summarize the steps I took to swap out my old case for the T3 Plus.
While the process was mostly similar to assembling an ATX case, I did run into a few struggles. I’ll also share some lessons learned (what I could have done to make the process easier).
For those looking for more detailed instructions on disassembling and assembling a custom PC, I’ve written an earlier article that could serve as a useful reference. Feel free to check it out.
Additionally, I’ve also compiled the steps I took when replacing the graphics card (GPU). If you’re interested, feel free to check out that article as well for more details.
Tools
The tools I used are the same ones mentioned in the previous article I shared earlier.

Phillips screwdriver
Used for tightening and loosening screws on the PC case.
I recommend a +2 size screwdriver with a comfortable grip, like the one shown here.
Anti-static gloves
PC components are sensitive to static electricity.
Especially in winter, static electricity can build up more easily, so I highly recommend using anti-static gloves like the ones shown here.
Anti-static brush or air spray
Over time, dust accumulates inside a PC case.
When swapping cases, it’s a good idea to have an anti-static brush or air spray to clean the dust off the PC components.
Time and mental preparedness
When connecting cables to the motherboard, especially if you’re not familiar with the process, things may not go smoothly at first.
If you rush and try to force connections, there’s a risk of damaging the connectors.
Make sure you have enough time and a calm mindset to work slowly and carefully, choosing a time when you’re not rushed.
Removing components from the old PC case
Start by removing the components from the case.
The steps are as follows:
- Disconnect the cables.
- Remove the graphics card (GPU).
- Remove the power supply.
- Remove the motherboard.
For a detailed breakdown of the removal process, please refer to my previous article.
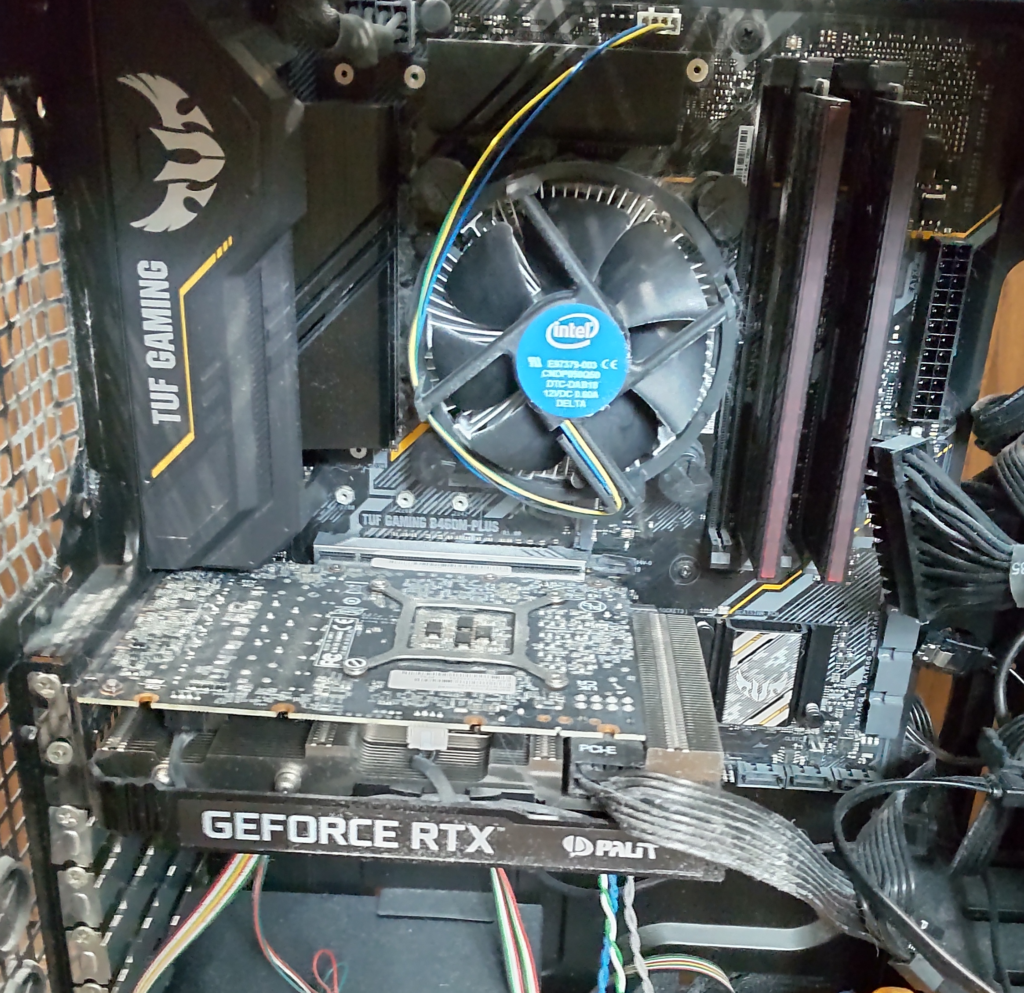
By the way, after neglecting cleaning for three years, my PC ended up looking dusty like this. After removing the components, I used air spray to clean the inside.
Actual assembly steps
Here are the actual assembly steps, presented with photos.
The steps I followed are as follows:
- Relocate the included fan to the front
- Install the motherboard
- Install the GPU
- Install the HDD
- Install the power supply
- Install additional case fans
- Cable management
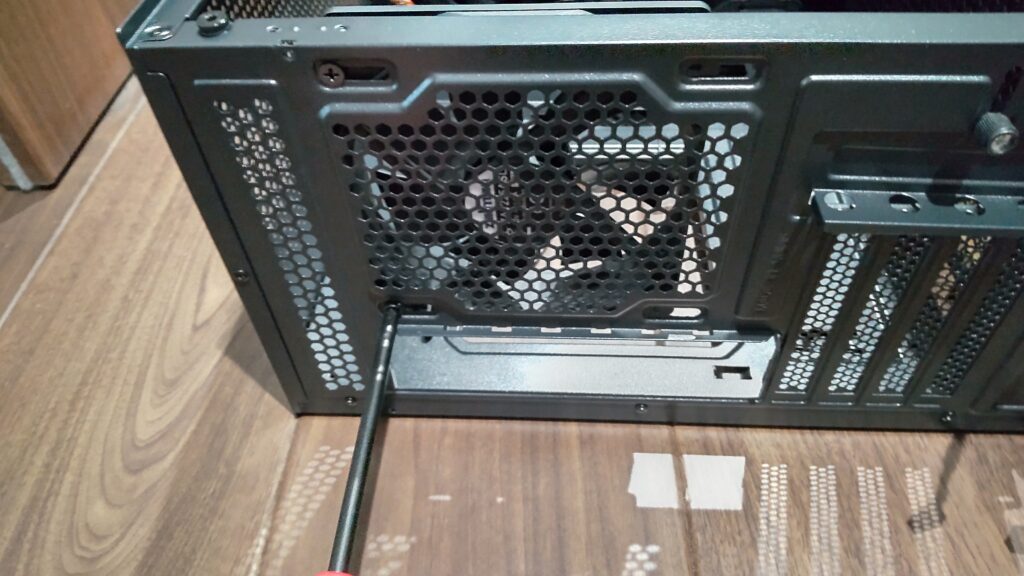
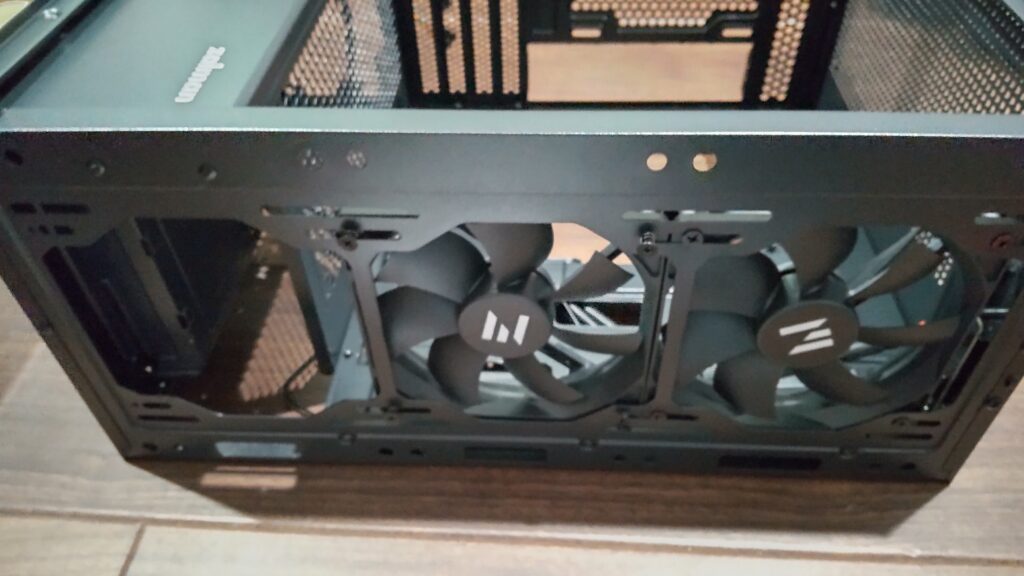
Since I wanted to add an LED case fan and install it at the rear, I moved the included fan from the rear to the front.
To do this, I first used a flathead screwdriver to remove the screws securing the rear fan.
I then secured the fan to the front frame using screws.
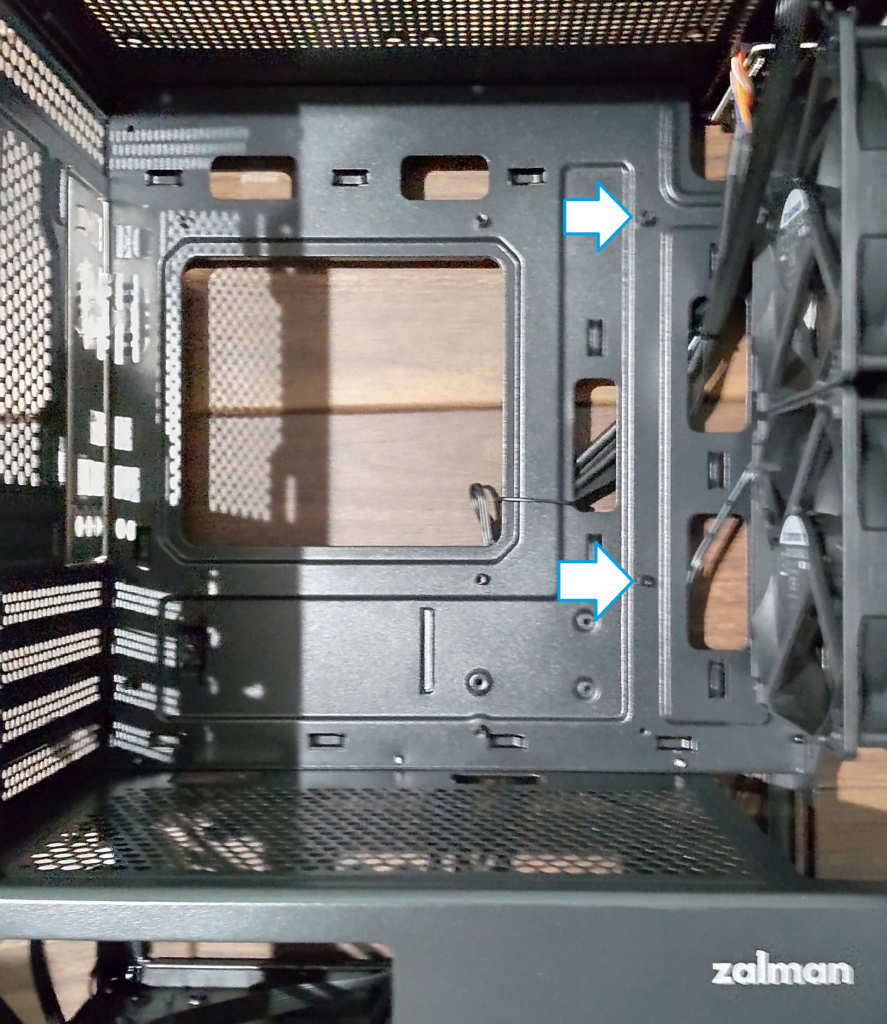
I inserted spacers in two locations to prepare for mounting the motherboard.
The spacers will be secured later when the motherboard is fixed with screws, so it’s fine to loosely screw them in by hand for now as a temporary hold.
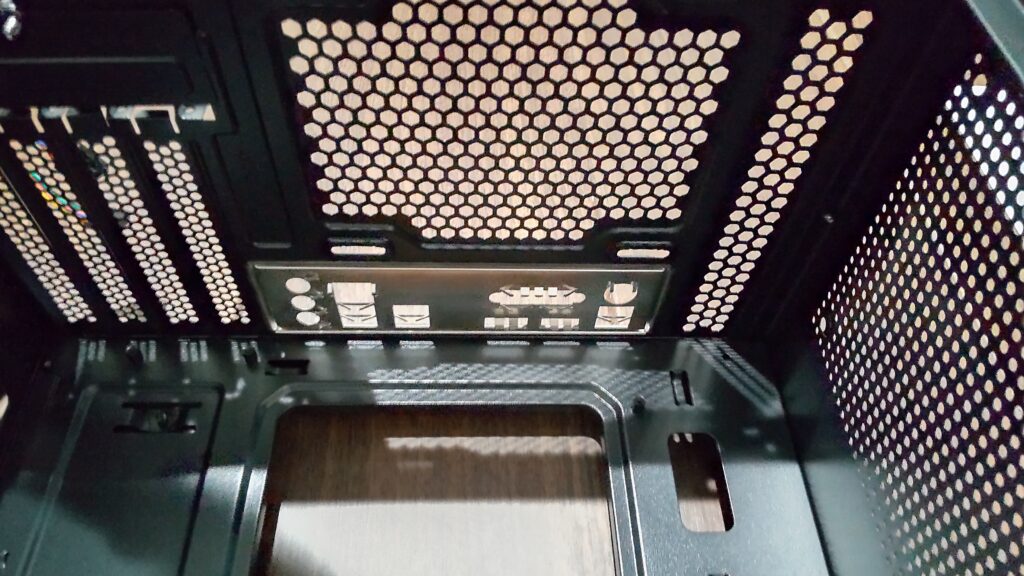
Next, attach the motherboard’s back panel to the case.
Before inserting the graphics card, remove two plates from the PCI slots.
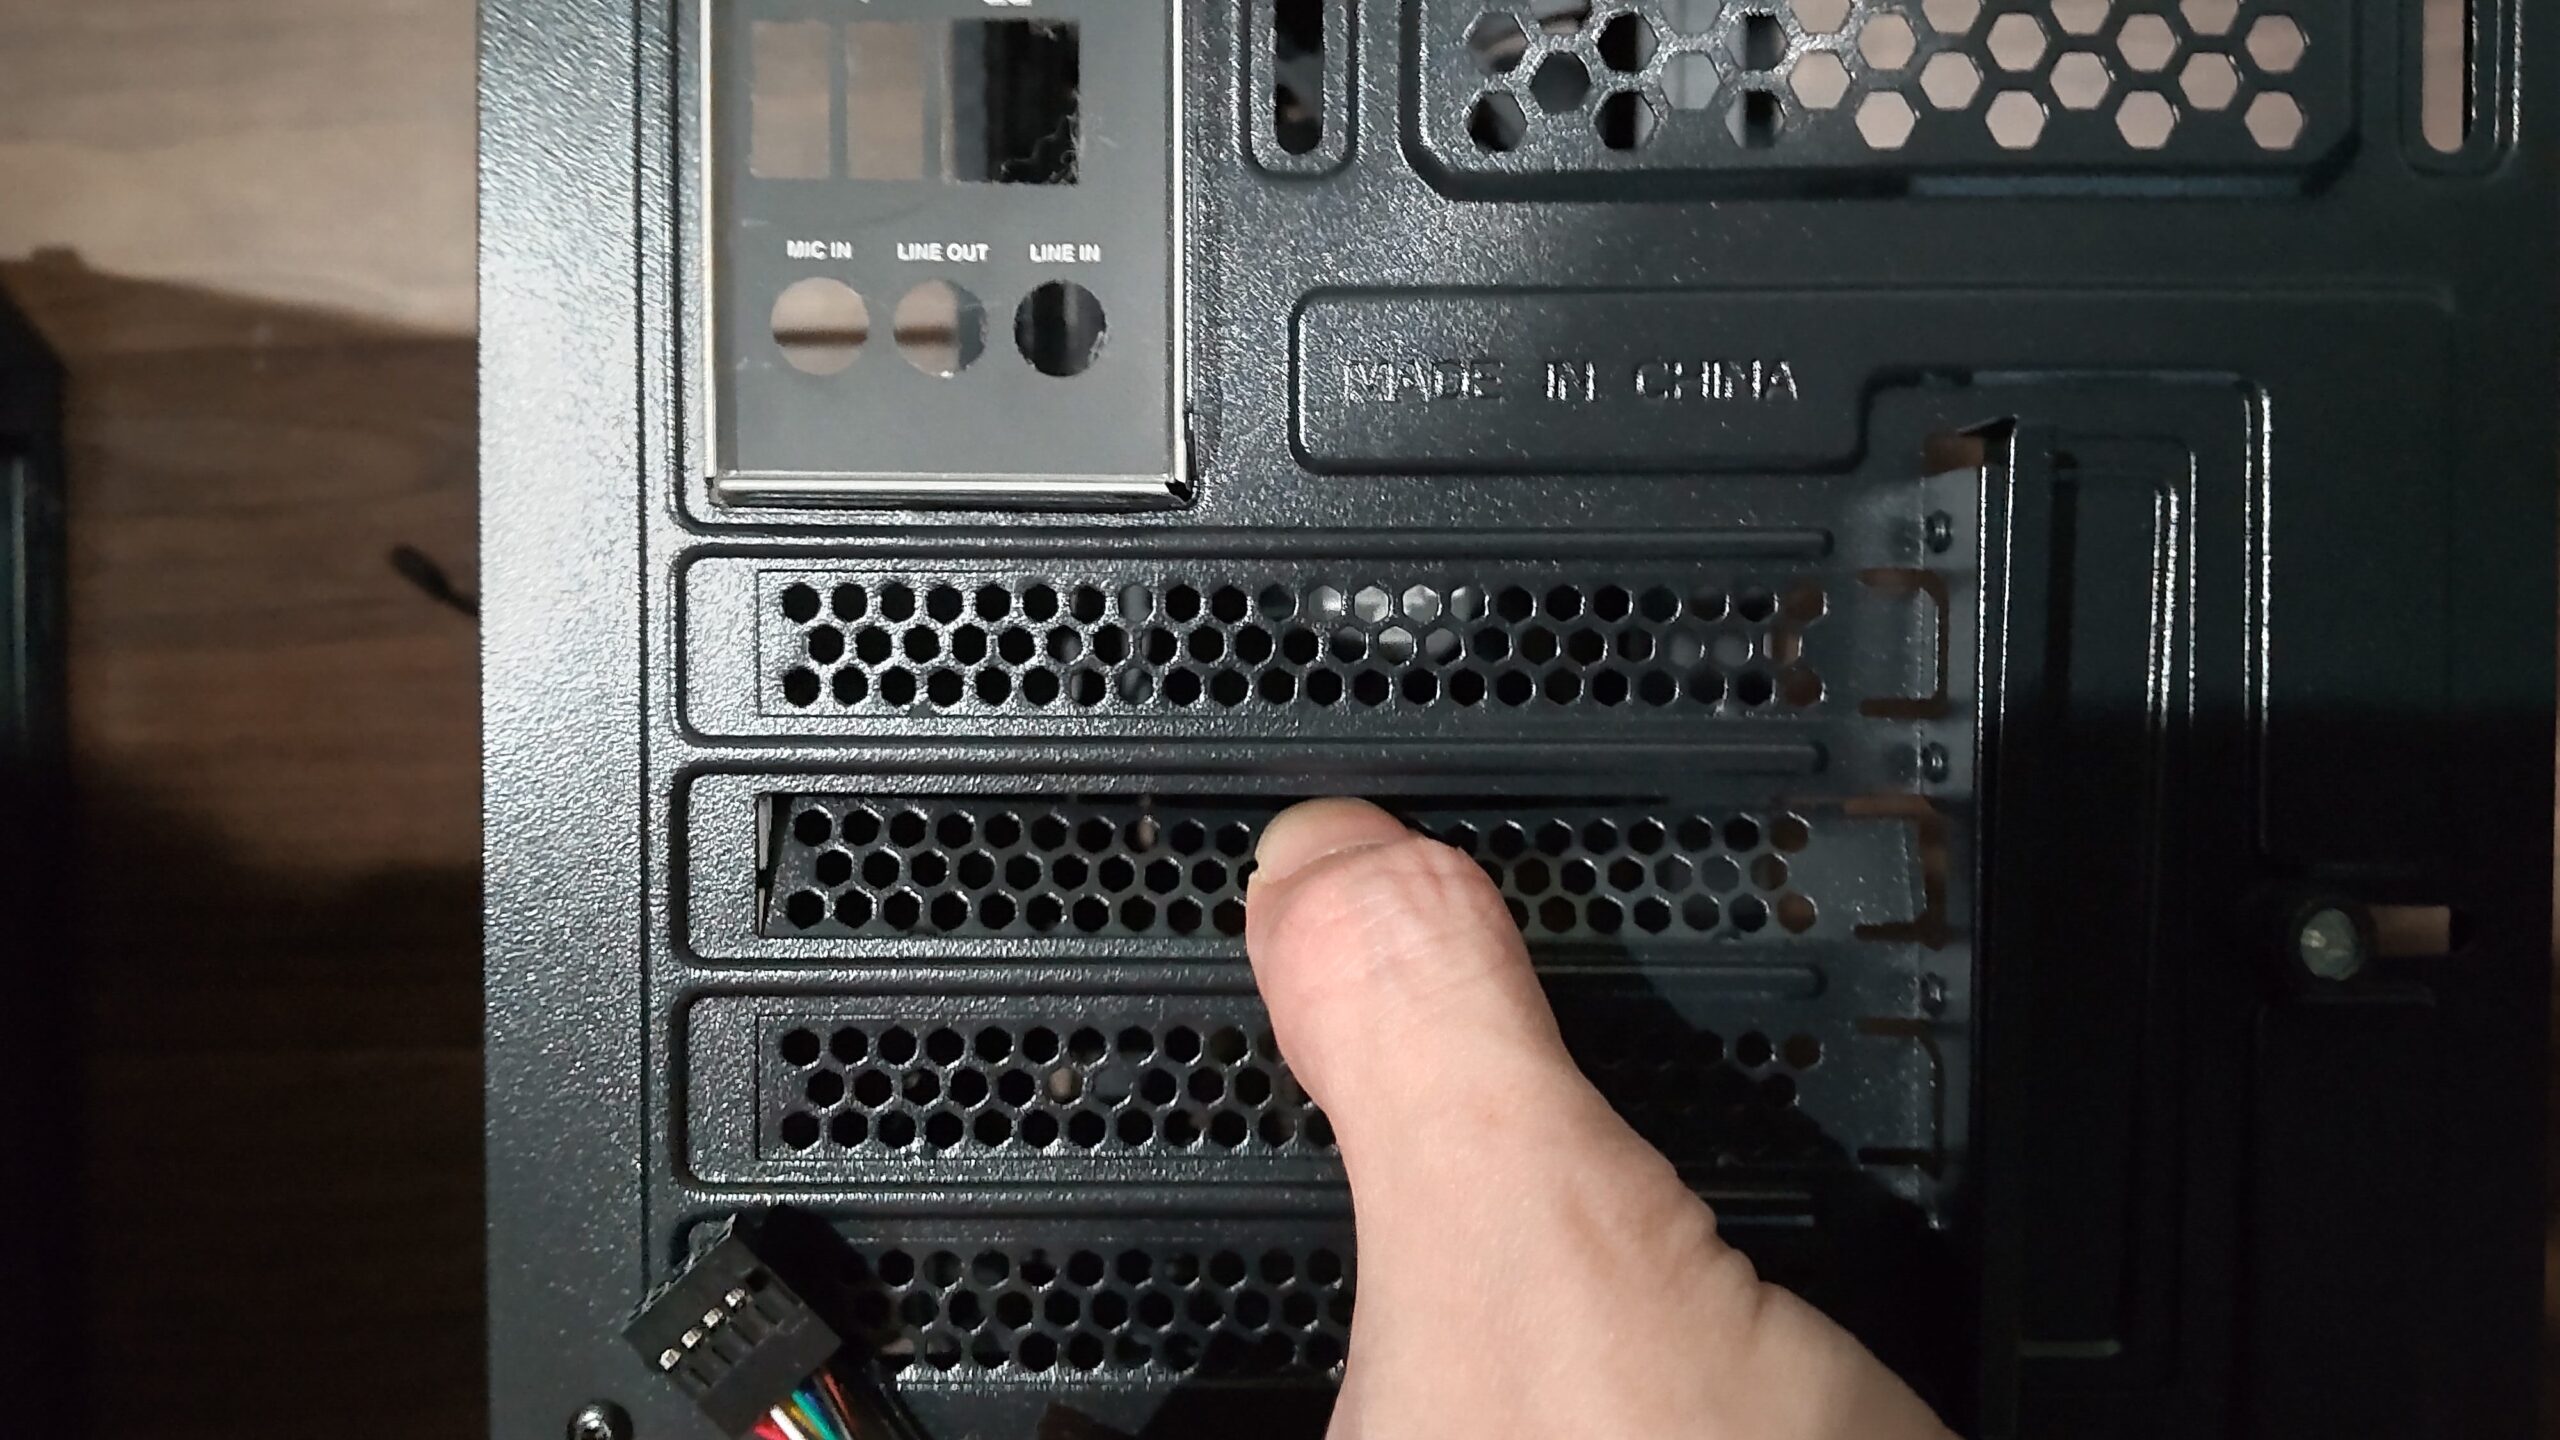
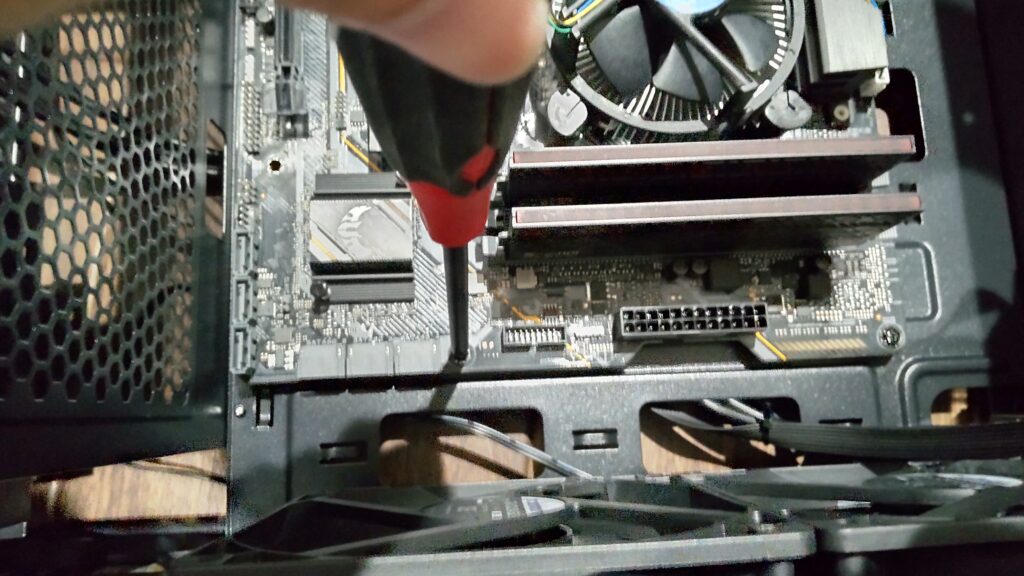
Screw the motherboard into place.
Be sure to read the manual and check which screws to use before proceeding.
I mistakenly used SSD screws to secure it, which caused me to strip one of the spacer screws and render it unusable.
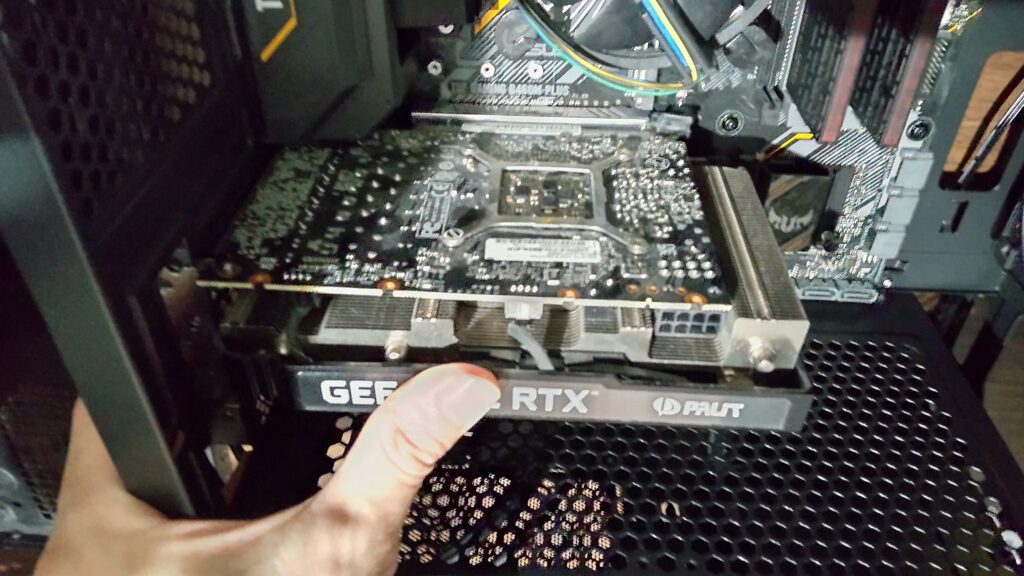
Insert the graphics card.
I later struggled to plug in the cables to the motherboard, so I regretted not inserting the graphics card last.
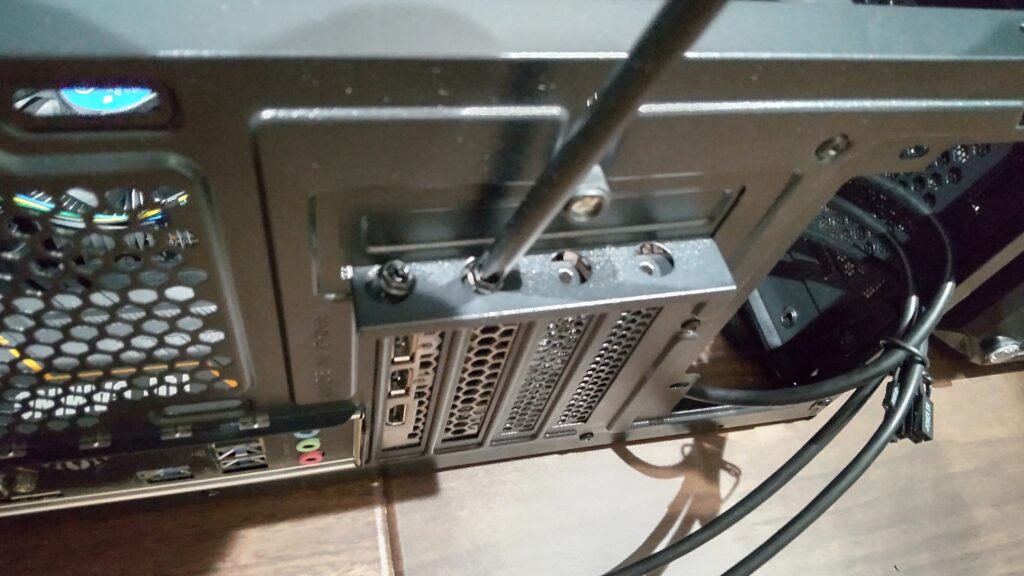
Secure it with screws.
Attach the HDD to the stay.
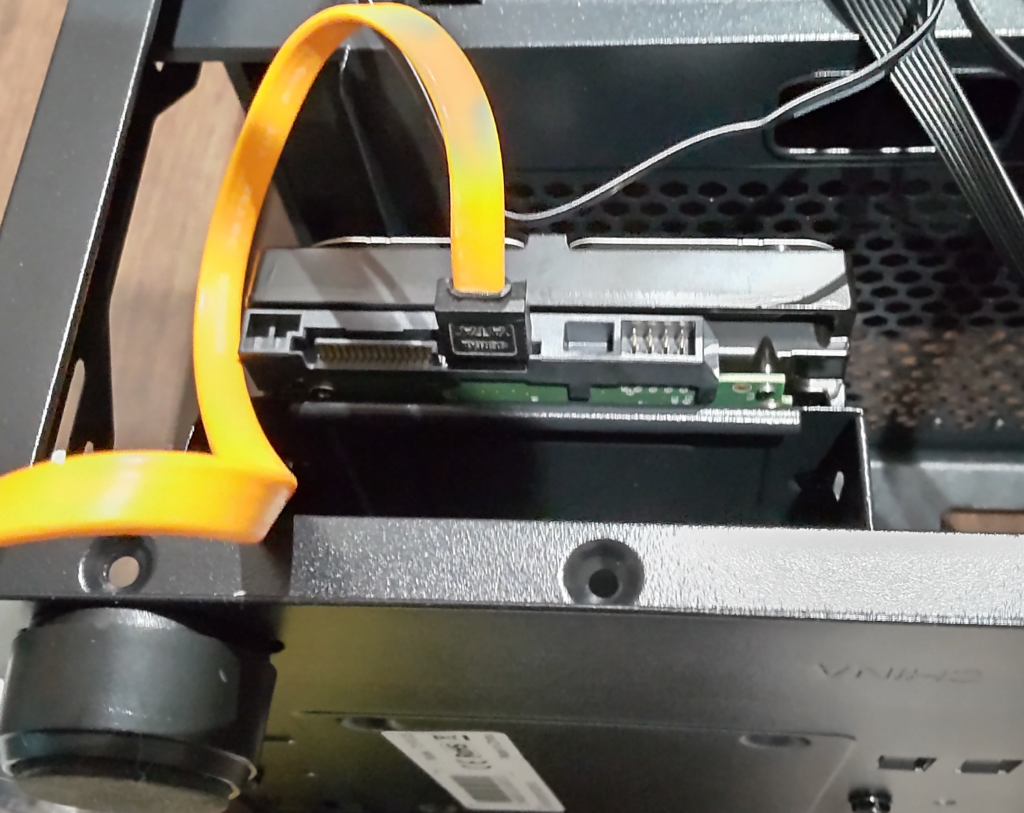
Install the power supply.
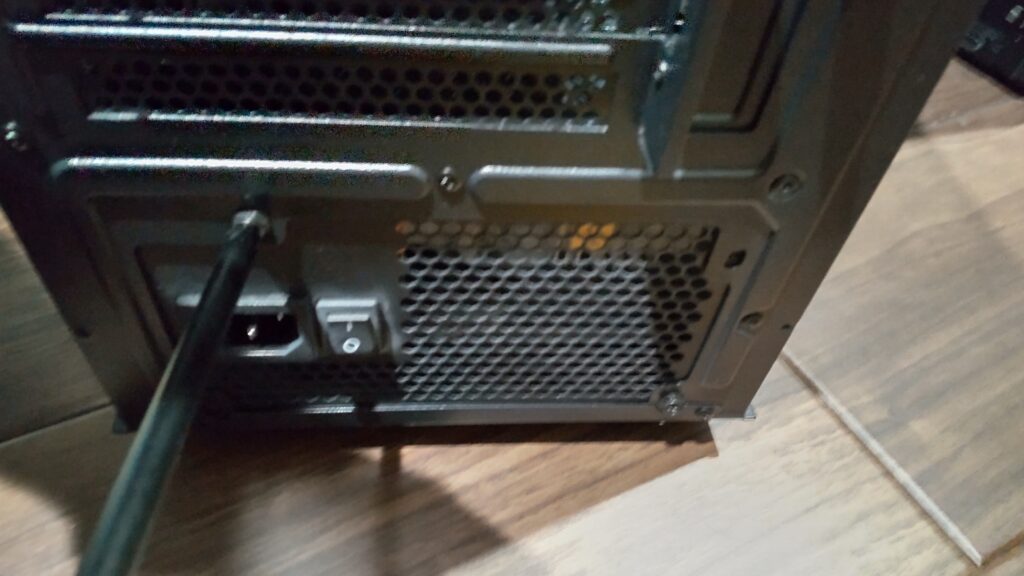
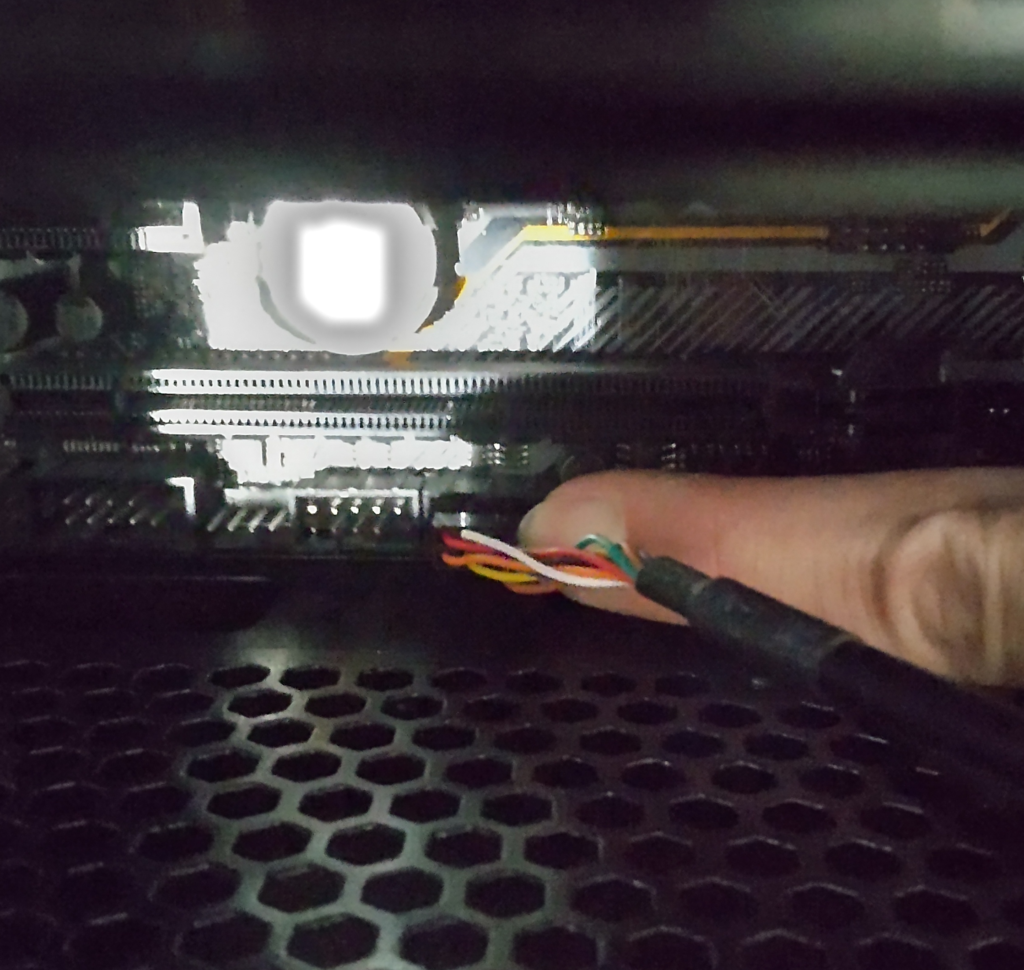
I plugged in the motherboard cables.
I regretted inserting the graphics card first because I struggled with limited space.
I also added one Deepcool LED fan “RF120B" to the rear side.
It’s a simple case fan that glows blue with the same speed as the original fans.
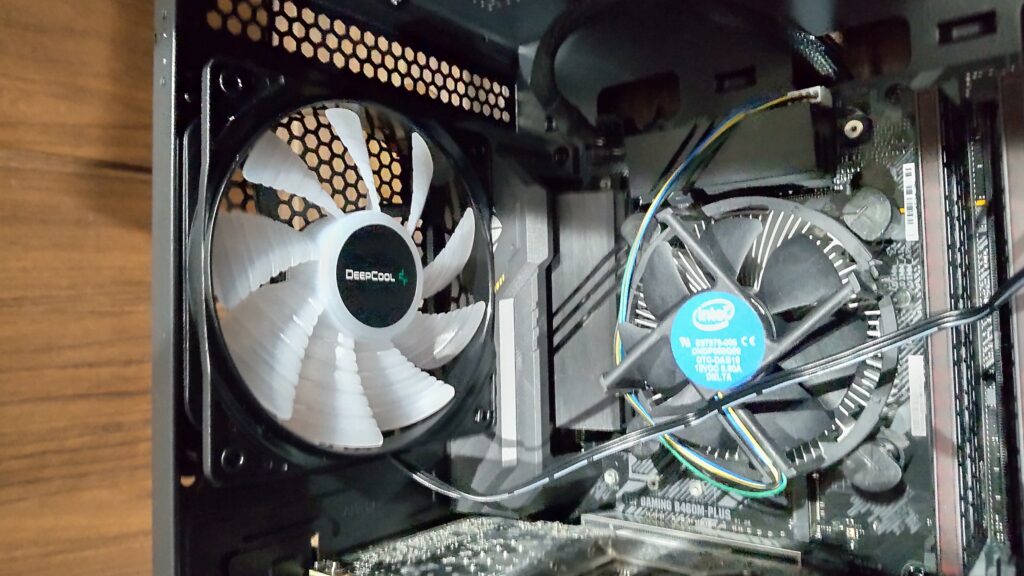
I connected it to one of the unused terminals of the included 3-way splitter cable.
Thanks to the included 3-way cable, I didn’t need to buy additional cables for the fan expansion, which is a nice convenience.
Reflection
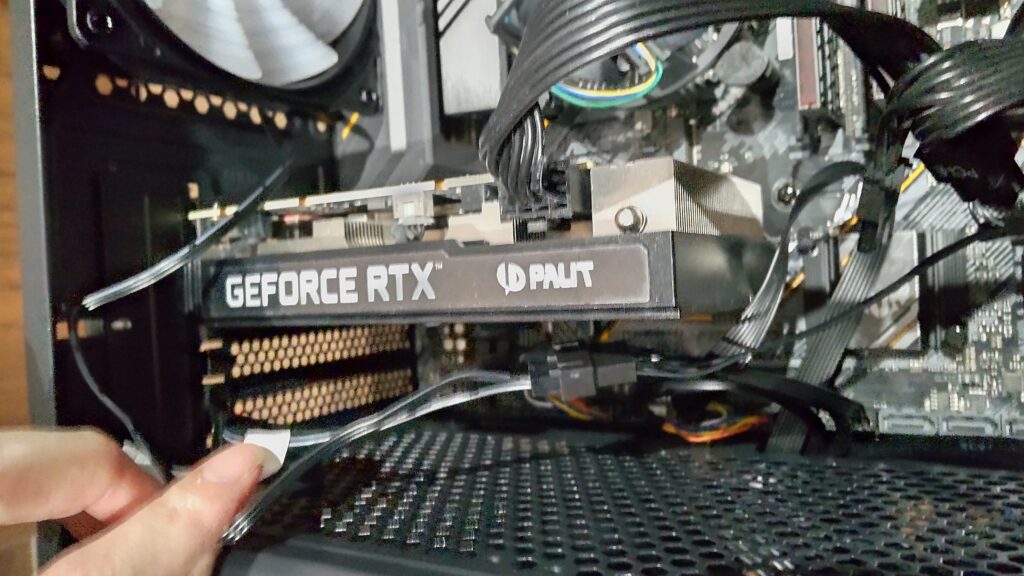
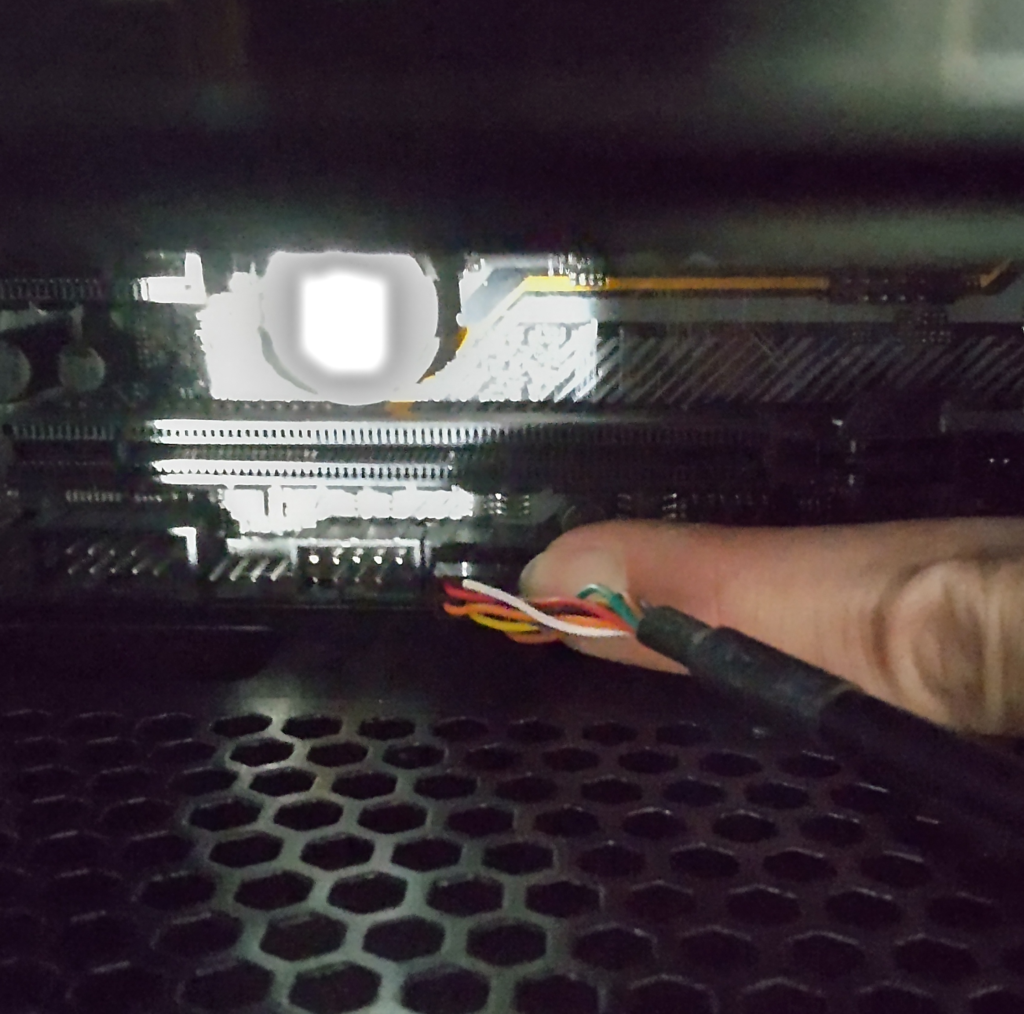
The most challenging part of assembling the T3 Plus was wiring the audio and I/O ports.
Since I installed the graphics card first, there was no space to reach the ports at the bottom of the motherboard, as seen in the picture, making it very difficult.
Looking back, I should have removed the graphics card first and done the wiring before attaching it to the case… (embarrassing).
AD
Using the ZALMAN T3 Plus
After using the ZALMAN T3 Plus, I’ve summarized the pros and cons, as well as a comparison of temperatures and noise levels when running benchmark software.
Size
Although it’s a compact PC case, its height of 42cm might make it feel a bit cramped when placed on a desk.
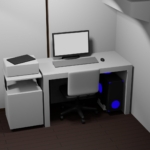
Below is an image created using the 3D software Blender, showing how the case looks on a 120cm x 60cm desk (with the case dimensions matching those of the T3 Plus).
Since the depth isn’t too large, you can push the case toward the back of the desk, leaving space in front for a tablet or other peripherals, thus making good use of the available space.
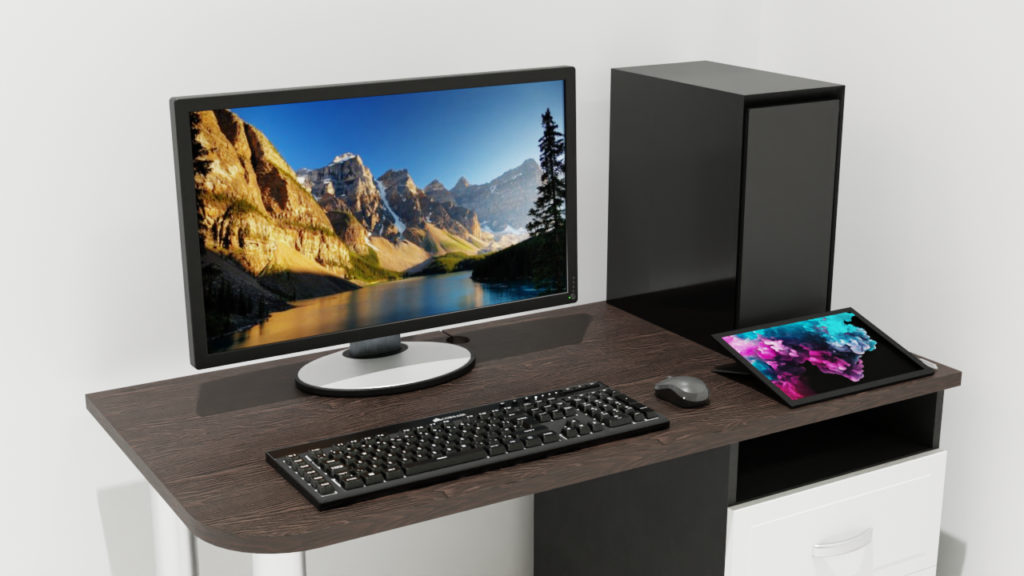
For placing it under the desk, the height is just right for easily reaching the power switch.
Switches & Front I/O
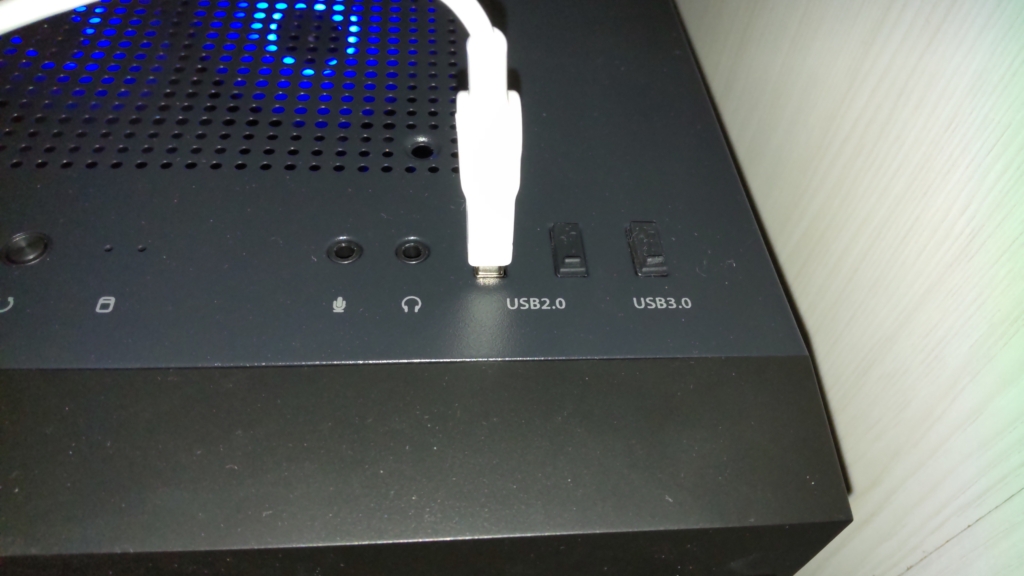
The power switch, USB ports, and audio jacks are located near the front of the top panel, making them easy to access when the case is placed on the floor.
With three USB ports, there should be no shortage of connectivity options.

The included caps for the ports help prevent dust from entering, which is a great feature for maintaining cleanliness inside the case.
Noize
The thin metal panels and ventilated top design amplify the internal noise. When the CPU is under heavy load, the noise from the CPU cooler can become quite loud.
Similarly, you can easily hear the noise from HDD rotation and reading during access. This could be a drawback if you’re sensitive to noise or need a quieter environment.
Since your CPU usage doesn’t often reach high levels during regular tasks like using Blender, the noise from the cooling system is less of an issue.
For tasks that demand less processing power, the cooling fans and components won’t need to work as hard, which helps reduce noise.
It’s always nice when your setup is quieter for day-to-day tasks, and the occasional noise under heavier load doesn’t become a major problem.
Temperature
I compared the CPU temperatures between the previous PC case (Xclio Nighthawk) and the new one.
Due to the time difference, the room temperature during the measurement with the old PC case was 21.9°C, while with the new PC case, it was 24.5°C, a difference of about 3°C.
After running the CPU benchmark software “Cinebench R23" three times each, the maximum temperature with the old PC case stayed at 77°C, while the T3 Plus rose to 90°C. Even after accounting for the 3°C room temperature difference, the temperature was still about 10°C higher with the T3 Plus.
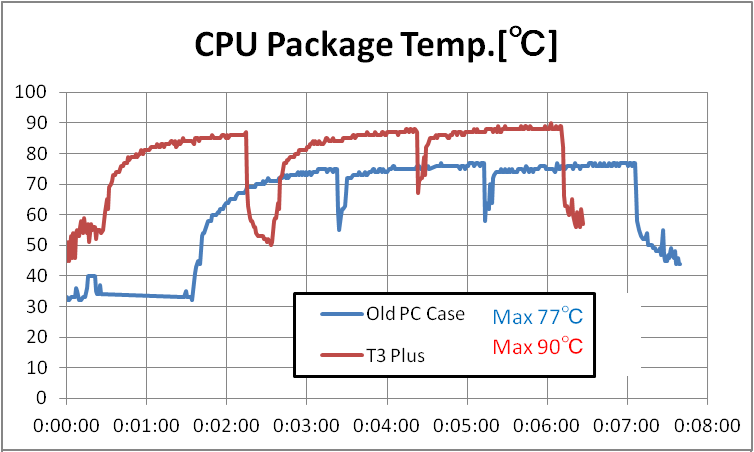
The previous PC case had ventilation holes on the side panel for cooling, allowing outside air to directly enter the top-flow CPU cooler.

However, since the T3 Plus has a solid side panel, it cannot take in cool outside air for the top-flow CPU cooler, which I suspect is causing the higher CPU temperatures.
Therefore, it seems that the T3 Plus is not very compatible with top-flow CPU coolers.
If a low-profile side-flow CPU cooler like the “Deepcool AG400" is used, the airflow generated by the front-to-back case fans could potentially help with cooling, which might lower the temperatures (I will test this if I have the chance).
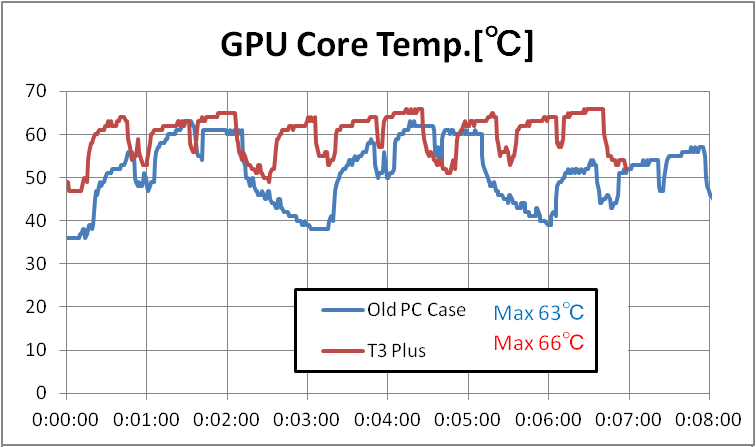
The GPU temperature was 63°C before the case swap and 66°C after the swap. After accounting for the room temperature difference (3°C), the temperatures are almost the same.
For the GPU, the T3 Plus is cooling it just as effectively as the old PC case.
Pros and Cons
最後に、このケースの良い点と悪い点をまとめます。
Pros
- Affordable, available from around 3000 yen
- Compact with short depth
- Side panels are tempered glass, enabling a “showcase" PC build
- Three USB ports included
- Two case fans included by default, with support for up to eight fans
Cons
- Incompatible with CPUs taller than 150mm
- Cannot mount radiators larger than 120mm
- Build quality is consistent with the price
- No noise dampening features
- Not well-suited for top-flow CPU coolers
Summary
I reviewed the process of replacing my PC case with the ZALMAN T3 Plus, a Micro ATX case available from around 3000 yen, along with my experience using it.
As mentioned in the article, this case may not be suitable for users who prioritize quiet operation or cooling performance.
However, for building a PC with entry-level components (such as a non-K Core i5 CPU and a GPU like the RTX 4050 or 4060), the T3 Plus provides adequate performance at an affordable price, making it a great option for first-time PC builders.
AD


