[For 3DCG Beginners] PC Assembly Guide [Core i5-10400F & GTX1650]
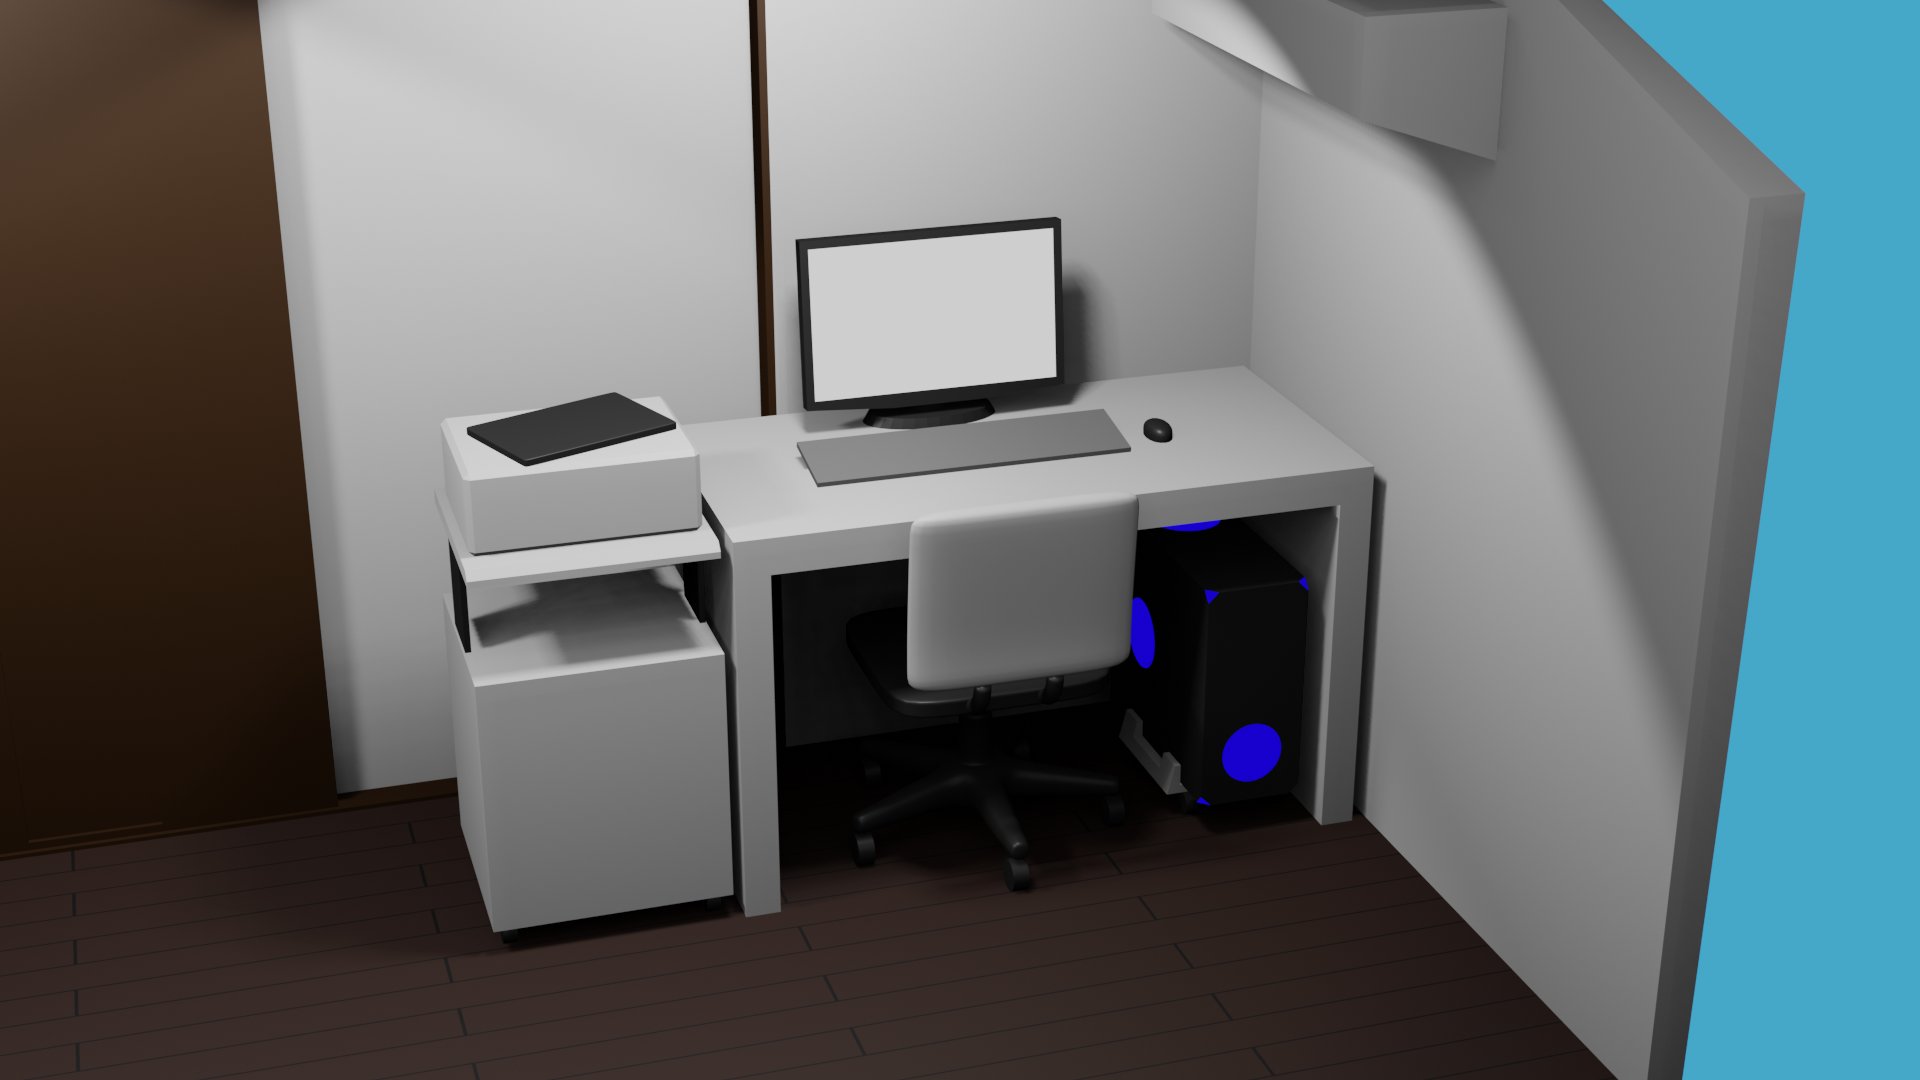
During the stay-at-home period due to the COVID-19 pandemic, I started learning 3D computer graphics using the free software “Blender" 😊.
However, my old computer kept freezing frequently while using Blender, which was hindering my work. As a result, I completely replaced the components of my PC (excluding the case) for the first time in 11 years.
For those who are new to building custom PCs or beginners in general, I’ve summarized the benefits of building your own PC, as well as the steps and precautions involved. I hope you find it helpful.
Also, the parts selection and performance of the PC I assembled are summarized in a related article, “[For 3DCG Beginners] PC Parts & Benchmark Guide," so I would be happy if you could check it out as well 😊.
If you have any feedback or questions, feel free to reach out to me on Twitter (https://twitter.com/klala_lab) 😊👋.
AD
About Building Your Own PC
When it comes to “building your own PC," those who are inexperienced might think, “It sounds difficult."
It’s true that choosing parts and assembling the PC requires a bit of prior knowledge 😅.
However, the process itself is quite simple, and all you need to do is combine a few different parts as outlined below:
- Remove the old parts from the PC
- Install the CPU
- Install the memory (RAM)
- Check functionality
- Install the SSD
- Mount the motherboard in the PC case
- Install the graphics card (GPU)
- Install the power supply and wiring
- Install Windows
This is my personal belief, but if you can assemble furniture from Nitori, I believe you can definitely build your own PC 🖥️🔧.
Also, if you’re good at detailed tasks like building model kits, you should be able to do it without any problems 😊.
However, if you’re not confident in your assembly skills, don’t give up just yet! 😅
Some stores (like Dospara) offer assembly services 😊.
Whether you choose to build it yourself or use the store’s service, one of the biggest benefits of custom PCs is that you get a “one-of-a-kind personal PC" 🖥️.
And, it’s often cheaper than buying a pre-built PC from a manufacturer. As I will explain later, you can get a PC with the recommended specs for Blender for around 100,000 yen! 💻✨ (Note: Monitor, keyboard, and mouse are sold separately!)
For those who love computers, I highly recommend diving into the world of custom-built PCs! 😆
Tools You’ll Need
All you need is a Phillips screwdriver! 👍
- Essential: Phillips screwdriver (+2 size)
- Needed only for M.2 SSD: Phillips screwdriver (+1 size)
- For Safety:
- Anti-static gloves
- For Cleaning Old PC Parts:
- Anti-static brush
- Compressed air duster
First and foremost, a Phillips screwdriver (+2 size) is essential. You can purchase this from Amazon or a hardware store.
I personally recommend the Vessel screwdriver, as its grip is comfortable and easy to handle 👍✨.
Additionally, if you’re using an M.2 SSD, which attaches directly to the motherboard, you’ll need a smaller Phillips screwdriver (+1 size), so be sure to check the size carefully.
If you’re working during the winter months or in dry conditions, it’s a good idea to wear anti-static gloves to prevent damage from static electricity. However, if it’s summer and conditions are less dry, it’s fine to work without them as it can be easier without gloves.いです)。
If you’re replacing old PC parts, it’s helpful to have an anti-static brush or compressed air spray to clean the dust.
PC cases tend to accumulate dust due to the continuous airflow design 😓.
To prevent damage, I recommend cleaning the inside of your PC case regularly ✨.
PC Parts Used
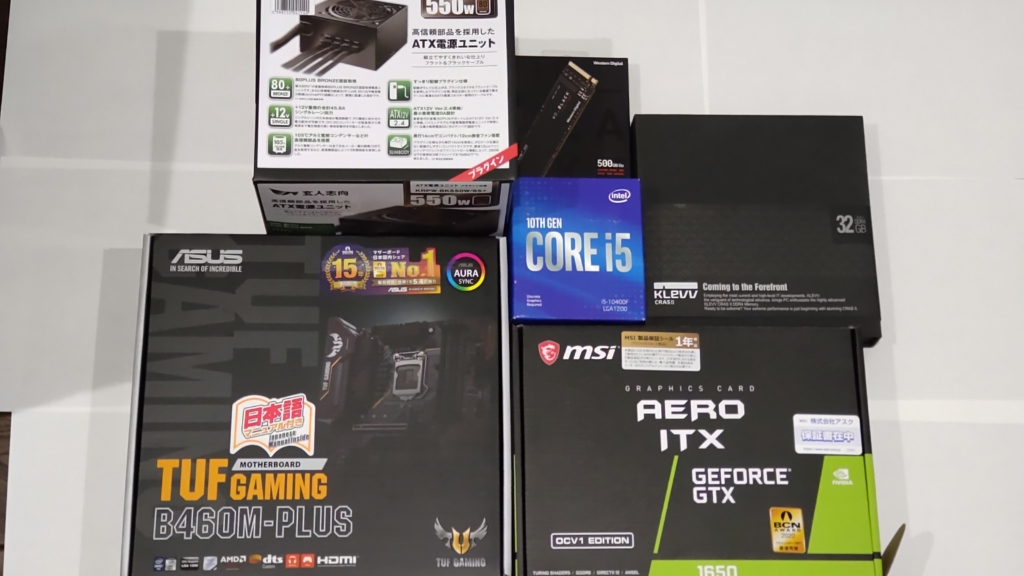
The parts I used are listed below.
I reused the PC case, hard drive, Blu-ray drive, and OS from my previous setup, so the total cost ended up being just a little over ¥70,000 (see the table below).
In the far-right column of the table, I’ve included the lowest prices for the OS and PC case as of May 30. (As mentioned in the article “【PC for 3DCG Beginners】Parts & Benchmarks" 16GB of memory is sufficient, so I’ve used the price of 8GB x 2 as a reference.)
While the graphics card prices have been rising, all the parts, including the OS, cost about ¥100,000.
| Part | Manufacturer | Model | Specs | Price at Purchase | May 30 Lowest Price |
| Total | Total \72,151 | Total \100,564 | |||
| CPU | Intel | Core i5 10400F BOX | 6 cores, 12 threads, 2.9GHz | \16,440 | \16,980 |
| Memory | Essencore | KM4Z16X2A-3000-0 | DDR4-3000(OC), 16GB x2 | \13,900 | ¥8,220 (Essencore 8GBx2) |
| Motherboard | ASUS | TUF GAMING B460M-PLUS | Intel B460, Micro-ATX | \10,820 | ¥13,480 |
| Graphics Card | MSI | GeForce GTX 1650 D6 AERO ITX OCV1 | GTX1650 GDDR6 4GB | \17,490 | \30,800 |
| Power Supply | 玄人志Kurotoshiko | KRPW-BK 550W/85+ | 550W, 80plus-Bronze | ¥5,181 | ¥5,181 |
| M.2 SSD | Western Digital | WD Black SN750 NVMe WDS500G3X0C | 500GB, Read 3470 / Write 2600 MB/s | \8,320 | ¥9,485 |
| PC Case | Xcilio | Nighthawk | ATX, MicroATX対応 | (Reused old PC) | \3,938 (Thermaltake Versa H26) |
| Hard Disk | Western Digital | WD 10EADS | SATA, 1TB | (Reused old PC) | – |
| Blu-ray Driveイブ | ATAPI | iHOS104 | DVD Recording / BD Playback – | (Reused old PC) | – |
| CPU Grease | Intel | CPU Cooler included grease | – | – | |
| OS | Microsoft | Windows 10 | (Reused old PC) | \12,480 |
The reason I selected these parts is detailed in another article, “【PC for 3DCG Beginners】Parts Selection & Benchmarks" but this configuration meets the recommended specs for Blender.
Also, the power supply has enough capacity, so upgrading the graphics card in the future is possible!
Feel free to refer to this for your parts selection 😊
[February 19, 2022 Update]
I upgraded my graphics card to the RTX3050!!
For a review on how much the performance improved, I’ve summarized it in this article, so please take a look!
【3DCG Custom PC】RTX3050 Review – Cycles Rendering & Gaming Performance Check
Also, I’ve summarized the steps for replacing the graphics card, so please refer to this article as well.
【3DCG Custom PC】Graphics Card Replacement Procedure
Assembly Procedure
Below are the detailed steps for assembling the PC:
- Remove Old Parts from the PC
- Install the CPU
- Install the Memory
- Perform a Functionality Check
- Install the SSD
- Attach the Motherboard to the PC Case
- Install the Graphics Card
- Install and Connect the Power Supply
- Install Windows
Removing Old Parts from the PC
In my case, since I was replacing the parts in my old PC, I started by removing the components. If you’re building a new PC, you can skip this part 😅
First, remove the side panel of the case.
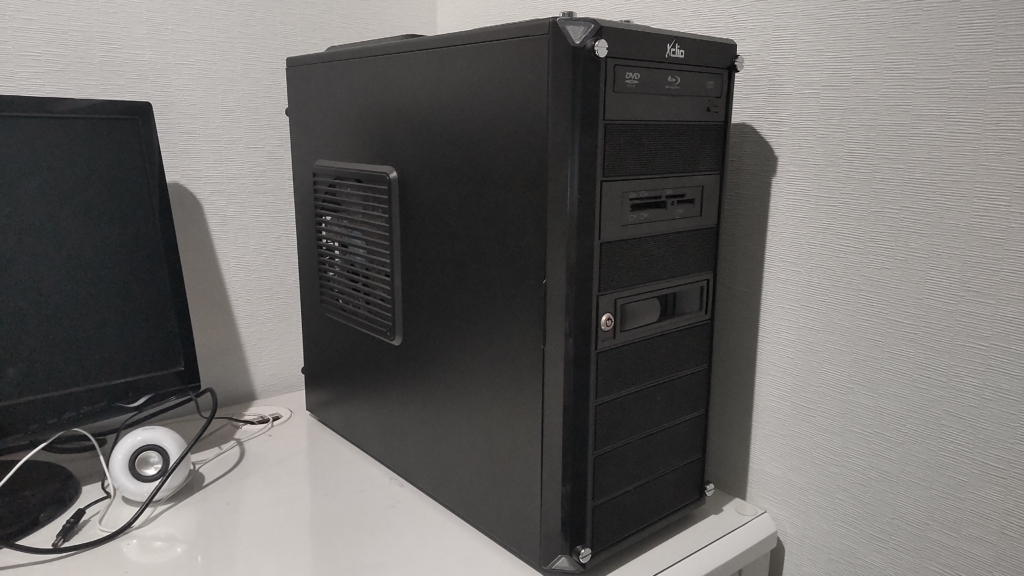
After removing the panel, it will look like this. I apologize for the messy wiring—it’s a bit of a jumble 😅
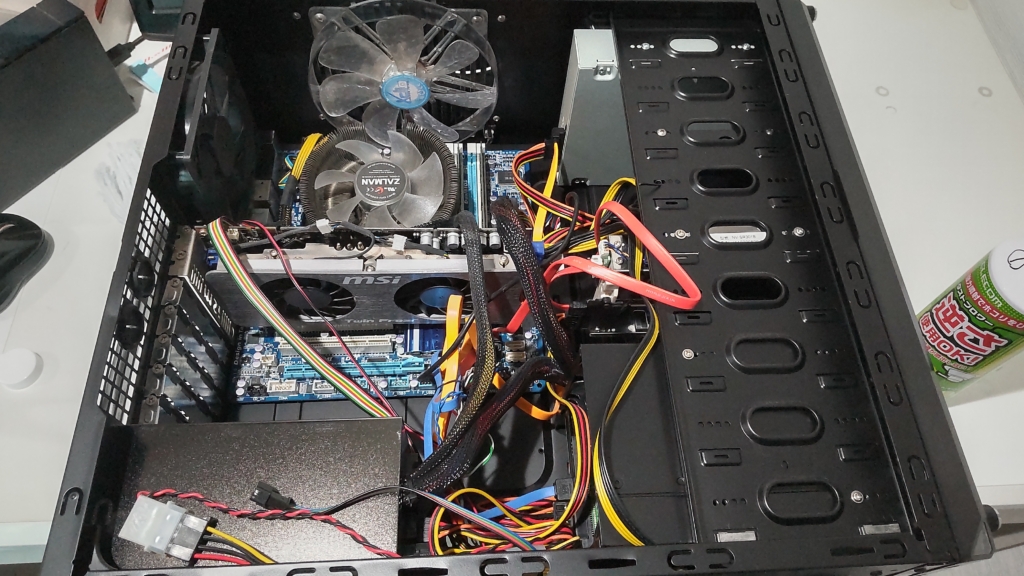
Once all the cables connected to the motherboard and graphics card are disconnected, remove the graphics card and power supply.
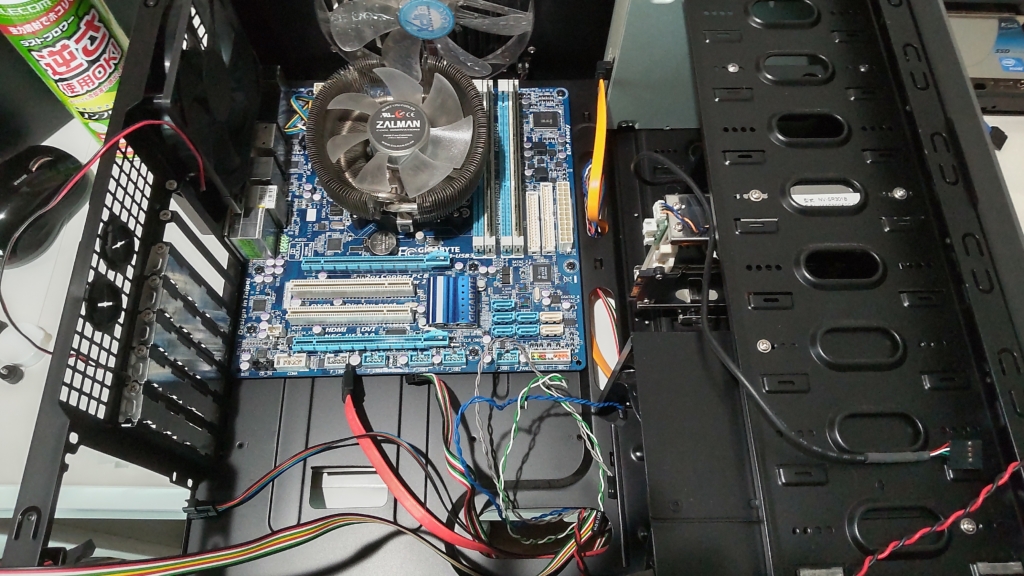
Next, unscrew the screws securing the motherboard to the case and remove the motherboard.
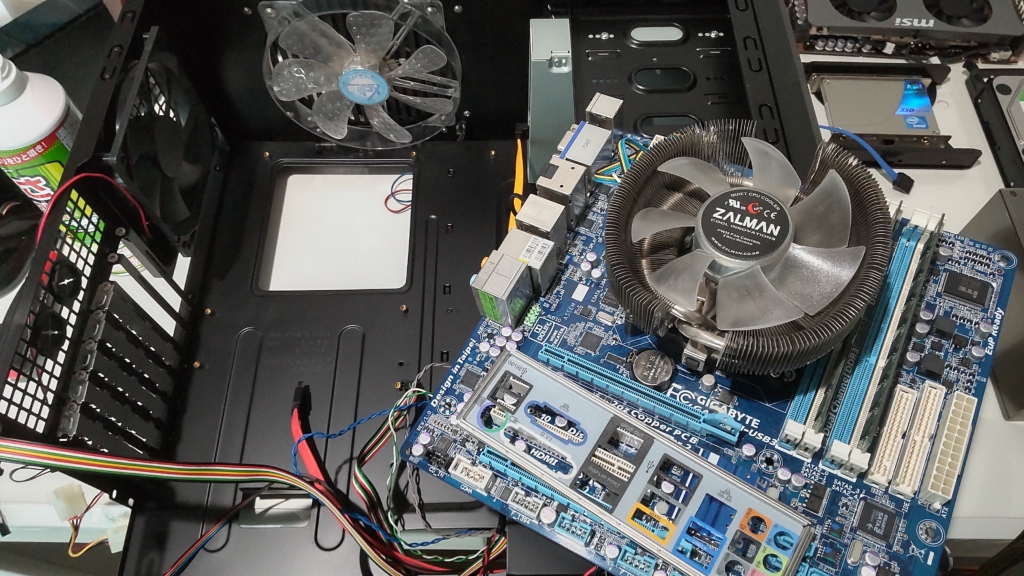
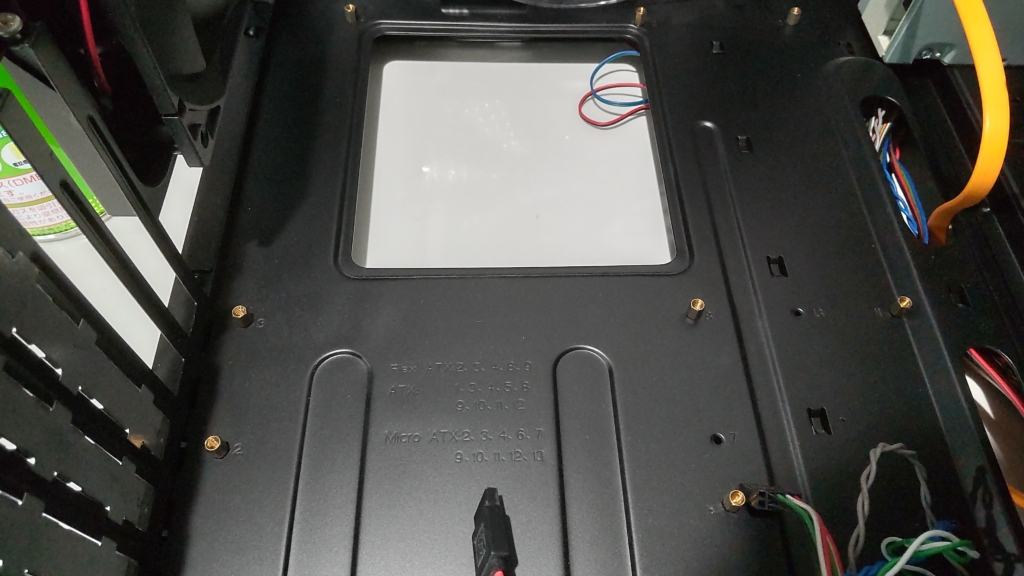
If there’s dust accumulated, it’s a good idea to clean the inside of the case with an air duster or anti-static brush at this point.
Installing the CPU
First, take the motherboard out of the box and anti-static bag, and place it on top of the box. This way, the back of the motherboard won’t touch the desk and get scratched, and it’ll also make it easier to install the CPU cooler later.
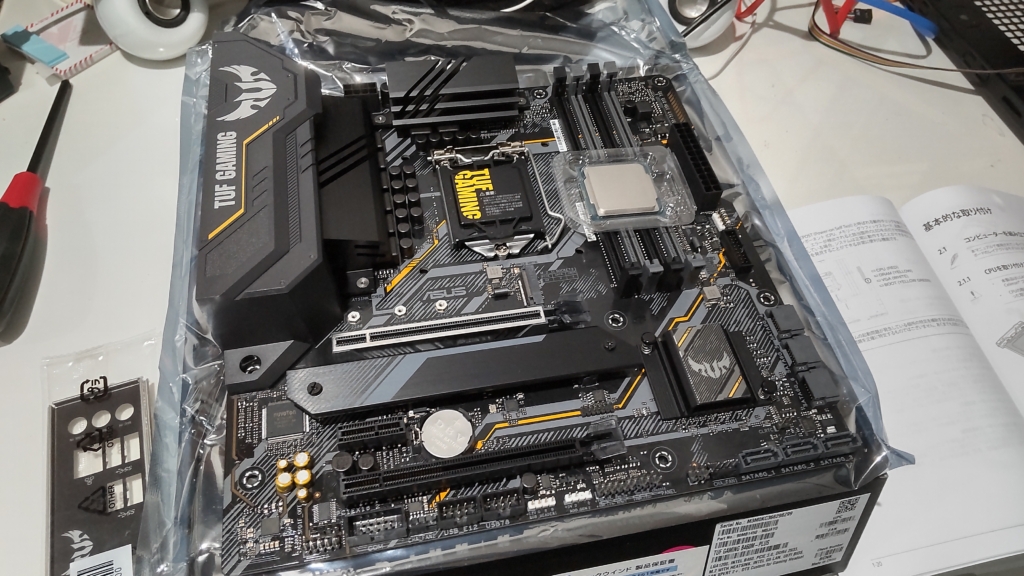
Open the protective cover of the CPU socket. The specific way to do this can be found in the motherboard manual, so please check that 😅
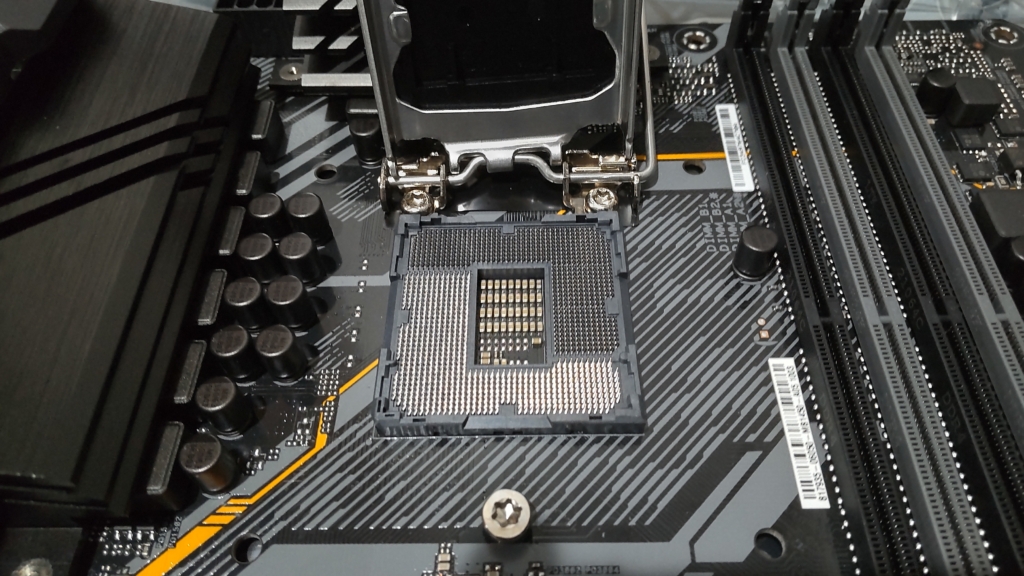
Now, it’s time to place the CPU into the socket 😊
Align the ▼ mark on the CPU with the one on the lower left corner of the socket and gently place it in. Be careful not to drop the CPU or bend the pins, as this can cause errors! 💦
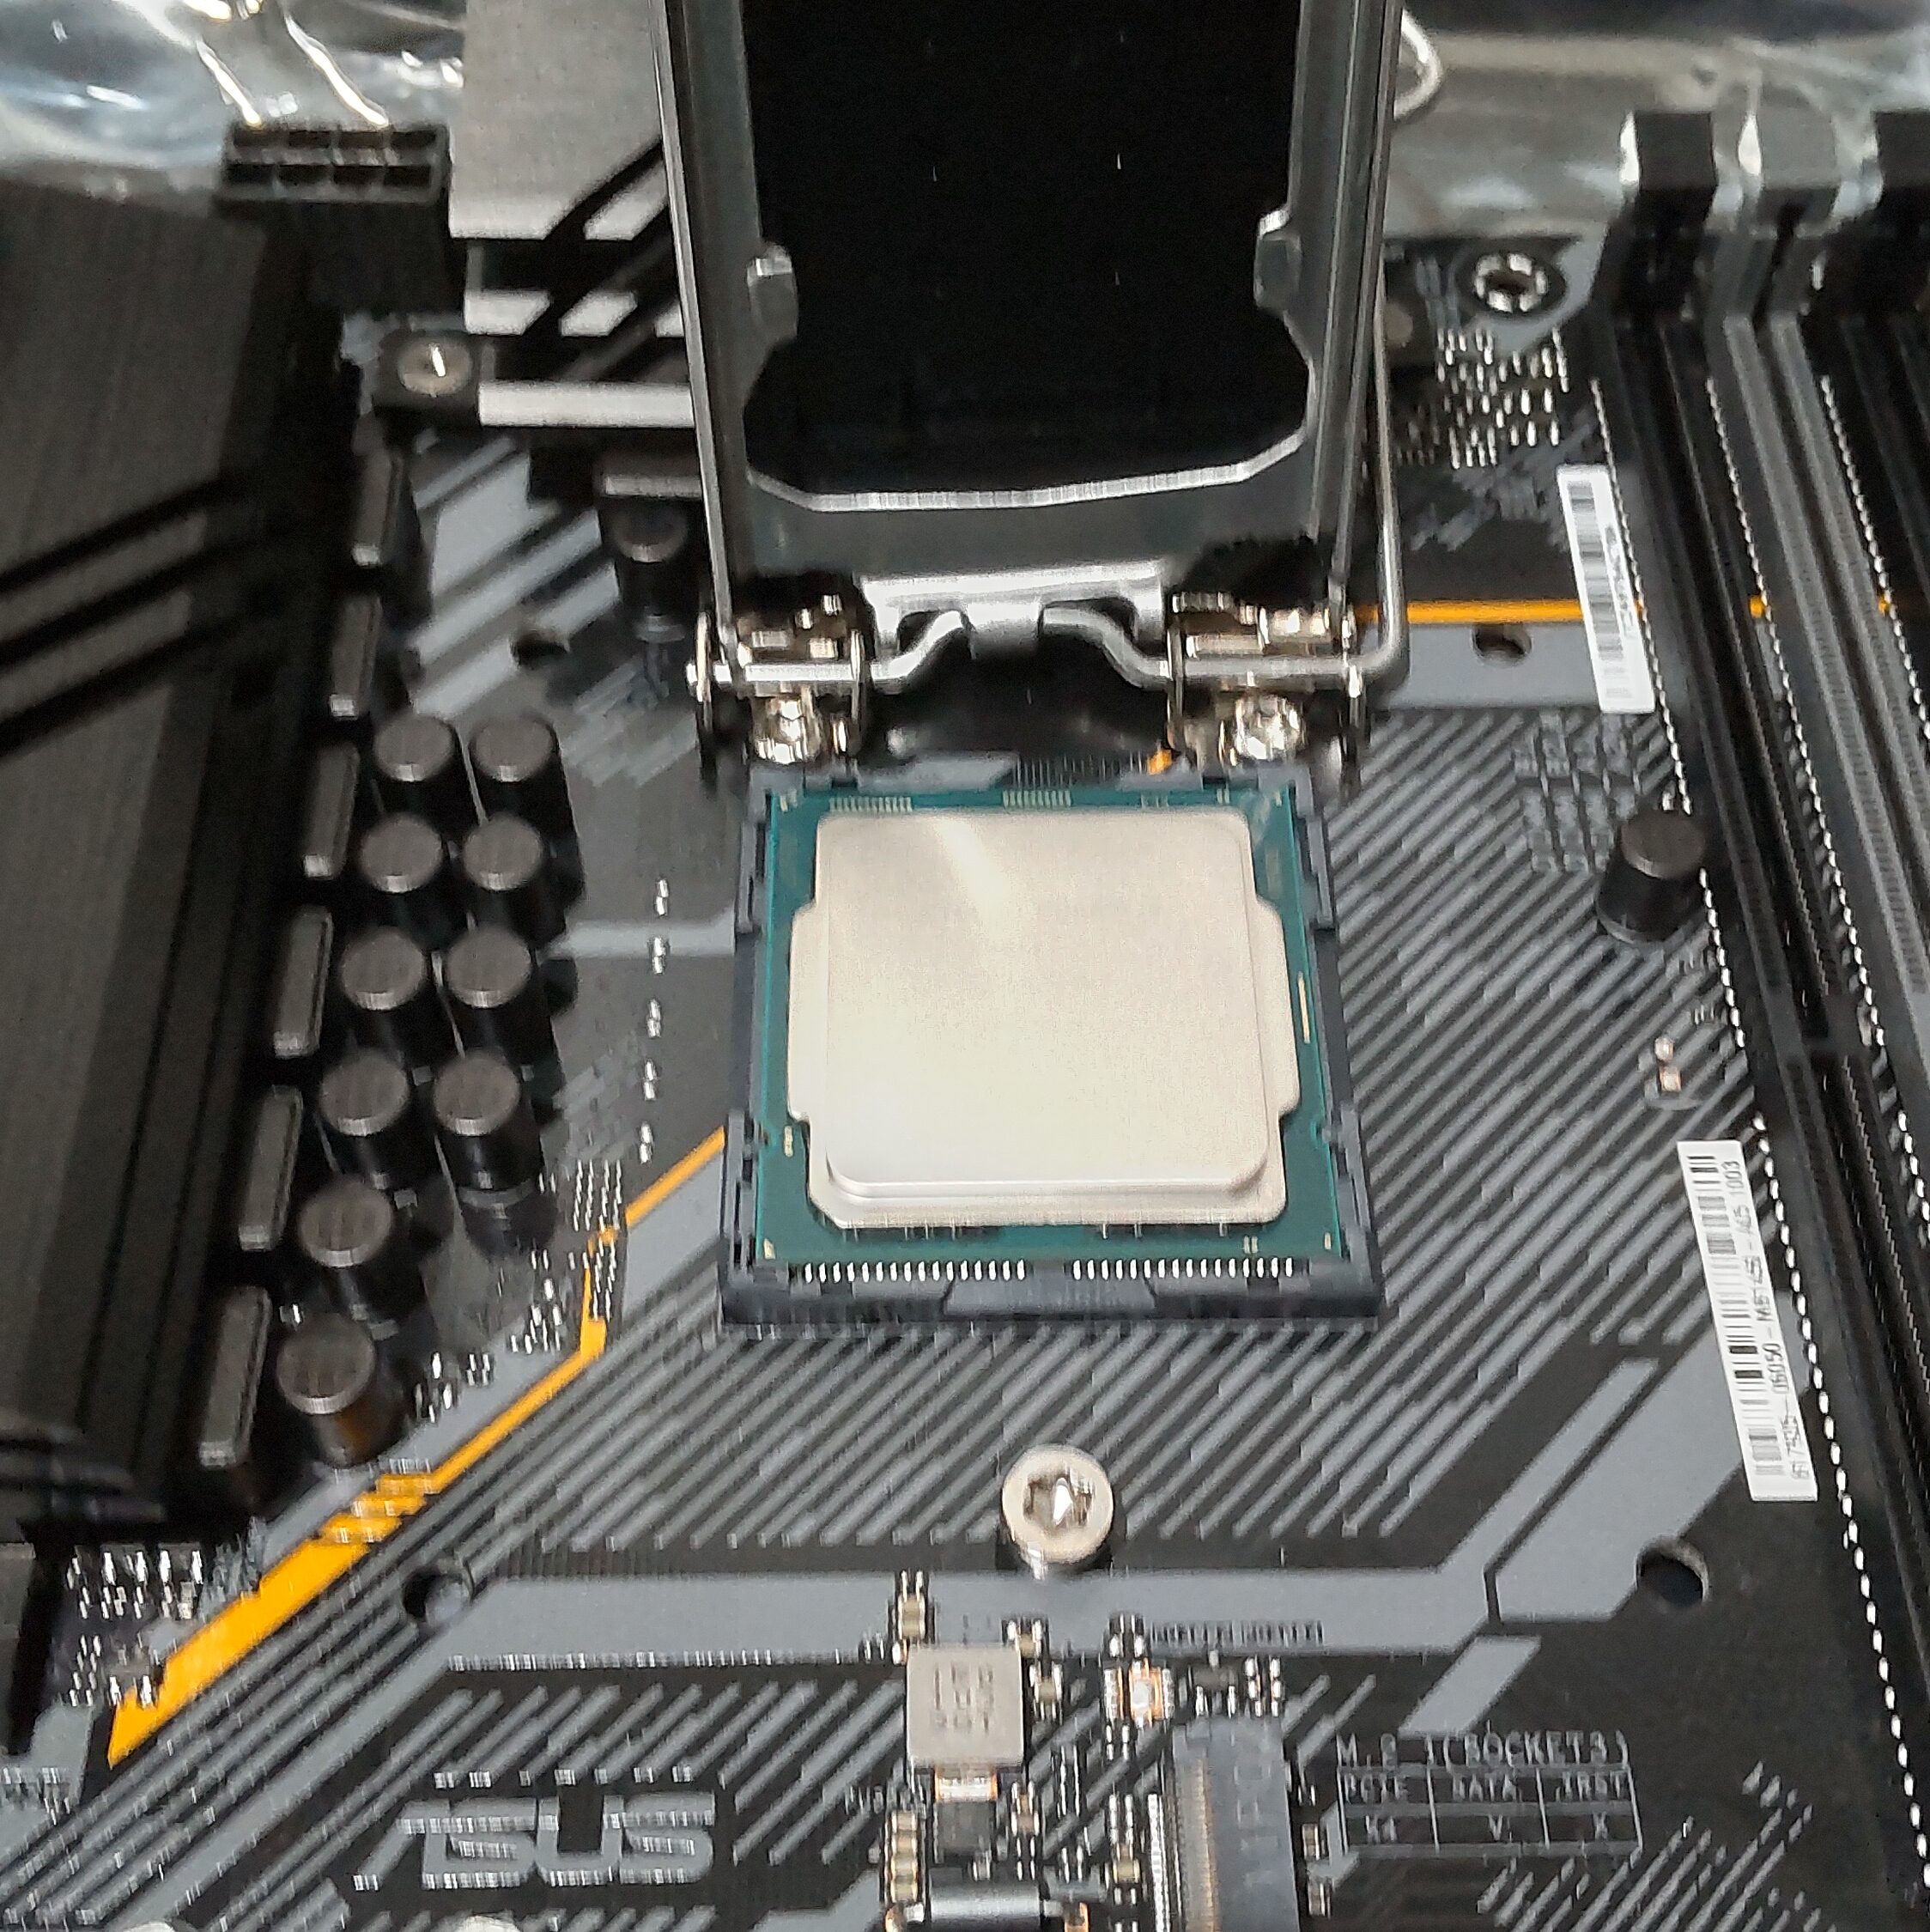
Once the CPU is in place, cover the socket with the protective lid.
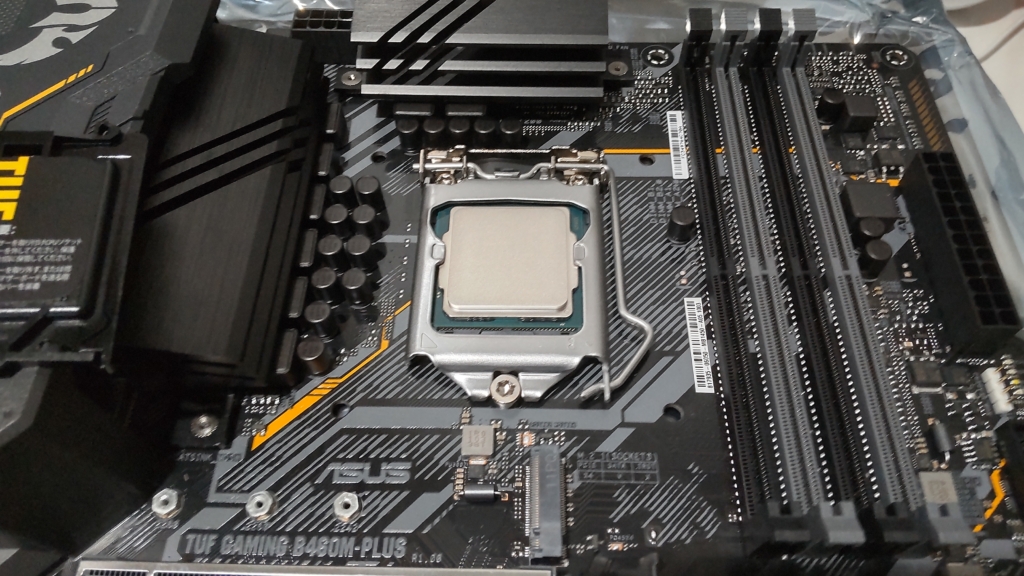
Next, install the CPU cooler. Since the Core-i5 10400F I’m using is known for its low heat output, I used the stock cooler.
If you’re concerned about fan noise, switching to a popular CPU cooler like Deepcool’s “AK400" might make you happier 👍️✨
[PR Link to Amazon]
Normally, you would apply thermal paste to the CPU before installing the cooler, but Intel’s stock cooler already has thermal paste pre-applied.
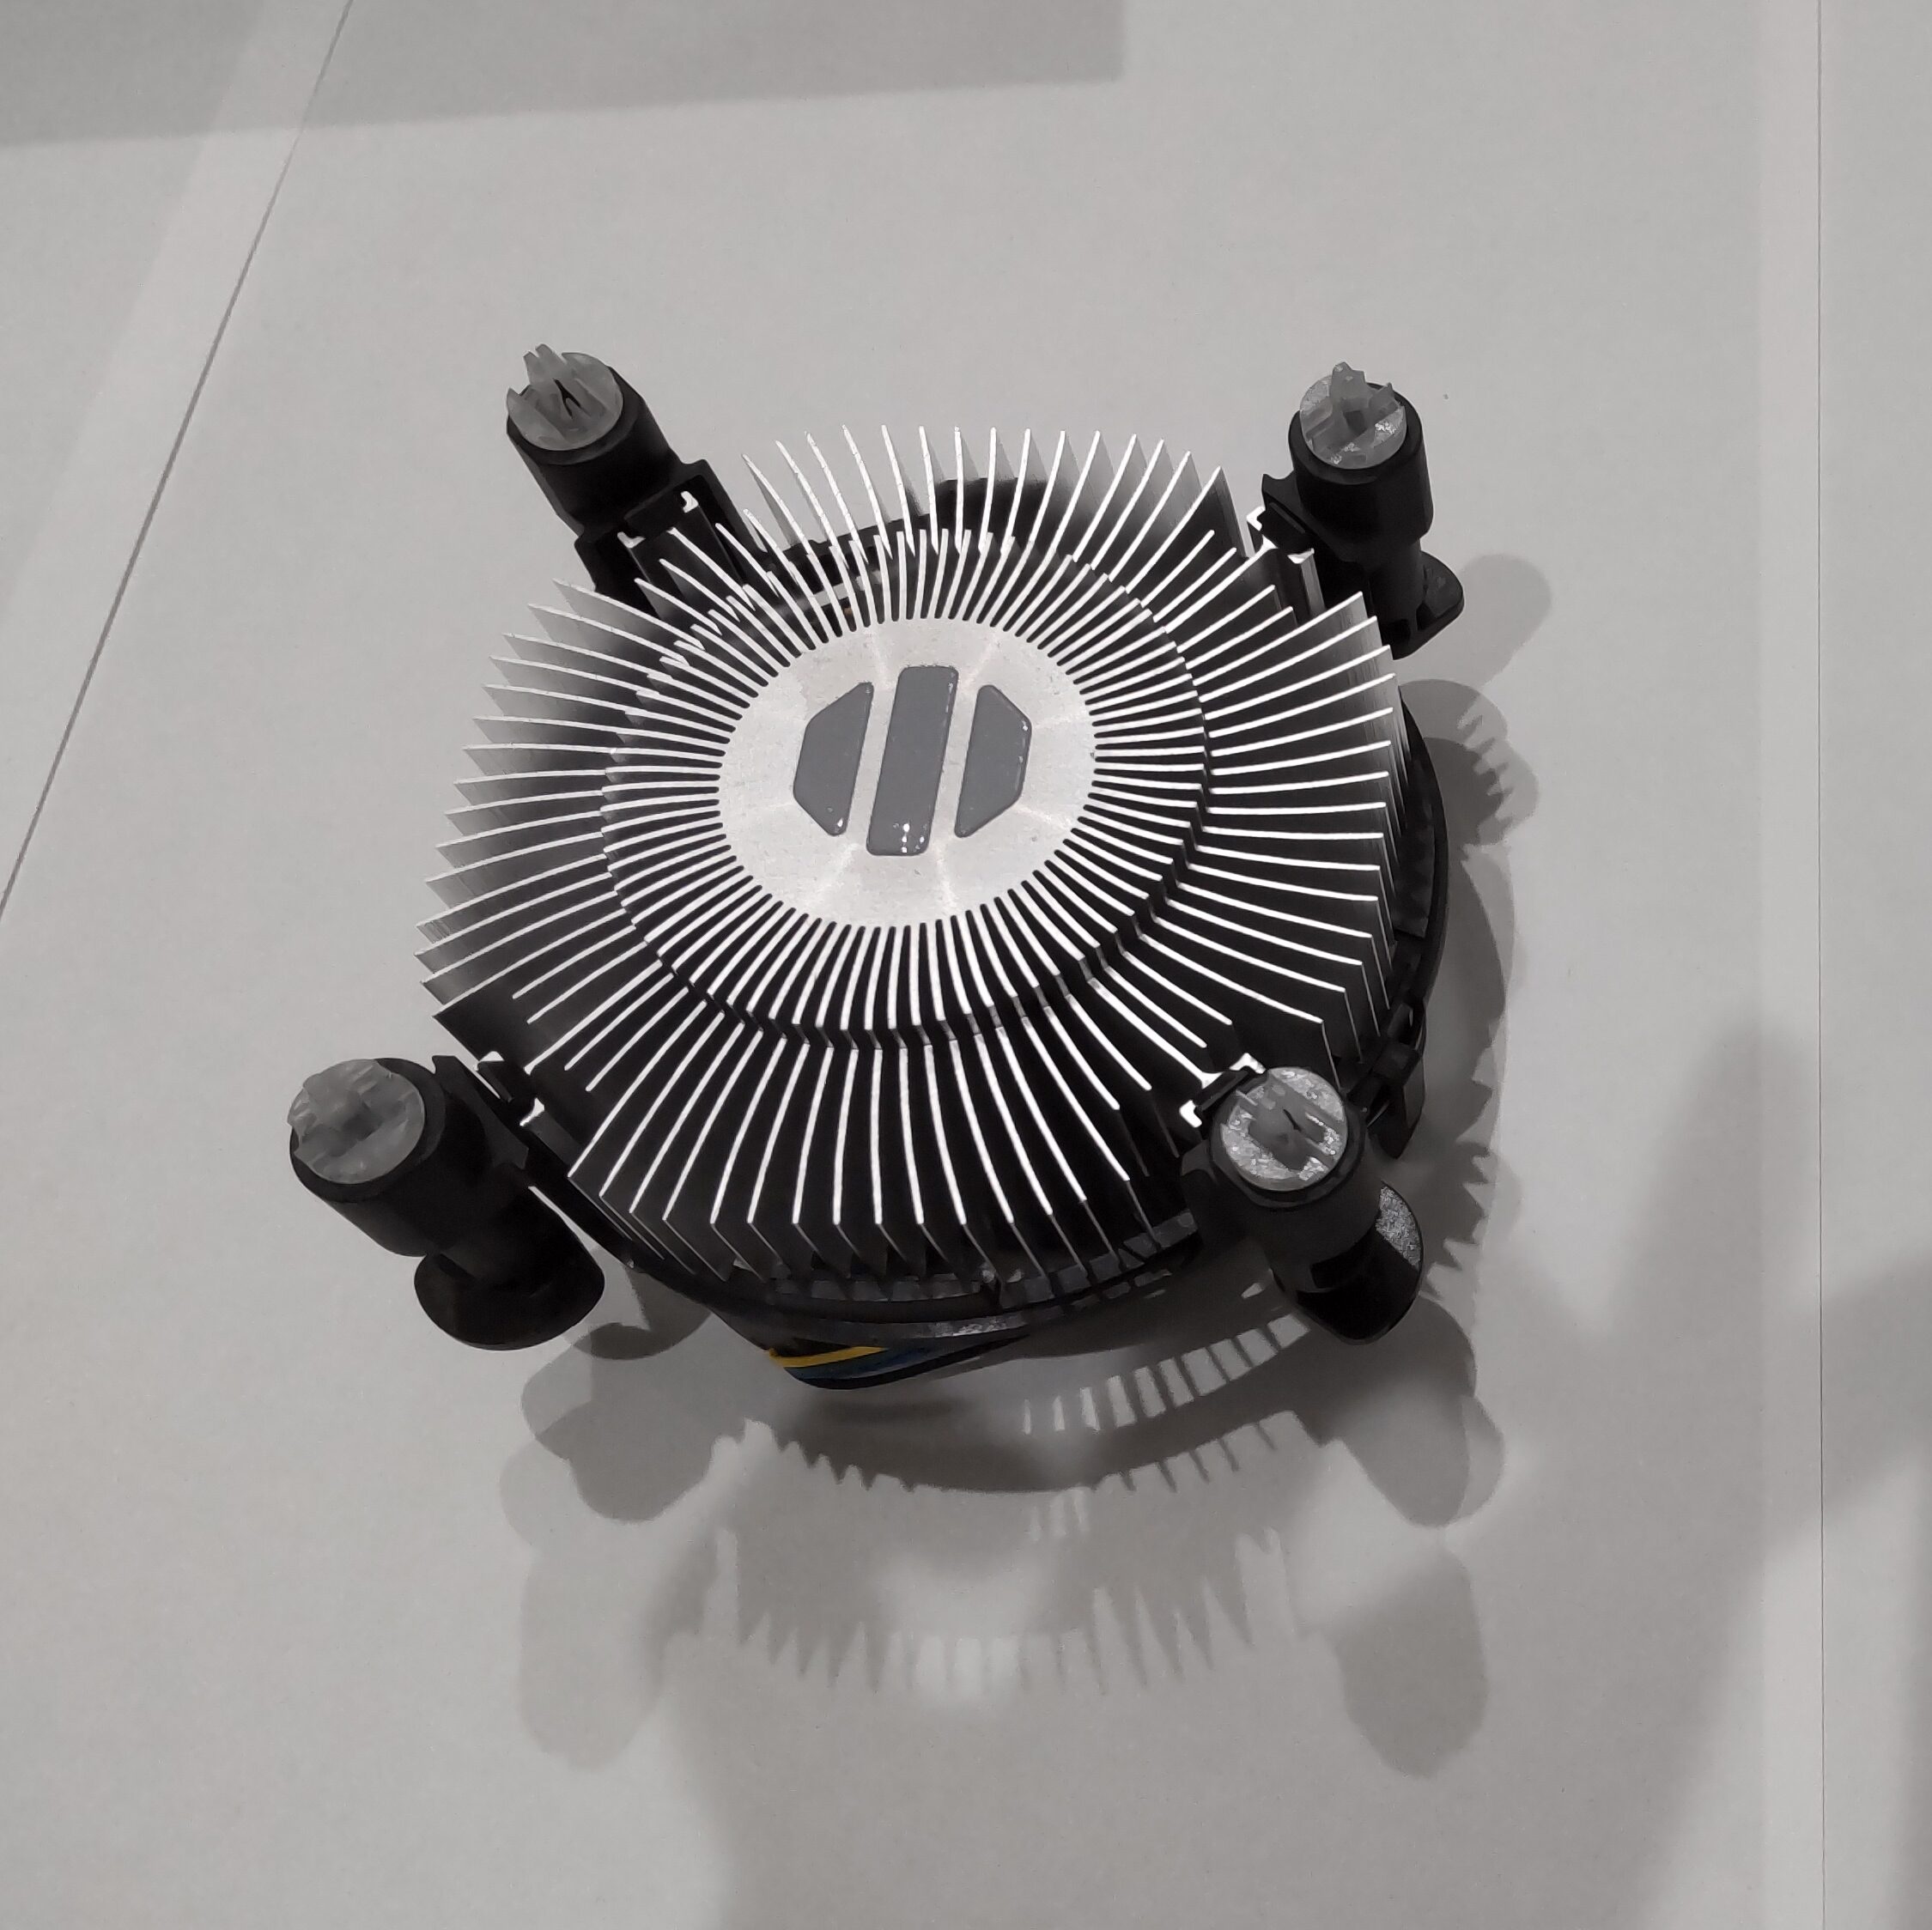
The cooler can be easily attached by simply inserting the four pins!
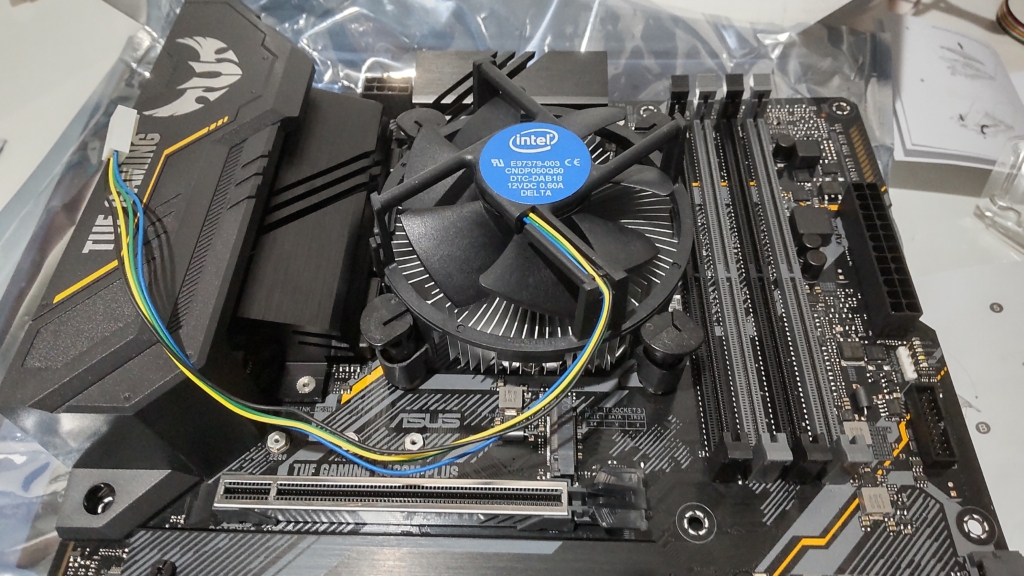
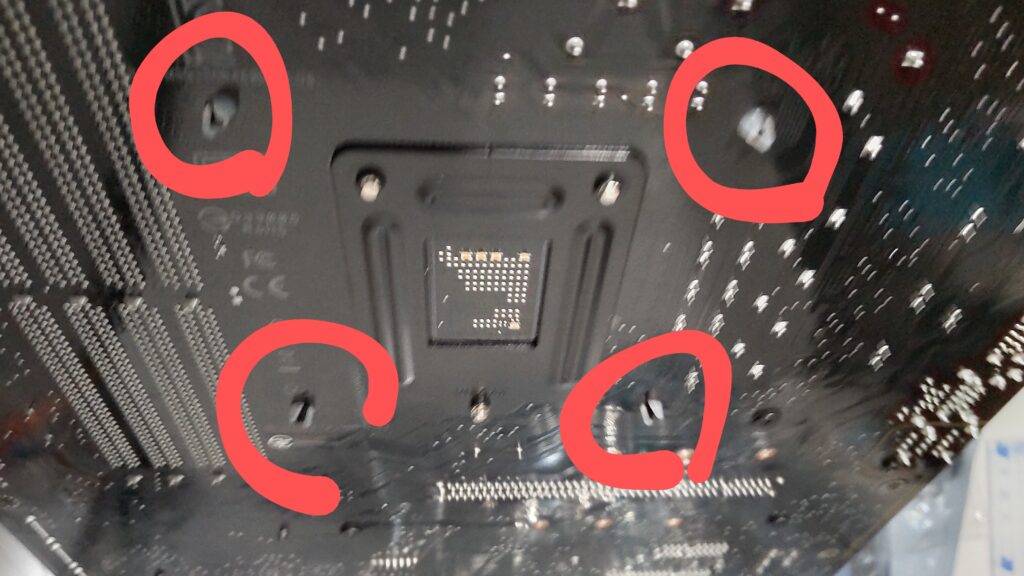
Once it’s securely installed, you can confirm the pins are protruding from the back of the motherboard 👍️
(Sorry for the blurry photo…)
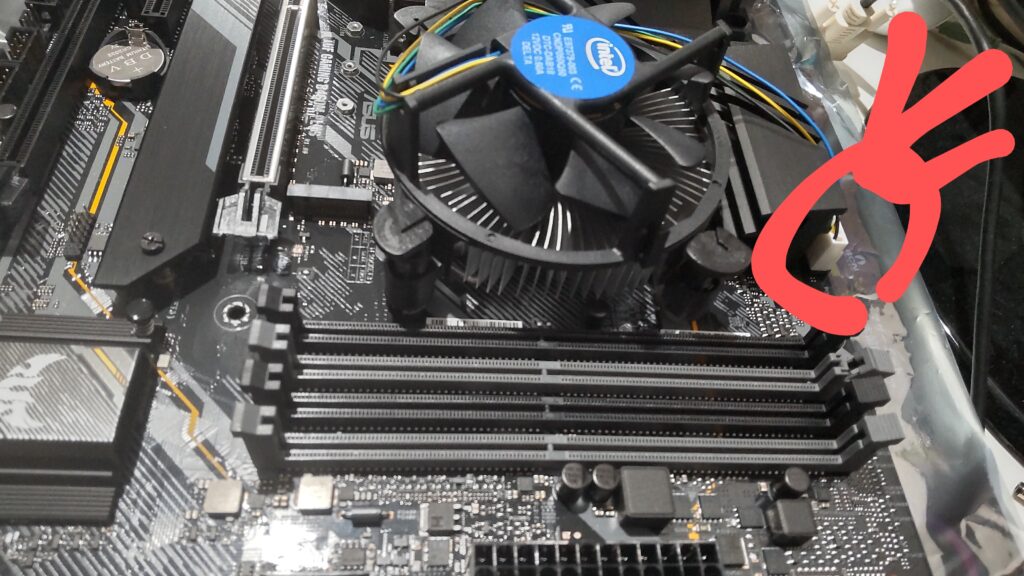
Finally, connect the CPU cooler’s power connector to the “CPU_FAN" header on the motherboard. This completes the CPU installation!
Installing the Memory
Take the memory sticks out of the box. Memory is used in pairs, known as “dual-channel," and when used in pairs, the speed is said to be twice as fast compared to using a single stick. Therefore, memory is usually sold in sets of two or four. The memory I’m using is a set of two.
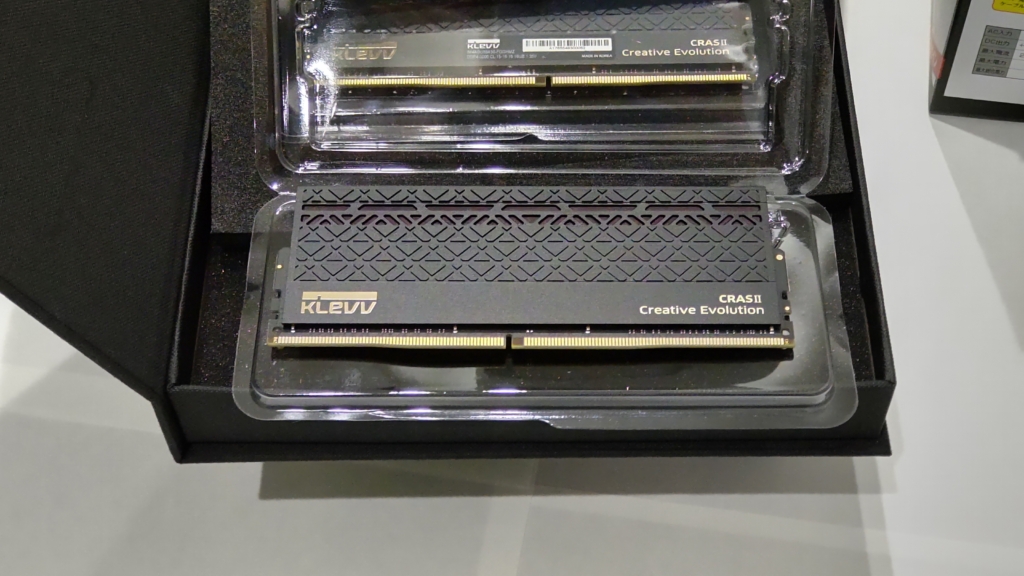
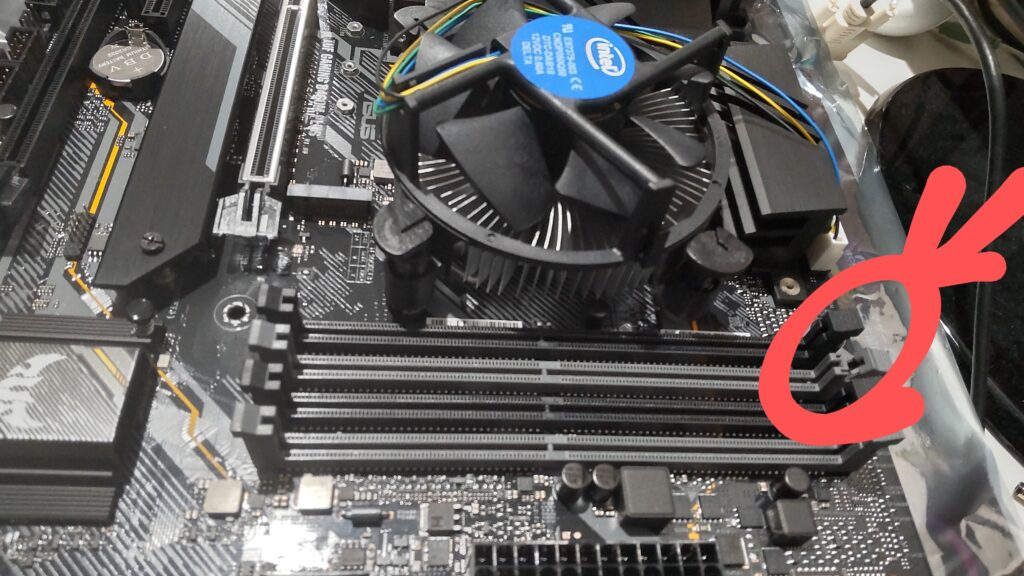
For the initial check, I will install only one stick of the two. You can insert it into any of the four memory slots. Before inserting, make sure to open the “latch," which is the lever used to lock the memory in place, as shown in the picture.
The motherboard I’m using has a “single-latch" type, where the latch is only on one side, but there are also “dual-latch" types that have latches on both sides.
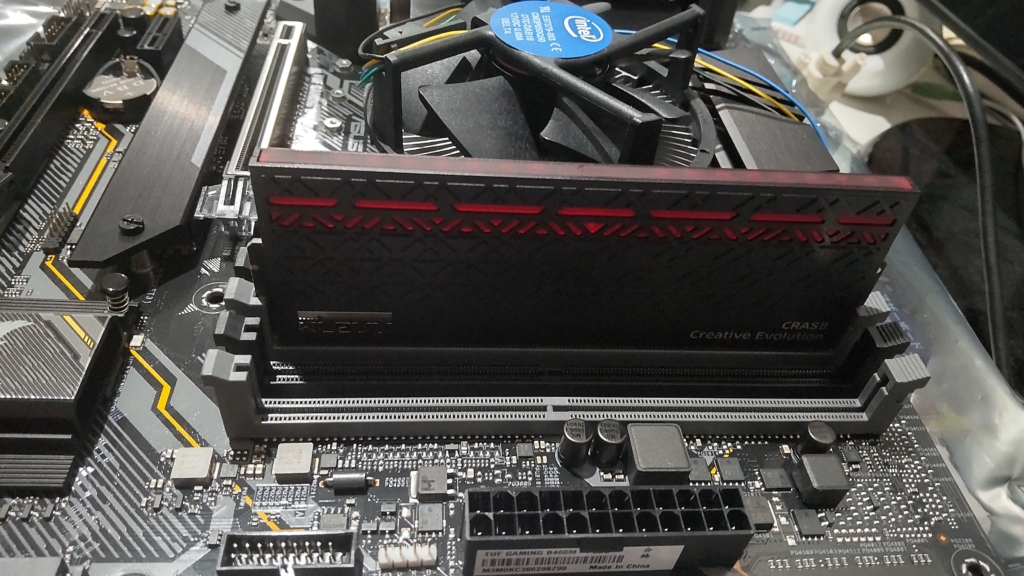
Ensure the notch on the memory matches the notch on the socket, then firmly insert the memory into place. Once it’s properly inserted, the latch will automatically close, securing the memory.
AD
Initial Check
To ensure there are no defective parts, I check the operation with a “minimal configuration" before installing the motherboard into the PC case.
- Motherboard
- CPU & CPU Cooler
- Memory (1 stick)
- Power Supply
- Graphics Card (if the CPU does not have integrated GPU)
Since the CPU I’m using does not have an integrated GPU, I will install a graphics card into the motherboard.
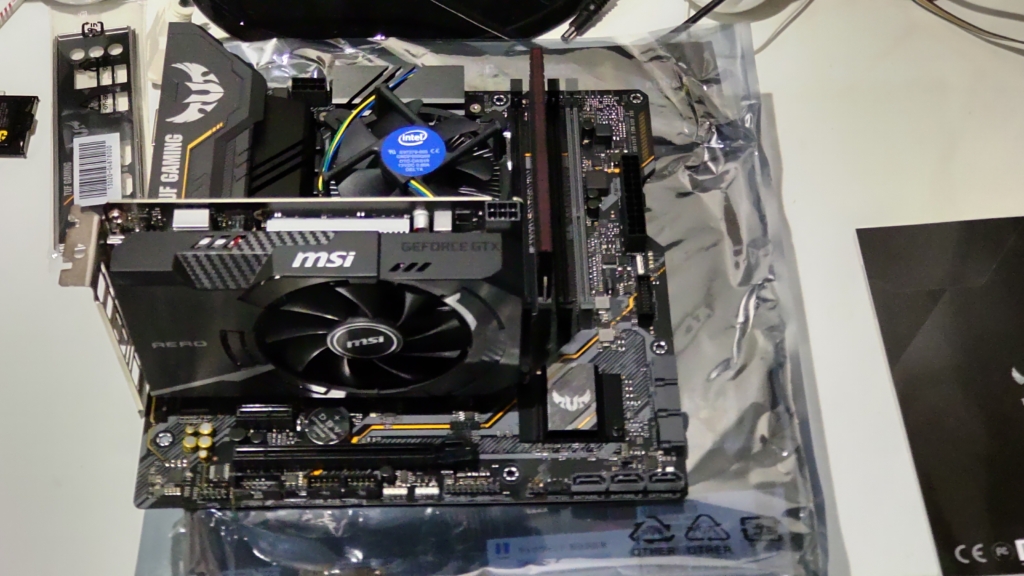
Next, connect the power supply. This time, I will connect the power cables to three locations:
The 20-pin main power supply on the right side of the motherboard
The 4-pin CPU power supply on the top of the motherboard
The 6-pin connector on the graphics card
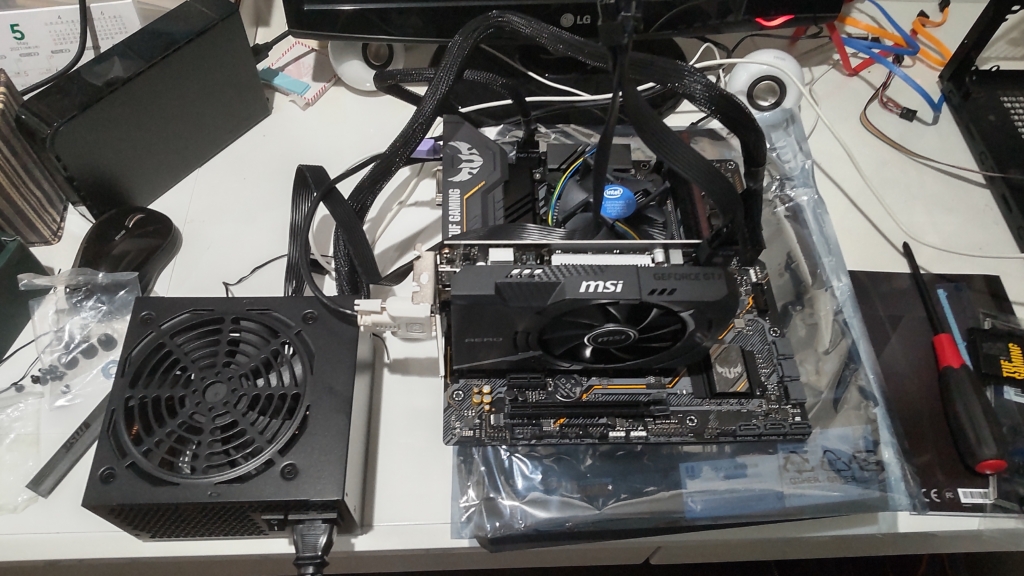
Plug the power cable into the socket, and switch the power switch on the power supply to “ON." The light on the upper-right corner of the motherboard lights up! 😊
This confirms that the power supply is working and providing electricity 💡
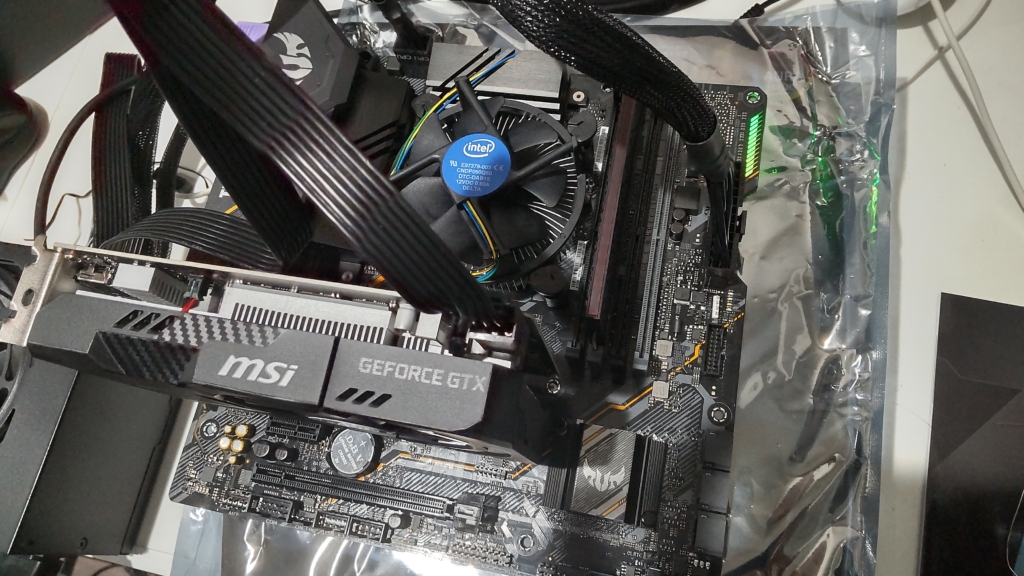
To turn on the PC, short the power switch pins on the motherboard (i.e., briefly touch the metal to connect the pins and allow electricity to flow). For this motherboard, the two pins circled in the diagram need to be shorted.
Check the motherboard manual to find the exact location of the power switch pins.

Once the pins are shorted, the CPU fan will start spinning, and the PC will power on. If it doesn’t start, calmly check whether the pins are properly connected and if the memory is correctly seated. (If re-seating the pins or memory doesn’t help, the issue might be a defective part… 💦)
If everything is working correctly, you should see a screen like this!
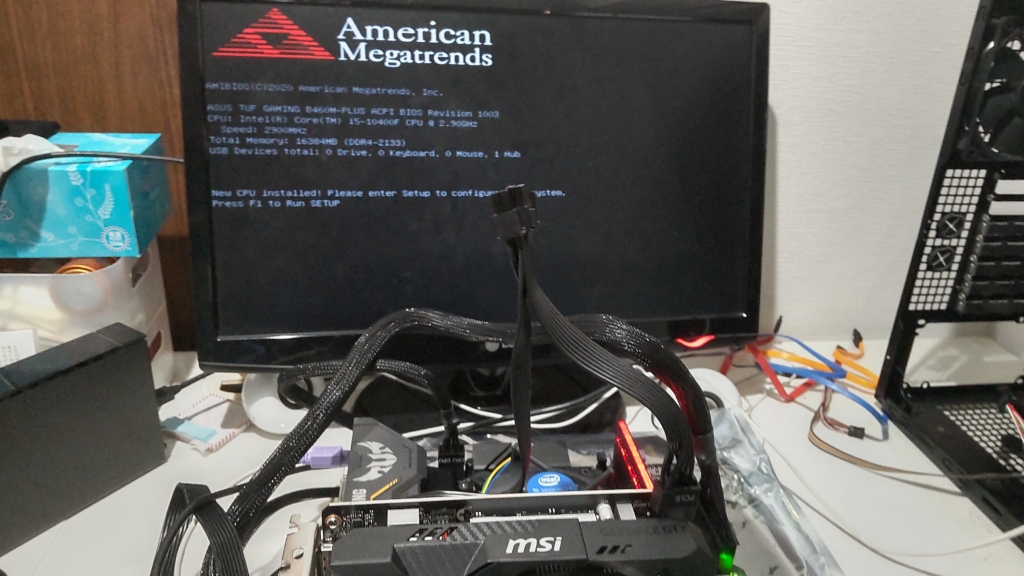
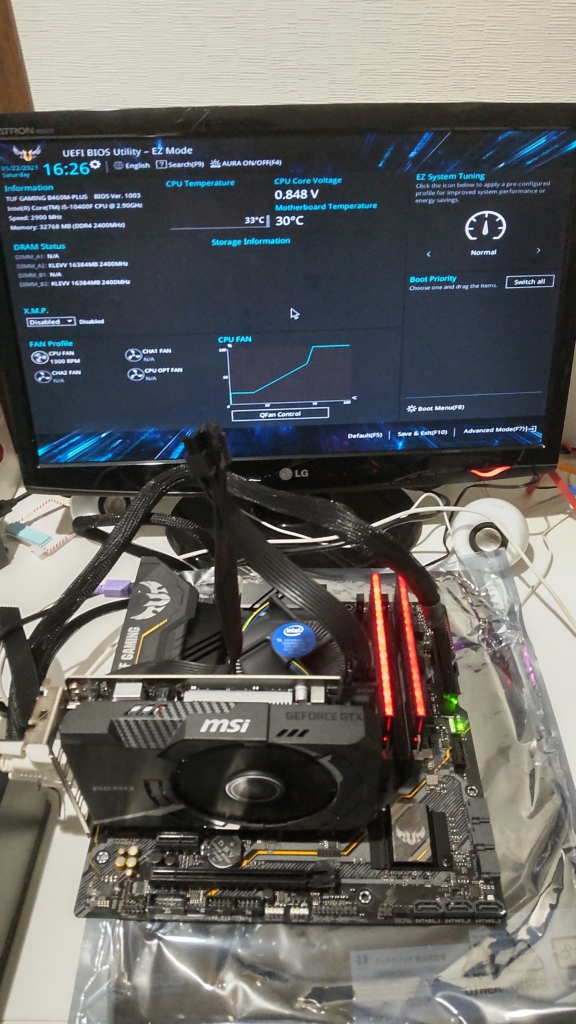
Finally, I also install the second memory stick and confirm that both sticks are recognized in the BIOS screen.
Installing the SSD
After turning off the power, I remove the graphics card and power supply for now.
The SSD I am using is an M.2 SSD, so I will install it into the M.2 socket on the motherboard.
Using a “+1 size" screwdriver, I remove the screw that holds the M.2 heatsink provided with the motherboard.
Note: Do not peel off the sticker on the front side of the M.2 SSD, as doing so may void the warranty by disconnecting the serial number link. According to“Shallow and Wide! PC Gaming," leaving the sticker on does not significantly affect the cooling performance. (As you can see in the photo, I peeled off the front sticker and attached it to the back side, so I can’t complain about losing the warranty 😅).
Now, I insert the SSD into the M.2 socket.
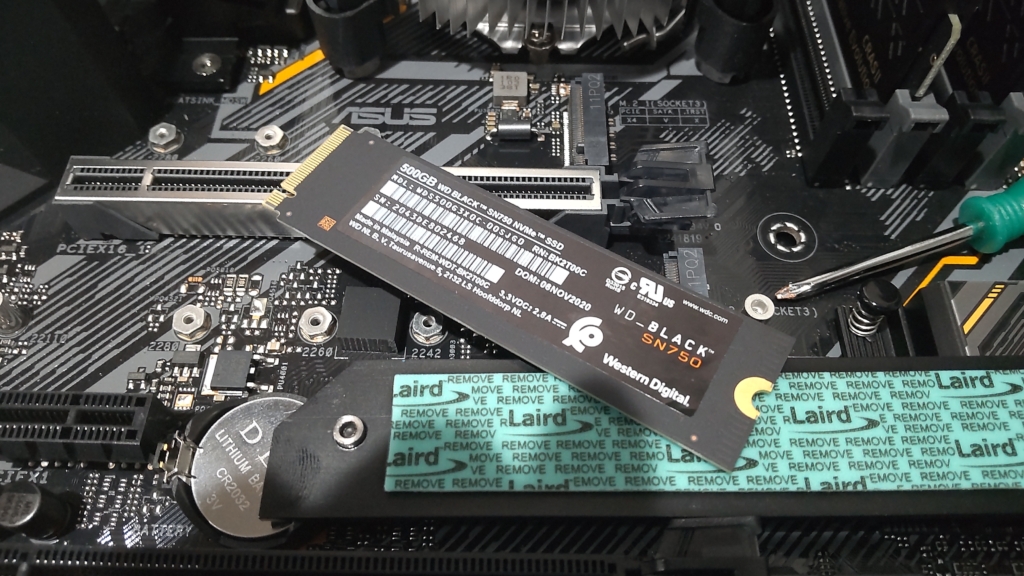
Now, I insert the SSD into the M.2 socket.
After peeling off the blue sticker, a white silicone pad is revealed.
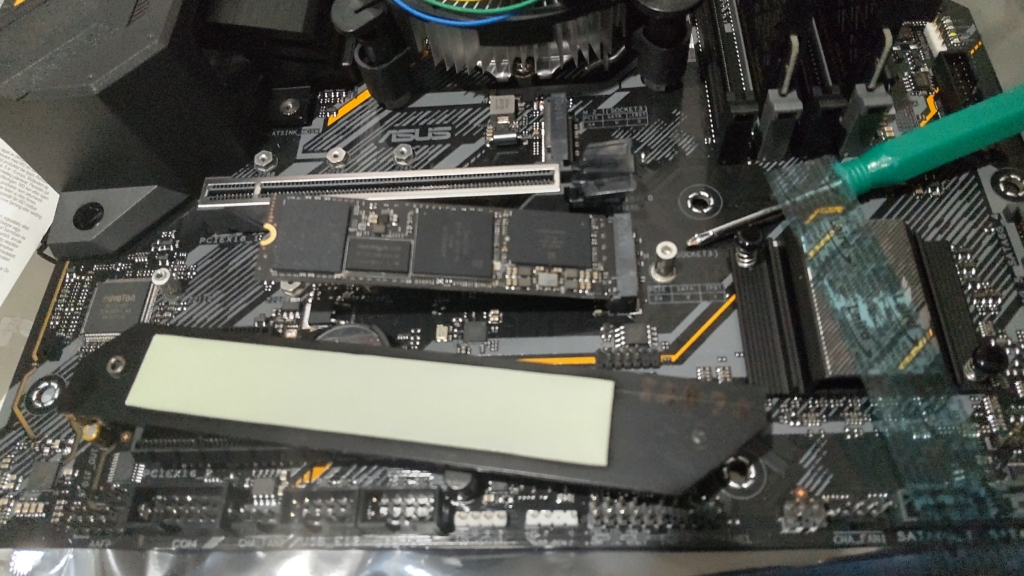
Press the heatsink against the SSD and secure it with two screws. This completes the installation!
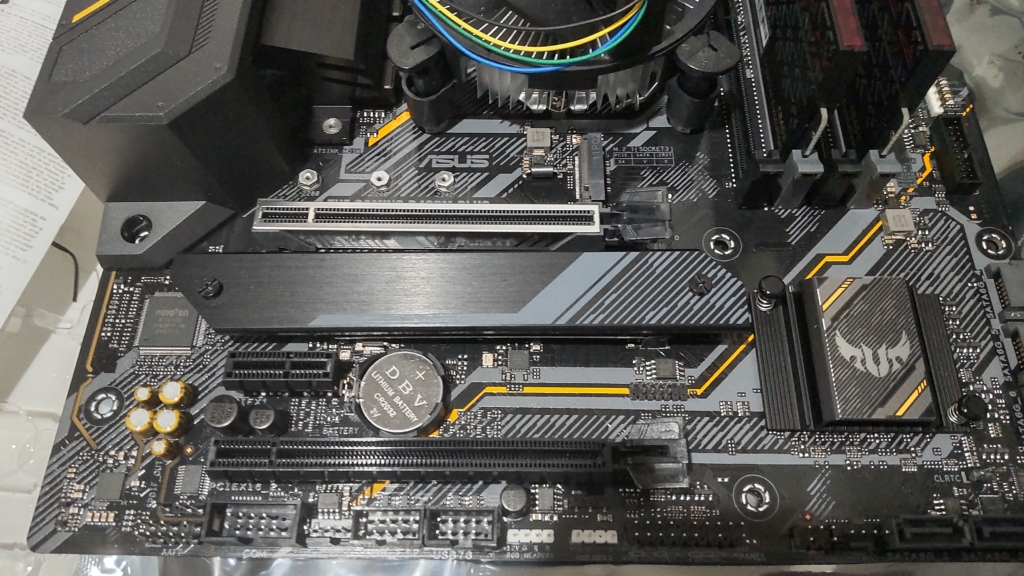
Installing the Motherboard into the PC Case
Before installing the motherboard into the PC case, attach the included backplate to the case.
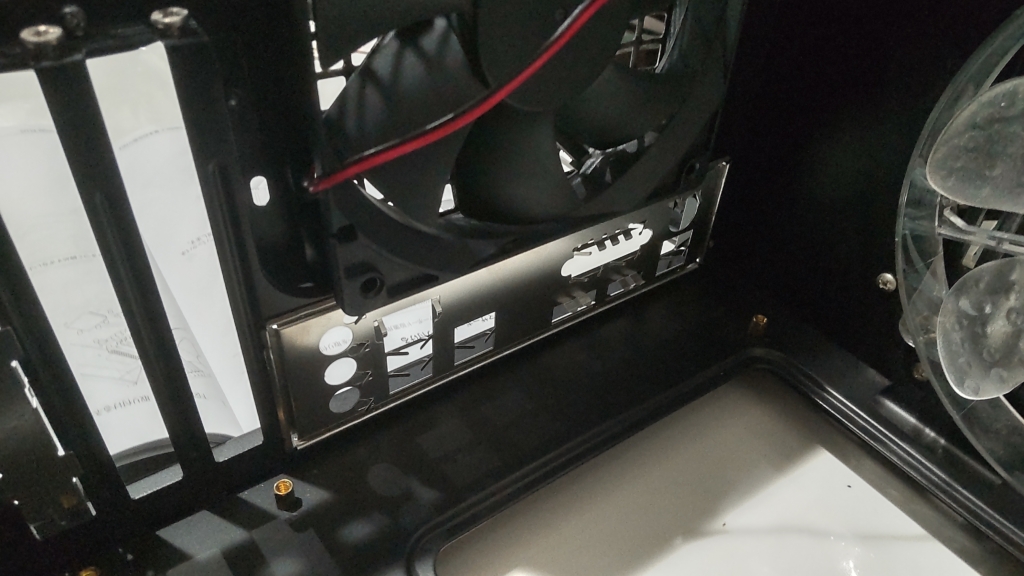
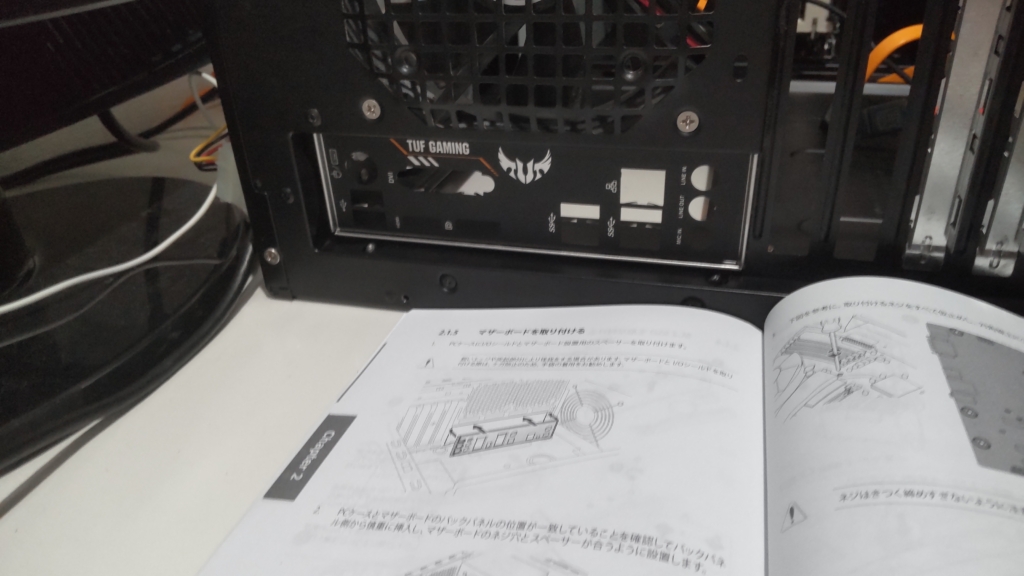
Next, install the “spacers" provided with the PC case at the designated positions.
Since the motherboard in this case is MicroATX, these positions are the 8 points shown in the diagram.

Now, let’s install the motherboard into the PC case!
Align the motherboard’s connectors with the backplate and insert them. If the clips on the backplate interfere with the connectors, you may need to break off the clips.
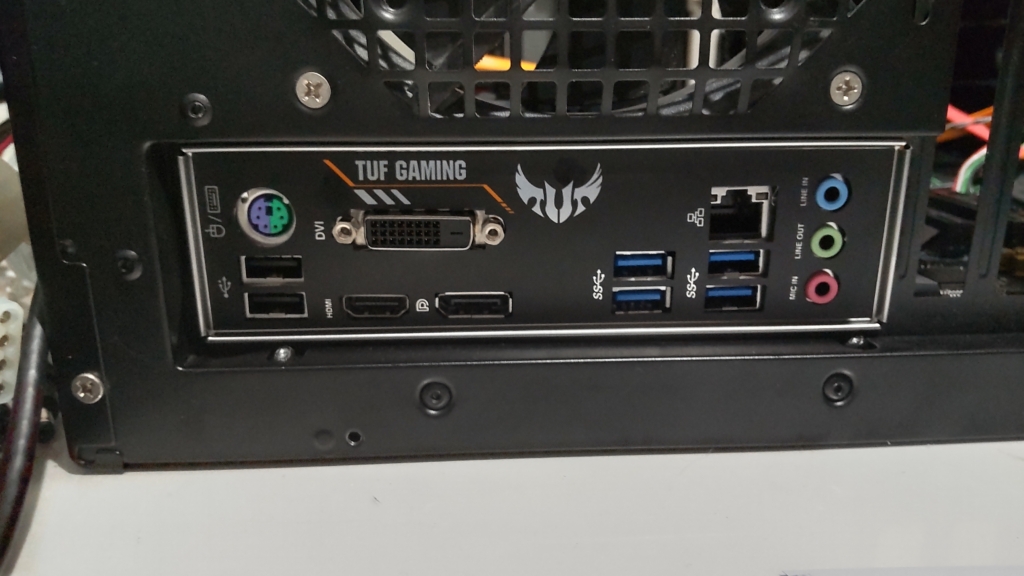
You will be able to see the spacers through the 8 holes on the motherboard. Now, secure the motherboard by tightening the screws provided with the case.
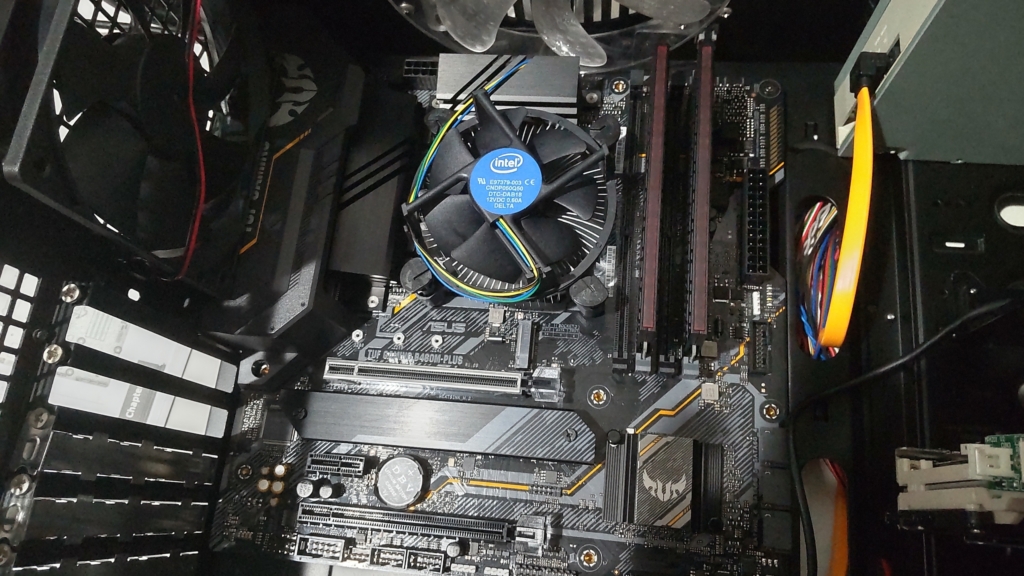
Installing the Graphics Card
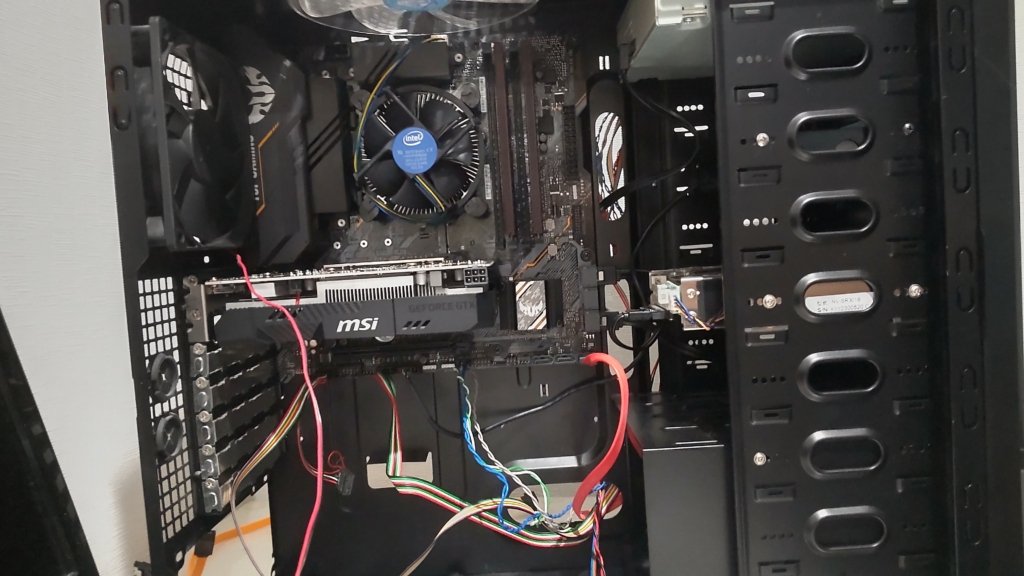
Remove the slots at the back of the case and install the graphics card.
Since the graphics card in this case occupies 2 slots, remove the two slots as shown in the diagram before installing the card.
Power Supply Installation and Wiring
The assembly of the custom PC is now almost complete! 😊
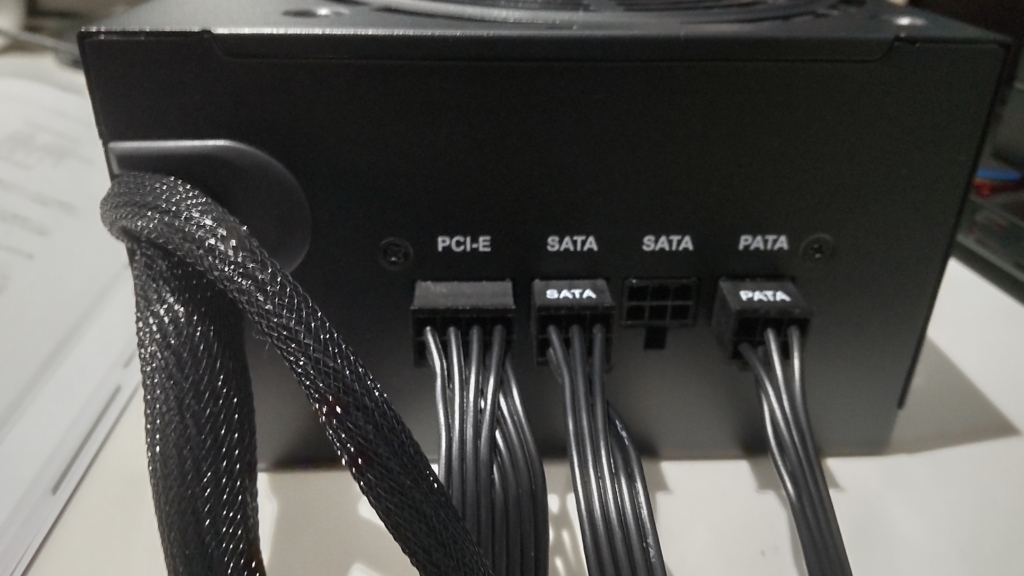
Before securing the power supply in the case, connect the power cables to the power supply (for fully/semi-modular power supplies).
This time, I connected the cables for PCI-E (graphics card), SATA (drives), and PATA (case fans).
(Note: Most recent cooling fans use a 4-pin connector for the graphics card, so PATA might not be needed…)
As we did during the initial setup, connect the power cables to the motherboard, graphics card, etc. To keep things tidy and improve airflow, try to route the cables behind the case as much as possible 💨✨
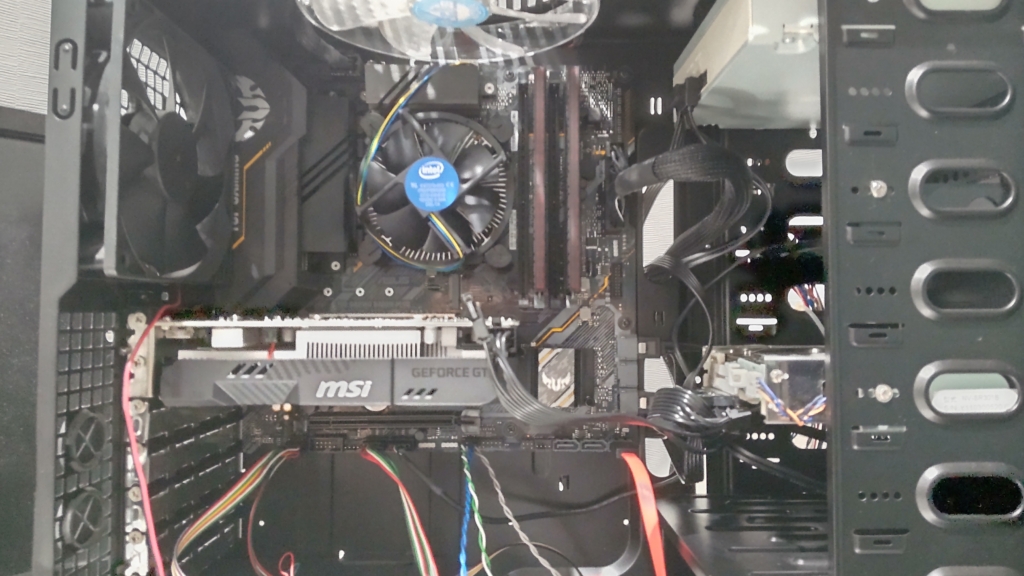
Screw the power supply into the case and organize the cables with cable ties.
Next, connect the cables for the case’s switches, Blu-ray drive, and HDD SATA cables, referring to the motherboard’s manual.
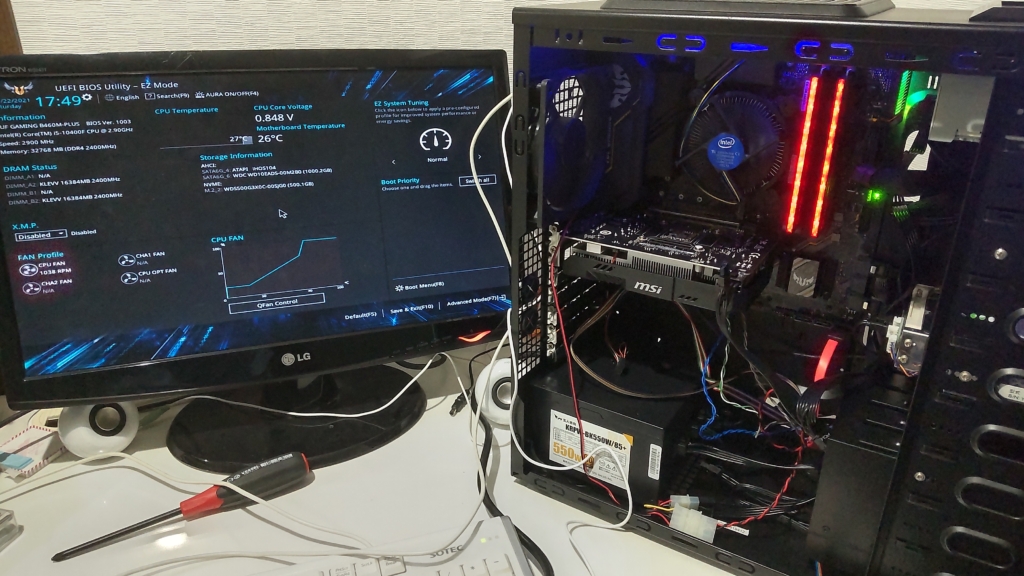
After completing the wiring, check if the BIOS boots up before closing the case.
At this point, your custom PC is complete! 🙌✨✨
Windows Installation
Now, it’s time to install the operating system (Windows 10).
You’ll likely need to use either the media that came with your purchased Windows package or create your own installation media, and then activate Windows using the license from your old PC.
I used the latter method and installed Windows via USB. For detailed instructions, you can refer to websites like ASK’s homepage. (Note: The USB drive must be at least 8GB in size, so be careful about that.)
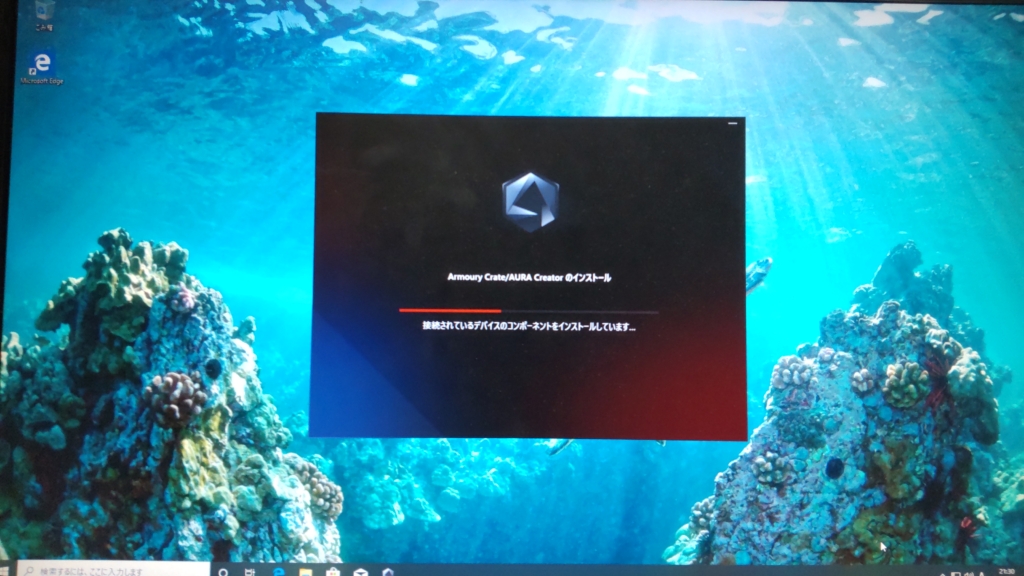
After launching Windows and connecting to the internet, ASUS’s official tools “Armoury Create/AURA Creator" will automatically install.
These tools are useful for driver installations and adjusting the lighting patterns of your components, so I’m glad I went with an ASUS motherboard.
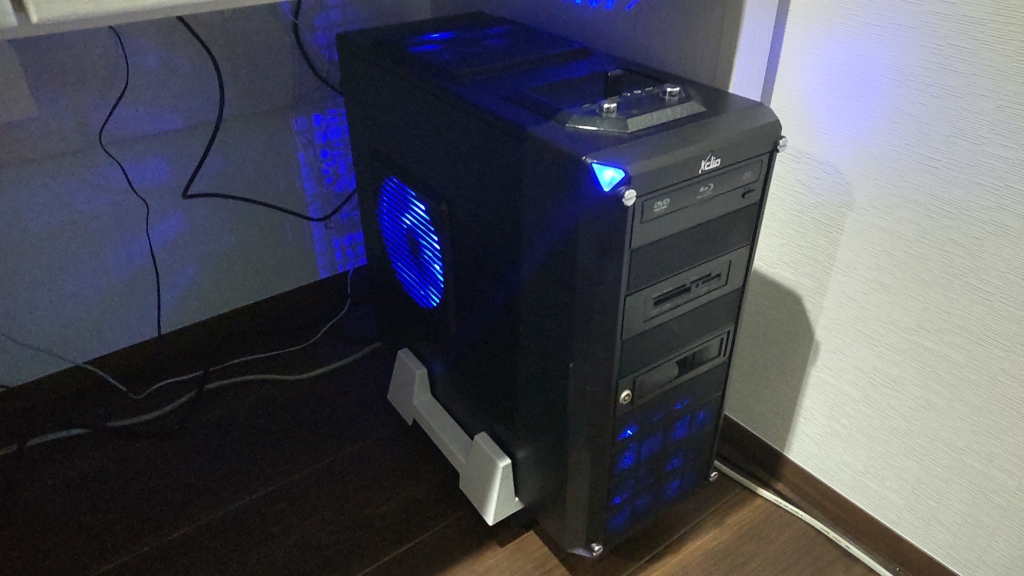
Here is the finished PC!
I placed it on a CPU stand from Sanwa Supply and tucked it under my desk. This way, my desk is more spacious, improving my work efficiency!
Sanwa Direct
https://direct.sanwa.co.jp/ItemPage/100-CPU001
Performance & User Experience
Thanks to the new PC, the rendering speed has increased 10 times!
For more details, refer to the related article “【Blender Beginner’s PC】Parts & Benchmark Overview.“
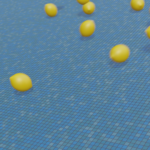
Additionally, I am now able to do particle animations, as shown in the article “Rolling Lemons“, as well as fluid simulations like the one below 😊.
Blender’s recommended specs are amazing!!
AD
Conclusion
I hope you found this guide on assembling a custom PC helpful 😅.
I decided on the parts for this “Beginner 3DCG PC," featuring a combination of Core-i5 10400F and GTX1650, so it should be capable of handling other tasks like gaming as well.
For beginners starting with 3DCG programs like Blender, this spec is a good starting point. As you level up, you can always swap the graphics card or CPU for higher-spec models, which is part of the fun 😊🎵
If you’re planning to build your own PC or are unsure about choosing a computer for 3DCG, feel free to refer to this guide as a reference 😀.
AD


