[Blender 2.93] 7 Useful Shortcut Keys & Modifiers for Car Modeling
Recently, I attempted car modeling for the first time, creating a BMW MINI Cooper S (2007 model). 🚗
The modeling process is summarized in a separate article: “MINI Cooper S Part 1/2". 🖥️
In this article, I will introduce some particularly useful shortcut keys and modifiers for car modeling.
- Part 1: Body Modeling
- Part 2: Exterior Parts Modeling
- Part 3: Chassis & Suspension Modeling
- Part 4: Interior Modeling
- Part 4.1: Dashboard Texture & Animation
- Part 5: Material & Composite Settings
- Part 6: Rigging, VFX (Live-Action Compositing), and Sound Effects
- Cityscape (East London) Background Modeling
- 7 Useful Shortcut Keys & Modifiers for Car Modeling (This Article) (本記事)
If you’re planning to start car modeling or are interested in it, I hope this article will be helpful! 😊
For any questions or feedback, feel free to reach out on Twitter(https://twitter.com/klala_lab)(^^)/
AD
7 Useful Shortcut Keys for Car Modeling
Here are seven shortcut keys that I frequently used during car modeling.
Ctrl + R: Loop CutK: Knife Tool (Face Cutting)M: Merge (Vertex Merging)X: Delete / Dissolve (Vertices, Edges)G(Pressed Twice): Slide Vertices Along Edges/: Isolate Selected ObjectAlt + E: Extrude Along Normals, etc.
I have not included the basic shortcut keys (such as G and S), which are essential for general modeling in Blender. For those, please check my other article: “Blender Hotkeys".
Ctrl + R: Loop Cut
This shortcut is frequently used to add edge loops by cutting a face.
You can increase the number of cuts by scrolling the mouse wheel, as shown in the example below.
K: Knife Tool (Face Cutting)
This tool is also used to cut faces and add edges, but unlike Ctrl + R, it allows you to insert edges at specific points on an edge or face.
Holding Ctrl while cutting snaps the cut to the midpoint of an edge, as shown in the example below.
M: Merge (Vertex Merging)
This shortcut is used to merge multiple vertices into one.
Select the vertices you want to merge and press M.
There are several merge options, including:
- “By Distance": Removes unnecessary vertices.
- “At Center": Merges at the center of selected vertices.
- “At Cursor": Merges at the location of the 3D cursor.
- “Collapse": Groups vertices together.
This is useful when reducing unnecessary vertices in a model.
X: Delete / Dissolve (Vertices, Edges)
Use this when you want to remove extra edges or vertices and unify faces or edges.
Select the vertices or edges to delete and choose “Dissolve Edge/Vertices".
Be careful! If you select edges or vertices incorrectly, it may delete entire faces as well.
G (Pressed Twice): Slide Vertices Along Edges
This is used to move vertices along an edge without altering the mesh’s overall shape.
This is highly useful in car modeling for adjusting vertex/edge positions while keeping the original shape intact.
You can also move multiple vertices at the same time, as shown in the example.
/: Isolate Selected Object
Pressing / on the keyboard isolates the selected object, displaying only it.
- Press
/again to return to the normal view. - This is very useful when working on individual parts of a model.
Alt + E: Extrude Along Normals, etc.
This shortcut is useful for extruding multiple faces evenly in different directions.
- The two most frequently used options are:
- “Extrude Faces Along Normals": Keeps adjacent faces connected while extruding in the normal direction.
- “Extrude Individual Faces": Separates adjacent faces before extruding in the normal direction.
AD
7 Essential Modifiers for Car Modeling
Just like shortcut keys, certain modifiers are incredibly useful for car modeling. Here are seven key modifiers that I found particularly helpful.
(Note: The last two might have slightly more specialized use cases… 😅)
- Mirror
- Subdivision Surface
- Solidify (Thickness Addition)
- Bevel
- Array
- Lattice
- Curve
Mirror Modifier
An essential modifier when modeling symmetrical objects like cars.
- As shown in the example, you can mirror the vertices on the left side (-Y) to the right side, ensuring that any edits made on one side are automatically applied to the other.
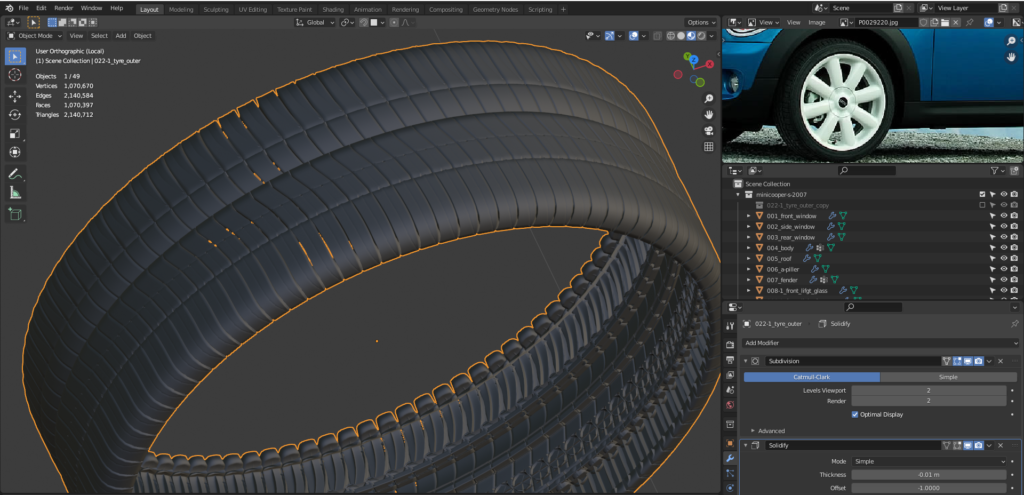
Subdivision Surface Modifier
This modifier increases the number of vertices to smooth out the mesh.
- As shown in the example, a low-poly, jagged mesh is transformed into a smooth curved surface.
- Typically, a subdivision level of 2 is sufficient (3 if needed).
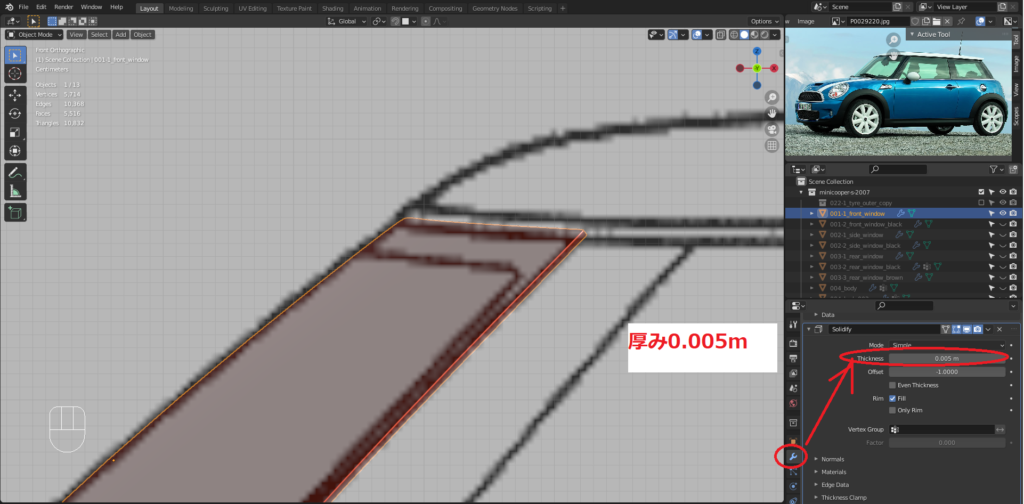
Solidify Modifier (Adding Thickness)
Used to add thickness to flat meshes, making it indispensable for creating window glass or car body panels.
- A thickness value of around 0.005 (5mm) is generally appropriate.
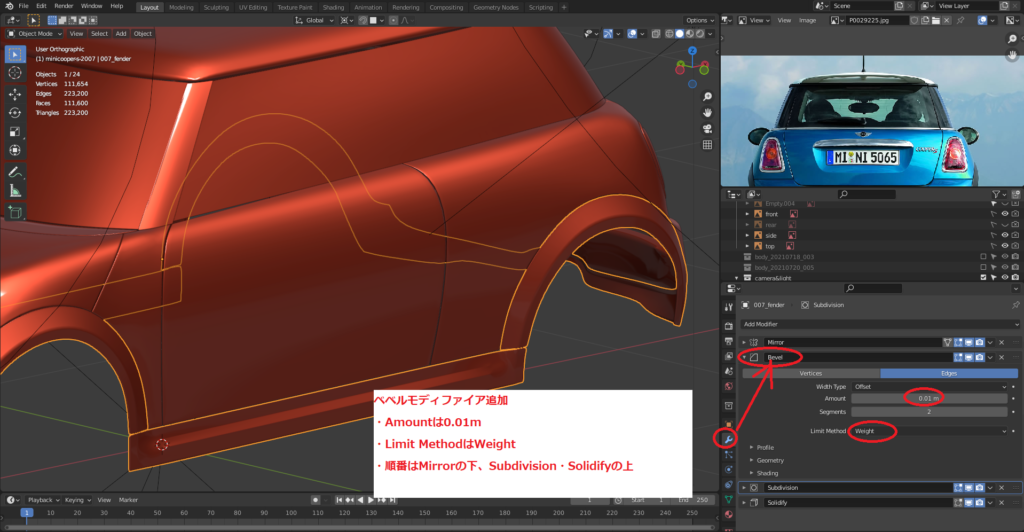
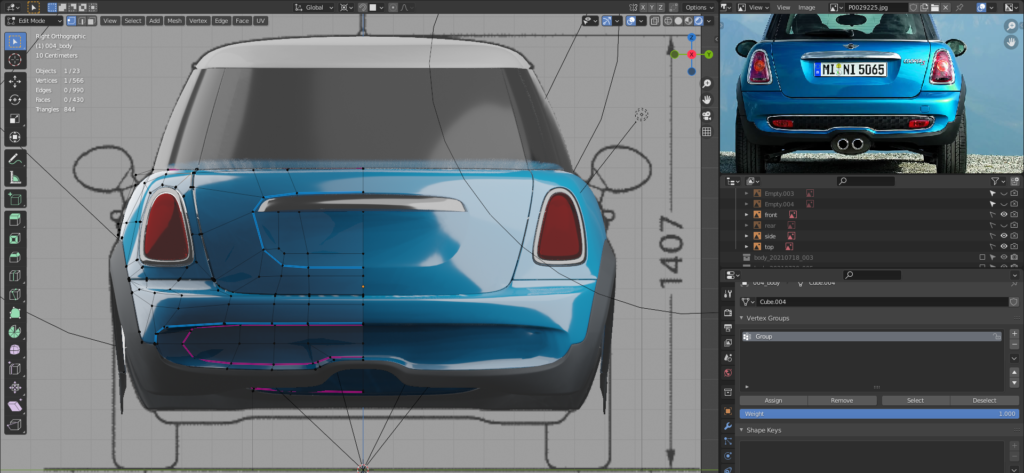
Bevel Modifier
Used to sharpen the edges of the car body.
- In the example, selecting an edge and setting the bevel weight to 1 makes it stand out more.
Array Modifier
Duplicates and arranges meshes in a linear or circular pattern.
Example 1: Creating a honeycomb grille.
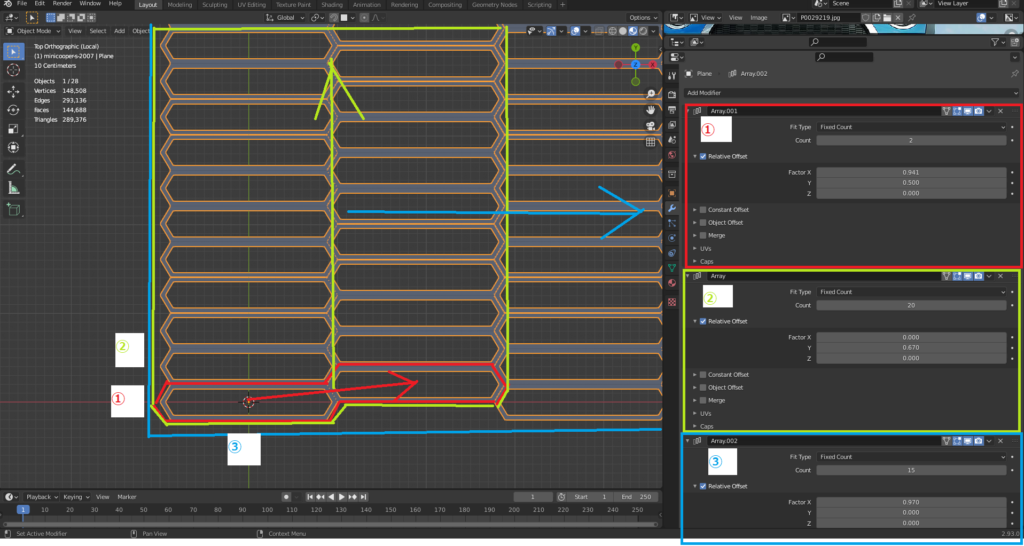
Example 2: Arranging tire treads.
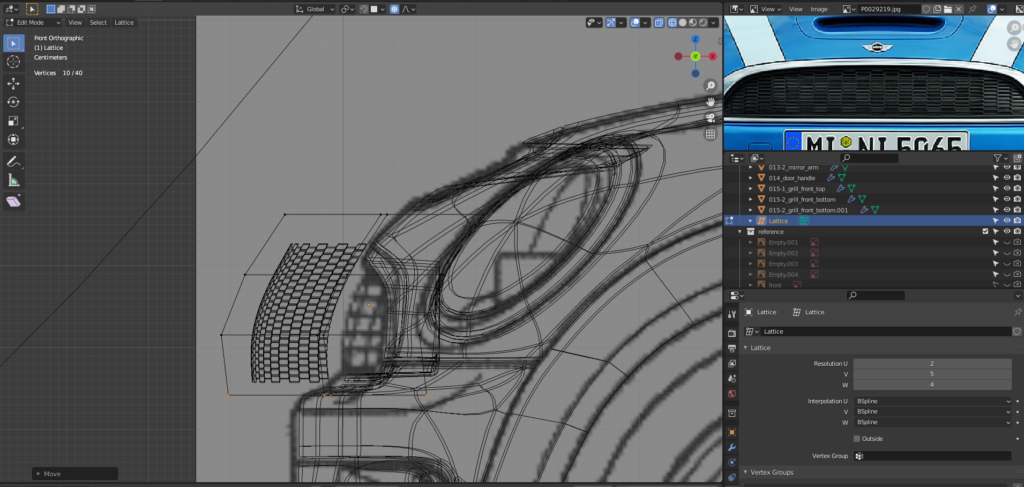
Lattice Modifier
Used to deform objects like grilles and emblems, making them fit the curvature of the car body.
First, add a Lattice and place it around the object you want to modify.
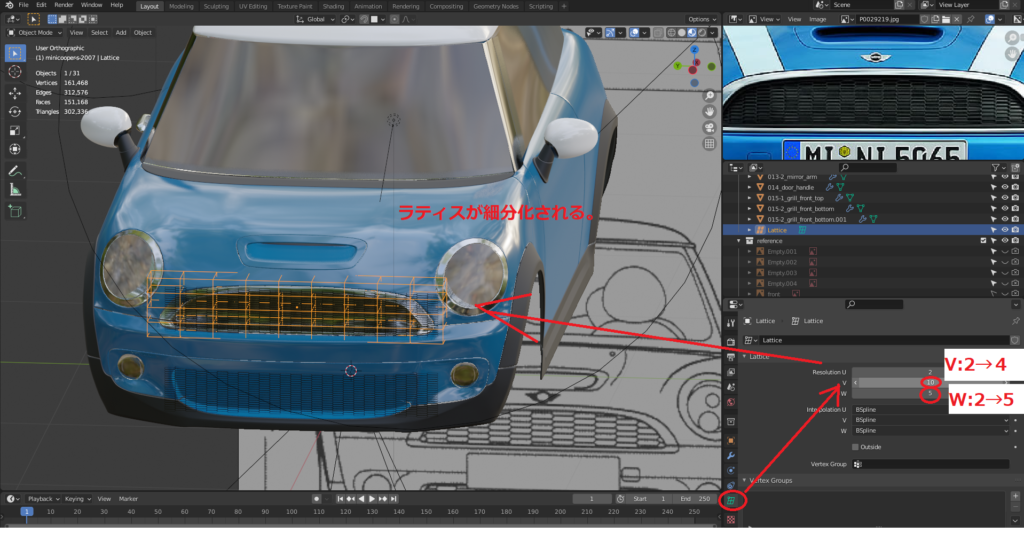
Then, subdivide the lattice in its properties.
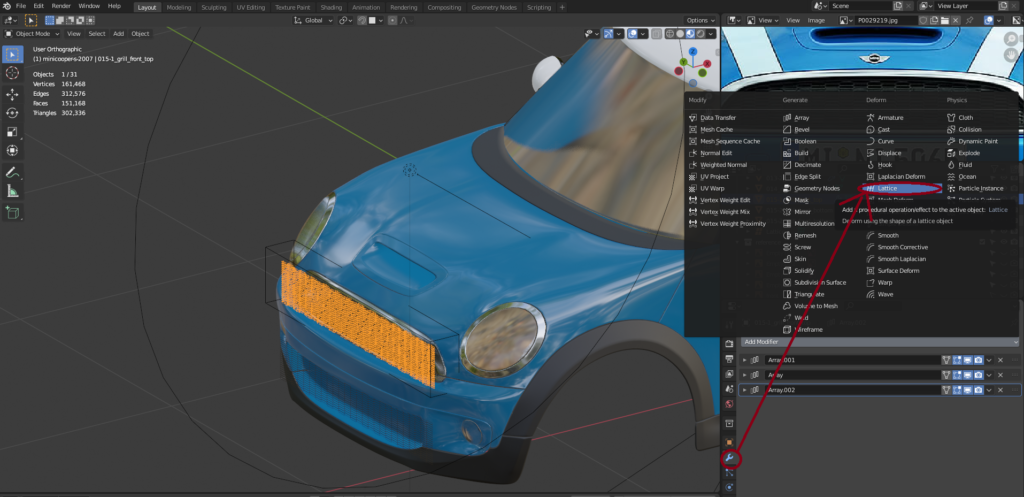
After adding a Lattice Modifier to the object, moving the lattice vertices will deform the object accordingly.
Curve Modifier
Used to bend objects along a Bézier curve.
- Example: Adjusting the shape of a windshield wiper blade to match the curvature of the glass.
AD
Conclusion
In this article, we summarized useful shortcut keys and modifiers for car modeling in Blender.
We hope this guide helps those who are just starting their car modeling journey! 😊
Related Articles
Part 1: Body Modeling
https://klala-lab.net/20210729-minicoopers-part1
Part 2: Exterior Parts Modeling
https://klala-lab.net/20210729-minicoopers-part2
Part 3: Suspension & Wheels
https://klala-lab.net/20210905-minicoopers-part3
Part 4: Interior Modeling
https://klala-lab.net/20210905-minicoopers-part4
Part 4.1: Dashboard Texturing & Animation
https://klala-lab.net/20210905-minicoopers-part4-1
Part 5: Materials & Compositing
https://klala-lab.net/20211102-minicoopers-part5
Part 6: Rigging, VFX & Sound Effects
https://klala-lab.net/20220102-minicooper-part6
Other Related Topics
East London Background Modeling
https://klala-lab.net/20211102-background_eastlondon
Blender Hotkeys
Reference Tutorials
This tutorial was used as a reference:
Buncho CG – Blender Car Modeling Tips
(Intermediate-Level Car Modeling Techniques with Subtitles)
AD